iT邦幫忙

2023 iThome 鐵人賽

DAY 10
0
Mobile Development

iOS 菜雞的開發日記系列 第 10

鐵人賽 [Day 10] APP 遠端通知教學 (3)

  • 分享至 

  • xImage
  •  

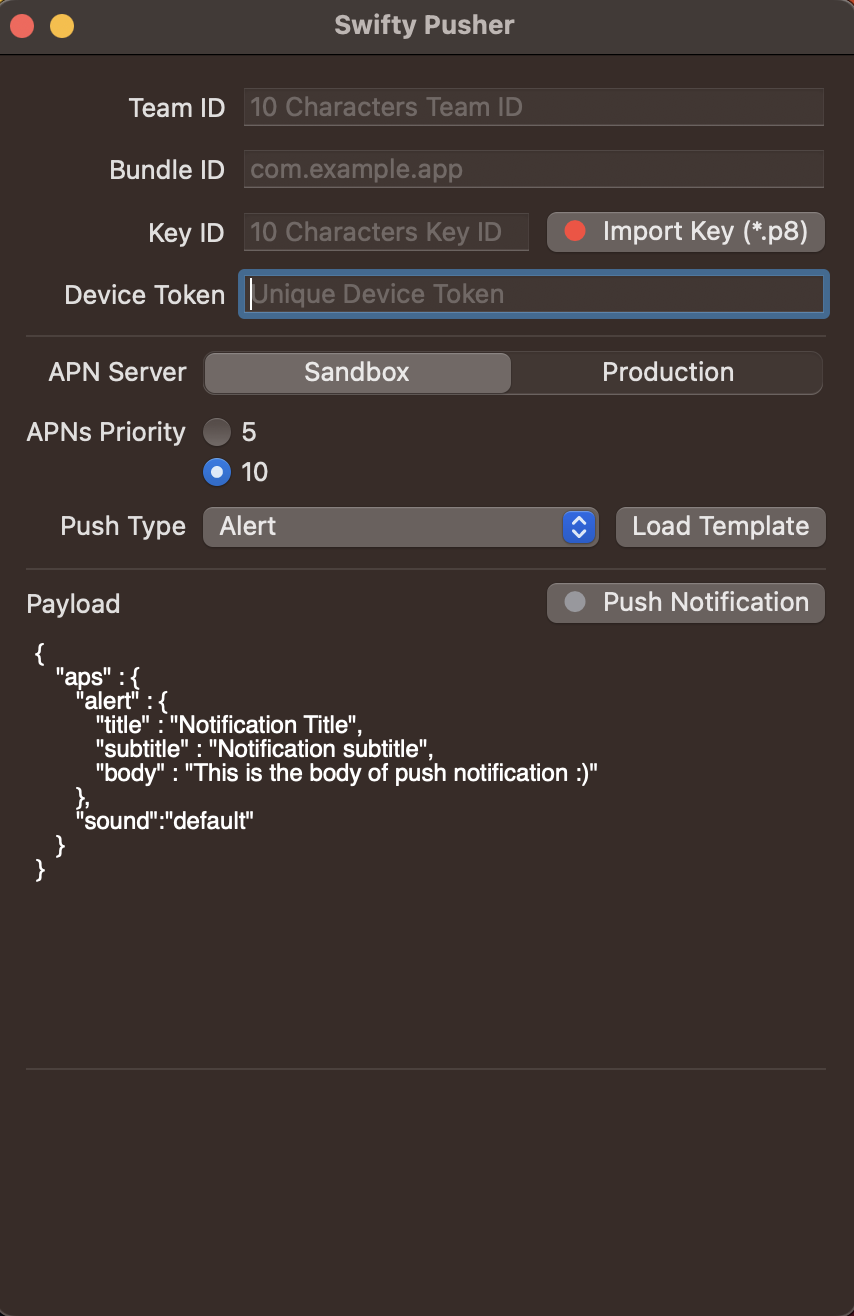
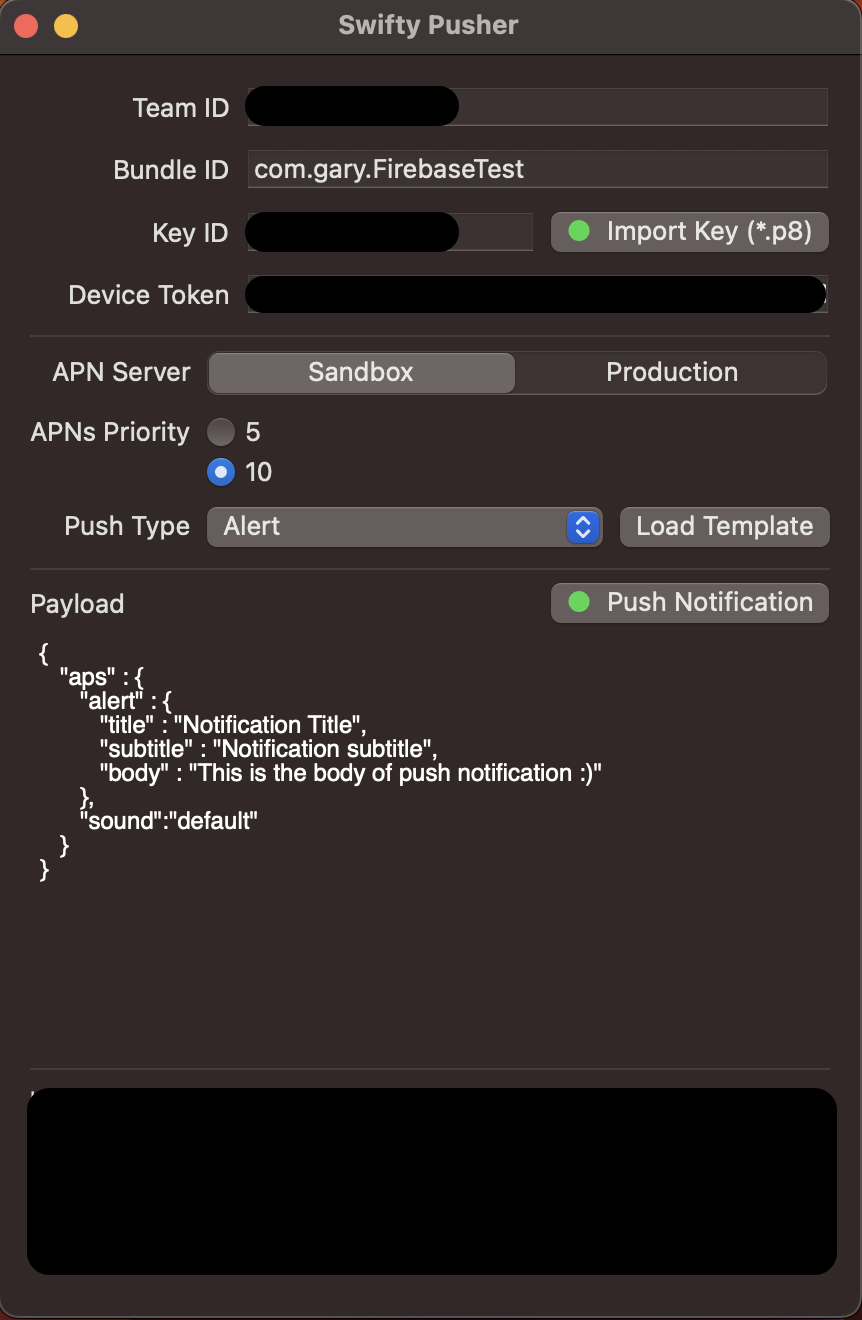
昨天已經把 APNs Key 拿到了!今天就是要教大家怎麼修改自己專案的 Code 並進行推播測試!

設定專案的 AppDelegate

我們在 App 啟動時,需要去註冊遠端推播,所以我們需要在 AppDelegate > application (didFinishLaunchingWithOptions) 做設定

func application(_ application: UIApplication, didFinishLaunchingWithOptions launchOptions: [UIApplicationLaunchOptionsKey: Any]?) -> Bool {
       
   UNUserNotificationCenter.current().requestAuthorization(options: [.alert,.sound,.badge, .carPlay], completionHandler: { (granted, error) in
            if granted {
                print("允許")
            } else {
                print("不允許")
            }
    })
        
    // 註冊遠程通知
    application.registerForRemoteNotifications()
    // 給代理到後面的 UNUserNotificationCenterDelegate
    UNUserNotificationCenter.current().delegate = self
    return true
}

之後在 Appdelegate 定義一個 extension ,做註冊遠端通知之後會做的事情

extension AppDelegate: UNUserNotificationCenterDelegate {
    func application(_ application: UIApplication, didRegisterForRemoteNotificationsWithDeviceToken deviceToken: Data) {
        // 將Data轉成String
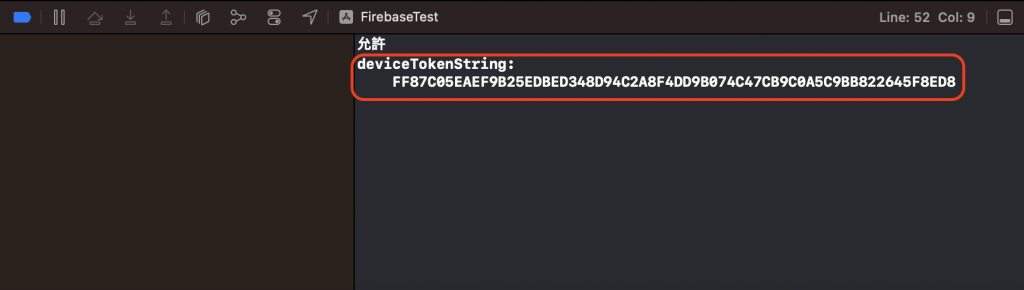
        let deviceTokenString = deviceToken.reduce("", {$0 + String(format: "%02X", $1)})
        print("deviceTokenString: \(deviceTokenString)")
    }
    
    func userNotificationCenter(_ center: UNUserNotificationCenter, willPresent notification: UNNotification) async -> UNNotificationPresentationOptions {
        return [.banner, .badge, .sound]
    }
}

留意一下 deviceTokenString ,他會 print 出裝置的 Remote Push 的 Device Token !

這樣子在 App 端的 Code 就修改完成囉!

開始測試遠端推播功能

若各位沒有後端可以進行推播動作的話,各位可以去下載 Swify Pusher 去做測試

https://ithelp.ithome.com.tw/upload/images/20230925/20151391jjYVbLdzXl.png

打開他的頁面會是長這樣子的

https://ithelp.ithome.com.tw/upload/images/20230925/20151391Ea8QnNmwYw.png

Team ID 在 APP Developer 的 Team 名稱旁邊可以找到(注意是 ID 不是名稱喔!)

Bundle ID 請填專案的 Bundle ID

Key ID 為昨天輸出的 .p8 名稱後面的 ID

https://ithelp.ithome.com.tw/upload/images/20230925/20151391Hwil7olba0.png

import Key (*.p8) 請匯入昨天下載的 .p8 檔案

Device Token 輸入 App 啟動時,所 print 出來的 Device Token

https://ithelp.ithome.com.tw/upload/images/20230925/20151391qOPPjw6PFB.png

補充說明: APN Server 是通知管道,分為沙箱及生產,APNs priority 則是用來控制推送通知的優先級。優先級越高,推送通知越有可能立即發送到用戶設備

https://ithelp.ithome.com.tw/upload/images/20230925/20151391d09ScDG0a8.png

點擊 Push Notification 就會發送通知囉!

https://ithelp.ithome.com.tw/upload/images/20230925/20151391lONXJm5FbY.jpg

https://ithelp.ithome.com.tw/upload/images/20230925/20151391aXma4eHyQV.jpg

這樣就大功告成啦!


上一篇
鐵人賽 [Day 9] APP 遠端通知教學 (2)
下一篇
鐵人賽 [Day 11] iOS Firebase 教學 (1)
系列文
iOS 菜雞的開發日記30
圖片
  直播研討會
圖片
{{ item.channelVendor }} {{ item.webinarstarted }} |
{{ formatDate(item.duration) }}
直播中

尚未有邦友留言

立即登入留言