既然今天要來連接資料庫,那我們就需要來先定義我們的資料表拉。
在Spring boot 內,需要將class標記成Entity,這樣讓JPA完成ORM。那這邊來解釋一下兩個新名詞。
Java Persistence API(JPA):負責ORM映射,以及簡化了SQL語法,可以用簡單的方法做到查詢,複雜的查詢依然需要下SQL。
Object-relational mapping (ORM): 是一種應用於資料庫Entity和 Model 資料容器兩者之間的對應。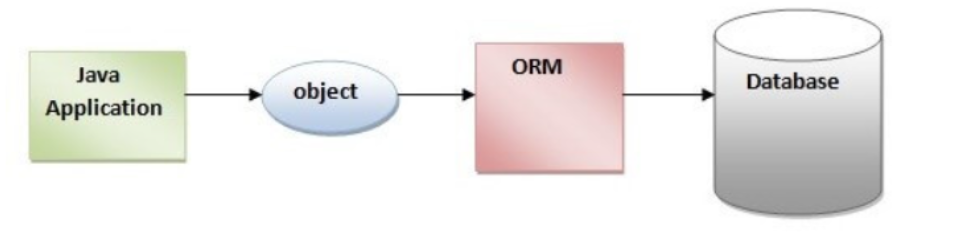
看範例
import jakarta.persistence.Entity;
import jakarta.persistence.GeneratedValue;
import jakarta.persistence.Id;
import jakarta.persistence.Table;
import lombok.Data;

@Entity
@Table(name = "_person")
@Data
public class Person {
    @Id
    @GeneratedValue(strategy = jakarta.persistence.GenerationType.IDENTITY)
    private Long id;
    private String name;
    private String email;
    private String phone;
}
@Entity: 標示此class為Entity
@Table: 可以設定此資料表細節,在此我為資料表重命名
@Data: lombok的小工具,可以減少一些程式碼,關鍵的有Getter、Setter與建構元。
接下來我們進到我們作天三個角色的分工。
這邊我希望做到簡單的存資料與取資料,先直接上程式碼再來細講。
import com.example.it2023demo.repository.model.Person;
import com.example.it2023demo.service.PersonService;
import org.springframework.beans.factory.annotation.Autowired;
import org.springframework.http.ResponseEntity;
import org.springframework.web.bind.annotation.GetMapping;
import org.springframework.web.bind.annotation.PostMapping;
import org.springframework.web.bind.annotation.RequestBody;
import org.springframework.web.bind.annotation.RestController;

@RestController
public class PersonController {

    @Autowired
    private PersonService service;

    @GetMapping("/person")
    public ResponseEntity<?> getAllPerson() {
        try {
            return ResponseEntity.ok().body(service.getAllPerson());
        } catch (Exception e) {
            return ResponseEntity.badRequest().build();
        }
    }

    @PostMapping("/person")
    public ResponseEntity<?> insetPerson(@RequestBody Person person) {
        try {
            return ResponseEntity.ok().body(service.inertPerson(person));
        } catch (Exception e) {
            return ResponseEntity.badRequest().build();
        }
    }
}
這裡的return我使用ResponseEntity,這是很方便的一個class,可以幫忙建構出一個完整的response。
這邊多看到了@Autowired,就來來講講我們第一天提到的核心觀念IOC與DI,Spring Boot 內包含的Beans模組的強大工具,可以幫我們做到這兩個核心概念,其實關鍵都藏在我們的標籤裡,以這裡來說@RestController的標示就默默地已經幫我們把PersonController這個class加入到Beans模組內,使其當我們需要的時侯能提供出我們需要的實例,同理@Service與@Repository也都有一樣的效果,所以這邊我們可以直接使用@Autowired來讓Beans模組幫我們把實例注入進來。
用於接收請求的request body,可以從客戶端傳送json資料,只要key能與類中的變數名對應到即可以接受到資料,稍後會做示範。
Service這邊我就只需要請Repository幫我們存資料與取資料就行了。
import com.example.it2023demo.repository.dao.PersonRepository;
import com.example.it2023demo.repository.model.Person;
import org.springframework.beans.factory.annotation.Autowired;
import org.springframework.stereotype.Service;
import java.util.List;

@Service
public class PersonService {

    @Autowired
    private PersonRepository repository;

    public List<Person> getAllPerson() {
        return repository.findAll();
    }

    public String inertPerson(Person person) {
        try {
            repository.save(person);
            return "Success";
        }catch (Exception e) {
            return e.getMessage();
        }
    }
}
最後看一下簡單的Repository
import com.example.it2023demo.repository.model.Person;
import org.springframework.data.jpa.repository.JpaRepository;
import org.springframework.stereotype.Repository;

@Repository
public interface PersonRepository extends JpaRepository<Person, Long> {
}
這裡要提一下的是繼承JpaRepository的泛行內型態,左邊要放的是資料表Entity,右邊則是這個資料表的主鍵。
它的位置如下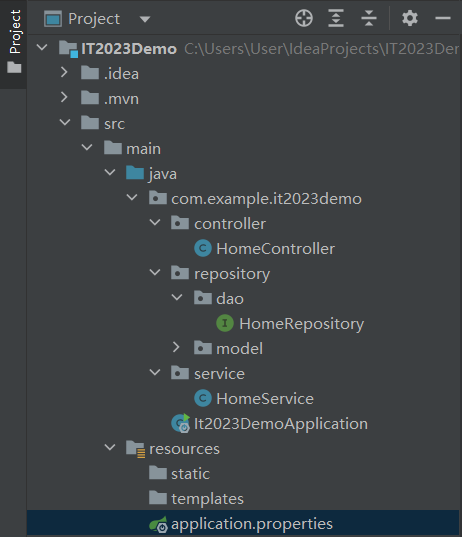
介紹一下這個昨天沒有細講的檔案,這裡會放一些配置,像我這個範例就會放入與資料庫連接的各種配置訊息,那我們直接看範例,看如何使用與撰寫。
#database連接設定
spring.datasource.url=jdbc:postgresql://localhost:5432/postgres
spring.datasource.username=postgres
spring.datasource.password=root
spring.datasource.driver-class-name=org.postgresql.Driver
#hibernate
spring.jpa.hibernate.ddl-auto=update
spring.jpa.show-sql=false
#postgres
spring.jpa.properties.hibernate.format_sql=false
spring.jpa.properties.hibernate.dialect=org.hibernate.dialect.PostgreSQLDialect
這裡的主角就是連接資料庫的工具JDBC
最後用postman demo一下剛剛的成果
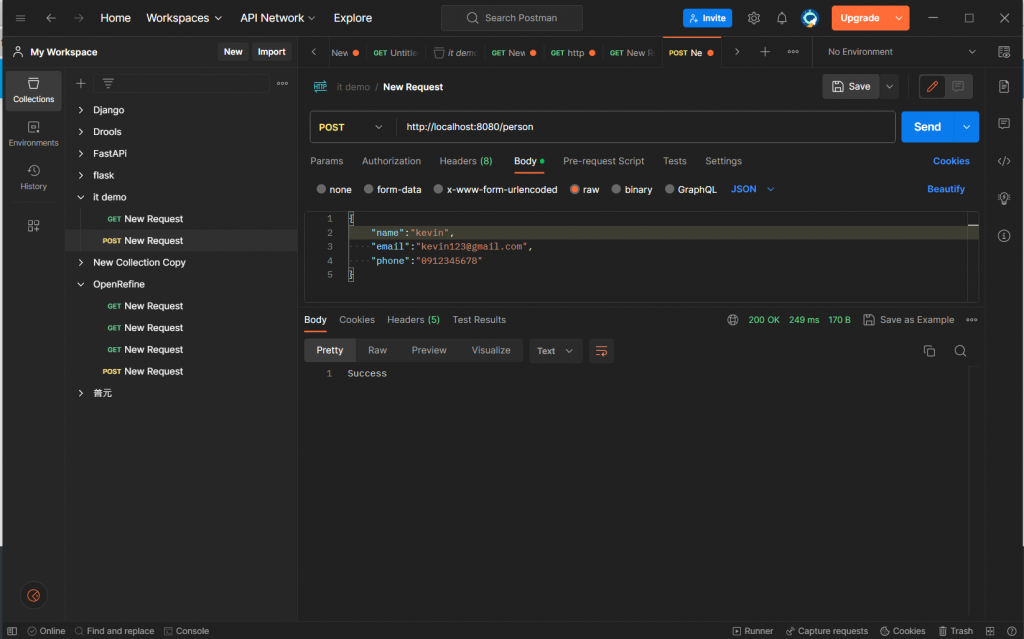
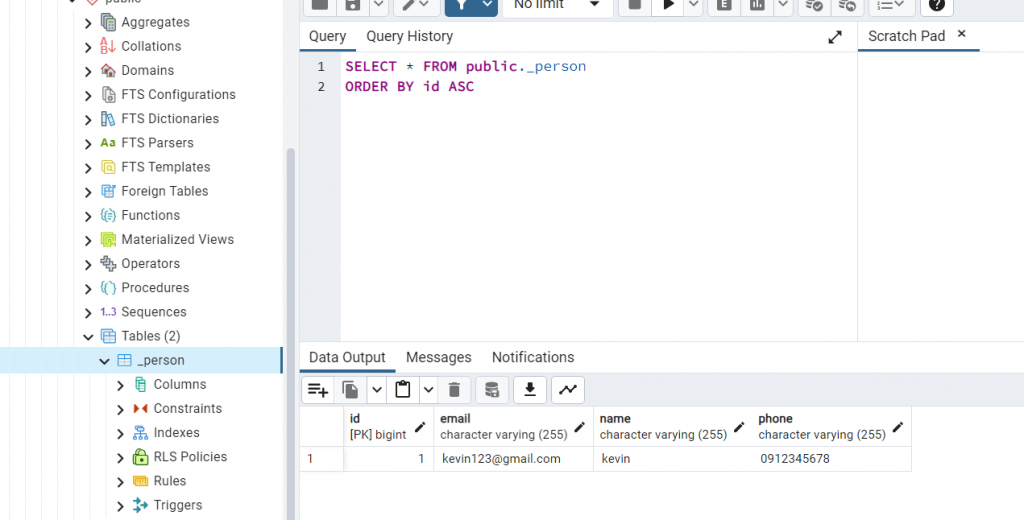
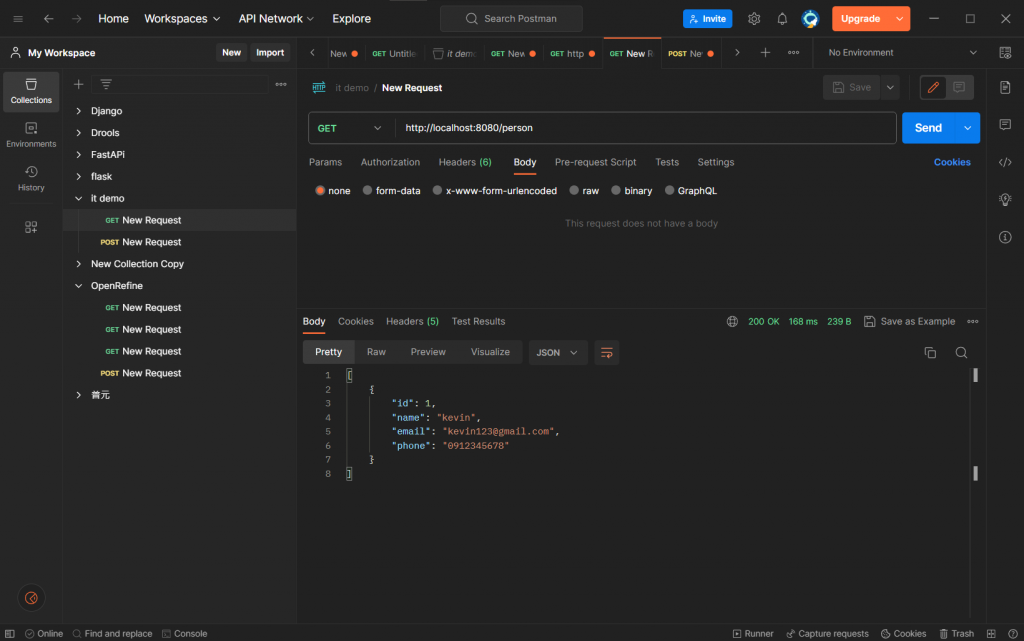
相當完美,簡單的資料庫串接就這樣完成了!幫今天畫下完美的句點。
https://kucw.github.io/blog/2020/3/java-lombok/

 iThome鐵人賽