討論 Kotlin & Flutter 頁面切換方式差異
Activity 和 Activity 間的頁面切換StatefulWidget 和 StatefulWidget 間的頁面切換arrow_back.xml
MainActivity.kt, activity_main.xml
SecondActivity.kt, activity_second.xml, app_bar.xml
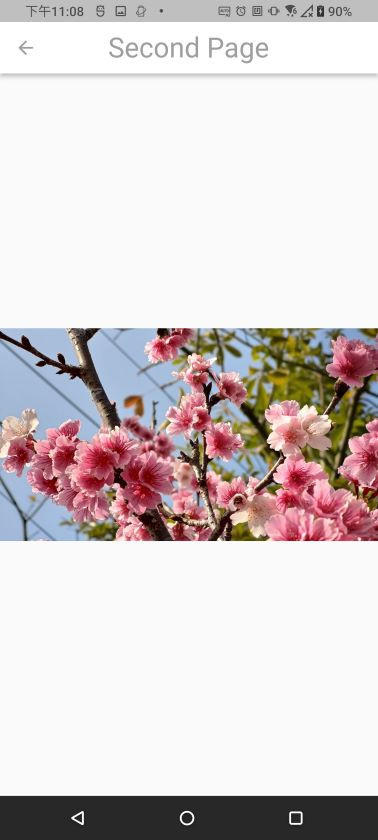
實際執行後的頁面截圖
| 第一頁 | 第二頁 |
|---|---|
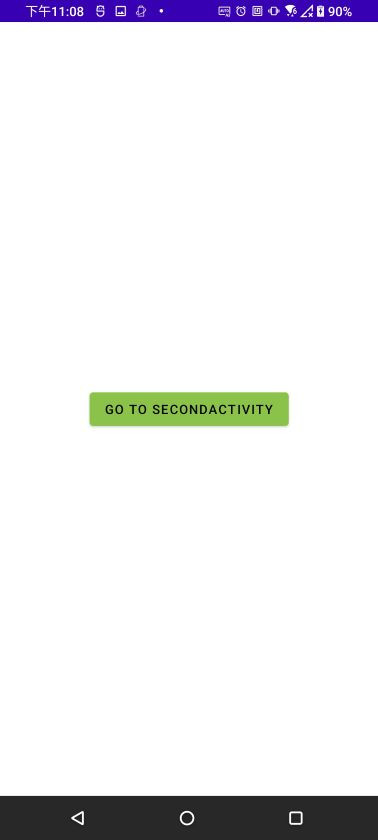 |
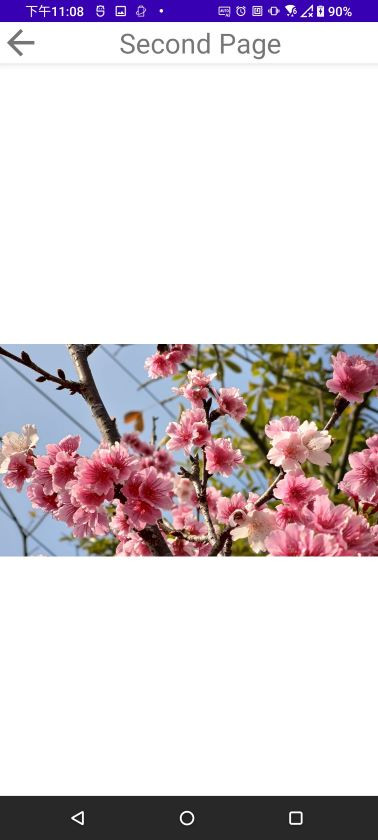 |
以下為 MainActivity.kt 檔案內容:
Intent 切換到第二頁:startActivity(Intent(p0!!.context, SecondActivity::class.java))
package com.example.kotlin_demo

import android.content.Intent
import androidx.appcompat.app.AppCompatActivity
import android.os.Bundle
import android.view.View
import android.widget.Button

class MainActivity : AppCompatActivity() {

    override fun onCreate(savedInstanceState: Bundle?) {
        super.onCreate(savedInstanceState)
        setContentView(R.layout.activity_main)

        val mainBtn:Button = findViewById<Button>(R.id.mainBtn)
        mainBtn.setOnClickListener(object : View.OnClickListener {
            override fun onClick(p0: View?) {
                startActivity(Intent(p0!!.context, SecondActivity::class.java))
            }

        })

    }
}
以下為 SecondActivity.kt 檔案內容:
finish()
package com.example.kotlin_demo

import androidx.appcompat.app.AppCompatActivity
import android.os.Bundle
import android.view.View
import android.widget.ImageView
import android.widget.TextView

class SecondActivity : AppCompatActivity() {
    override fun onCreate(savedInstanceState: Bundle?) {
        super.onCreate(savedInstanceState)
        setContentView(R.layout.activity_second)

        val title : TextView = findViewById<TextView>(R.id.barTitle)
        title.setText("Second Page")

        val backBtn : ImageView = findViewById<ImageView>(R.id.backBtn)
        ///點擊按鈕返回到原本的主頁
        backBtn.setOnClickListener(object:View.OnClickListener{
            override fun onClick(p0: View?) {
                finish()
            }

        })

    }
}
以下為 arrow_back.xml 檔案內容:返回鍵按鈕圖片
<vector xmlns:android="http://schemas.android.com/apk/res/android"
    android:width="45dp"
    android:height="45dp"
    android:viewportWidth="960"
    android:viewportHeight="960"
    android:tint="?attr/colorControlNormal"
    android:autoMirrored="true">
  <path
      android:fillColor="@android:color/white"
      android:pathData="M313,520L537,744L480,800L160,480L480,160L537,216L313,440L800,440L800,520L313,520Z"/>
</vector>
以下為 activity_main.xml 檔案內容:第一頁頁面的按鈕排版 layout
<?xml version="1.0" encoding="utf-8"?>
<androidx.constraintlayout.widget.ConstraintLayout xmlns:android="http://schemas.android.com/apk/res/android"
    xmlns:app="http://schemas.android.com/apk/res-auto"
    xmlns:tools="http://schemas.android.com/tools"
    android:layout_width="match_parent"
    android:layout_height="match_parent"
    tools:context=".MainActivity">

  <Button
      android:id="@+id/mainBtn"
      android:layout_width="wrap_content"
      android:layout_height="wrap_content"
      android:backgroundTint="@color/lightGreen"
      android:text="Go to Second Page"
      app:layout_constraintStart_toStartOf="parent"
      app:layout_constraintEnd_toEndOf="parent"
      app:layout_constraintTop_toTopOf="parent"
      app:layout_constraintBottom_toBottomOf="parent"
      app:defaultNavHost="true"
      app:navGraph="@navigation/nav_graph"
      />

</androidx.constraintlayout.widget.ConstraintLayout>
以下為 activity_second.xml 檔案內容:第二頁頁面的排版 layout,含頂端bar和中間的圖片
<?xml version="1.0" encoding="utf-8"?>
<androidx.constraintlayout.widget.ConstraintLayout xmlns:android="http://schemas.android.com/apk/res/android"
    xmlns:app="http://schemas.android.com/apk/res-auto"
    xmlns:tools="http://schemas.android.com/tools"
    android:layout_width="match_parent"
    android:layout_height="match_parent"
    tools:context=".SecondActivity">

    <include layout="@layout/app_bar"
        android:id="@+id/appbar"
        app:layout_constraintStart_toStartOf="parent"
        app:layout_constraintEnd_toEndOf="parent"
        app:layout_constraintTop_toTopOf="parent"
        />

    <ImageView
        android:layout_width="match_parent"
        android:layout_height="wrap_content"
        app:layout_constraintStart_toStartOf="parent"
        app:layout_constraintEnd_toEndOf="parent"
        app:layout_constraintTop_toBottomOf="@id/appbar"
        android:src="@drawable/sakura"
        />

</androidx.constraintlayout.widget.ConstraintLayout>
以下為 app_bar.xml 檔案內容:單獨建立頂端bar的layout,含左上方返回鍵和中間文字設定
<?xml version="1.0" encoding="utf-8"?>
<androidx.constraintlayout.widget.ConstraintLayout xmlns:android="http://schemas.android.com/apk/res/android"
    xmlns:app="http://schemas.android.com/apk/res-auto"
    android:layout_width="match_parent"
    android:layout_height="wrap_content"
    android:background="@color/white"
    android:elevation="6dp"
    >


    <ImageView
        android:id="@+id/backBtn"
        android:layout_width="wrap_content"
        android:layout_height="wrap_content"
        app:layout_constraintStart_toStartOf="parent"
        app:layout_constraintTop_toTopOf="parent"
        android:src="@drawable/arrow_back"
        />

    <TextView
        android:id="@+id/barTitle"
        android:layout_width="wrap_content"
        android:layout_height="wrap_content"
        android:layout_marginEnd="20dp"
        android:textSize = "30sp"
        app:layout_constraintStart_toEndOf="@id/backBtn"
        app:layout_constraintTop_toTopOf="parent"
        app:layout_constraintEnd_toEndOf="parent"
        app:layout_constraintBottom_toBottomOf="parent"

        />

</androidx.constraintlayout.widget.ConstraintLayout>
pubspec.xml
main.dart, FirstScreen.dart
SecondScreen.dart
實際執行後的頁面截圖
| 第一頁 | 第二頁 |
|---|---|
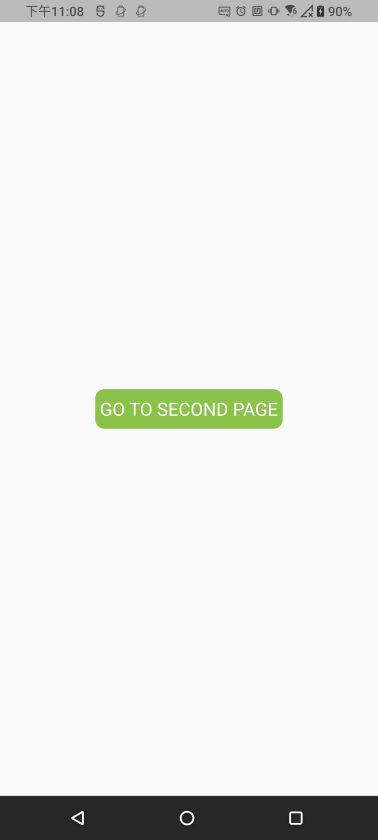 |
 |
以下為 pubspec.xml 檔案內容:匯入第二頁所需圖片
assets:
     - asset/sakura.jpg
以下為 main.dart 檔案內容:設定程式進入點會顯示 FirstScreen 元件
import 'package:flutter/material.dart';
import 'package:flutter_demo/FirstScreen.dart';

void main() {
  runApp(const MyApp());
}

class MyApp extends StatefulWidget {
  const MyApp({super.key});

  @override
  _MyAppState createState() => _MyAppState();
}

class _MyAppState extends State<StatefulWidget> {
  PageController _controller = PageController();

  @override
  Widget build(BuildContext context) {
    return MaterialApp(
      debugShowCheckedModeBanner: false,
      home: Scaffold(
        body: FirstScreen(),
      ),
    );
  }
}
以下為 FirstScreen.dart 檔案內容:
FirstScreen 元件( 第一頁頁面),可點選按鈕進入第二頁Navigator.of(context).push(MaterialPageRoute(builder: (context){ return SecondScreen(); }));
以下為完整內容:
import 'package:flutter/cupertino.dart';
import 'package:flutter/material.dart';
import 'SecondScreen.dart';
///第一頁頁面元件
/// - 可點選按鈕進入第二頁
class FirstScreen extends StatefulWidget{
@override
State<FirstScreen> createState() => _FirstScreenState();
}
class _FirstScreenState extends State<FirstScreen>{
@override
Widget build(BuildContext context) {
return Scaffold(
body: SafeArea(
child: InkWell(
onTap: (){
//前往第二頁
 Navigator.of(context).push(MaterialPageRoute(builder: (context){
                 return SecondScreen();
               }));
},
child: Container(
alignment: Alignment.center,
child: _wMainBtn(),
))),
);
}
///按鈕元件
Widget _wMainBtn(){
return Container(
padding: EdgeInsets.symmetric(vertical: 10,horizontal: 5),
decoration: BoxDecoration(
color: Colors.lightGreen,
borderRadius: BorderRadius.circular(10)),
child: Text(
"GO TO SECOND PAGE",
style: TextStyle(color: Colors.white, fontSize: 20),
),
);
}
}
以下為 SecondScreen.dart 檔案內容:
SecondScreen 元件(第二頁頁面),點選左上角按鈕可返回上一頁,頁面中間顯示櫻花圖片Navigator.pop(context);
import 'package:flutter/cupertino.dart';
import 'package:flutter/material.dart';

///第二頁頁面元件
/// - 可返回上一頁, 顯示櫻花圖片

class SecondScreen extends StatefulWidget {
  @override
  State<SecondScreen> createState() => _SecondScreenState();
}

class _SecondScreenState extends State<SecondScreen> {
  @override
  Widget build(BuildContext context) {
    return Scaffold(
      appBar: _wAppbar(),
      body: Container(
        alignment: Alignment.center,
        child: Image.asset("asset/sakura.jpg"),
      ),
    );
  }

  PreferredSizeWidget _wAppbar(){
    return AppBar(
      backgroundColor: Colors.white,
      title: Text(
        "Second Page",
      ),
      titleTextStyle: TextStyle(color: Colors.grey, fontSize: 30),
      centerTitle: true,
      leading: IconButton(
        icon: Icon(
          Icons.arrow_back,
          color: Colors.grey,
        ),
        onPressed: () {
          Navigator.pop(context);
        },
      ),
    );
  }
}