昨天我們為了限制其他使用者在 index.ts 不能使用不在我們設計內的方法,所以把 Map 裡面的 Google Maps 用 Private Modifiers 設定,限定外部訪問
並且把 Map 改成class CustomMap 表示這個 class 裡面的方法都是我們客製設計的
那今天我們來加上可愛的標記彈窗吧
就是這個
可以想像我們會在 class CustomMap 中多加一個方法,如
點擊標記時,上面跳個小彈窗,可以想像我們會在標記上面加個監聽器,然後在點擊時秀出該位置的彈窗
google maps 中的標記彈窗關鍵字是 infowindows
我們可以在 Maps JavaScript API 中搜尋
文件如下
可以知道 InfoWindow 裡面可以包含 content、pixelOffset、position、maxWidth 等屬性,我們先以簡單的 content 加入專案試試
下面是大致步驟:
InfoWindow 的 content 屬性InfoWindow 的 open 方法User Company 的方法export class CustomMap {
private googleMap: google.maps.Map;
constructor() {
this.googleMap = new google.maps.Map(
document.getElementById("maps") as HTMLElement,
{
zoom: 5,
center: {
lat: 23,
lng: 120.6,
},
}
);
}
addMaker(mappable: Mappable): void {
const markerI = new google.maps.Marker({ // 先把 Marker 做變數接起來
map: this.googleMap,
position: {
lat: mappable.location.lat,
lng: mappable.location.lng,
},
});
markerI.addListener("click", () => { // 新增 Marker 點擊時的監聽器
// 在這邊加入標記彈窗
infoWindow = new google.maps.InfoWindow({
content
});
});
});
}
}
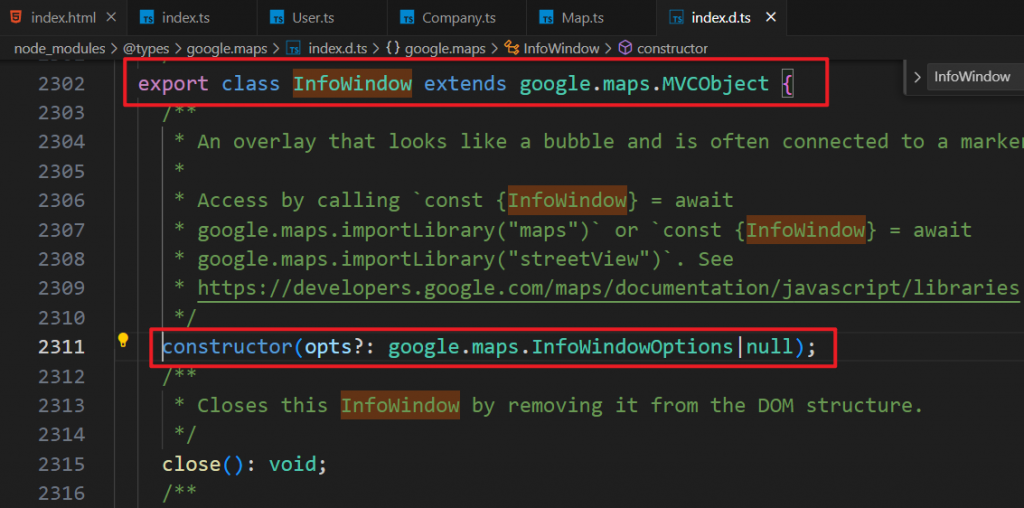
這邊我們可以繼續看官方文件也可以對 InfoWindow 點 F12,看我們程式碼內的說明書 Type definition file
這邊可以看到 InfoWindow 會接收一個型別為 google.maps.InfoWindowOptions 的參數
再繼續看 google.maps.InfoWindowOptions 的定義,可以發現裡面有一個 content 參數,他的型別可以是 string|Element|Text|null

這代表著 content 可以是一段文字或是 HTML 文本,我們可以測試
export class CustomMap {
  private googleMap: google.maps.Map;
  constructor() {
    this.googleMap = new google.maps.Map(
      document.getElementById("maps") as HTMLElement,
      {
        zoom: 5,
        center: {
          lat: 23,
          lng: 120.6,
        },
      }
    );
  }
  addMaker(mappable: Mappable): void {
    const markerI = new google.maps.Marker({  // 先把 Marker 做變數接起來
      map: this.googleMap,
      position: {
        lat: mappable.location.lat,
        lng: mappable.location.lng,
      },
    });

    markerI.addListener("click", () => {  // 新增 Marker 點擊時的監聽器
        // 在這邊加入標記彈窗
        infoWindow = new google.maps.InfoWindow({
          content = `<h1>超大 H1 標籤</h1>`
        });
      });
    });
  }
}
但光是設定好內容,我們還需要加入打開標記彈窗的事件他才會出現
InfoWindow 的 open 方法一樣可以看文件或是對 InfoWindow 點 F12,看我們程式碼內的說明書 Type definition file,在裡面找我們要操作的 InfoWindow 有甚麼方法

可以看到 open 方法與他接收的兩個參數 options 和 anchoroptions 可以是我們 class 中本身的 google.maps.Mapanchor 就是我們要打開的錨點,就是我們的 Marker 物件 markerI
export class CustomMap {
  private googleMap: google.maps.Map;
  constructor() {
    this.googleMap = new google.maps.Map(
      document.getElementById("maps") as HTMLElement,
      {
        zoom: 5,
        center: {
          lat: 23,
          lng: 120.6,
        },
      }
    );
  }
  addMaker(mappable: Mappable): void {
    const markerI = new google.maps.Marker({
      map: this.googleMap,
      position: {
        lat: mappable.location.lat,
        lng: mappable.location.lng,
      },
    });

    markerI.addListener("click", () => {
      const infoWindow = new google.maps.InfoWindow({
        content: `<h1>超大 H1 標籤</h1>`
      });
      infoWindow.open(this.googleMap, markerI);  // this way
    });
  }
}
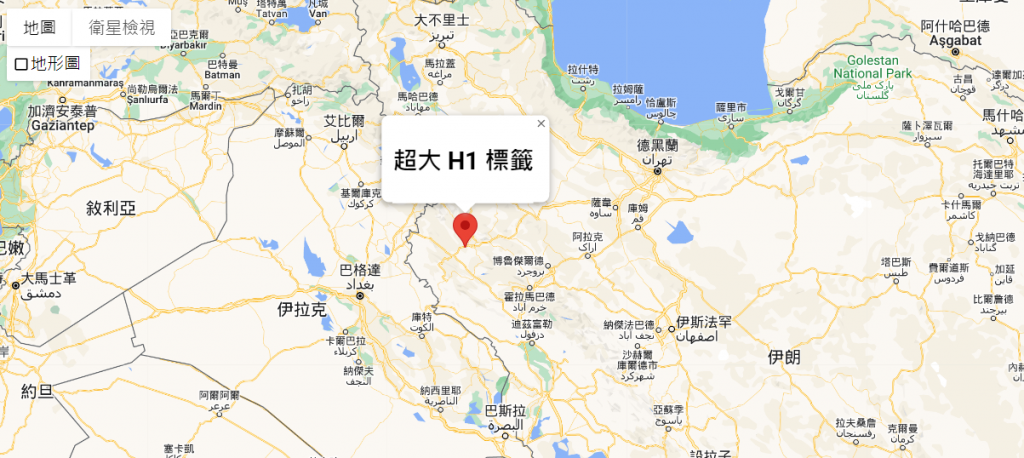
這樣子,位置跟打開邏輯都完成了,現在可以試試看 parcel index.html
可以看到我們設定的標籤會在點擊事件後正確出現
User Company 的方法回憶我們的需求,標記彈窗裡面的內容應該會是 User 跟 Company 裡面的值,代表 InfoWindow 應該要吃外面的參數才對,也表示 class User 和 Company 裡面應該要新增屬性
那他們應該怎麼交集呢?
class User 和 Company 自己本身就要有個設定標記彈窗的地方,或是設定標記彈窗要顯示參數的地方。
可以先設想這個方法 markerContent() 會設定好該 class 的彈窗自定義內容,呼叫之後就會回傳
// User.ts
export class User {
  name: string;
  location: {
    lat: number;
    lng: number;
  };
  constructor() {
    this.name = faker.person.firstName();
    this.location = {
      lat: faker.location.latitude(),
      lng: faker.location.longitude(),
    };
  }

  markerContent(): string {
    return `user name: ${this.name}!!`;   // this way
  }
}
然後 CustomMap 那邊就要這樣接
interface Mappable {
  location: {
    lat: number;
    lng: number;
  };
}


export class CustomMap {
  private googleMap: google.maps.Map;
  constructor() {
    this.googleMap = new google.maps.Map(
      document.getElementById("maps") as HTMLElement,
      {
        zoom: 5,
        center: {
          lat: 23,
          lng: 120.6,
        },
      }
    );
  }
  addMaker(mappable: Mappable): void {
    const markerI = new google.maps.Marker({
      map: this.googleMap,
      position: {
        lat: mappable.location.lat,
        lng: mappable.location.lng,
      },
    });

    markerI.addListener("click", () => {
        content: mappable.markerContent(),    //  this way
      });
      infoWindow.open(this.googleMap, markerI);
    });
  }
}
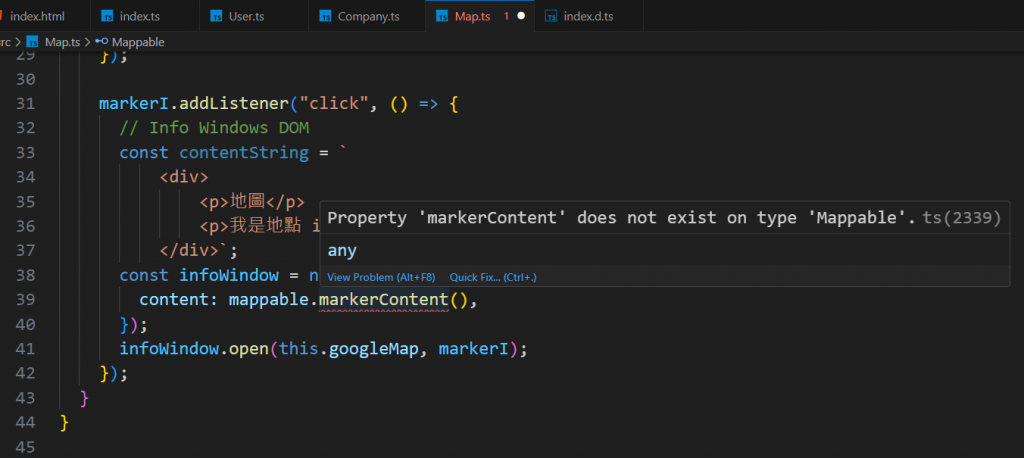
但是這樣寫會發現,阿,報錯了

因為傳入 addMaker() 的參數是設定好 interface Mappable 的,現在我們想要多引用 markerContent() 方法的話,interface Mappable 也要補齊這個設定
// Map.ts
interface Mappable {
  location: {
    lat: number;
    lng: number;
  };
  markerContent(): string;    // this way
}

export class CustomMap {
  private googleMap: google.maps.Map;
  constructor() {
    this.googleMap = new google.maps.Map(
      document.getElementById("maps") as HTMLElement,
      {
        zoom: 5,
        center: {
          lat: 23,
          lng: 120.6,
        },
      }
    );
  }
  addMaker(mappable: Mappable): void {
    const markerI = new google.maps.Marker({
      map: this.googleMap,
      position: {
        lat: mappable.location.lat,
        lng: mappable.location.lng,
      },
    });

    markerI.addListener("click", () => {
      const infoWindow = new google.maps.InfoWindow({
        content: mappable.markerContent(),      // this way
      });
      infoWindow.open(this.googleMap, markerI);
    });
  }
}
這樣 TypeScript 就會檢查 index.ts 中,addMaker() 傳入的參數有沒有符合 interface Mappable 的介面設定
// index.ts
import { User } from "./User";
import { Company } from "./Company";
import { CustomMap } from "./Map";

const map = new CustomMap();
const user = new User();
const company = new Company();
map.addMaker(user);
map.addMaker(company);
像下圖因為傳入的參數 class Company 的實體裡面沒有 markerContent() 方法,所以報錯了
所以最後,我們的 class Company 也加入 markerContent() 方法試試
// Company.ts
import { faker } from "@faker-js/faker";

export class Company {
  companyName: string;
  catchPhrase: string;
  location: {
    lat: number;
    lng: number;
  };
  constructor() {
    this.companyName = faker.company.name();
    this.catchPhrase = faker.company.catchPhrase();
    this.location = {
      lat: faker.location.latitude(),
      lng: faker.location.longitude(),
    };
  }

  markerContent(): string {
    return `
      <div>
        <h3>公司標記</h3>
        <p>We are ${this.companyName}</p>
        <p style="color: red;">We are ${this.catchPhrase}!!</p>
      </div>
    `;
  }
}
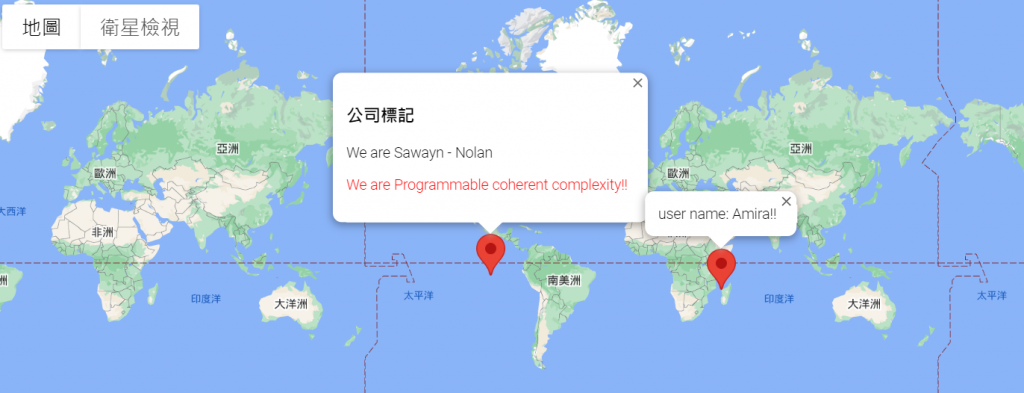
現在可以試試看 parcel index.html
可以看到我們設定的 class User Company 的標籤彈窗都會在點擊後正確出現囉

