
Bootatrap是一個很常被用來配合CSS樣式做輔助的一個前端框架,可以把它想成一個很多已經幫妳寫好很多樣式的class的工具包,你只需要在html裡加入需要的樣式的class名,就可以了!
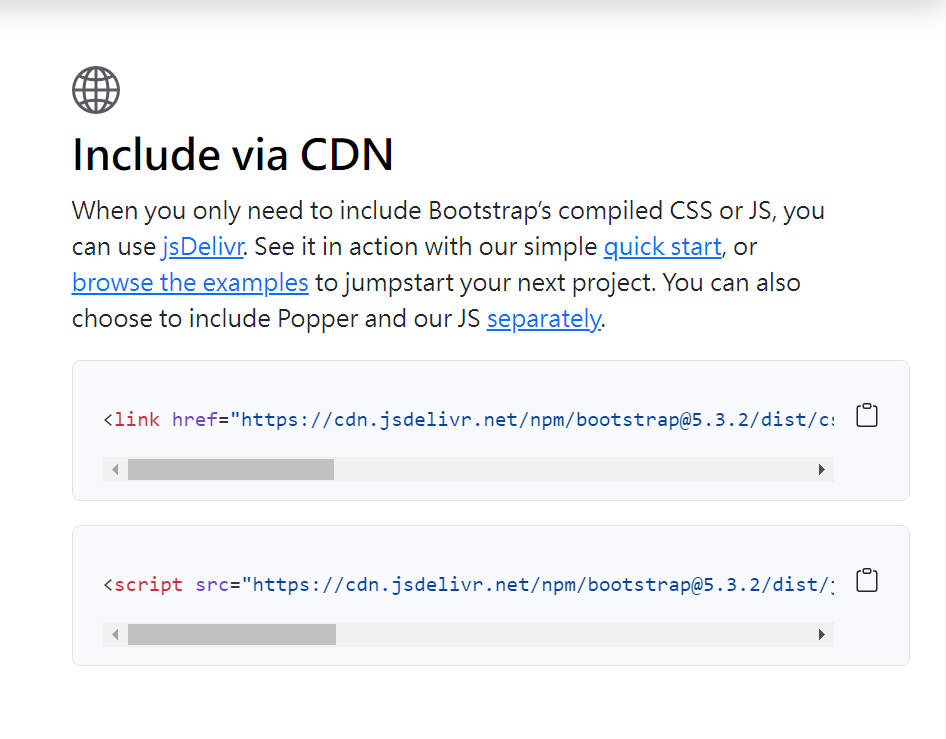
要使用Bootstrap的話有兩種方式,第一種是下載資源包,並把資源包的檔案放到開發網頁的資料夾裡,然後在HTML檔裡進行引入,詳細的說明會在後面的實作篇介紹喔;第二種方式是使用CDN,平常練習寫網頁可以使用CDN就好!
CDN(Content Delivery Network)是一種網路服務,其原理簡單來說是將網站內容存儲在分佈於全球多個地點的伺服器上,這樣你只需要在網頁中添加幾句程式碼引入相關資源,就可以輕鬆啟用這項工具!
<head>
    <link href="https://cdn.jsdelivr.net/npm/bootstrap@5.3.2/dist/css/bootstrap.min.css" rel="stylesheet" integrity="sha384-T3c6CoIi6uLrA9TneNEoa7RxnatzjcDSCmG1MXxSR1GAsXEV/Dwwykc2MPK8M2HN" crossorigin="anonymous">
</head>
<body>
    <!-- 要引入的JS檔統一放在<body>標籤內的最底部,確保網頁在建立結構後才開始執行功能。 -->
    <script src="https://cdn.jsdelivr.net/npm/bootstrap@5.3.2/dist/js/bootstrap.bundle.min.js" integrity="sha384-C6RzsynM9kWDrMNeT87bh95OGNyZPhcTNXj1NW7RuBCsyN/o0jlpcV8Qyq46cDfL" crossorigin="anonymous"></script>
</body>
大家可以上去閱讀Bootstrap官方網站的文件(Doc)了解更多概念喔!以下我們直接進行實作,讓大家更理解Boostrap的用法:
閱讀了Bootstrap官方網站的文件(Doc)會發現Bootatrap有提供很多已經幫你寫好的元件的程式碼,它就像模板,我們可以直接套用之後再修改樣式或內容,以下使用Bootatrap實作導引列、表單和Footer:
我們複製這段程式碼到HTML的<header>裡: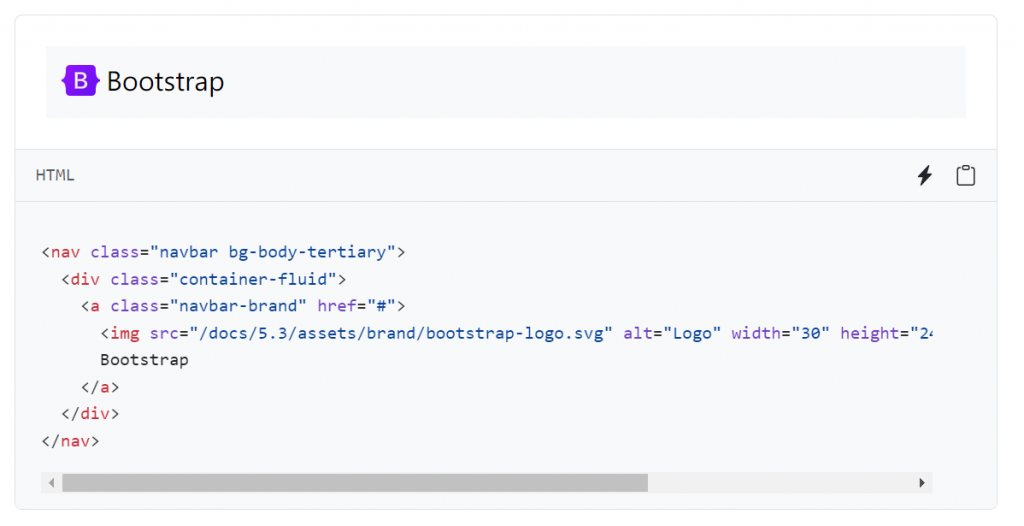
使用開發人員工具(右鍵選擇檢查或F12)取得網頁圖片: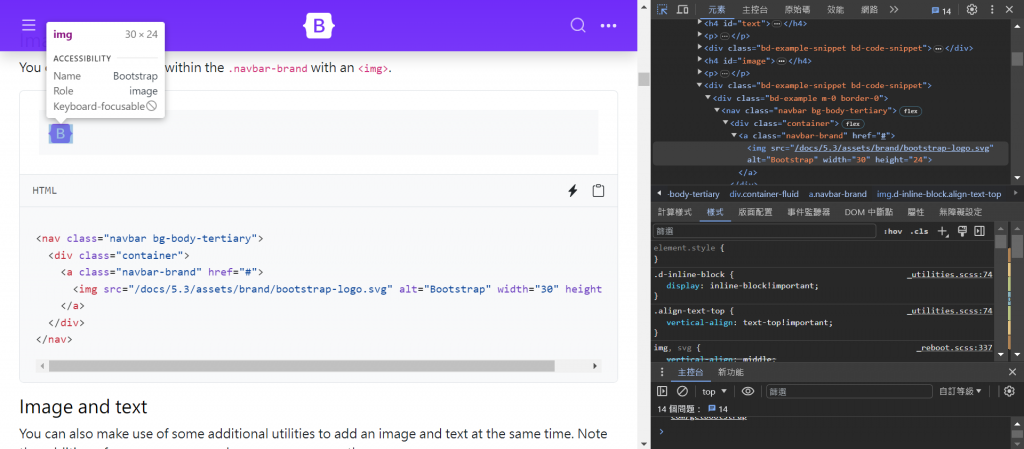
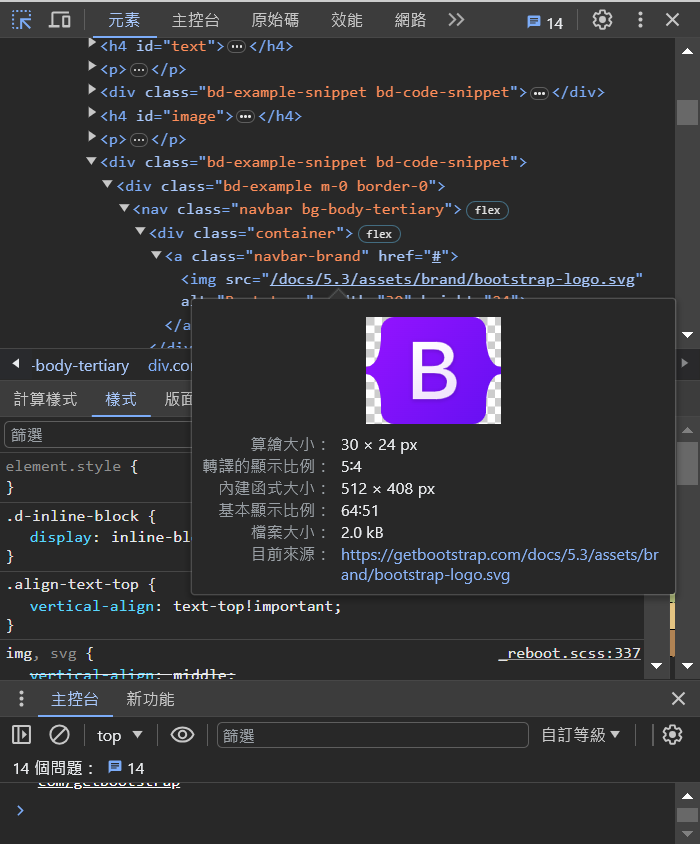
點進去圖片的網址後會看到: 然後右鍵另存新檔將圖片存在練習網頁的資料夾中:
HTML:
    <header>
      <nav class="navbar bg-body-tertiary">
        <div class="container-fluid">
          <a class="navbar-brand" href="#">
            <img
              src="bootstrap-logo.svg"
              alt="Logo"
              width="30"
              height="24"
              class="d-inline-block align-text-top"
            />
            Bootstrap
          </a>
        </div>
      </nav>
    </header>
預覽畫面:
我們複製Horizontal form的程式碼到<section>裡: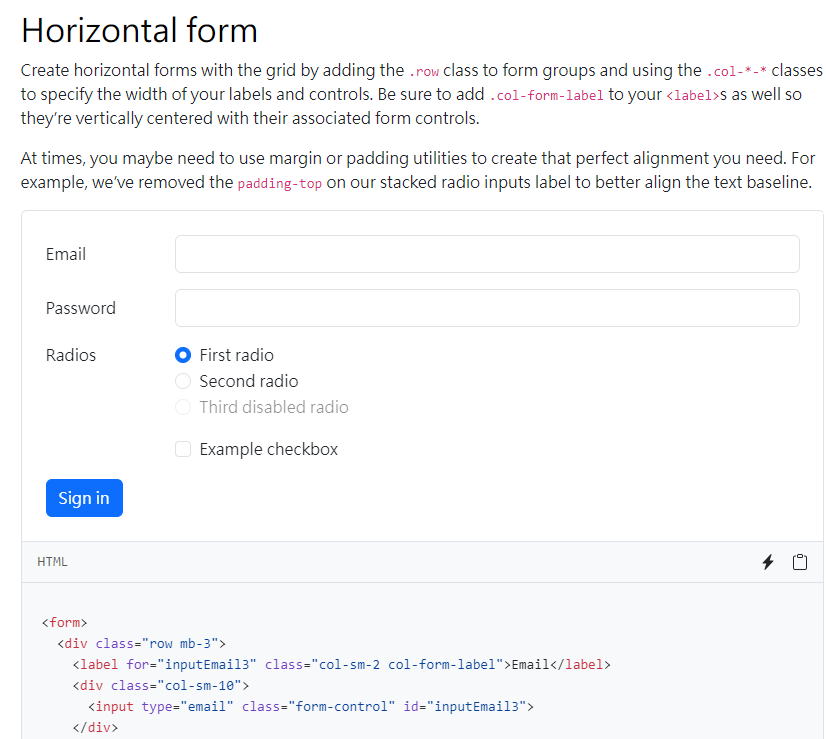
在 中添加 class="px-5 py-5",這樣會在水平方向和垂直方向上分別添加 5 級距的padding,px表示水平方向上的padding,py表示垂直方向上的padding。<section class="px-5 py-5"></section>
然後在<section>裡加上這一行程式碼<h1 class="pb-4 fw-bold text-primary">登入系統</h1>,這行程式碼用到了一些Bootstrap的類明,這邊簡單說明:
1.pb-4:pb相當於CSS的padding-bottom,添加4級距的padding-bottom。
2.fw-bold:相當於CSS的font-weight:bold;,為粗體。
3.text-primary:設定文字的顏色為藍色,可以在這裡看到更多顏色的class名!
表單的完整HTML:
    <section class="px-5 py-5">
      <h1 class="pb-4 fw-bold text-primary">登入系統</h1>
      <form>
        <div class="row mb-3">
          <label for="inputEmail3" class="col-sm-2 col-form-label">Email</label>
          <div class="col-sm-10">
            <input type="email" class="form-control" id="inputEmail3" />
          </div>
        </div>
        <div class="row mb-3">
          <label for="inputPassword3" class="col-sm-2 col-form-label"
            >Password</label
          >
          <div class="col-sm-10">
            <input type="password" class="form-control" id="inputPassword3" />
          </div>
        </div>
        <fieldset class="row mb-3">
          <legend class="col-form-label col-sm-2 pt-0">Radios</legend>
          <div class="col-sm-10">
            <div class="form-check">
              <input
                class="form-check-input"
                type="radio"
                name="gridRadios"
                id="gridRadios1"
                value="option1"
                checked
              />
              <label class="form-check-label" for="gridRadios1">
                First radio
              </label>
            </div>
            <div class="form-check">
              <input
                class="form-check-input"
                type="radio"
                name="gridRadios"
                id="gridRadios2"
                value="option2"
              />
              <label class="form-check-label" for="gridRadios2">
                Second radio
              </label>
            </div>
            <div class="form-check disabled">
              <input
                class="form-check-input"
                type="radio"
                name="gridRadios"
                id="gridRadios3"
                value="option3"
                disabled
              />
              <label class="form-check-label" for="gridRadios3">
                Third disabled radio
              </label>
            </div>
          </div>
        </fieldset>
        <div class="row mb-3">
          <div class="col-sm-10 offset-sm-2">
            <div class="form-check">
              <input class="form-check-input" type="checkbox" id="gridCheck1" />
              <label class="form-check-label" for="gridCheck1">
                Example checkbox
              </label>
            </div>
          </div>
        </div>
        <button type="submit" class="btn btn-primary">Sign in</button>
      </form>
    </section>
預覽畫面: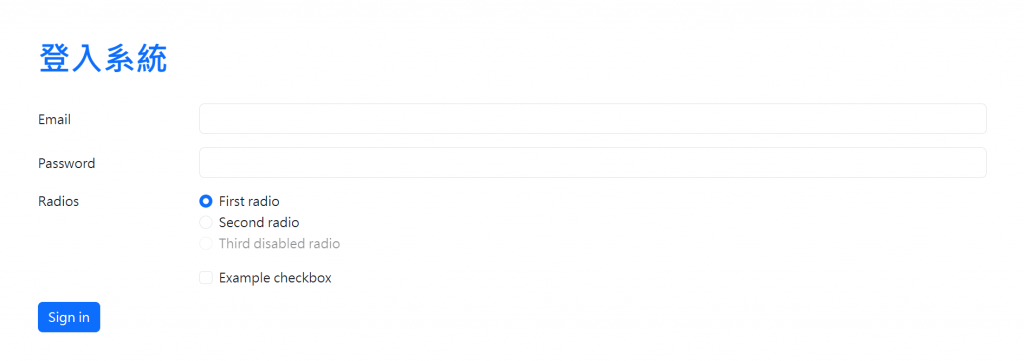
日後會針對常用的Bootstrap的class加以說明喔!
Bootstrap沒有提供Footer的元件,但網路上有其他人提供自己使用Bootstrap做好的Footer的程式碼!點進去以上連結後我們複製以下程式碼貼在<body>裡: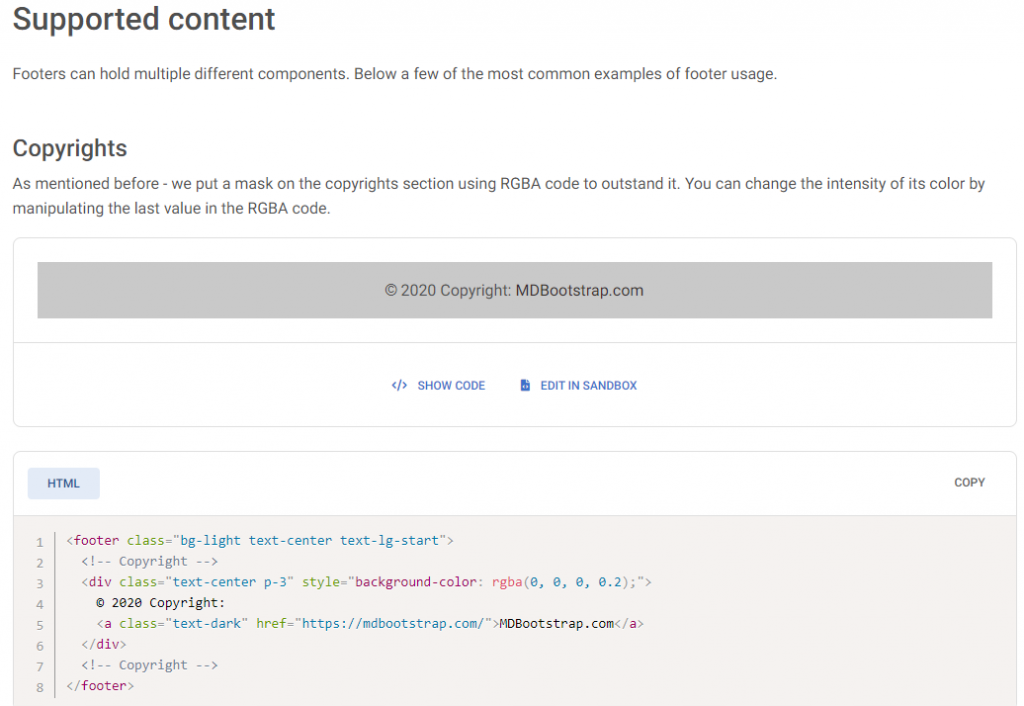
Footer的完整HTML:
    <footer class="bg-light text-center text-lg-start">
      <!-- Copyright -->
      <div class="text-center p-3" style="background-color: rgba(0, 0, 0, 0.2)">
        © 2020 Copyright:
        <a class="text-dark" href="https://mdbootstrap.com/">MDBootstrap.com</a>
      </div>
      <!-- Copyright -->
    </footer>
這樣一來,我們就使用Bootstrap成功完成了一個初步的網頁視覺呈現: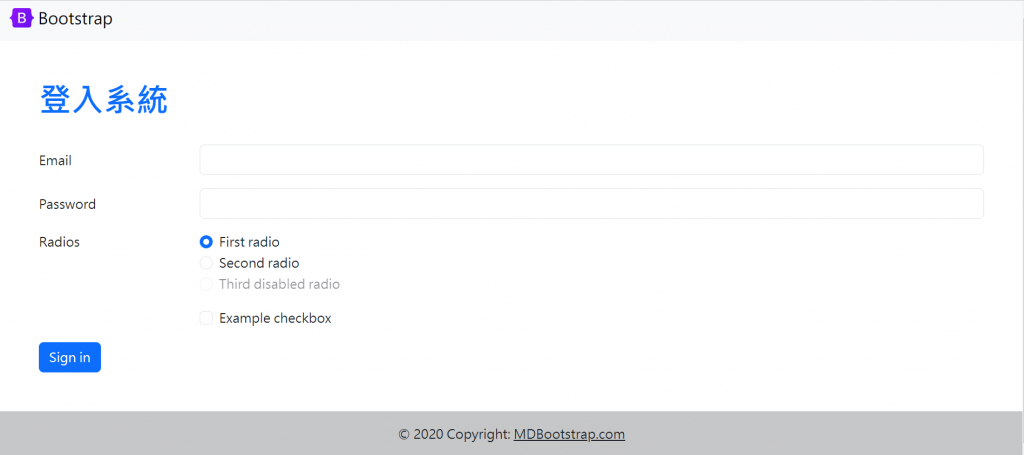
是不是很簡單呀!有沒有開始愛上Bootstrap了

 iThome鐵人賽