iT邦幫忙

2023 iThome 鐵人賽

DAY 13
0
DevOps

Azure DevOps Troubleshooting and best practices 系列 第 13

Azure DevOps migration - Azure Board 介紹與搬移 (下)

  • 分享至 

  • xImage
  •  

前言

本篇文章將開始搬移 Azure Borard 內的工作內容 (Work item),在開始之前需要完成一些前置工作,否則在搬移過程中,你會遇到許多問題與挫折。所以在開始正式搬移之前,建議你先閱讀 (Azure DevOps migration - Azure Board 介紹與搬移 (上)) [https://ithelp.ithome.com.tw/articles/10329528]


開始搬移 Workitem

首先,我們先開啟 Azure DevOps 來源專案,點選左邊選單內 Boards > Queries,點選上方 New Query。
https://ithelp.ithome.com.tw/upload/images/20230928/20091494gdyaKMzqDv.png


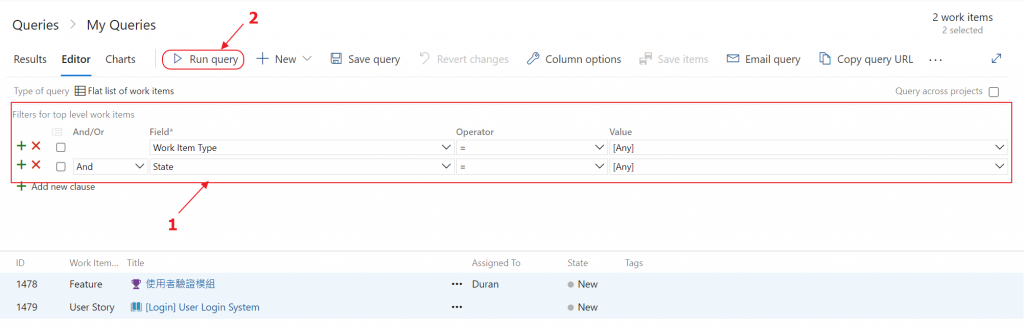
編輯完查詢條件後,點選上方 Run Query 進行查詢,下方會呈現查詢結果

建議:工作搬移至另一個專案是透過 Query 功能進行搬移,所以查詢條件非常重要。搬移之前規劃好的查詢條件會讓你事半功倍。
https://ithelp.ithome.com.tw/upload/images/20230928/20091494Slbeh89pUy.png


你可以透過 Ctrl 鍵 + 滑鼠點選選取要搬移的工作內容,或者使用 Ctrl + a 選擇全部工作,點選右邊 ... 按鈕,選擇 Move to team Project
https://ithelp.ithome.com.tw/upload/images/20230928/20091494MOHGa4dUoI.png


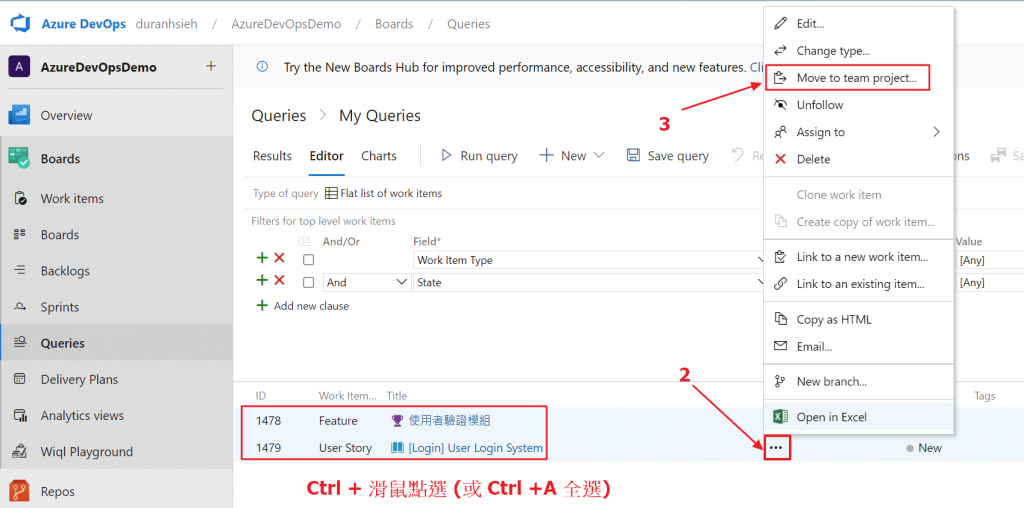
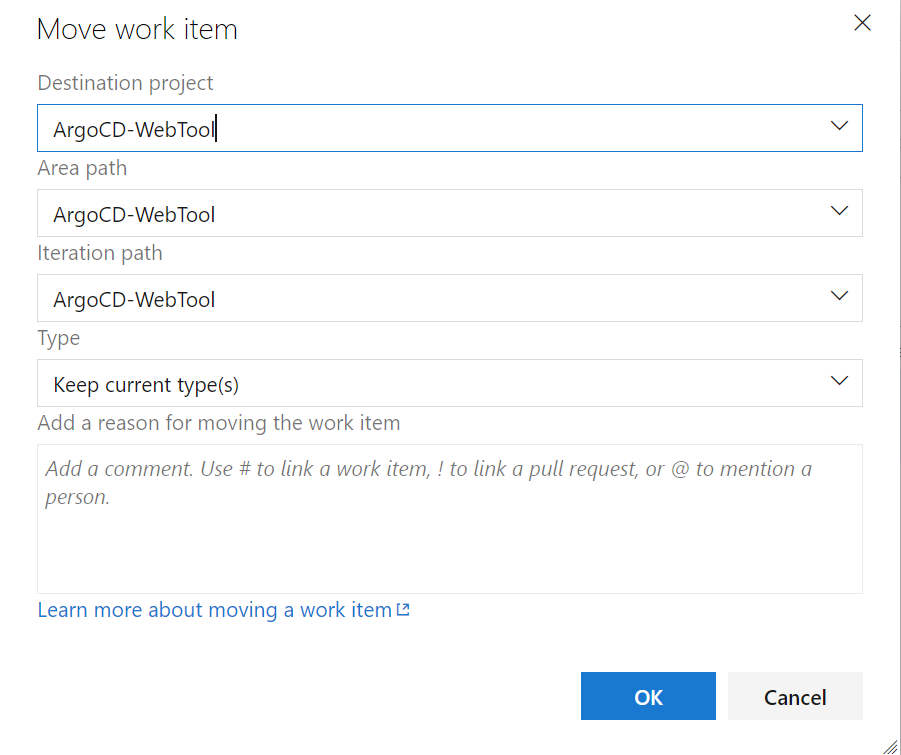
選擇 Project、Team、Iteration 與 Type,點選 OK 後會進行檢查

若 workitem type 錯誤,會顯示無法搬移錯誤訊息
https://ithelp.ithome.com.tw/upload/images/20230928/20091494H0hYgDLnFj.png


若沒有錯誤訊息,你會發現要搬移的工作內容變成粗體字,此時只要點選右上方 save item 按鈕,即完成搬移。
https://ithelp.ithome.com.tw/upload/images/20230928/20091494xcZiPHPhYP.png


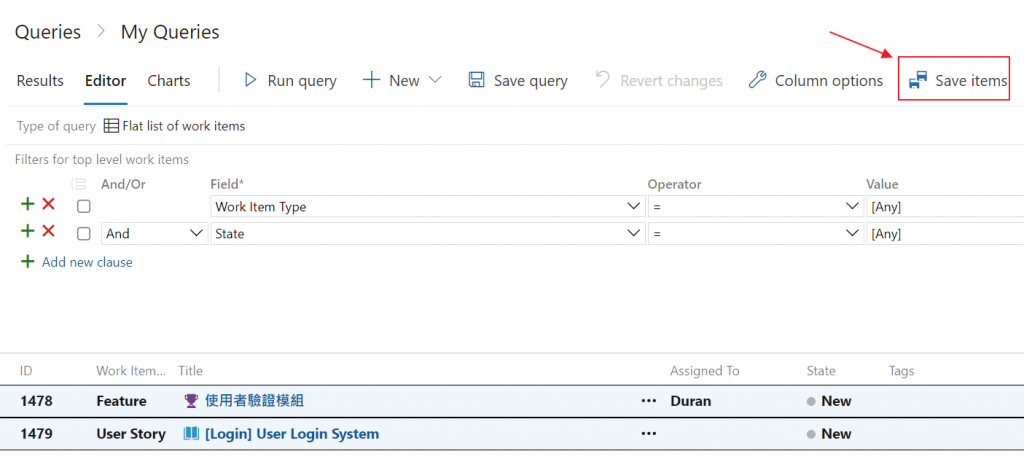
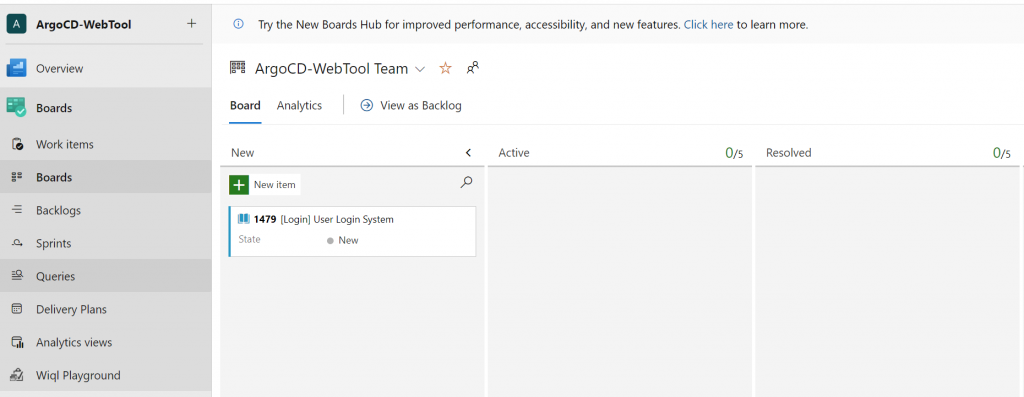
接下來,切換到目標專案,透過相同的方式查詢,即可看見工作內容已經搬移成功。
https://ithelp.ithome.com.tw/upload/images/20230928/20091494zD3JJNWmOF.png


如果來源專案與目標專內的 Team、Iteration、Area 與 Workitem Type 設定內容皆相同,搬移過程所遇到的問題就比較少,而且呈現方式會與原來專案內完全相同。如下圖所示,Borad 若與原來專案設定相同,則完全不需要事後調整,可以完整呈現過去團隊運作方式。

理所當然,真實世界專案流程比想像中還複雜,許多的客製內容需要事先準備 - 搬移前置作業是非常花時間的

https://ithelp.ithome.com.tw/upload/images/20230928/20091494HspTMqzNmT.png


上一篇
Azure DevOps migration - Azure Board 介紹與搬移 (上)
下一篇
Azure DevOps migration - 如何搬移 Azure Pipeline 至其他專案 (上)
系列文
Azure DevOps Troubleshooting and best practices 30
圖片
  直播研討會
圖片
{{ item.channelVendor }} {{ item.webinarstarted }} |
{{ formatDate(item.duration) }}
直播中

尚未有邦友留言

立即登入留言