昨日我們透過官網大概說明了整個Spring MVC預設幫我們自動裝配的組件,今日我們來看看靜態資源是如何設置的


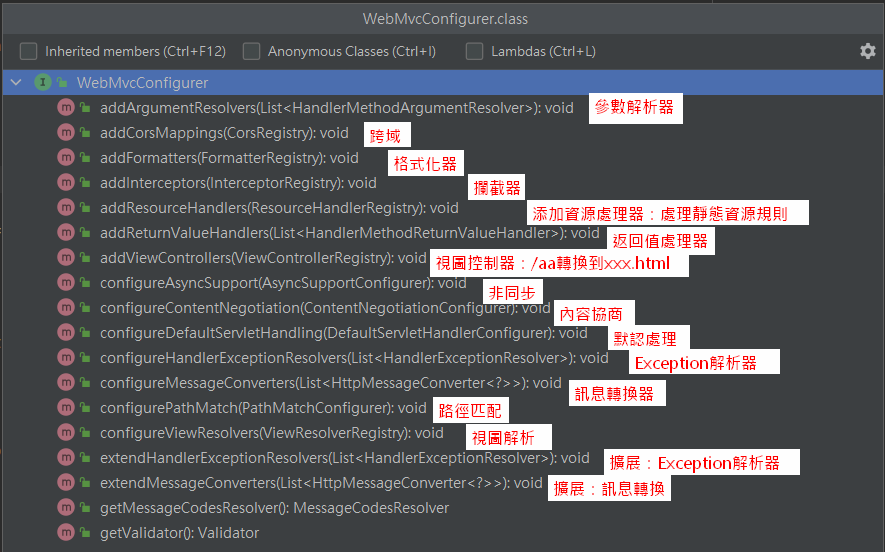
進入static content前,我們先來看看這個最重要

在WebMvcAutoConfiguration class中有一個靜態內部類別WebMvcAutoConfigurationAdapter它實作了WebMvcConfigurer Interface,讓Spring MVC可以增加各種自訂功能
並綁定兩個xxxProperties
從WebMvcAutoConfigurationAdapter中可以看到處理靜態資源的source code,從中加入兩個ResourceHandler,定義了靜態資源路徑
public void addResourceHandlers(ResourceHandlerRegistry registry) {
    if (!this.resourceProperties.isAddMappings()) {
        logger.debug("Default resource handling disabled");
    } else {
        this.addResourceHandler(registry, this.mvcProperties.getWebjarsPathPattern(),      "classpath:/META-INF/resources/webjars/");
        this.addResourceHandler(registry, this.mvcProperties.getStaticPathPattern(), (registration) -> {
            registration.addResourceLocations(this.resourceProperties.getStaticLocations());
            if (this.servletContext != null) {
                ServletContextResource resource = new ServletContextResource(this.servletContext, "/");
                registration.addResourceLocations(new Resource[]{resource});
            }

        });
    }
}
從addResourceHankler中可以看到預設會有3個cache相關設定,作用在於瀏覽器訪問過,就會將靜態資源緩存到瀏覽器中,此功能無默認設定值,可透過配置文件spring.web進行修改
a. period: 緩存間隔,default 0 sec;
b. cacheControl:緩存控制,default 無;
c. useLastModified:是否使用lastModified header,default false;
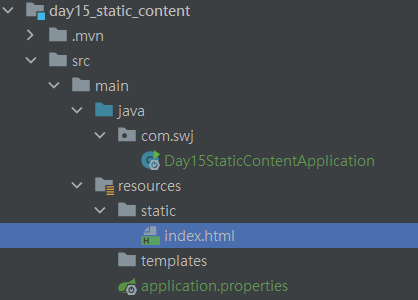
在靜態資源下找index.html,沒有則在template目錄下找

靜態資源路徑下尋找favicon.ico
