在開發時通常會分好幾個不同環境,為了不同目的區分成開發dev、整合測試sit、使用者測試uat、正式環境prod,背後很多的設定也會跟著不同,例如資料庫連線、資料拋檔路徑等,我們總不能佈署一個環境修改一次設定檔吧,這樣人工改錯的機率一定很大,所以Spring Boot提供了Profiles讓我們來解決這個問題,今天我們就來看看吧

可以在@Component, @Configuration 或 @ConfigurationProperties加上@Profile註解
@Configuration
@Profile("Prod")
public class ProdConfiguration {
}
@Configuration
@Profile("uat")
public class UatConfiguration {
}
@Configuration
@Profile("sit")
public class SitConfiguration {
}
@Configuration
@Profile("dev")
public class DevConfiguration {
}
@Configuration
public class MyConfiguration {
}
調整一下banner.txt
_ _ _ _ _
| | | | | | | | |
| |__| | ___| | | ___ | | __ _ _ __ ___ ___ ___
| __ |/ _ \ | |/ _ \ _ | |/ _` | '_ ` _ \ / _ \/ __|
| | | | __/ | | (_) | | |__| | (_| | | | | | | __/\__ \
|_| |_|\___|_|_|\___/ \____/ \__,_|_| |_| |_|\___||___/
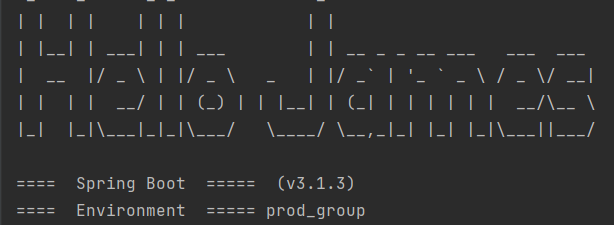
==== Spring Boot ===== ${spring-boot.formatted-version}
==== Environment ===== ${spring.profiles.active:}
設定檔設定啟動環境
spring:
  profiles:
    active: dev
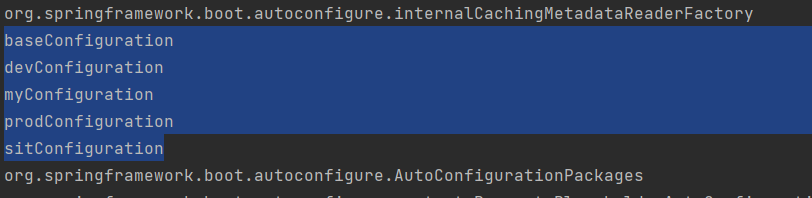
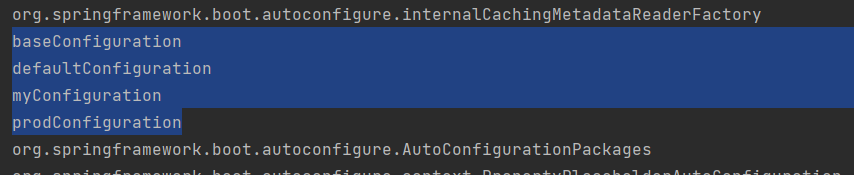
啟動結果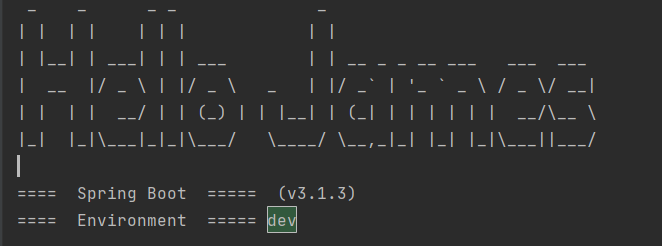
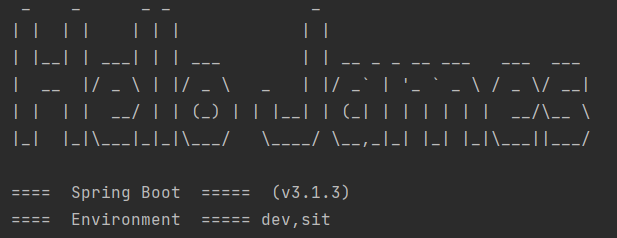
你也可以一次同時讓多個環境同時生效,可以設定default默認的啟動環境,也可以設定include不管如何都要啟動的環境
@Configuration
@Profile("default")
public class DefaultConfiguration {
}
@Configuration
@Profile("base")
public class BaseConfiguration {
}
spring:
  profiles:
    active: dev,sit #激活一個或多個環境
    default: default #指定默認環境
    include: base #包含指定環境,無論激活哪一個環境,這個都要包含
除了可以使用設定檔的方式啟動環境也可以透過command line的方式:--spring.profiles.active=dev,hsqldb
spring:
  profiles:
    group:
      prod_group:
        prod,base,default
      dev_group:
        dev,base,default
      sit_group:
        sit,base,default
    active: prod_group  #激活prod_group
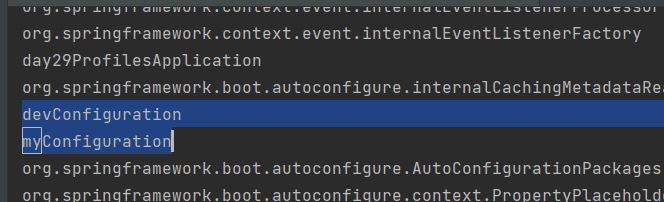
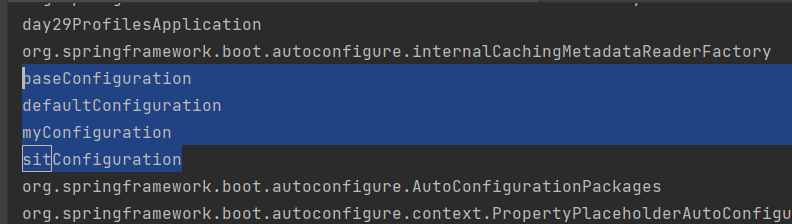
透過程式的方式激活環境
public static void main(String[] args) {
    ApplicationContext ioc = new SpringApplicationBuilder()
            .sources(Day29ProfilesApplication.class)
            .profiles("sit","base","default")
            .run(args);
    for (String beanName : ioc.getBeanDefinitionNames()) {
        System.out.println(beanName);
    }
}
我們可以使用application-{profile}.properties or application-{profile}.yaml作為指定環境的配置文件
server.port=8000
spring.profiles.active=uat2
application-uat2.properties
server.port=9999
application-prod2.properties
server.port=11111
我們可以看到當application.proteries設定檔與application-uat2.properties的server.port有衝突時會以profile的為主,激活的環境為uat2,server port也被修改為9999囉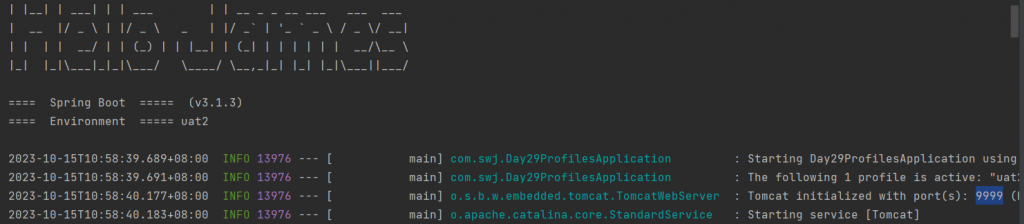


 iThome鐵人賽