來架個網站吧建立網站環境前,建議可以預先建立網站環境範本,未來在部屬資料庫、應用程式伺服器等服務可以事半功倍。接下來就是我自己常用的設定。
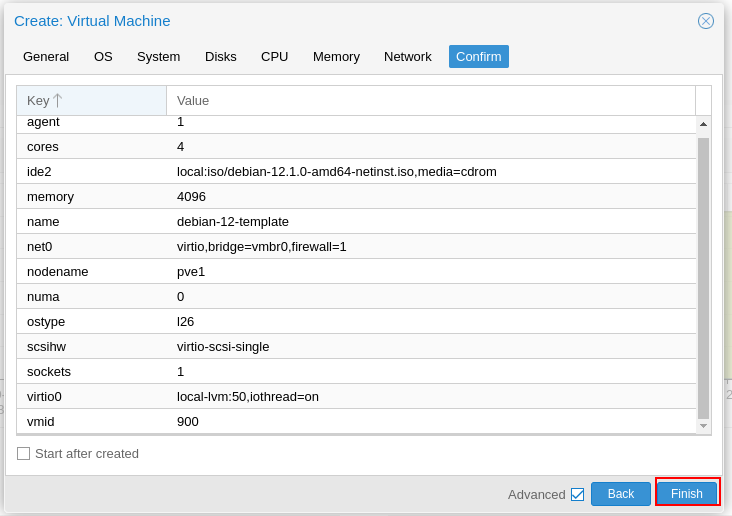
我的範本規劃如下
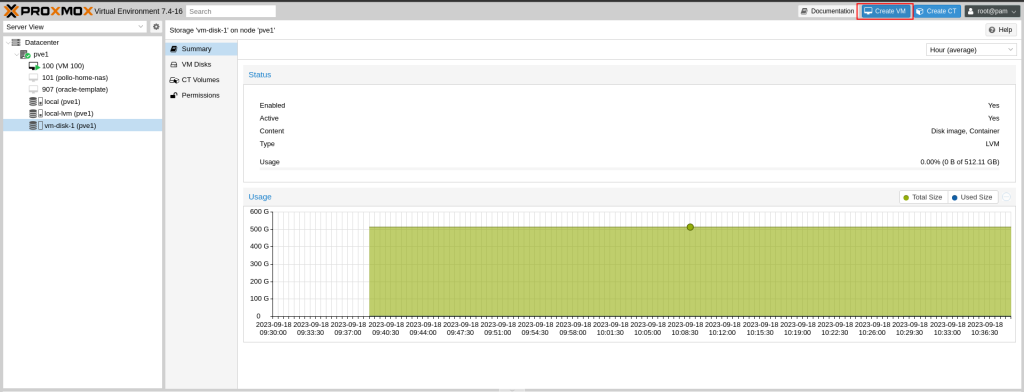

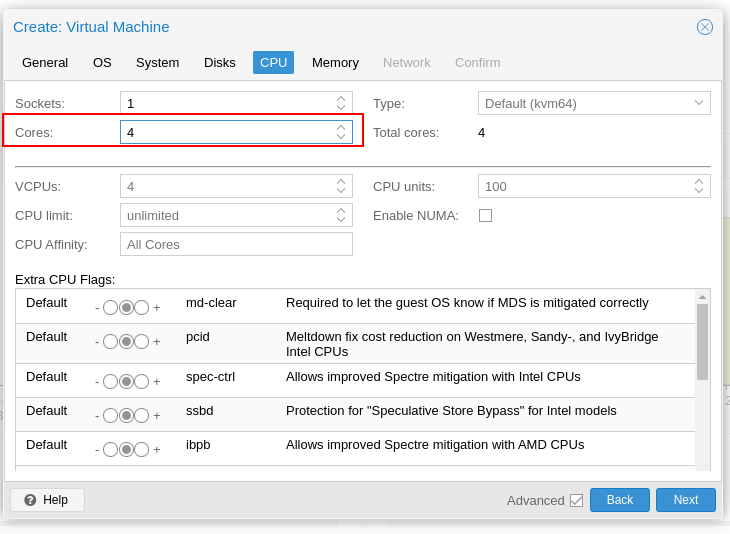
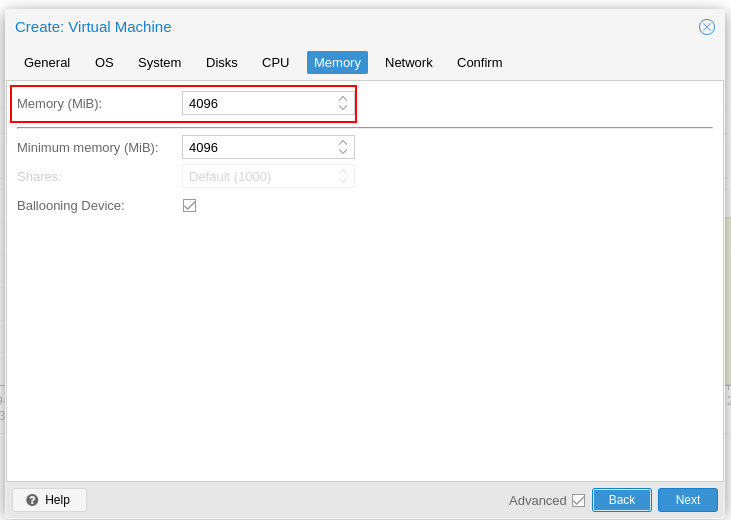
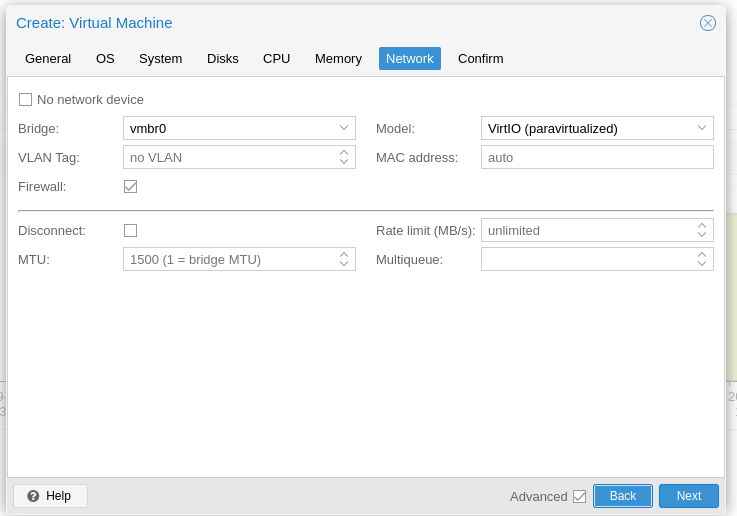
![Create VM]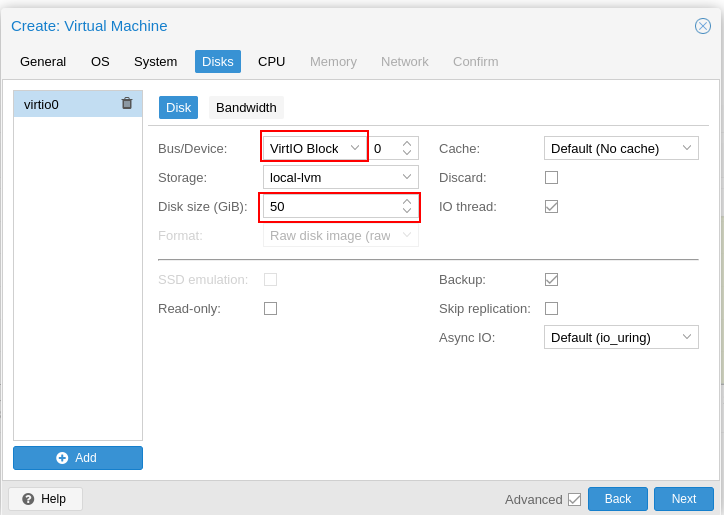
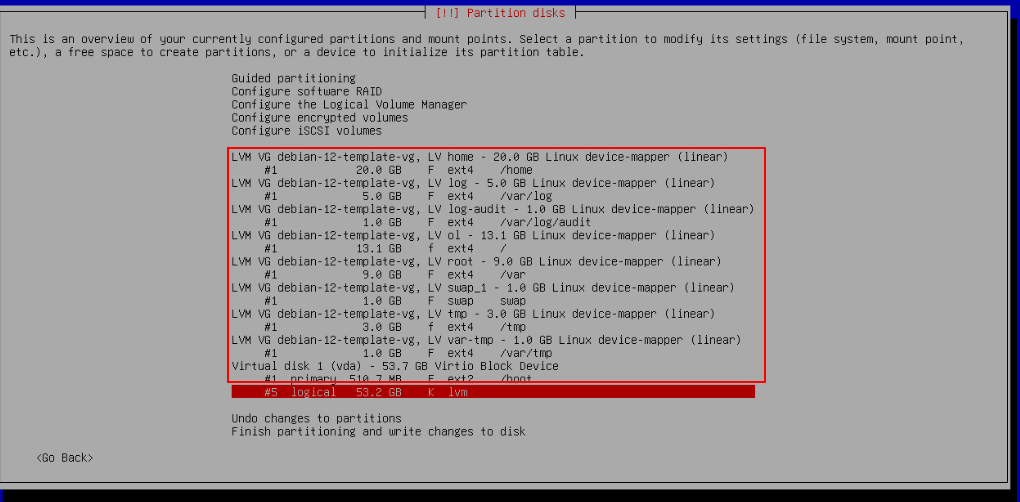
tmp是預防維運人員塞太大檔案造成系統功能異常。每的獨立磁區大小是實際狀況分配。切割的完成的設定截圖如下:
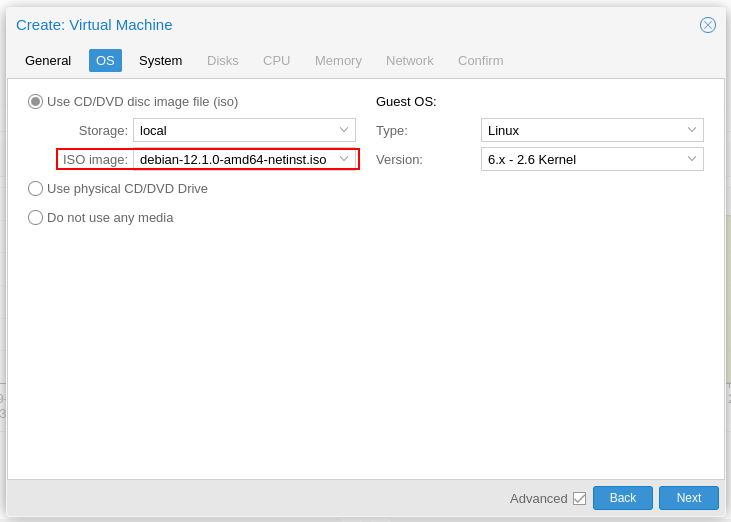
安裝詳細步驟詳細說明我在這邊就不一一敘述了,有興趣的可以讀篇文章:我的Linux生活日記 02-安裝Debian
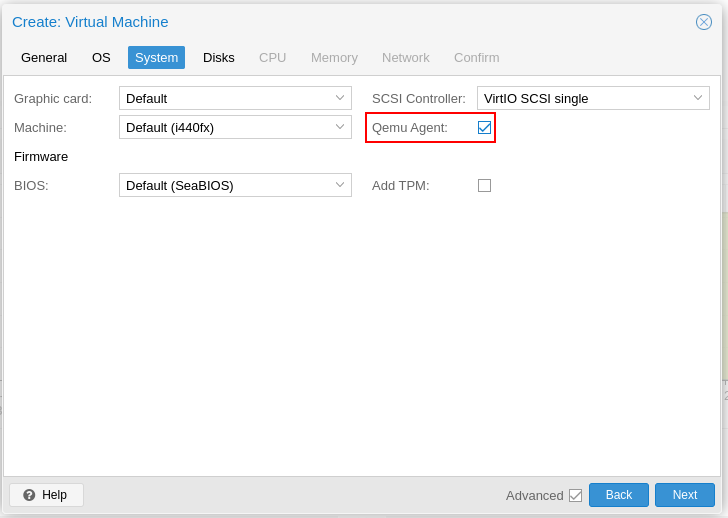
sudo systemctl enable qemu-guest-agent
sudo systemctl enable firewalld
pollochang@debian-12-template:~$ history
    1  sudo apt update
    2  sudo apt install qemu-guest-agent vim firewalld wget curl autofs rsync
    3  sudo vim /etc/profile.d/ssh-login-info.sh
    4  sudo chmod +x /etc/profile.d/ssh-login-info.sh
    5  sudo apt install tmux
    6  history
pollochang@debian-12-template:~$ history
    1  2023-09-18 16:10:55 sudo -i
    2  2023-09-18 16:10:55 sudo apt update
    3  2023-09-18 16:10:55 sudo apt install qemu-guest-agent vim firewalld wget curl autofs rsync
    4  2023-09-18 16:10:55 sudo vim /etc/profile.d/ssh-login-info.sh
    5  2023-09-18 16:10:55 sudo chmod +x /etc/profile.d/ssh-login-info.sh
    6  2023-09-18 16:10:55 sudo apt install tmux
    7  2023-09-18 16:10:55 history
    8  2023-09-18 16:10:55 sudo vim /etc/profile.d/history.sh
    9  2023-09-18 16:10:58 history
# for setting history length see HISTSIZE and HISTFILESIZE in bash(1)
HISTCONTROL=ignoredups:ignorespace
HISTSIZE=50000
HISTFILESIZE=50000
HISTTIMEFORMAT='%F %T '
sudo chmod 0755 /etc/profile.d/history.sh
ll)
alias ll='ls -alF'
alias la='ls -A'
alias l='ls -CF'
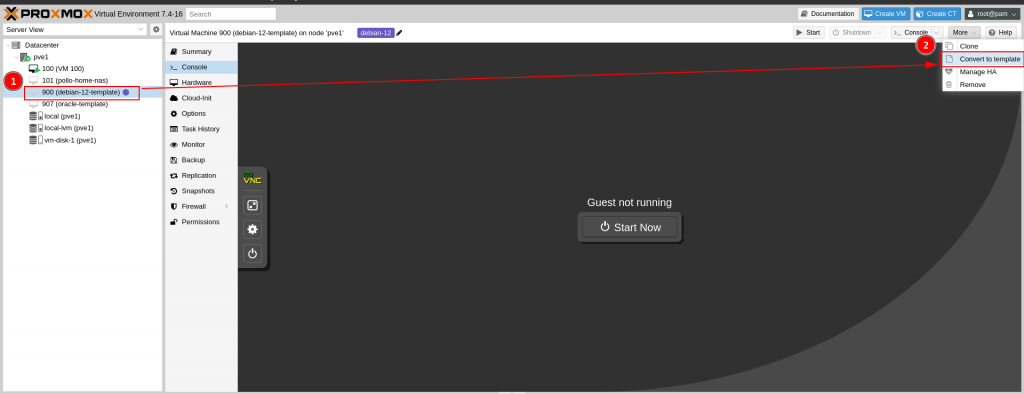
配置完成之後就可以轉成範本。