從今天開始,就不再一一列舉 tilemaker 設定檔的名詞,以及 Maplibre Style 的細節。我們就從地圖樣式的「需求」出發,來看看可以怎麼撰寫它們。以下先接續我們 Day12 到 Day16 的山頂/三角點標示:
有關於山頂/三角點,我們會希望在縮放層級較小時顯示較重要的物件,並在外觀上做出區別。
以山頂來說,「百岳」和「小百岳」會有較高的優先級。通常在 OSM 中會以 ref 來標示。舉例來說:
而三角點的優先級則是從一等、二等、三等三角點排下來。
因此,我們可以先大概決定一下各縮放層級該出現的物件:
另外,優先級較高的物件在和其它物件重疊時,自然有優先顯示權,因此我們需要額外的屬性來協助渲染作業。
根據上面的縮放層級規則,在 Lua 設定檔中的 node_function 可以這樣撰寫:
-- In function node_function(node)

if node:Holds("ref") then
  local ref = node:Find("ref")
  node:Attribute("ref", ref)

  if ref:find("^百岳") ~= nil then
    local rank = string.match (ref, "%d+")
    SetLevelAttribute(node, 0 + rank)
    SetLevelAttribute(node, 0 + rank)
    if tonumber(rank) < 20 then
      node:MinZoom(7)
    else
      node:MinZoom(8)
    end
  elseif ref:find("^小百岳") then
    local rank = string.match (ref, "%d+")
    SetLevelAttribute(node, 100 + rank)
    node:MinZoom(9)
  else
    SetLevelAttribute(node, 200)
    node:MinZoom(11)
  end
else
    SetLevelAttribute(node, 300)
    node:MinZoom(11)
end
我們先處理山頂物件。這邊使用到的 SetLevelAttritute 是自訂義的函式,可以為向量圖磚中的 Feature 新增 level 屬性,其值越小,表示物件越重要:
-- Set level for priority
function SetLevelAttribute(obj, level)
  obj:AttributeNumeric("level", level)
end
level 的值可以由 OSM 中的 ref 屬性決定。可以看到,若為「百岳」,則我們將之設定為 0+百岳排名,因此排序為 1~100。以排名第二的雪山為例,其值就是0+2=2。使用相同的算法,小百岳的起始值為100,故排序為 101~200。
至於其它有 ref 屬性的山頂,則設定 level=200,其餘的山頭則是 level=300。
至於三角點,為了能確保優先級在山頂之下,level 就從 1000 開始計算,可以這樣撰寫:
if node:Holds("survey_point") then
  node:Attribute("survey_point", survey_point)
  if survey_point == "trig_1st" then
    SetLevelAttribute(node, 1000)
    node:MinZoom(10)
  elseif survey_point == "trig_2nd" then
    SetLevelAttribute(node, 2000)
    node:MinZoom(11)
  elseif survey_point == "trig_3rd" then
    SetLevelAttribute(node, 3000)
    node:MinZoom(12)
  else
    SetLevelAttribute(node, 4000)
    node:MinZoom(12)
  end
end
以下是有關文字的圖層:
{
  "id": "peak_name",
  "type": "symbol",
  "source": "taiwan",
  "source-layer": "peak",
  "layout": {
    "symbol-sort-key": ["get", "level"],
    "text-field": [
      "case",
      ["has", "ele"],
      ["concat", ["get", "name"], "\n", ["get", "ele"], "m"],
      ["get", "name"]
    ],
    "text-offset": [0, -1.6],
    "text-max-width": 15,
    "text-size": 18,
    "text-padding": 20
  },
  "paint": {
    "text-halo-color": "white",
    "text-halo-width": 1.5
  }
}
可以注意到,屬性 symbol-sort-key 能夠令渲染的物件依照相應的規則決定顯示優先級,其值的 ["get", "level"] 就是對物件的 level 屬性取值。
因此,這個圖層中,百岳排名靠前的山頭,始終可以有最高的優先級,而且這項規則是隨縮放層級連續呈現的。在 z7 到 z8 的縮放中,結果如下:
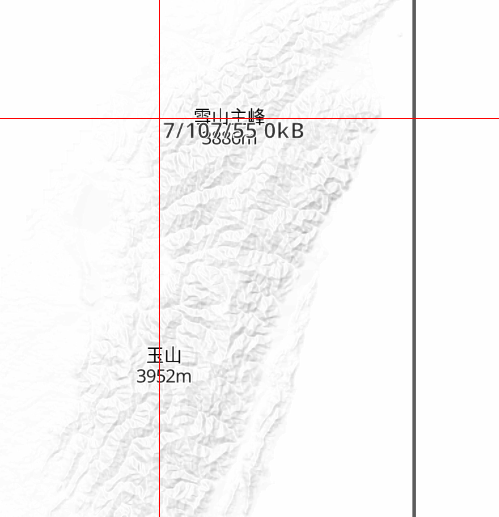
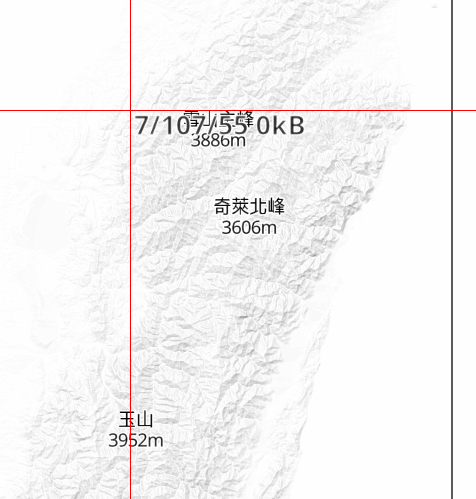
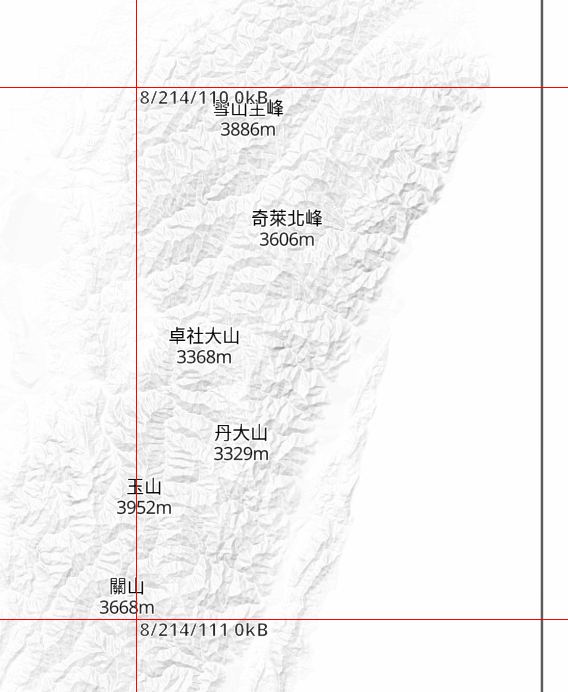
可以看到,山頭是依百岳的順序出現的。
在標示三角點時,我們也可以使用 Maplibre Style Spec 中,表達式的的 match 語法,依三角點的分級來取得不同顏色的值:
{
  "id": "peak_location",
  "type": "circle",
  "source": "taiwan",
  "source-layer": "peak",
  "filter": ["has", "survey_point"],
  "paint": {
    "circle-color": [
      "match", ["get", "survey_point"],
      "trig_1st", "red",
      "trig_2nd", "#edbfbb",
      "trig_3rd", "#596dab",
      "white"
    ],
    "circle-stroke-width": 2,
    "circle-stroke-color": "black"
  }
}
四種顏色的三角點,其渲染結果如下: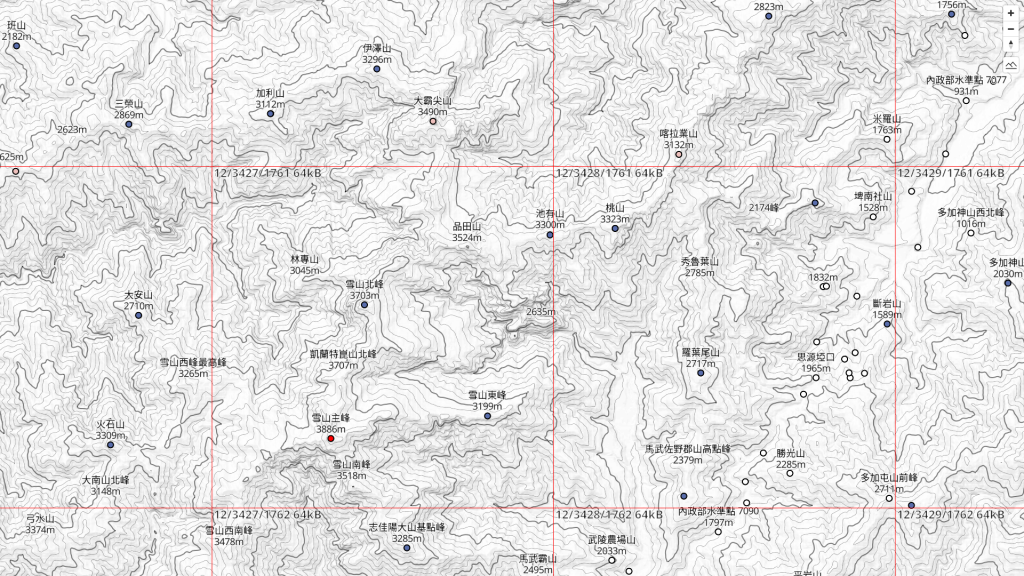
今天的主題是以網路地圖的縮放功能為考量,想辦法令向量圖磚和渲染結果可以達到「不突兀」這一目標。之後也會用差不多的方式,向大家介紹路徑、水體等圖層該如何處理。
另外,今天使用到的設定檔和 Style 一樣可以參考 Github。


 iThome鐵人賽