前幾天我們將目光放在自製向量圖磚,並在前端渲染山頂/三角點等圖形。今天我們就先暫時放下這些,來看看登山地圖中,另一個重要的元素:高程資訊。
除了山頭的高度以外,使用者在閱讀 Web Map 時,會參考到:
這些都會使用到在 Day5 提過的 Terrain-RGB 圖磚以及 maplibre-contour 套件。以下我們來看看套件中使用的範例並稍作修改。
首先使用 CDN 引入 maplibre-contour 套件:
<script src="https://unpkg.com/maplibre-contour@0.0.3/dist/index.min.js"></script>
接著,定義套件中新加入的 class: DemSource。它可以引入 terrain-rgb 圖磚並被 Style 引用。可以看到,這邊使用的圖磚服務來自 AWS S3。
var demSource = new mlcontour.DemSource({
  url: "https://elevation-tiles-prod.s3.amazonaws.com/terrarium/{z}/{x}/{y}.png",
  encoding: "terrarium",
  maxzoom: 13,
});
接著為了渲染等高線,要讓 Maplibre 接受自定義的 contour protocol:
// calls maplibregl.addProtocol for the shared cache and contour protocols
demSource.setupMaplibre(maplibregl);
新增 Map 物件,並定義 Style:
var map = new maplibregl.Map({
  container: "map",
  zoom: 14,
  center: [121.3662395,23.8584442]
  hash: true,
  style: {
    ...
  }
在資料來源(sources)中,需要定義供山坡陰影渲染的 raster-dem 型態來源,以及供等高線渲染的 vector 型態來源。可以看到,兩者在定義圖磚格式時,都使用了剛剛加入的 demSource 以及自訂的 protocol。
  {
    ...
    sources: {
      dem: {
        type: "raster-dem",
        encoding: "terrarium",
        tiles: [demSource.sharedDemProtocolUrl],
        maxzoom: 13,
        tileSize: 256,
      },
      contours: {
        type: "vector",
        tiles: [
          demSource.contourProtocolUrl({
            thresholds: {
              // zoom: [minor, major]
              11: [200, 1000],
              12: [100, 500],
              13: [100, 500],
              14: [50, 200],
              15: [20, 100],
            },
            elevationKey: "ele",
            levelKey: "level",
            contourLayer: "contours",
          }),
        ],
        maxzoom: 16,
      },
    },
    ...
接著在圖層列表(layers)中,就可以定義實際被渲染的圖層了。id=hills 的圖層是山坡陰影,id=contours 的圖層是等高線,針對資料的 level 屬性決定線條寬度。id=contour-text 則是等高線的高度文字,由於使用了 filter,僅 level > 0 的線段資料會被渲染。
  {
    ...
    layers: [
      {
        id: "hills",
        type: "hillshade",
        source: "dem",
        paint: {
          "hillshade-exaggeration": 0.25,
        },
      },
      {
        id: "contours",
        type: "line",
        source: "contours",
        "source-layer": "contours",
        paint: {
          "line-color": "rgba(0,0,0, 50%)",
          "line-width": ["match", ["get", "level"], 1, 1, 0.5],
        },
        layout: {
          "line-join": "round",
        },
      },
      {
        id: "contour-text",
        type: "symbol",
        source: "contours",
        "source-layer": "contours",
        filter: [">", ["get", "level"], 0],
        paint: {
          "text-halo-color": "white",
          "text-halo-width": 1,
        },
        layout: {
          "symbol-placement": "line",
          "text-anchor": "center",
          "text-size": 10,
          "text-field": [
            "concat",
            ["number-format", ["get", "ele"], {}],
            "'",
          ],
          "text-font": ["Noto Sans Bold"],
        },
      },
    ],
  },
});
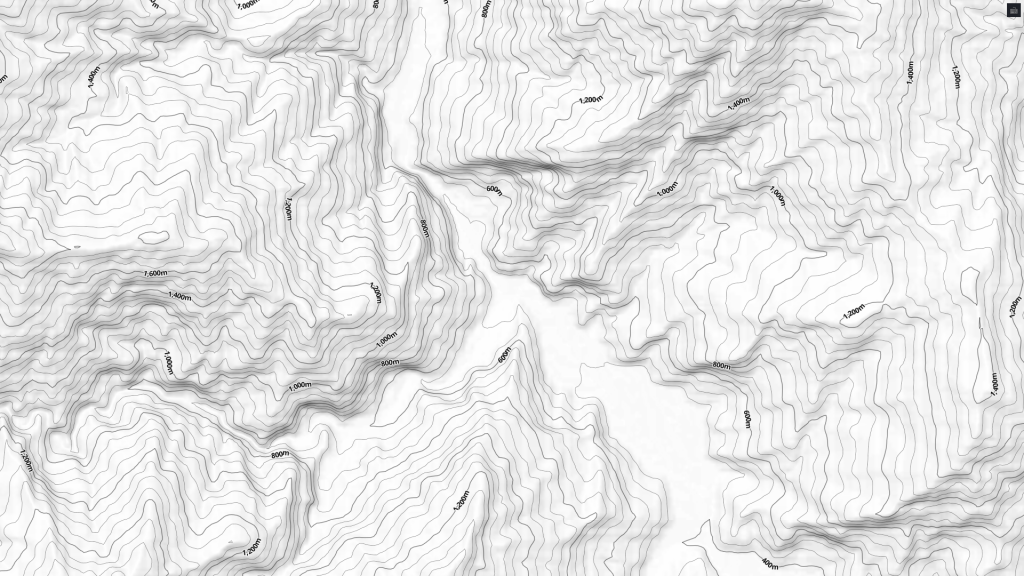
最終可以得出成果:
由於上面使用的全球性圖磚服務,其高程資料來源多來自於 USGS 的 SRTM(太空梭雷達地形測量任務),其精確度可能並不如國內開放資料。這邊我們改為使用台灣的圖磚服務(使用內政部20公尺網格數值地形模型),並將編碼調整為 mapbox。
var demSource = new mlcontour.DemSource({
  url: "https://osmhacktw.github.io/terrain-rgb/tiles/{z}/{x}/{y}.png",
  encoding: "mapbox",
  maxzoom: 13,
});
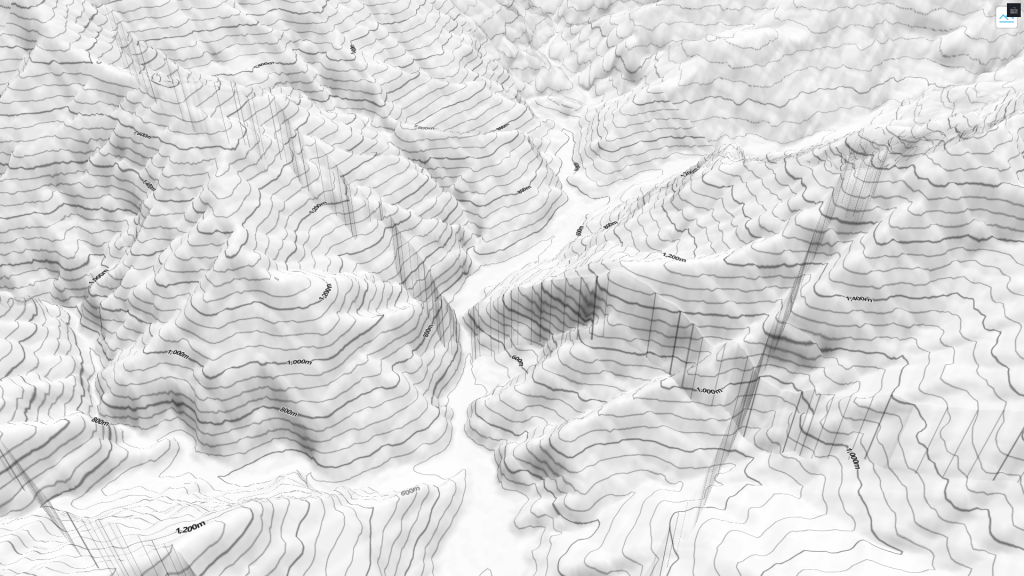
與上圖相比,可以看到在中央的河床地帶較為平坦,比較貼近現實狀況(不過山坡陰影就有點差強人意了)。
若要在 Maplibre 中啟用地形選項,則需要在 style 中多定義一個 type=raster-dem 的資料來源:
sources: {
  terrainSource: {
    type: 'raster-dem',
    tiles: [
      "https://osmhacktw.github.io/terrain-rgb/tiles/{z}/{x}/{y}.png"
    ],
    tileSize: 256
  },
  ...
並在 style 中額外新增 terrain 屬性:
terrain: {
  source: 'terrainSource',
  exaggeration: 1
}


 iThome鐵人賽