今天我們來為我們的Nextjs App和component來添加測試。我們先使用已經建立好的Jest和Playwright進行測試。
我們先試著執行。
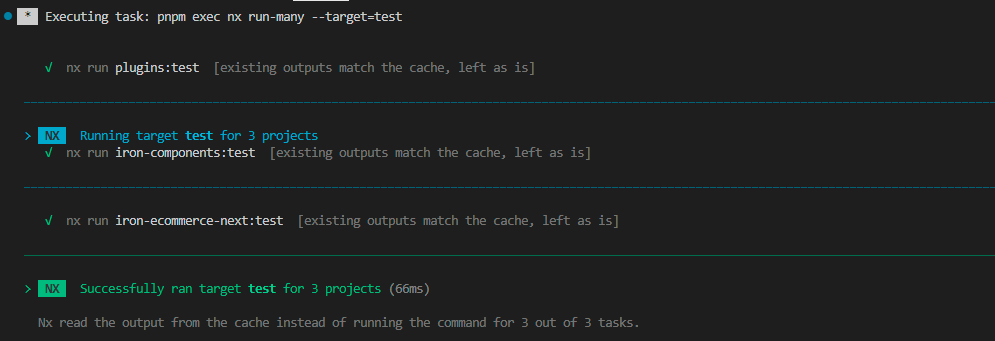
pnpm exec nx run-many --target=test
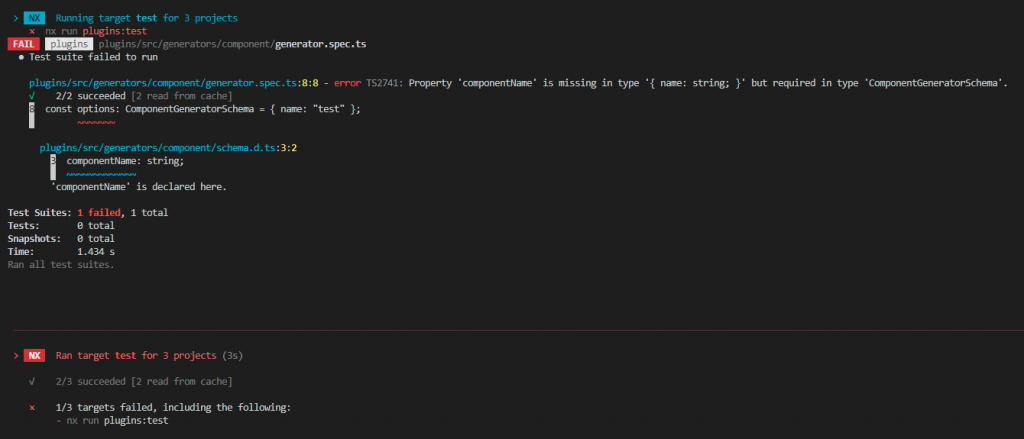
修正一下generator的測試
import { componentGenerator } from "./generator";
import { ComponentGeneratorSchema } from "./schema";
import { Tree, addProjectConfiguration, readProjectConfiguration } from "@nx/devkit";
import { createTreeWithEmptyWorkspace } from "@nx/devkit/testing";

describe("component generator", () => {
	let tree: Tree;
	const options: ComponentGeneratorSchema = { name: "test", componentName: "SampleComponent" };

	beforeEach(() => {
		tree = createTreeWithEmptyWorkspace();
		addLibToWorkspace(tree, options.name);
	});

	it("should run successfully", async () => {
		await componentGenerator(tree, options);
		const config = readProjectConfiguration(tree, options.name);
		expect(config).toBeDefined();

		const componentPath = tree.exists(`libs/${options.name}/src/lib/${options.componentName}`);
		expect(componentPath).toBeTruthy();
	});
});

function addLibToWorkspace(tree: Tree, libName: string) {
	addProjectConfiguration(tree, libName, {
		root: `libs/${libName}`,
		sourceRoot: `libs/${libName}/src`,
		projectType: "library",
		targets: {},
		tags: []
	});
}
在我們開始為我們的元件添加測試前,先設置測試環境。這包括安裝必要的依賴,並在 tsconfig.base.json 和 jest.setupTest.ts 中進行相應的配置。通過這些設置來確保了測試環境的正確設置
安裝常用的依賴
pnpm add -D @testing-library/user-event @testing-library/dom @testing-library/jest-dom @types/testing-library__jest-dom
我們知道Jest是一個廣泛使用的測試框架。然而,當涉及到 DOM 操作和驗證時,Jest本身可能不足以處理所有的狀態行為。所以我們需要加入jest-dom這個lib,jest-dom是一個為 Jest 提供自定義匹配器的,使得在測試中驗證 DOM 狀態變得更容易直觀。接下來我們進行設置
首先在tsconfig.base.json添加types設置:
		// ...
		"types": ["node", "jest", "@testing-library/jest-dom"]
	},
	"exclude": ["node_modules", "tmp"]
}
創建設定檔案在根目錄jest.setupTest.ts:
import "@testing-library/jest-dom";
打開根目錄上的jest,jest.preset.js:
const nxPreset = require("@nx/jest/preset").default;

module.exports = {
	...nxPreset,
	setupFilesAfterEnv: ["./jest.setupTest.ts"],
	testEnvironment: "jest-environment-jsdom"
};
接下來打開我們的libs\iron-components\tsconfig.spec.json並在types中加入@testing-library/jest-dom。
{
	"extends": "./tsconfig.json",
	"compilerOptions": {
		"outDir": "../../dist/out-tsc",
		"module": "commonjs",
		"types": ["jest", "node", "@testing-library/jest-dom"]
	},
	"include": [
		"jest.config.ts",
		"src/**/*.test.ts",
		"src/**/*.spec.ts",
		"src/**/*.test.tsx",
		"src/**/*.spec.tsx",
		"src/**/*.test.js",
		"src/**/*.spec.js",
		"src/**/*.test.jsx",
		"src/**/*.spec.jsx",
		"src/**/*.d.ts"
	]
}
執行:
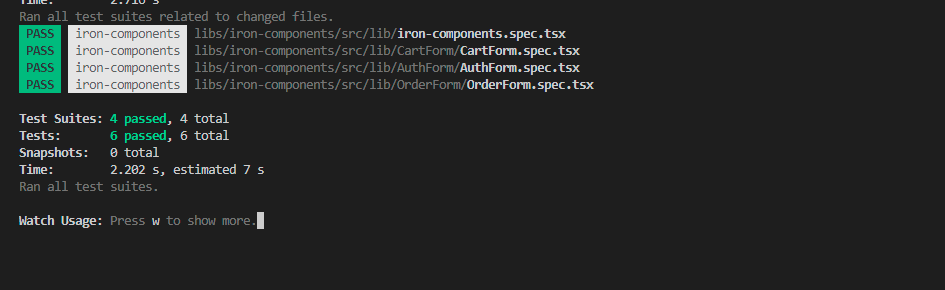
pnpm exec nx run iron-components:test --watch=true
現在我們開始為我們的元件添加測試:
稍微修正我們的libs\iron-components\src\lib\AuthForm\AuthForm.tsx加入id和htmlFor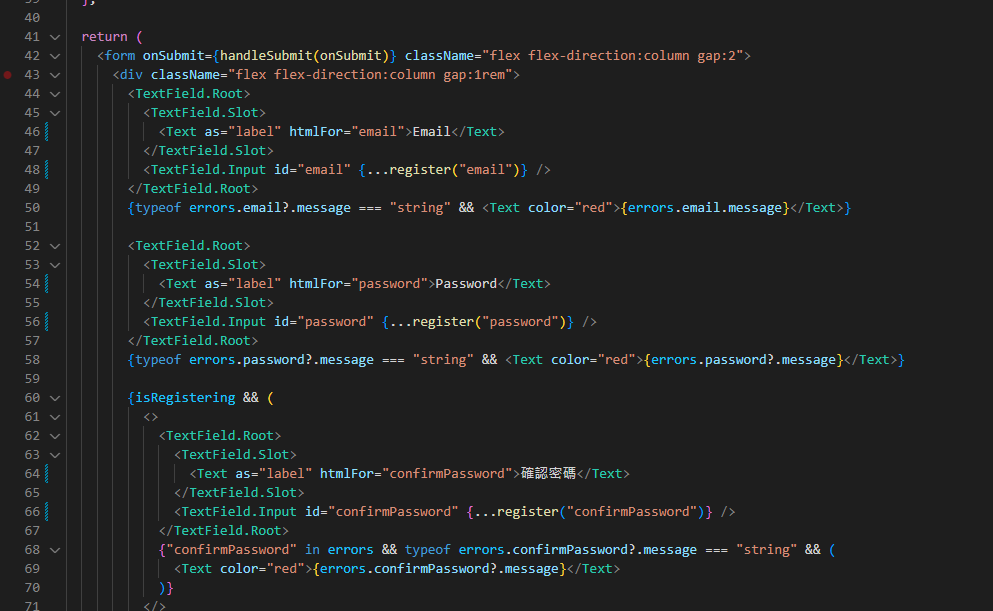
接著加入測試libs\iron-components\src\lib\AuthForm\AuthForm.spec.tsx:
import { fireEvent, render, screen } from "@testing-library/react";
import AuthForm from "./AuthForm";

describe("AuthForm", () => {
	it("should render successfully", () => {
		const { baseElement } = render(<AuthForm />);
		expect(baseElement).toBeTruthy();
	});

	it("should render login form by default", () => {
		render(<AuthForm />);
		expect(screen.getByLabelText(/email/i)).toBeInTheDocument();
		expect(screen.getByLabelText(/password/i)).toBeInTheDocument();
		expect(screen.queryByLabelText(/確認密碼/i)).not.toBeInTheDocument();
	});

	it("should switch to register form on button click", () => {
		render(<AuthForm />);
		fireEvent.click(screen.getByText(/沒有帳戶?點擊註冊/i));
		expect(screen.getByLabelText(/確認密碼/i)).toBeInTheDocument();
	});
});
通過本文,我們了解了如何添加測試。並且我們配置了 Jest 設置,並進行了初始的測試運行。然後,我們編寫了元件生成器的測試,以確保它能夠正確生成所需的元件。