🔥【Vue.js → Nuxt 入門推薦!🌟 新書即將上市 🌟】
📘《想要 SSR 嗎?就使用 Nuxt 吧!Nuxt 讓 Vue.js 更好處理 SEO 搜尋引擎最佳化》
👀 Nuxt v4 內容與範例也可以參考並購買本系列文筆著所著書籍
📦 預計於 2025/08/14 出版,目前天瓏書局預購有 7️⃣8️⃣ 折優惠
👉 點此前往購買:https://pse.is/7yulnj
注意:Nuxt 4 已於 2025/07/16 釋出,本文部分內容或範例可能和最新版本有所不同
在做網頁的 SEO 搜尋引擎最佳化時,你可以在 og:image 或 twitter:image 設定圖片的網址,來讓搜尋引擎爬蟲收錄網頁縮圖或在分享連結的時候能夠在其他能支援縮圖的網站上正確顯示,但為了客製化每個頁面的縮圖,你可能需要為每個頁面都製作專屬的圖片,但如果有個方式能夠使用程式與依據頁面內容來自動產生縮圖,那將大大減少人工製作圖片的時間。
在還未使用 Nuxt 這類 SSR 框架時,你在 Vue 中可能只能設定一張整個網站共用的連結縮圖,因為整個 Vue 網站是依賴 index.html 來做客戶端渲染,所以不管你首次請求的連結網址為何,伺服器端渲染所回傳的 og:image 就會吃 index.html 所設定的,這種方式不僅不利於客製化各個頁面的縮圖,也可能造成頁面共用的縮圖得謹慎挑選,否則可能發生縮圖與實際網頁內容不大相符的問題。
如今你將專案升級使用了 Nuxt 框架,你可以很方便的使用一些組合式函數來設定 SEO 相關的標籤,其中 og:image 與 twitter:image 等縮圖也是最佳化的重點。
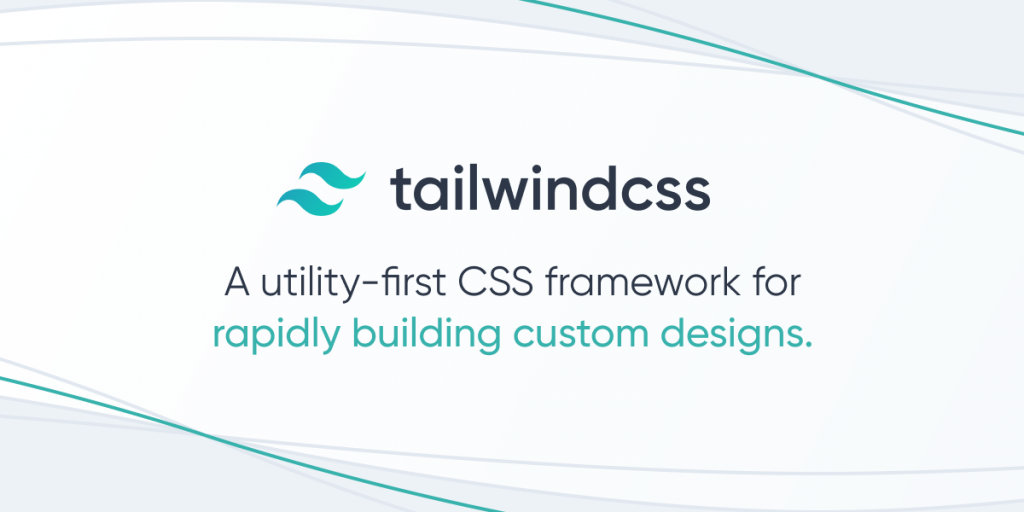
為此每個頁面設計了不同的縮圖,如下圖檔案,你想要放置在某篇介紹 Tailwind CSS 的頁面,你需要將圖片放置在 public 或 assets 目錄以連結的方式設定在 og:image 與 twitter:image,當然你也可以上傳至外部圖片伺服器,將這張圖片的連結與文章內容一起儲存在資料庫內,等待下次使用者或爬蟲請求時,再一併渲染縮圖標籤與圖片網址。
當你的網頁設定了 OG Tag,搜尋引擎爬蟲在收錄網頁時,就會解析這些標籤來建立索引,我們在使用搜尋資料時,網頁的資訊也就對應著顯示出來,而其中網頁不論是在被收錄時或以連結的形式分享到社群媒體,其中有個 Meta Tag 是可以設定連結的縮圖,通常是放置網頁的摘要或者作為行銷推廣圖片,標籤的屬性 og:image 與 twitter:image 都是最常使用的。
舉例來說以連結形式被分享至 Facebook,會呈現如下的資訊,Facebook 會解析網頁內的 OG Tag 將對應的如標題及縮圖等資訊顯示出來。
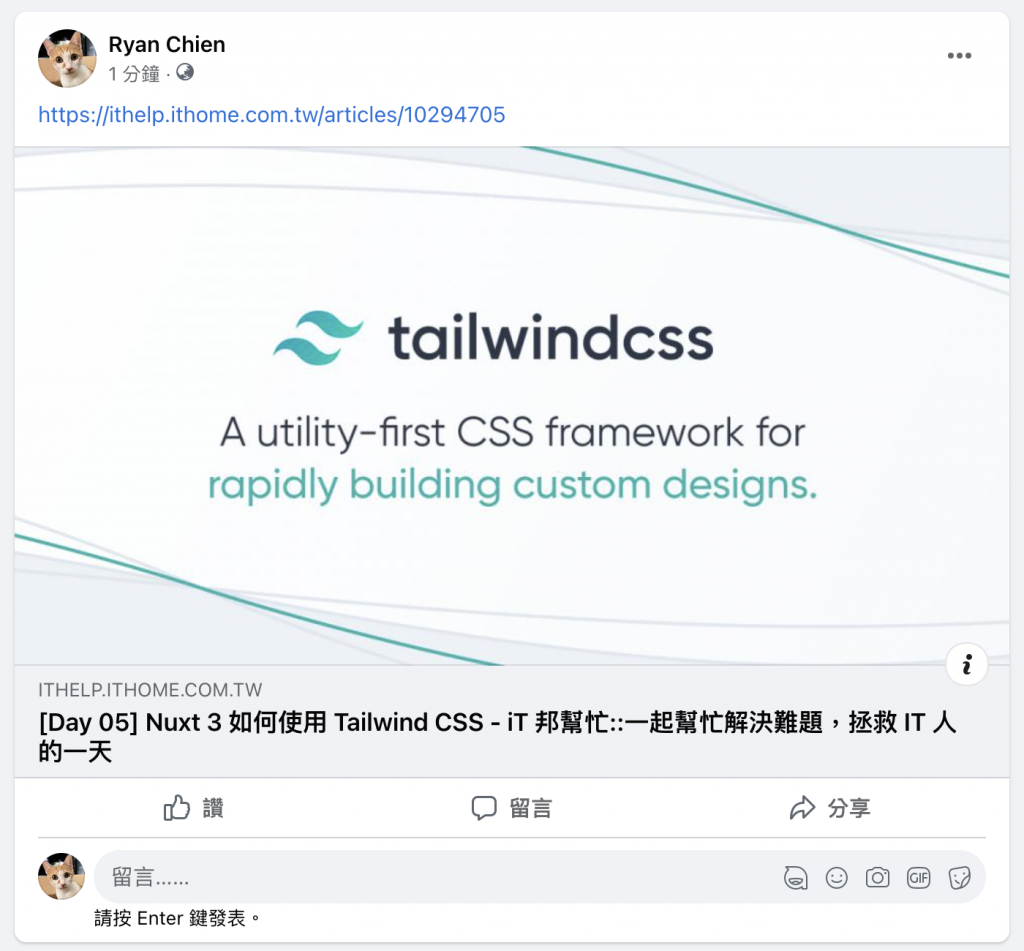
其中連結的縮圖依照 Facebook 的指引,即是對應網頁中的 <meta property="og:image" ... />。
不只是在 Facebook 上分享連結會有連結預覽的效果,也因為大家都遵循著 OG Tag 進行設定,例如 LINE 在傳送訊息時網址的連結預覽使用的是 og:title、og:description 和 og:image 有著相應的設定關係。
如下圖,我們使用 LINE 傳送一條連結,也會因為設置了OG Tag 也有成功解析出連結預覽的效果。。

而 Twitter 使用的則是 twitter:title、twitter:description 和 twitter:image 等,所以在其他主流的社群媒體或通訊軟體等也都有跟進解析。
設定縮圖方式以人工製圖並為每個頁面獨立設定,或以頁面內容擷取圖片連結來當縮圖都是常見的,但若有工具可以依據頁面所具有的資料,如標題、摘要、價格、數量等,來依據各種數值自動產生縮圖,那將大大減少人工製作圖片的時間。
當然你可以自己實作一個 Server API,依據傳入的文字內容,來製作並回傳一張圖片給前端,以此你也可以達到自動產生縮圖的效果,但你仍需要考量一些問題如下:
nuxt-og-image 是一個可以依據傳入文字來動態產生縮圖的 Nuxt 模組,其自訂的模板更能讓你為不同的類型頁面來制定縮圖樣式,讓你在相同類型的頁面使用相同的模板來調整圖片文字或呈現的內容。
安裝套件
npm install -D nuxt-og-image
修改 ./nuxt.config.ts 檔案,添加 nuxt-og-image 至 modules。
export default defineNuxtConfig({
  modules: ['nuxt-og-image']
})
修改 ./nuxt.config.ts 檔案,設定 nuxt-og-image 字型選項,使其產生文字支援中文字型。
export default defineNuxtConfig({
  modules: ['nuxt-og-image'],
  ogImage: {
    fonts: ['Noto+Sans+TC:700']
  }
})
在頁面中,使用組合式函式 defineOgImage,套用自動產生的縮圖,在伺服器端會自動產生圖片連結與自動渲染 og:image:src 與 twitter:image:src 等標籤 。
<script setup>
const ogImageOptions = {
  title: 'Nuxt 3 學習網站',
  description: '使用 Nuxt 3 來開發一個網站',
  siteName: 'Nuxt'
}

defineOgImage(ogImageOptions)
</script>
HTML 內產生的 Meta Tag 如下:
<meta property="og:image" content="http://localhost:3000/articles/1/__og_image__/og.png">
<meta property="og:image:width" content="1200">
<meta property="og:image:height" content="630">
<meta property="og:image:type" content="image/png">
<meta name="twitter:card" content="summary_large_image">
<meta name="twitter:image:src" content="http://localhost:3000/articles/1/__og_image__/og.png">
<meta name="twitter:image:width" content="1200">
<meta name="twitter:image:height" content="630">
nuxt-og-image 產生標籤的實作使用
useServerHead與useServerSeoMeta組合式函式,所以只有在首次請求由伺服器端選染的 HTML 才會出現,如果是在客戶端渲染時期切換頁面是不會產生的。
透過訪問自動產生的連結 http://localhost:3000/articles/1/__og_image__/og.png, 可以查看產生的縮圖如下:

除了組合式函數外,也可以透過模組內建的 <OgImage> 元件來建立縮圖:
<template>
  <div>
    <OgImage v-bind="ogImageOptions" />
  </div>
</template>

<script setup>
const ogImageOptions = {
  title: 'Nuxt 3 學習網站',
  description: '使用 Nuxt 3 來開發一個網站',
  siteName: 'Nuxt'
}
</script>
舉例來說,頁面 ./pages/articles/[id].vue 是顯示文章的頁面,內容是依據文章的 id 來向 API 請求文章資料,所以瀏覽 /articles/1 與 /articles/2 預期可以得到文章 1 與 文章 2 的內容,我們可以在 defineOgImage 函式所傳入的 ogImageOptions,來傳入我們所取得的文章標題等來製作縮圖。
<script setup>
const { data: article } = await useFetch(`/api/articles/${route.params.id}`)

const ogImageOptions = {
  title: article.value.title,
  description: article.value.description,
  siteName: 'Nuxt'
}

defineOgImage(ogImageOptions)
</script>
透過前面幾個例子可以發現,縮圖連結的網址似乎有特定的格式:
// 文章 1 頁面網址
http://localhost:3000/articles/1

// 文章 1 頁面縮圖網址
http://localhost:3000/articles/1/__og_image__/og.png
nuxt-og-image 透過實作 API 與路由,為其頁面路由路徑的末端添加了 /__og_image__/og.png 路徑,來表示訪問產生縮圖的 API,當然我們瀏覽這個縮圖網址,其實就是觸發 nuxt-og-image 製作該頁面的縮圖。
nuxt-og-image 允許你使用模板元件來建構更複雜的縮圖,步驟如下。
為了更符合實際需求,我們可以在模板內設定背景圖片,來達到產生固定的背景圖片,依據頁面而產生文字描述的縮圖,這邊挑選的圖片如下,並建立在 ./public/og-image-tamplate-background.png。

新增一個檔案 ./components/OgImage/CustomTemplate.vue,需要注意的是模板元件需要遵循套件約定放置在 ./components/OgImage 或 ./components/OgImageTemplate 元件目錄下,並允許傳入 titile 與 description 來渲染文字。
<template>
  <div>
    <img class="background" src="/og-image-tamplate-background.png" />
    <div class="login-wrap">
      <div class="icon">
        <svg
          xmlns="http://www.w3.org/2000/svg"
          xmlns:xlink="http://www.w3.org/1999/xlink"
          width="100%"
          height="100%"
          viewBox="0 0 256 168"
        >
          <path
            fill="#00DC82"
            d="M143.618 167.029h95.166c3.023 0 5.992-.771 8.61-2.237a16.963 16.963 0 0 0 6.302-6.115a16.324 16.324 0 0 0 2.304-8.352c0-2.932-.799-5.811-2.312-8.35L189.778 34.6a16.966 16.966 0 0 0-6.301-6.113a17.626 17.626 0 0 0-8.608-2.238c-3.023 0-5.991.772-8.609 2.238a16.964 16.964 0 0 0-6.3 6.113l-16.342 27.473l-31.95-53.724a16.973 16.973 0 0 0-6.304-6.112A17.638 17.638 0 0 0 96.754 0c-3.022 0-5.992.772-8.61 2.237a16.973 16.973 0 0 0-6.303 6.112L2.31 141.975a16.302 16.302 0 0 0-2.31 8.35c0 2.932.793 5.813 2.304 8.352a16.964 16.964 0 0 0 6.302 6.115a17.628 17.628 0 0 0 8.61 2.237h59.737c23.669 0 41.123-10.084 53.134-29.758l29.159-48.983l15.618-26.215l46.874 78.742h-62.492l-15.628 26.214Zm-67.64-26.24l-41.688-.01L96.782 35.796l31.181 52.492l-20.877 35.084c-7.976 12.765-17.037 17.416-31.107 17.416Z"
          ></path>
        </svg>
      </div>
      <span class="text">Nuxt 3 Blog</span>
    </div>
    <div class="container">
      <div class="title">
        {{ title }}
      </div>
      <div v-if="description" class="description">
        {{ description }}
      </div>
    </div>
  </div>
</template>

<script setup>
defineProps({
  title: {
    type: String
  },
  description: {
    type: String
  }
})
</script>

<style scoped>
.container {
  position: relative;
  display: flex;
  flex: 1;
  flex-direction: column;
  justify-content: center;
  padding: 36px 72px;
  color: #18181b;
}

.background {
  position: absolute;
  width: 1200px;
  height: 630px;
  top: 0;
}

.login-wrap {
  position: absolute;
  display: flex;
  flex-direction: row;
  align-items: center;
  z-index: 2;
  margin: 48px 72px 24px;
}

.login-wrap .icon {
  width: 64px;
  height: 42px;
}

.login-wrap .text {
  font-size: 36px;
  font-weight: 900;
  font-family: Helvetica, sans-serif;
  margin: 0 6px;
}
.title {
  margin: 24px 0px;
  display: -webkit-box;
  -webkit-line-clamp: 2;
  -webkit-box-orient: vertical;
  text-overflow: ellipsis;
  font-weight: bold;
  font-size: 48px;
}

.description {
  display: -webkit-box;
  -webkit-line-clamp: 2;
  -webkit-box-orient: vertical;
  text-overflow: ellipsis;
  font-size: 24px;
  line-height: 28px;
  opacity: 0.6;
}
</style>
你可以透過組合式函數來傳入 ogImageOptions 並指定 component 為剛才建立的模板檔案名稱 CustomTemplate,其他參數屬性則依據 defineProps 所定義傳入標題與描述。
const { data: article } = await useFetch(`/api/articles/${route.params.id}`)

const ogImageOptions = {
  component: 'CustomTemplate',
  title: article.value.title,
  description: article.value.description
}

defineOgImage(ogImageOptions)
當瀏覽文章頁面時,背景與 Logo 會是固定的,只有中間的標題與描述文字,會依據文章內容而產生。

除了文字結合模板所產生的圖片外,頁面相關資訊若也有圖片連結可以使用,同樣也是可以安排在模板上做呈現,非常的靈活,當然主要在一些純文字或討論類型的文章,可能沒有適合的圖片來當作連結的縮圖,就更適合利用 Nuxt OG Image 模組,來依據頁面的相關文字或資訊來產生具有模板特色的連結縮圖。
感謝大家的閱讀,歡迎大家給予建議與討論,也請各位大大鞭小力一些:)
如果對這個 Nuxt 3 系列感興趣,可以訂閱接收通知,也歡迎分享給喜歡或正在學習 Nuxt 3 的夥伴。
參考資料