iT邦幫忙

2023 iThome 鐵人賽

DAY 22
0
DevOps

一步步學DevOps:30天入門計劃系列 第 22

Day 22 git push Gitlab(簡單小範例)

  • 分享至 

  • xImage
  •  

本機建立Git目錄

1.在本機建立新目錄gitworkspace,並且初始化git init後,新增一個 main.sh檔

#!/bin/bash
main() {
    echo "This is the main branch."
}
main "$@"
  • 添加更改到暫存區
    git add
  • 提交更改,並提供描述
    git commit -m "Add main file"
  1. 建立新分支並切換到新分支,並修改main.sh
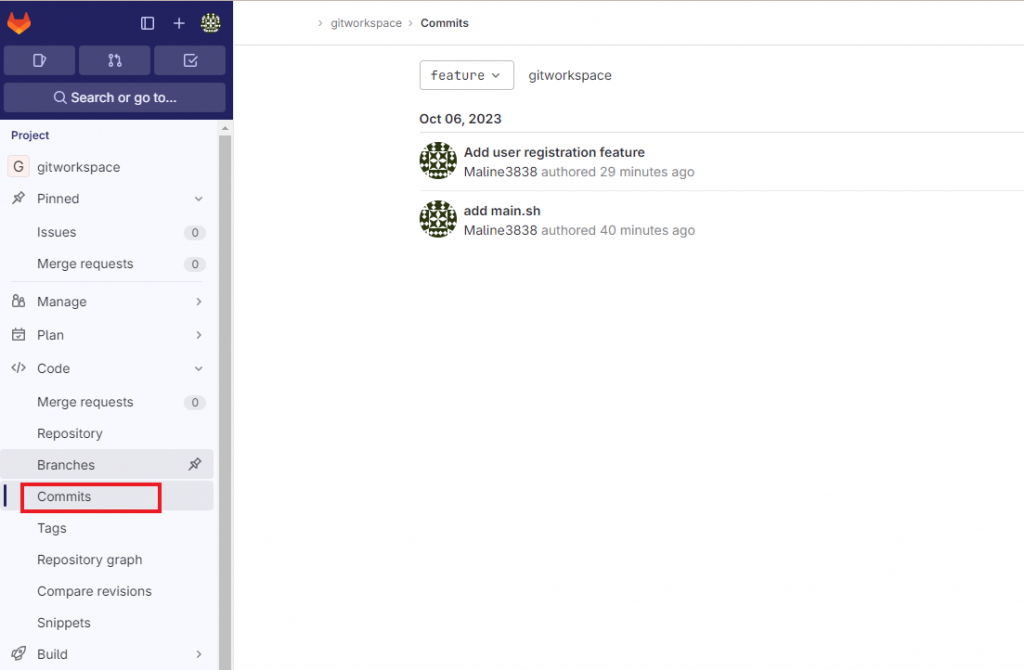
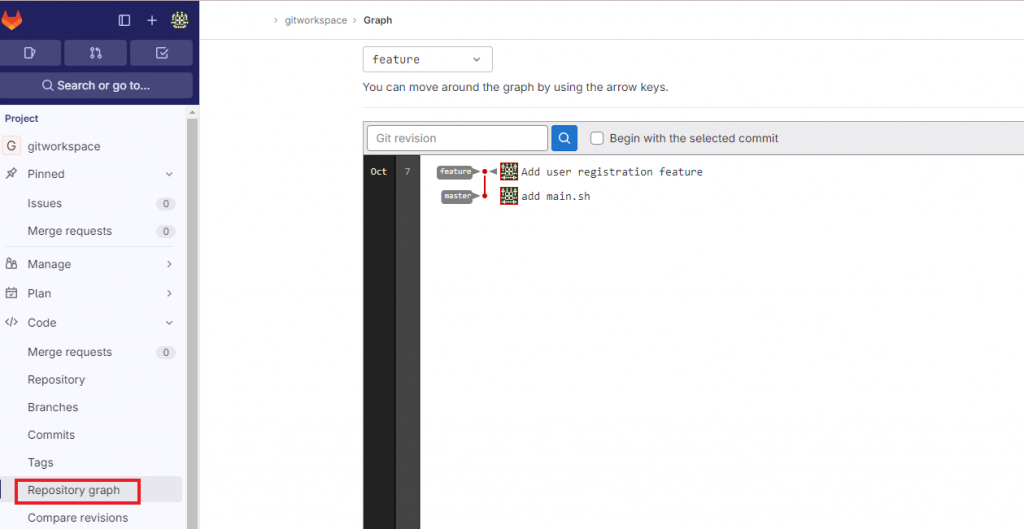
 git checkout -b feature
#!/bin/bash
main() {
    echo "This is the feature branch."
    echo "Adding user registration feature."    
    echo "Validating user input."
    echo "Styling the registration form."
}
main "$@"
  • 添加更改到暫存區
    git add

  • 提交更改,並提供描述
    git commit -m "Add feature branch "
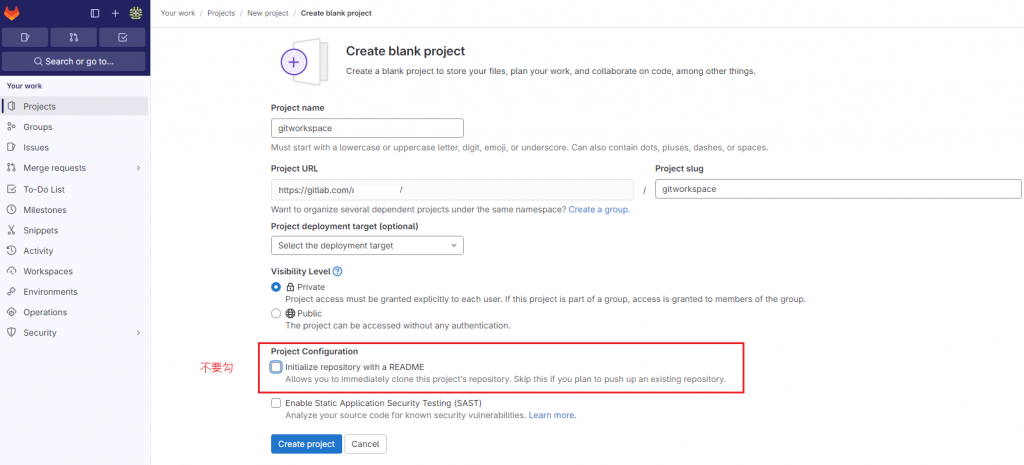
註冊或登入Gitlab

1.new project/repository,Create blank project

https://ithelp.ithome.com.tw/upload/images/20231007/201398004udO1SByIo.png

  • Initiaize repository with a README不要勾,因為本機的儲存庫己經初始化了,這裡不能再初始化否則不能同步。

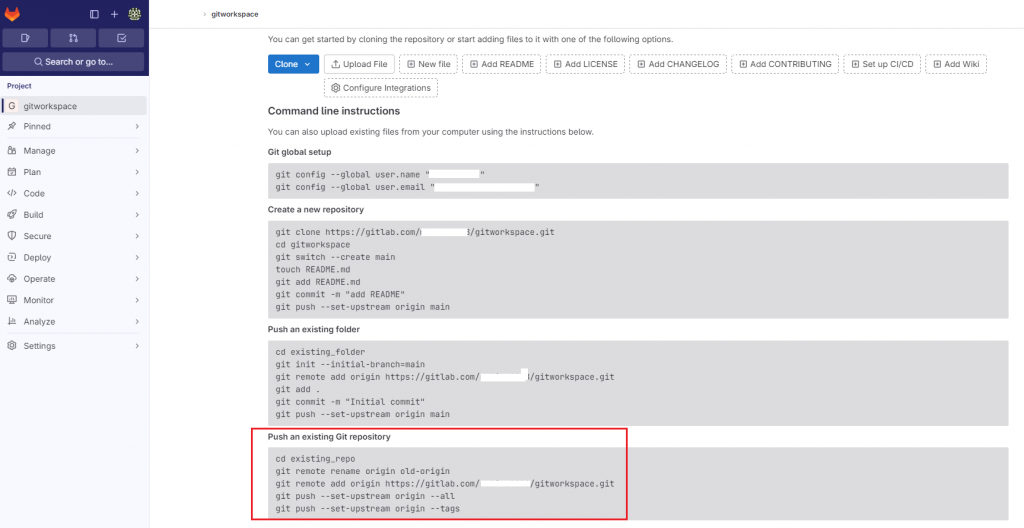
2.Push an existing Git repository,在本機輸入下面二行指令,使本機和遠端的Gitlab進行同步。

git remote add origin https://gitlab.com/maline3838/gitworkspace.git
git push --set-upstream origin –all

https://ithelp.ithome.com.tw/upload/images/20231007/20139800Acl8j8m5vu.png

  • Code/Commit可以查看Commit的資訊

https://ithelp.ithome.com.tw/upload/images/20231007/20139800p2rfNpinow.png

  • Code/Repository graph 可查看Git 存儲庫的版控歷史圖形,顯示存儲庫中的不同分支、提交(commits)、合併(merges)、分支切換和其他版本控制操作之間的關係和流向

https://ithelp.ithome.com.tw/upload/images/20231007/20139800EmqMExGZR3.png


上一篇
Day 21 Git 版本控制介紹
下一篇
Day 23 Gitlab CI/CD Pipeline 介紹
系列文
一步步學DevOps:30天入門計劃30
圖片
  直播研討會
圖片
{{ item.channelVendor }} {{ item.webinarstarted }} |
{{ formatDate(item.duration) }}
直播中

尚未有邦友留言

立即登入留言