觀察style.css中,可以發現作者幫我們寫了一個highlight樣式,並且使用了position: absolute;脫離文檔流,但index.html中並沒有一個元素使用這個 class name,因此我們應該是用 javascript 創造出一個元素套用上這個 class name 並隨著各個連結移動達到的聚光燈效果。
.highlight {
  transition: all 0.2s;
  border-bottom: 2px solid white;
  position: absolute;
  top: 0;
  background: white;
  left: 0;
  z-index: -1;
  border-radius: 20px;
  display: block;
  box-shadow: 0 0 10px rgba(0, 0, 0, 0.2);
}
const body = document.querySelector("body");
const highlight = document.createElement("div");
highlight.classList.add("highlight");
body.appendChild(highlight);
<a>節點,並每個都要新增mouseenter事件監聽器,當鼠標移入元素時觸發handleHighlight函式。// 取得所有`<a>`節點
const linkList = document.querySelectorAll("a");
// 全部新增`mouseenter`事件監聽器
linkList.forEach((link) =>
link.addEventListener("mouseenter", handleHighlight)
);
highlight的定位,要基於觸發事件的那個<a>移動。hightlight的定位top、left,但你用了會發現只有<nav>中連結的效果是我們想要的,而所有<div class=wrapper">中的連結,都有所偏移,我們也可以印出來觀察看看。function handleHighlight(e) {
highlight.style.top = `${this.offsetTop}px`;
highlight.style.left = `${this.offsetLeft}px`;
console.log("offsetTop", this.offsetTop, "offsetLeft", this.offsetLeft);
highlight.style.width = `${this.offsetWidth}px`;
highlight.style.height = `${this.offsetHeight}px`;
}

打開 Devtool 觀察你會發現,當滑鼠移至<a href="">consectetur</a>上時聚光燈的效果偏移了,不是我們想要的樣子,且印出來的offsetTop只有 6offsetLeft只有 269,這是為什麼呢?這時候我們先回去 MDN 在仔細看一次offsetTop的敘述「returns the distance of the outer border of the current element relative to the inner border of the top of the offsetParent」,那我們改印觸發事件的offsetParent出來看看。

這時你會發現:
<nav>內連結的 offsetParent 是<body>
<div class="wrapper">內連結的 offsetParent 是<div class="wrapper">
什麼樣的原因造成的呢?答案是<div class="wrapper">容器上的positon:relative,因此這個容器內的所有<a>定位依據都指向了它,你可能會想那我再加個this.offsetParent的offsetTop/Left不就正常了嗎?
highlight.style.top = `${this.offsetTop + this.offsetParent.offsetTop}px`;
highlight.style.left = `${this.offsetLeft + this.offsetParent.offsetLeft}px`;
但如果遇上層層結構每層都有positon:relative設定,那簡直沒完沒了...
最後依照上面所述改寫handleHighlight函式,即完成本日目標
function handleHighlight(e) {
  highlight.style.top = `${this.getBoundingClientRect().top + scrollY}px`;
  highlight.style.left = `${this.getBoundingClientRect().left + scrollX}px`;
  highlight.style.width = `${this.offsetWidth}px`;
  highlight.style.height = `${this.offsetHeight}px`;
}
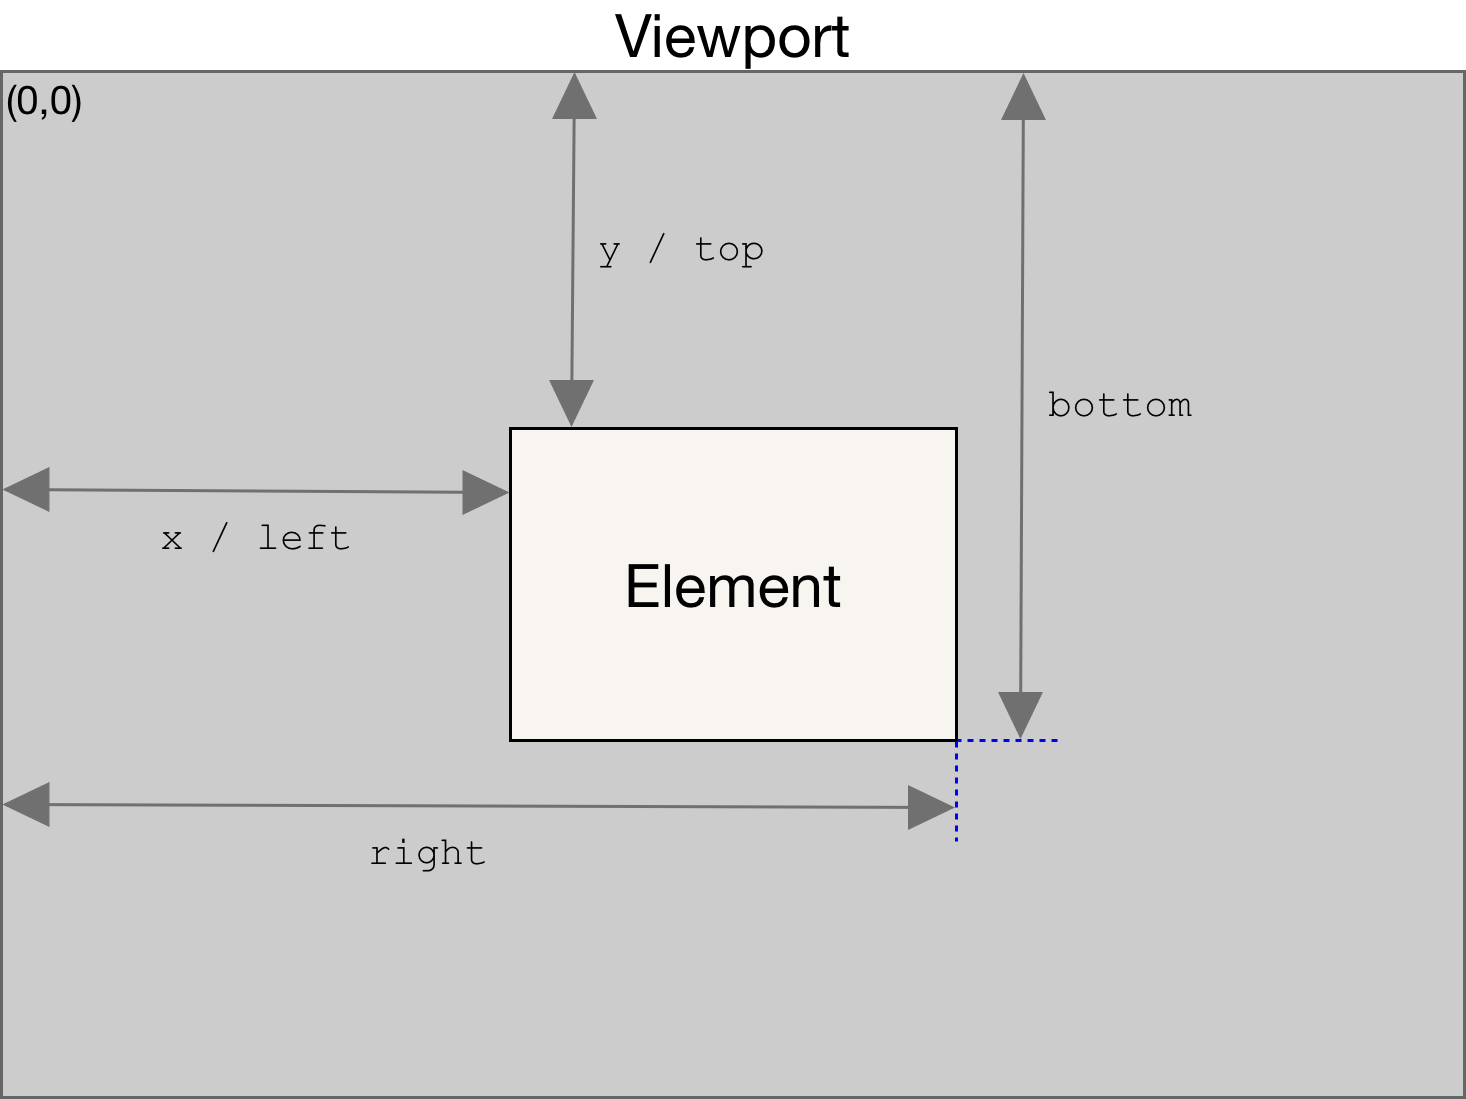
(圖片從MDN引用)