昨天我們建立了天氣資訊 DAG 的基本架構和流程。今天我們來繼續實作細部的 Task 工作。
首先我們從 Extract Function 進行實作。
在擷取資料的 Task 中,我們希望從氣象 API 中取得當下天氣資訊,在 API 列表中我們選擇"v1/rest/datastore/O-A0003-001 現在天氣觀測報告-現在天氣觀測報告"這隻 API,點擊之後我們可以看到API 資訊。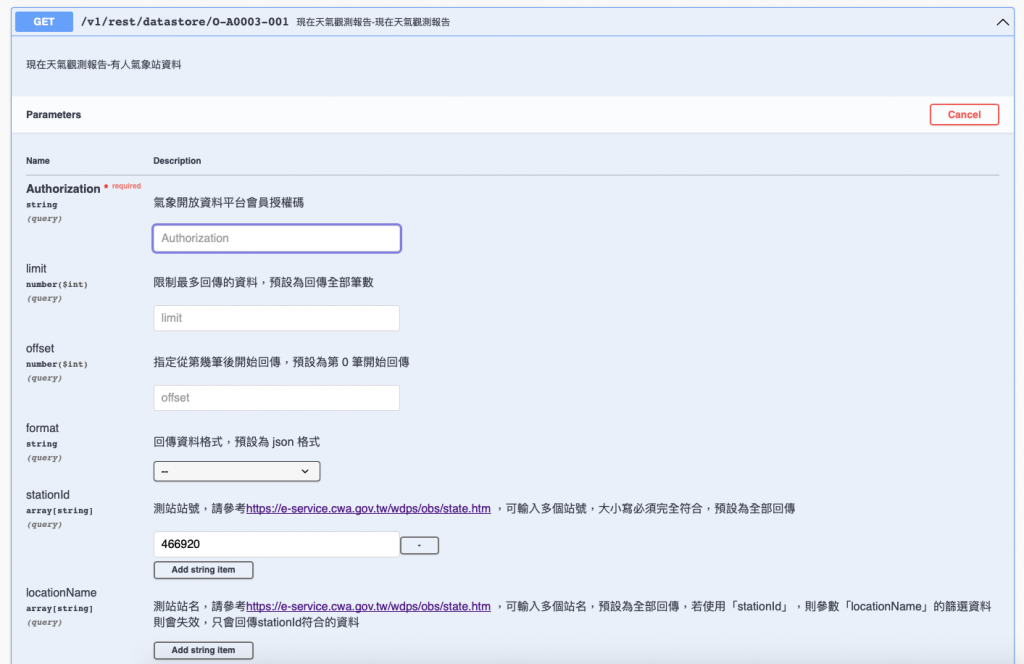
在這邊的 StationId 我們選擇臺北的觀測站作為範例,觀察下圖所給的 id 為 466920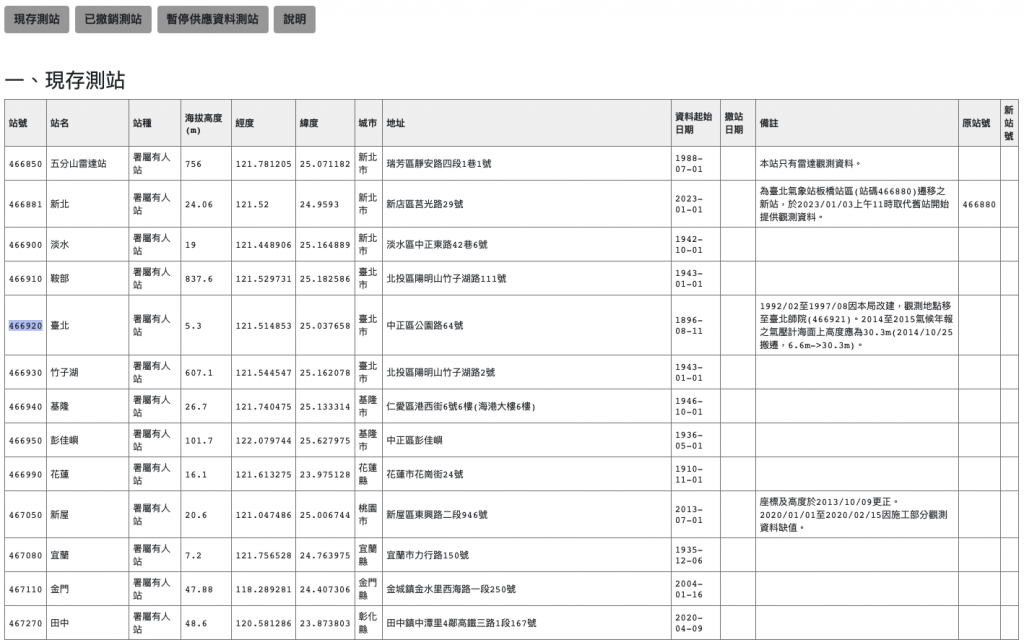
我們可以測試 API 觀看他的呼叫方法以及回傳格式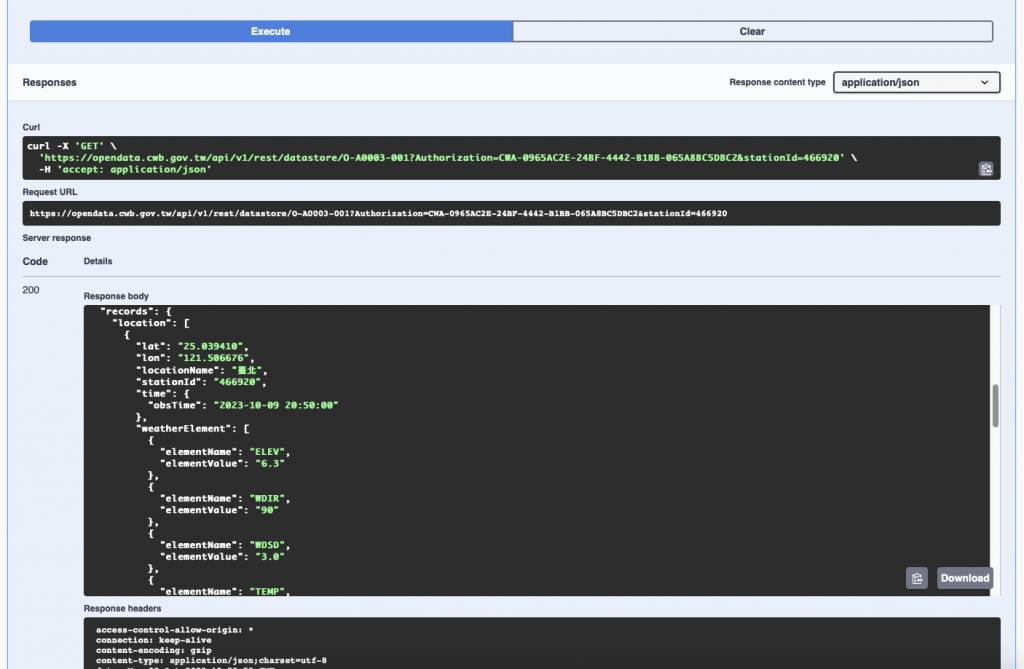
我們可以看到這個 GET API 的呼叫範例,接著將API 位置,及相關參數儲存至 Variable。這邊儲存 station_id、weather_api以及weather_auth_token。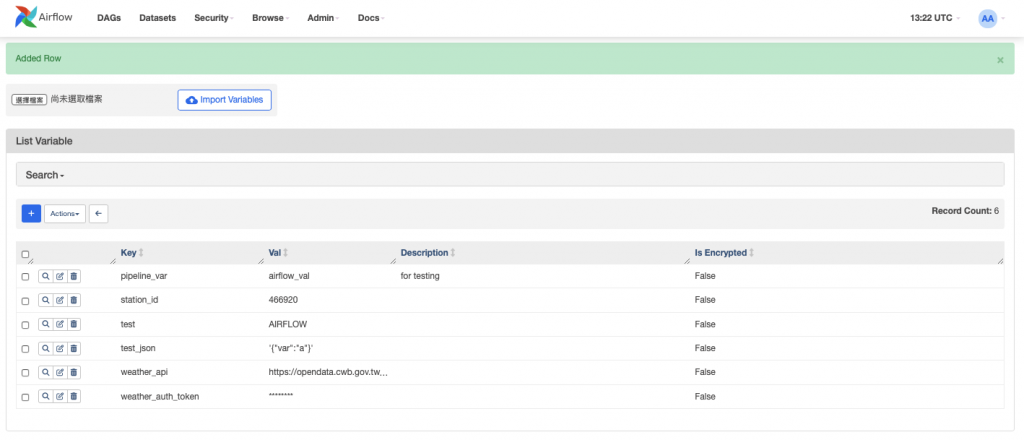
接著我們可以實作一版 Extract Task。將回傳的資訊只截取我們需要的 "TEMP", "HUMD", "Weather", "obsTime" 值。
# 定義所需之資料
weather_data_col = ["TEMP", "HUMD", "Weather", "obsTime"]
# 抓取資料
def extract_data():
    station_id = Variable.get("station_id")
    weather_api = Variable.get("weather_api")
    auth_token = Variable.get("weather_auth_token")
    url = f"{weather_api}?Authorization={auth_token}&stationId={station_id}"
    response = requests.get(url).json()
    weather_data = ["" for i in range(len(weather_data_col))]
    for data in response["records"]["location"][0]["weatherElement"]:
        if data["elementName"] in weather_data_col:
            weather_data[weather_data_col.index(data["elementName"])] = data["elementValue"]
    # 取得時間
    weather_data[weather_data_col.index("obsTime")] = response["records"]["location"][0]["time"]["obsTime"]
    print(weather_data)
    return weather_data
執行看看之後看看 Extract Task 的 log ,程式正確被執行,成功截取所需之資訊。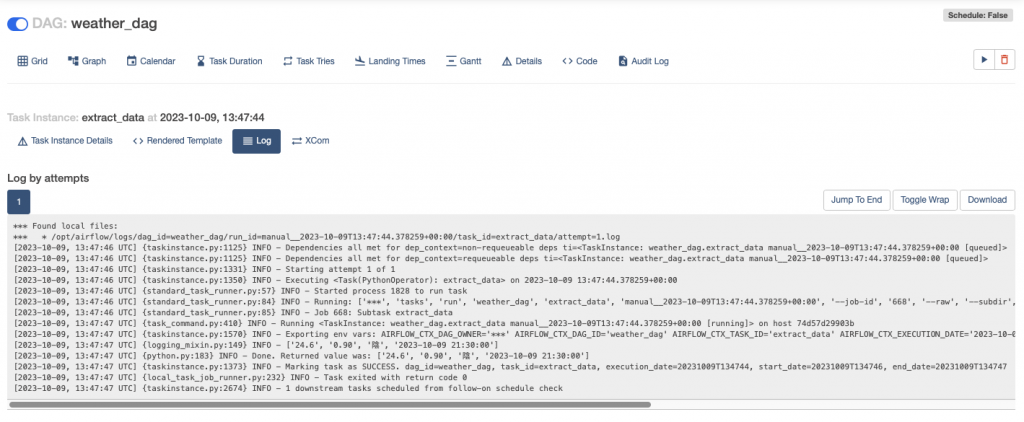
擷取完之後我們需要將特定資料進行轉換,接著我們來開發 Transform Task。
由於我們取得到濕度是0~1 表示的浮點數,我們想要把它變成百分比的百分比數。因此會針對"HUMD"欄位作轉換。
# 轉換資料
def transform_data(**kwargs):
    ti = kwargs['ti']
    weather_data = list(ti.xcom_pull(task_ids='extract_data'))
    weather_data[weather_data_col.index("HUMD")] = str(float(weather_data[weather_data_col.index("HUMD")]) * 100)
    return weather_data
透過上面的程式我們首先透過 XCom 取得 extract_data 回傳的值,並將 HUMD 進行轉換。轉換資料完成之後,就是最後把資料儲存進資料庫的步驟了。
在實作 Load Task 之前,我們要先設定 MySQL ,創建相關 Table。並在 Variable 中加入相關 Table。您可以參考以下的 SQL 來 創建 Table
CREATE TABLE `weather` (
  `TEMP` float DEFAULT NULL,
  `HUMD` float DEFAULT NULL,
  `Weather` varchar(255) DEFAULT NULL,
  `obsTime` datetime DEFAULT NULL
);
創建之後將 Schema 以及 Table 名稱儲存至 Variable,在這邊我命名為 weather_schema、weather_table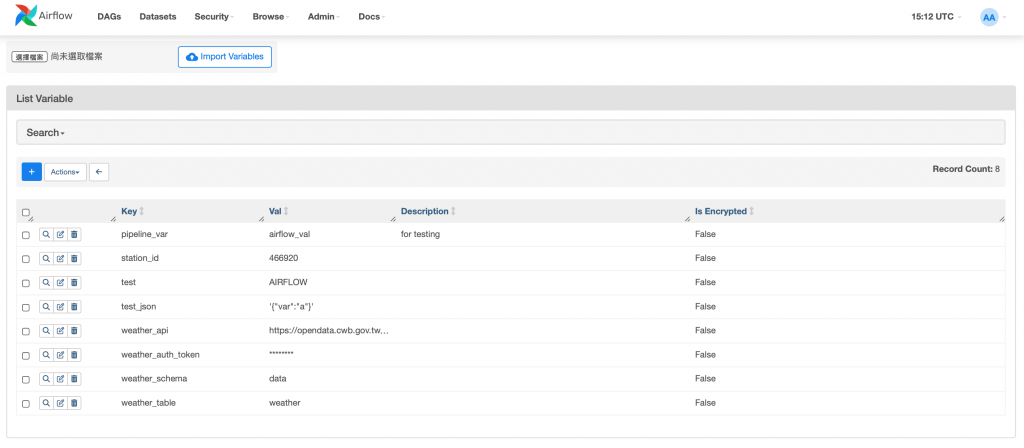
完成之後我們就可以在 Task 中使用相關設定了!我們透過之前學過的 Hook 實作 MySQL 的 INSERT。在這邊要先import MySqlHook 再進行開發。
from airflow.providers.mysql.hooks.mysql import MySqlHook

# 將資料插入到 MySQL 資料庫
def load_to_mysql(**kwargs):
    ti = kwargs['ti']
    weather_data = list(ti.xcom_pull(task_ids='transform_data'))
    mysql_schema = Variable.get("weather_schema")
    weather_table = Variable.get('weather_table')
    col_string = ",".join(weather_data_col)

    sql = f"INSERT INTO {mysql_schema}.{weather_table} ({col_string}) VALUES (%s, %s, %s, %s)"
    mysql_hook = MySqlHook(mysql_conn_id='mysql_conn')
    mysql_hook.run(sql, parameters=weather_data)
編寫完成儲存之後,我們就來執行我們的 DAG 看看了!
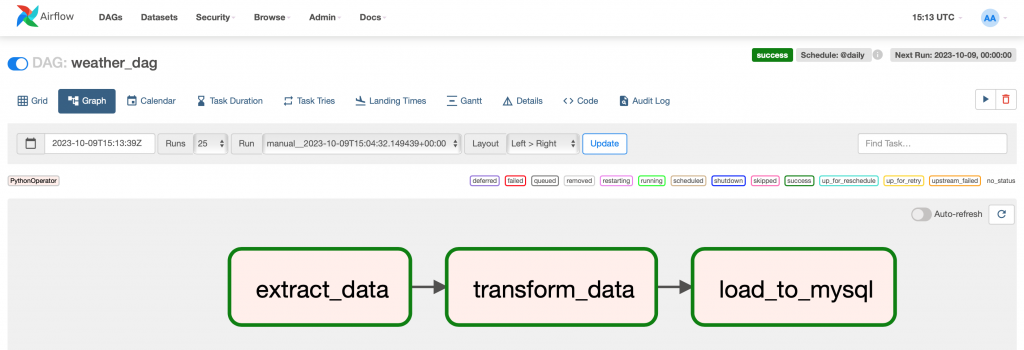
DAG 順利執行成功,資料也成功進入到 MySQL中!
學習了 Airflow 許多功能強大的元件後,可以讓我們很有效率地進行DAG 的開發。這兩天實作完 Data pipeline,相信大家有更抓的 Airflow 的開發吧!