| 屬性 | 用途 | 範例 | 備註 |
|---|---|---|---|
color |
設定文字顏色 | color: white; |
常用單位:px、em、% 等 |
background-color |
設定背景顏色 | background-color: #D2E9FF; |
常用值(以紅色為例):英文單字red、RGB值rgb(255, 0, 0)或十六進位制#ff0000 |
可參考十六進位制色碼表。
| 屬性 | 用途 | 範例 | 備註 |
|---|---|---|---|
height |
設定元素高度 | height: 60px; |
常用單位:px、em、% 等 |
width |
設定元素寬度 | width: 1380px; |
常用單位:px、em、% 等 |
float |
設定元素浮動方式 | float: left; |
常用值:靠左left、靠右right |
float算是難度較高的屬性,使用它後會覺得網頁升級了一倍,是一個很不錯的排版工具。
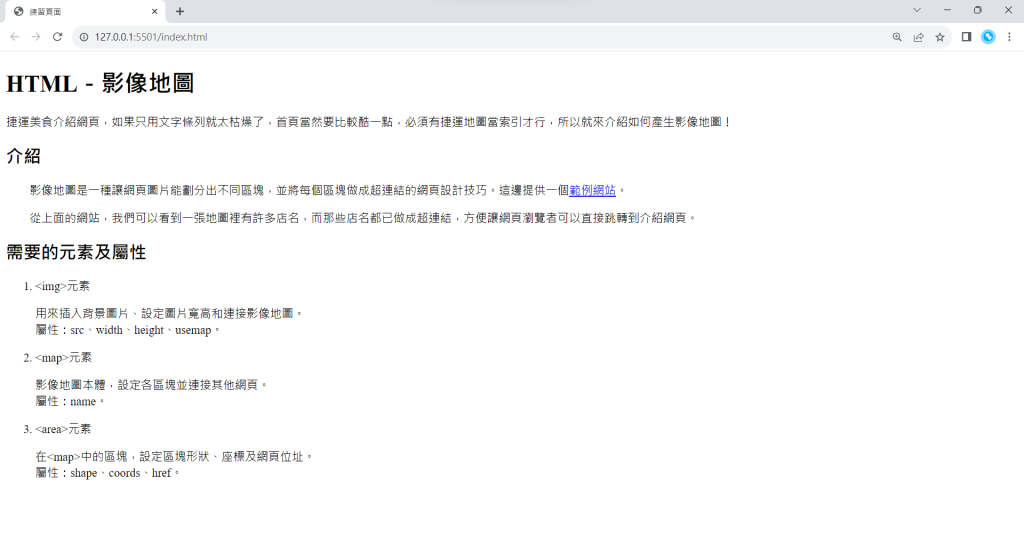
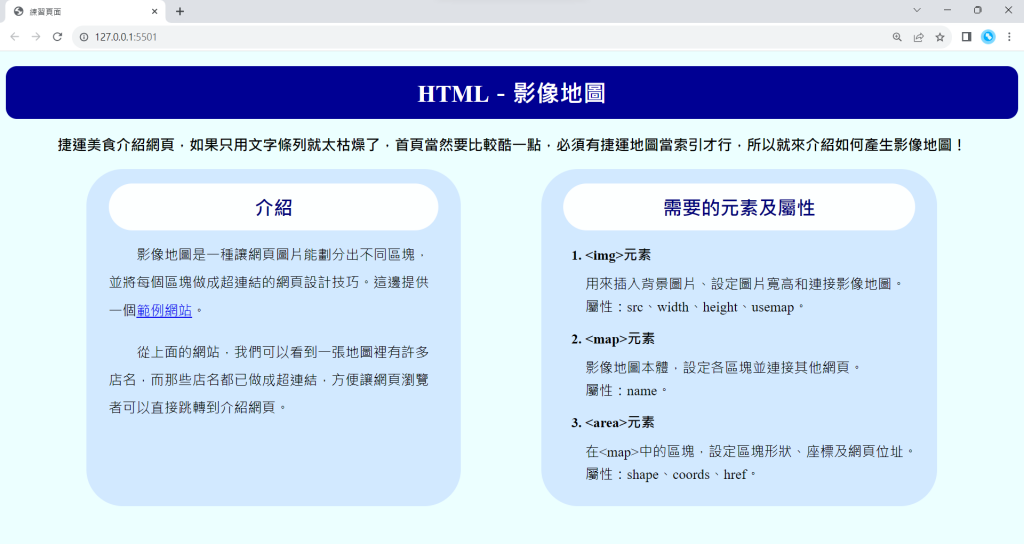
之前有提到會使用這些基本美化工具來美化一個網頁,這邊先給一組美化前後對照圖。


不敢說做得有多漂亮,但是應該可以明顯看出CSS的強大!那接下來就介紹一下我是怎麼寫的。
建議搭配[Day24]最後的HTML程式碼一起服用。
body {
    background-color: #ECFFFF;
    width: 1380px;
}
h1, .center {
    text-align: center;
}
.center是指在HTML中有設定class="center"的元素。
h1 {
    color: white;
    background-color: #000093;
    margin-top: 20px;
    padding: 15px 0px;
    border-radius: 15px;
}
因為希望文字能垂直置中,我將
padding的值設為上下15px。margin-top則設定了<h1>元素與網頁頂端的間距。
.foreword {
    text-align: center;
    font-size: 20px;
    font-weight: bold;
}
.foreword是指在HTML中有設定class="foreword"的元素。
.left, .right {
    width: 500px;
    height: 420px;
    padding: 20px 20px;
    background-color: #D2E9FF;
    border-radius: 50px;
}
.left是指在HTML中有設定class="left"的元素,.right也是一樣的道理。
.left {
    float: left;
    width: 450px;
    margin: 0px 55px 0px 110px;
    padding: 20px 30px;
}
.right {
    float: right;
    margin: 0px 110px 0px 55px;
}
兩個區塊的初始寬度都為
500px,但我覺得「介紹」用500px有點寬,所以先把它改成450px。接著以一開始設定的網頁寬度
1380px為基準,設定margin和padding。
margin+元素+padding=width。
(55+110+450+30+30)+(110+55+500+20+20)=1380。
h2.center {
    margin: 0px;
    font-size: 26px;
    color: #000079;
    background-color: #FDFFFF;
    border-radius: 50px;
    padding: 15px 0px;
}
h2.center是指在HTML中有設定class="center"的<h2>元素。
因為外層還有一個元素,為了方便設定間距我將這兩個次標題的margin設為0px。
將padding上下設為15px,得到文字垂直置中效果。
div.right h2.center {
    width: 480px;
    margin: 0px 10px;
}
div.right h2.center是指在HTML中,有設定class="right"的<div>元素中,有設定class="center"的<h2>元素。
div.right的寬度為500px,div.right h2.center的寬度為480px,
為了讓這個標題能夠水平置中,我設定margin左右為((500-480)/2)px。
.intro {
    font-size: 19px;
    line-height : 2;
    margin-top: 15px;
}
p.line_height {
    font-size: 19px;
    line-height : 1.6;
    margin: 0px;
}
.intro是指在HTML中有設定class="intro"的元素。p.line_height是指在HTML中有設定class="line_height"的<p>元素。
ol {
    font-size: 19px;
}
li {
    font-weight: bold;
    margin: 14px 0px;
}
以上,成功將原本光禿禿的HTML稍微美化了一番,希望介紹的夠清楚。我是YQ,完賽倒數4天,明天見。
