前言
昨天介紹了 PyFlink 的 DataStream API,有興趣的可以先去看看這篇:Day24 - PyFlink (1):DataStream API。
程式碼
這次參賽的程式碼都會放在 Big-Data-Framework-30-days,建議大家直接把整個 repo clone 下來,然後參考 README 進行基本設置,接著直接 cd 到今天的資料夾內。
其實昨天就有用到一點 Table API 的東西了,今天我們更深入地瞭解一下 Table API 的用法。
不論對於 Streaming 或 Batch 來說,Table API 的程式大致上遵循下面的架構:
有兩種做法能夠創建 Table 環境,分別是:
from pyflink.table import EnvironmentSettings, TableEnvironment

# env_settings = EnvironmentSettings.in_streaming_mode()
env_settings = EnvironmentSettings.in_batch_mode()
t_env = TableEnvironment.create(env_settings)
from pyflink.datastream import StreamExecutionEnvironment
from pyflink.table import StreamTableEnvironment

env = StreamExecutionEnvironment.get_execution_environment()
t_env = StreamTableEnvironment.create(env)
Source Table 與 Sink Table 的創建方式基本上是一致的所以放在一起講,昨天在講 DateStream API 的時候有提到 Source 和 Sink,其實概念都一樣,只是把他們轉換為 Table API 的寫法而已。
Table 一定要與 TableEnvironment 綁定在一起,且位於不同 TableEnvironment 的 Table 是不能互動的。創建 Table 的方法有很多種,這裡舉幾種:
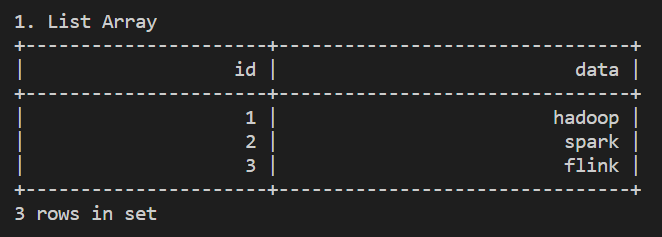
List Array
主要是測試用
table = t_env.from_elements(
    [(1, 'hadoop'), (2, 'spark'), (3, 'flink')],
    ['id', 'name'])

table.execute().print()
DDL Statements
就是昨天用方法,這裡我們補充說明一下 datagen,雖說預設是隨機生成,但實際上能設定 sequence 或 random,另外如果是在 batch mode 的話,一定要帶 number-of-rows。
( ps. 雖然設為 number-of-rows 10,但因為有設定 sequence,所以最後還是只會有 3 行。)
table = t_env.execute_sql("""
    CREATE TABLE my_source (
        id INT,
        score INT
    ) WITH (
        'connector' = 'datagen',
        'fields.id.kind'='sequence',
        'fields.id.start'='1',
        'fields.id.end'='3',
        'fields.score.kind'='random',
        'fields.score.min'='1',
        'fields.score.max'='100',
        'number-of-rows' = '10'
    )
""")

table = t_env.from_path("my_source")
table.execute().print()
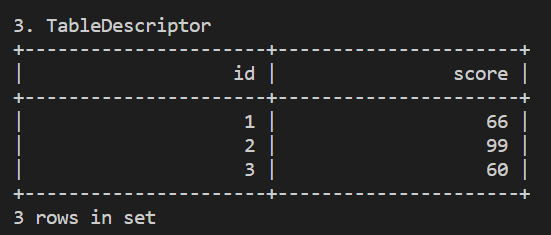
TableDescriptor
就是把 DLL 換個方式寫,有點像 ORM。
from pyflink.table import TableDescriptor, Schema, DataTypes

t_env.create_temporary_table(
    'my_source',
    TableDescriptor.for_connector('datagen')
        .schema(Schema.new_builder()
                .column('id', DataTypes.BIGINT())
                .column('score', DataTypes.BIGINT())
                .build())
        .option('fields.id.kind', 'sequence')
        .option('fields.id.start', '1')
        .option('fields.id.end', '3')
        .option('fields.score.kind', 'random')
        .option('fields.score.min', '1')
        .option('fields.score.max', '100')
        .option('number-of-rows', '10')
        .build()
)

table = t_env.from_path("my_source")
table.execute().print()
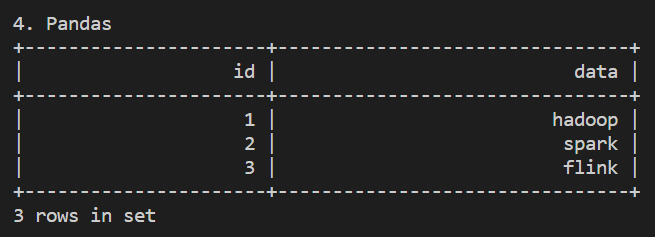
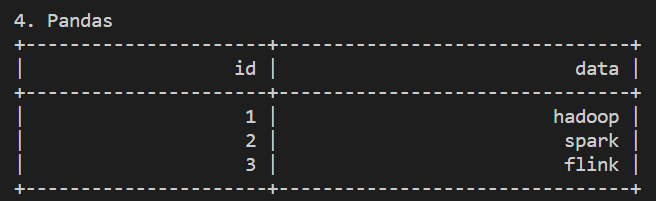
Pandas
跟 PySpark 一樣,PyFlink 也兼容 Pandas,可以直接從 Pandas DataFrame 轉換為 Flink Table
import pandas as pd

df = pd.DataFrame.from_dict({
    'id':[1,2,3],
    'data': ['hadoop', 'spark', 'flink']
    })

table = t_env.from_pandas(df)
table.execute().print()
前面都是用 datagen connector 生成資料,屬於 Source Table,接著我們來看一下 Sink Table,雖然格式都一樣, 但根據資料輸入與輸出的不同,因此 connector 的設定也會有所不同,這裡我們一樣先拿最簡單的 print (STDOUT) 來練習。
t_env.execute_sql("""
    CREATE TABLE my_sink (
        id BIGINT,
        data STRING
    ) WITH (
        'connector' = 'print'
    )
""")
大約等於昨天的 Transform,一樣是換成 Table API 的寫法,我們直接拿前面建的 table 繼續做。
from pyflink.table.expressions import col

sink_table = table.select(col("id")*10, col("data"))
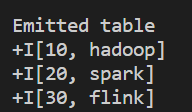
將轉換過的 table 輸出到 Sink Table 中。
sink_table.execute_insert("print").wait()
# or
# t_env.create_temporary_view('sink_table', sink_table)
# t_env.execute_sql("INSERT INTO my_sink SELECT * FROM sink_table").wait()
這幾天用到的 connector 只有 datagen 和 print,說白了都是些沒有麼用的功能呢 XDD,放心吧,Flink connectors 的選擇可多了呢,其中 Apache Kafka 可說是最常被使用的 Connector 之一。
預計明天會先岔開一下做 Kafka 的介紹,之後再回來講如何在 Flink 中使用 Apache Kafka Connector 來收發數據流。


 iThome鐵人賽