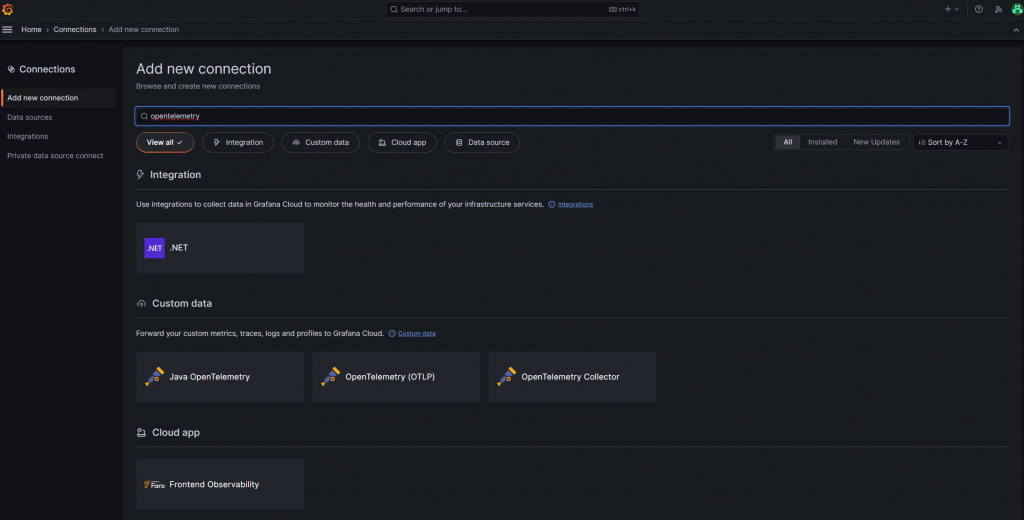
前面有提到資料會透過 Grafana Agent 送到 Grafana Cloud 上面,因此我們需要先安裝 Grafana Agent。Grafana Agent 可以在 Docker、Kubernetes、Linux、macOS 或 Windows 上以靜態模式 (static mode) 安裝,可以選擇在專案使用 Docker 運行或是安裝在 windows 服務上 連結點擊,我手邊是 window 電腦,因此接下來步驟以 window 為主,其他方式像是 docker 可以參考官方文件說明
grafana-agent-installer.exe.zip 檔案,並解壓縮grafana-agent-installer.exe 安裝 Grafana Agent或者新增 OTLP Connections
選擇 OS platform,以我手邊環境為例是 windows
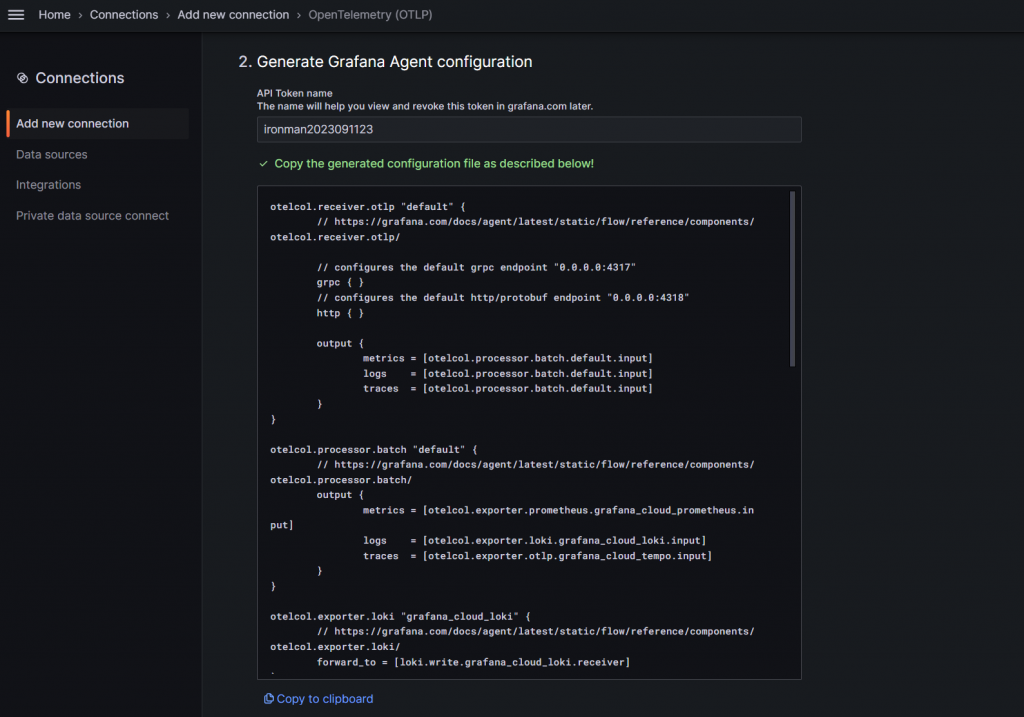
輸入 API Token Name 產生 Grafana Agent 組態設定檔,這裡產生會一併產生 username 與 password 資訊
下載 windows 安裝程式,如果安裝過這裡可以跳過
Agent 會安裝成功後目錄會在 C:\Program Files\Grafana Agent Flow\config.river,到此目錄下開啟 config 檔案將步驟 2 資訊貼上
重啟 Grafana Agent Flow 服務
補充 Grafana Agent 組態設定檔 重點如下
- otelcol.receiver.otlp:
    - 配置 Grafana Agent 的 OTLP 接收器,接受應用程式的 trace、log 和 metrics 數據資料
    - 預設監聽 gRPC 0.0.0.0:4317 和 HTTP/Protobuf 0.0.0.0:4318 endpoint
- otelcol.processor.batch
    - 指定資料的輸出目標 (批次)
- otelcol.exporter.loki
    - 設定 Loki exporter
    - Log 數據輸出到 Grafana Cloud Loki。透過 forward_to 指定 Loki 的接收器
- otelcol.exporter.prometheus
    - 設定 Prometheus exporter
    - Metrics 資料輸出到 Grafana Cloud Prometheus。透過 forward_to 指定 Prometheus的接收器
- prometheus.remote_write
    - 設定 Prometheus 資料寫入 Grafana Cloud Prometheus 的細節
    - 包含目標的 Url 與基本身分驗證資訊
- loki.write
    - 設定將 log 資料寫入 Grafana Cloud Loki 的細節
    - 包括 Loki 的URL和基本身份驗證資訊
- otelcol.exporter.otlp
    - 設定 OTLP exporter
    - 將 trace 數據輸出到 Grafana Cloud Tempo。
    - 指定 Tempo endpoint 和基本身分驗證資訊
- otelcol.auth.basic
    - 設定基本身份驗證詳細資訊
    - 用於與 Tempo 進行身分驗證
到程式 program.cs 加上下列程式碼多設定輸出 exporter 為 otlp
.WithTracing(builder => builder
    .AddAspNetCoreInstrumentation()
    .AddConsoleExporter()
    .AddOtlpExporter()
)
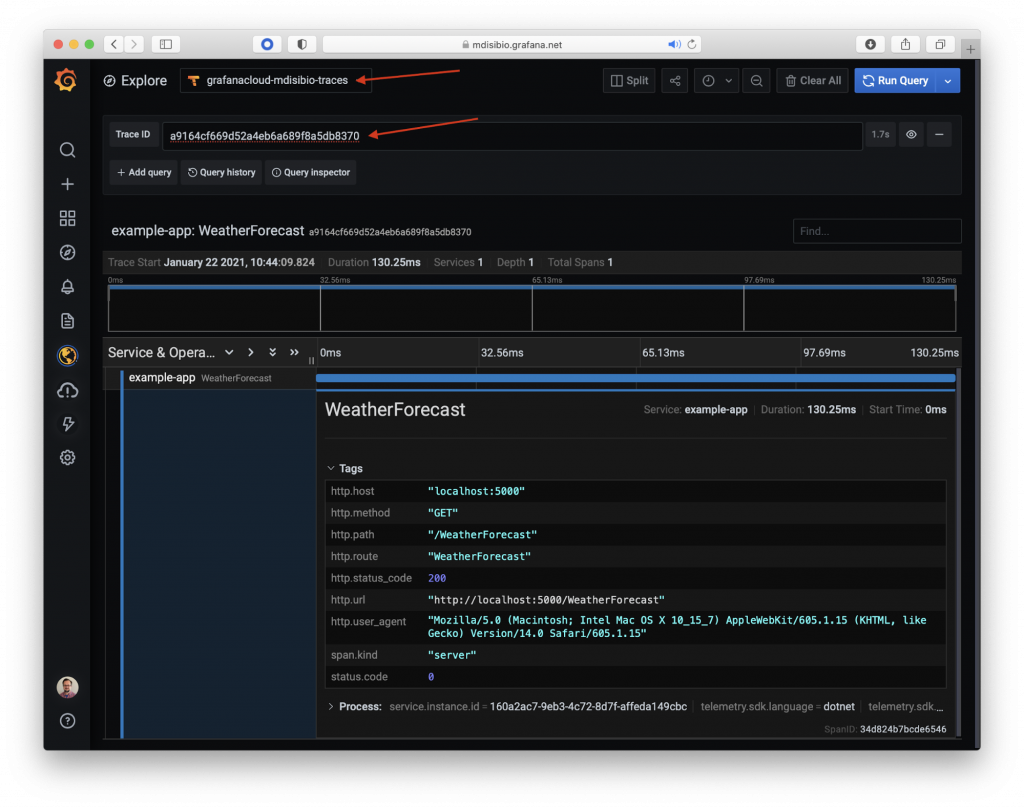
登入 Grafana Cloud 並到 explore 頁籤,按下 run query 即可在 tempo 看到結果。例如在此範例中的 tempo 查詢結果
Log 與 Metrics 可以參考此範例,寫法差不多這裡就不在多說明
傳送門 : Observability with Grafana Cloud and OpenTelemetry in .net microservices
Application Observability recommended architecture
