昨天挑戰點擊標記後,跳出自定義的資訊視窗失敗了…先來複習失敗品 :
只出現吐司,不是預期的長相。
目前的邏輯 :
InfoWindowAdapter 設定給 Google Map為了確定是否收到標記的點擊,所以在點擊時會跳出吐司,所以確定了監聽標記沒有問題;那問題可能是出在初始化 InfoWindowAdapter :
// 取得當前點擊的咖啡廳資訊
val info = placeDetailsMap[marker.snippet]
map.setInfoWindowAdapter(MainInfoAdapter(layoutInflater, info!!))
官方範例和爬文後發現,都是將初始化做在取得 GoogleMap 物件的 onMapReady();但當初筆者認為要在點擊時才傳入當前資料,所以沒有照做,以下是官方範例的程式碼 :
override fun onMapReady(googleMap: GoogleMap?) {

    // ...

    with(map) {

        // Setting an info window adapter allows us to change the both the contents and
        // look of the info window.
        setInfoWindowAdapter(CustomInfoWindowAdapter())
    }

    // Add lots of markers to the googleMap.
    addMarkersToMap()
}
假設問題是出在這邊,那麼又該如何解決傳入自定義物件 PlaceDetails ?
在將標記加入至地圖時,我們也會一併設定 title() 和 snippet(),title 目前是設定咖啡廳的名稱,snippet 倒是隨便給的 id 而已,那就拿 snippet 開刀看看?
這是目前設定標記的程式碼 :
private fun addMarkersToMap() {

    // place markers for each of the defined locations
    placeDetailsMap.keys.map {
        with(placeDetailsMap.getValue(it)) {
            map.addMarker(
                MarkerOptions()
                    .position(position)
                    .title(title)
                    .snippet(it)
                    .icon(icon)
            )
        }
    }
}
因為 snippet 吃的是 string,筆者想直接使用 Moshi 套件 將自定義的 PlaceDetails 資料轉成 JsonString 餵它,然後在自定義的 InfoAdapter 內在轉換成 PlaceDetails ,好像有點偷吃步,路過的大神也歡迎分享下作法 :>
// Moshi
implementation 'com.squareup.moshi:moshi:1.13.0'
implementation "com.squareup.moshi:moshi-kotlin:1.13.0"
先到 MainInfoAdapter.kt,修改下建構子 :
class MainInfoAdapter(private val inflater: LayoutInflater):
GoogleMap.InfoWindowAdapter {}
在 getInfoWindow() 將資料皆出來,並顯示於 UI :
override fun getInfoWindow(marker: Marker): View? {

    val view = inflater.inflate(R.layout.item_cafe, null)

    val tvID = view.findViewById<TextView>(R.id.tv_id)
    val tvName = view.findViewById<TextView>(R.id.tv_name)
    val tvCity = view.findViewById<TextView>(R.id.tv_city)

    // 從 snippet 取出詳細資訊
    val moshi = Moshi.Builder().add(KotlinJsonAdapterFactory()).build()
    val adapter = moshi.adapter(PlaceDetails::class.java)
    val info = marker.snippet?.let { adapter.fromJson(it) }
    info?.let {
        tvID.text = it.id
        tvName.text = it.name
        tvCity.text = it.city
        // ...
    }

    return view
}
這邊要改的東西有點多,總之先把點擊標記的程式碼拿掉。
接著改在 onMapReady() 設定 adapter 給地圖 :
map.setInfoWindowAdapter(adapter)
override fun onMapReady(googleMap: GoogleMap) {

    // return early if the map was not initialised properly
    map = googleMap

    // 取得位置權限
    requestLocationPermissions()

    with(map) {

        // Set the map type
        mapType = com.google.android.gms.maps.GoogleMap.MAP_TYPE_NORMAL

        // UI 設定 : 交通 、指南針、縮放按鈕
        isTrafficEnabled = true
        uiSettings.isCompassEnabled = true
        uiSettings.isZoomControlsEnabled = true

        // 設置預設標記 - 台北
        val taipei = LatLng(25.0329694, 121.5654177) // 例如,台北的经纬度
        moveCamera(com.google.android.gms.maps.CameraUpdateFactory.newLatLngZoom(taipei, 10f))
        addMarker(
            MarkerOptions().position(taipei).title("台北")
        )

        // 我的位置點擊
        setOnMyLocationButtonClickListener(this@MainActivity)
        setOnMyLocationClickListener(this@MainActivity)

        // 設定自定義資訊視窗
        val adapter = MainInfoAdapter(layoutInflater)
        map.setInfoWindowAdapter(adapter)
    }
}
接著在取得 API 資料處重新設定咖啡廳的詳細資訊 :
cafes.forEach {
    // 取出咖啡廳的經緯度
    placesMap = mutableMapOf(
        it.id to LatLng(it.latitude.toDouble(), it.longitude.toDouble())
    )

    // 設定咖啡廳的詳細資訊
    placeDetailsMap[it.id] = PlaceDetails(
        title = it.name,
        id = it.id,
        name = it.name,
        city = it.city,
        wifi = it.wifi,
        seat = it.seat,
        quiet = it.quiet,
        tasty = it.tasty,
        cheap = it.cheap,
        music = it.music,
        url = it.url,
        address = it.address,
        latitude = it.latitude,
        longitude = it.longitude,
        limited_time = it.limited_time,
        socket = it.socket,
        mrt = it.mrt,
        standing_desk = it.standing_desk,
        open_time = it.open_time
    )
}
最後是調整標記資訊,改用 Moshi 將資料轉換成 JsonString,設定給 snippet :
val moshi = Moshi.Builder().add(KotlinJsonAdapterFactory()).build()
val adapter = moshi.adapter(PlaceDetails::class.java)

    .snippet(adapter.toJson(this))
private fun addMarkersToMap() {

    val moshi = Moshi.Builder().add(KotlinJsonAdapterFactory()).build()
    val adapter = moshi.adapter(PlaceDetails::class.java)

    // place markers for each of the defined locations
    placeDetailsMap.keys.map {
        with(placeDetailsMap.getValue(it)) {
            map.addMarker(
                MarkerOptions()
                    .position(LatLng(latitude.toDouble(), longitude.toDouble()))
                    .title(title)
                    .snippet(adapter.toJson(this))
                    .icon(BitmapDescriptorFactory.defaultMarker(BitmapDescriptorFactory.HUE_AZURE))
            )
        }
    }
}
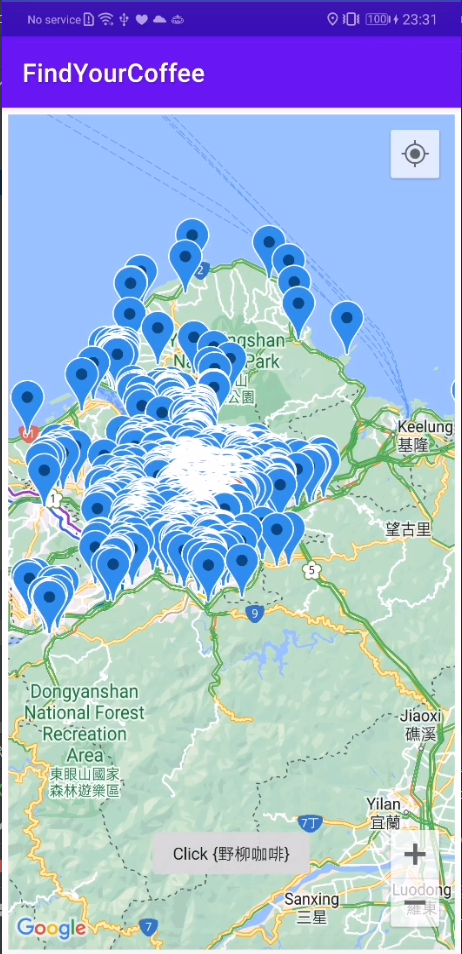
好了~~~試試看 :

成功了~~~ 哭出乃 !
不知不覺我們的專案大體成形了,至少也有個87%,豪開心~~~
又是冷門ㄟ,聽到好聽的通通都加入歌單