iT邦幫忙

2023 iThome 鐵人賽

DAY 28
0
WordPress

30天學會使用 CyberPanel 管理 WordPress 站台系列 第 31

<Day 28> 將CyberPanel 管理介面使用的8090 Port 改成443 Port

  • 分享至 

  • xImage
  •  

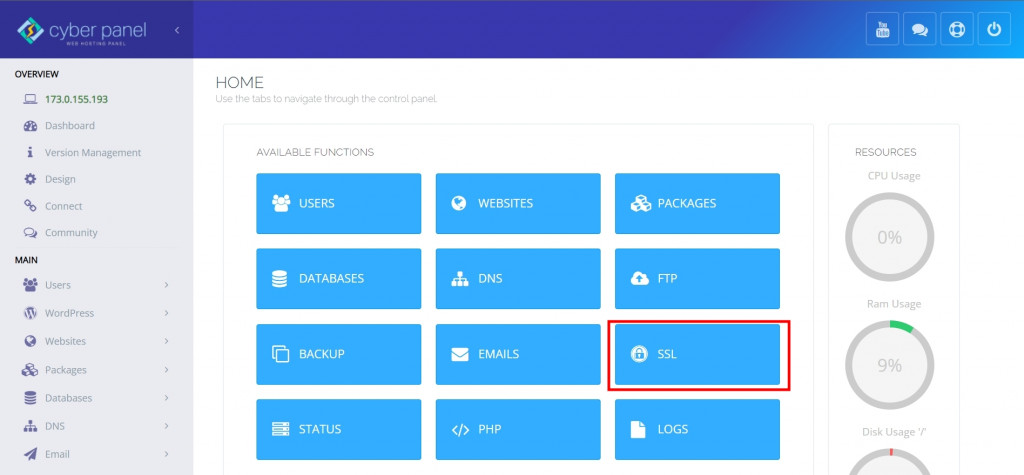
因為CyberPanel管理介面,預設使用的Port是8090,這個在某些公司場景就會遭遇到問題,因為現在很多的防火牆規則政策是僅允許80、443,所以要將CyberPanel管理介面預設使用的Port 8090改成443,步驟滿簡單的主要有3個步驟。

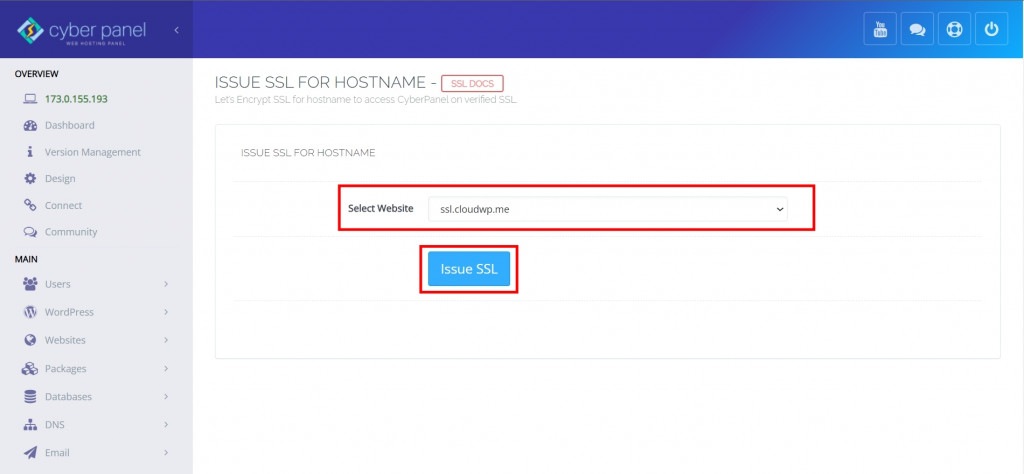
今天實作分享的使用的網址是 https://ssl.cloudwp.me
https://ithelp.ithome.com.tw/upload/images/20231012/20070781UR7YxVLCdb.jpg

  1. 步驟1,啟用 HOSTNAME SSL,選擇一個已經建立好的網站,來擔任CyberPanel管理介面要使用的網址,筆者今天是使用 ssl.cloudwp.me 來實作
    https://ithelp.ithome.com.tw/upload/images/20231012/20070781C8ZxnbrVI9.jpg

https://ithelp.ithome.com.tw/upload/images/20231012/20070781F2eO235jOc.jpg


https://ithelp.ithome.com.tw/upload/images/20231012/20070781Jq9cZeNUvW.jpg


  1. 步驟2,參考CyberPanel官方的論壇的教學 How to remove port 8090 from CyberPanel,(httpd_config.conf的檔案路徑是在 /usr/local/lsws/conf/),將httpd_config.conf 設定檔,加上以下的設定參數
extprocessor cyberpanel {
  type                    proxy
  address                 https://ssl.cloudwp.me:8090
  maxConns                100
  pcKeepAliveTimeout      60
  initTimeout             60
  retryTimeout            0
  respBuffer              0
}

  1. 步驟3,將 .htaccess 設定檔,加上以下的設定參數
RewriteEngine On
REWRITERULE ^(.*)$ HTTP://cyberpanel/$1 [P]

CyberPabel 官方網站 https://cyberpanel.net/
CyberPanel 線上文件 https://community.cyberpanel.net/docs


上一篇
<Day 27> 移轉 Plesk 建立的 WordPress 站台到 CyberPanel
下一篇
<Day 29> 使用 Apache JMeter™ 壓力測試 WordPress站台
系列文
30天學會使用 CyberPanel 管理 WordPress 站台33
圖片
  直播研討會
圖片
{{ item.channelVendor }} {{ item.webinarstarted }} |
{{ formatDate(item.duration) }}
直播中

尚未有邦友留言

立即登入留言