Firebase 託管為您的 Web 應用、靜態和動態內容以及微服務提供快速且安全的託管。
簡介
Firebase Hosting
收費方式
https://firebase.google.com/pricing#hosting
到終端機要建置的目錄中輸入
npm create vite@latest 專案名稱 -- --template vue
cd 專案名稱
npm install
npm run dev
這時候確認一下專案已可在本地端開啟
git init
git add 文件名稱
git add .
git commit -m "提交訊息"
git remote add origin 遠端存儲庫的URL
main或master)上傳到遠端存儲庫,可以使用以下命令:
git push -u origin main
main 替換為您的分支名稱。步驟1:建立 Firebase 專案並註冊您的應用
進到首頁,點選「Get Started」
創建 Firebase 項目
點選「新增專案」
注意: Firebase CLI 需要Node.js v16.13.0 或更高版本
npm install -g firebase-tools
▲ 此命令啟用全局可用的firebase命令。
若您還沒登入firebase,則需
firebase login
▲ 已登入可略過
firebase init
▲ 初始化結束時,Firebase 會自動在本地應用程序目錄的根目錄下創建以下兩個文件:
列出您的項目配置的firebase.json配置文件、存儲項目別名的.firebaserc文件
接著開始一系列選擇,
Which Firebase features do you want to set up for this directory? Press Space to select features, then Enter to confirm your choices.
 (Press <space> to select, <a> to toggle all, <i> to invert selection, and <enter> to proceed)
 ◯ Realtime Database: Configure a security rules file for Realtime Database and (optionally) provision default instance
 ◯ Firestore: Configure security rules and indexes files for Firestore
 ◯ Functions: Configure a Cloud Functions directory and its files
❯◯ Hosting: Configure files for Firebase Hosting and (optionally) set up GitHub Action deploys
 ◯ Hosting: Set up GitHub Action deploys
 ◯ Storage: Configure a security rules file for Cloud Storage
 ◯ Emulators: Set up local emulators for Firebase products
我選擇Hosting: Configure files for Firebase Hosting and (optionally) set up GitHub Action deploys (配置 Firebase Hosting 的文件,並(可選)設置 GitHub Action 部署)
按下 空白鍵
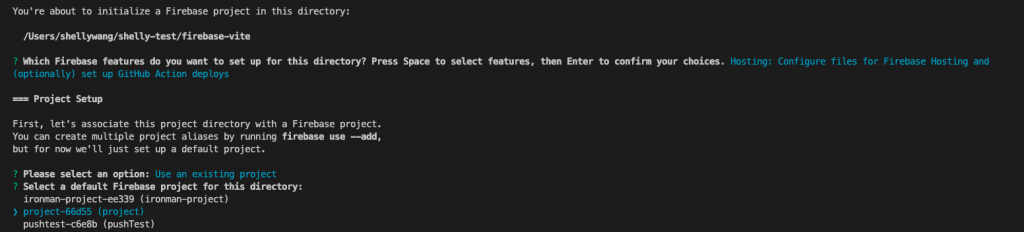
接著選擇如何將你的本地專案與 Firebase 專案關聯起來
我選擇使用現有的專案 (Use an existing project)(就是我剛剛步驟三建立的專案)
? What do you want to use as your public directory? dist
//您想使用哪個目錄作為您的公共目錄?預設是pubilc,我是用vite,所以改為dist
Configure as a single-page app (rewrite all urls to /index.html)? Yes
// 要管理的網頁是SPA 頁面,就改為yes
? Set up automatic builds and deploys with GitHub? Yes
// 是否自動部署?
? For which GitHub repository would you like to set up a GitHub workflow? (format: user/repository)
//連結的GitHub repository,輸入步驟二的repository,(user/repository)
? Set up the workflow to run a build script before every deploy? Yes
? What script should be run before every deploy? npm run build
// 在每次部署之前應該運行哪個腳本?輸入指令
? Set up automatic deployment to your site's live channel when a PR is merged? Y
// 發PR時要不要自動部署?
? What is the name of the GitHub branch associated with your site's live channel? main
// 連結GitHub branch名稱,看你是叫master還是main
接著會出現
✔ Firebase initialization complete!
接著就會出現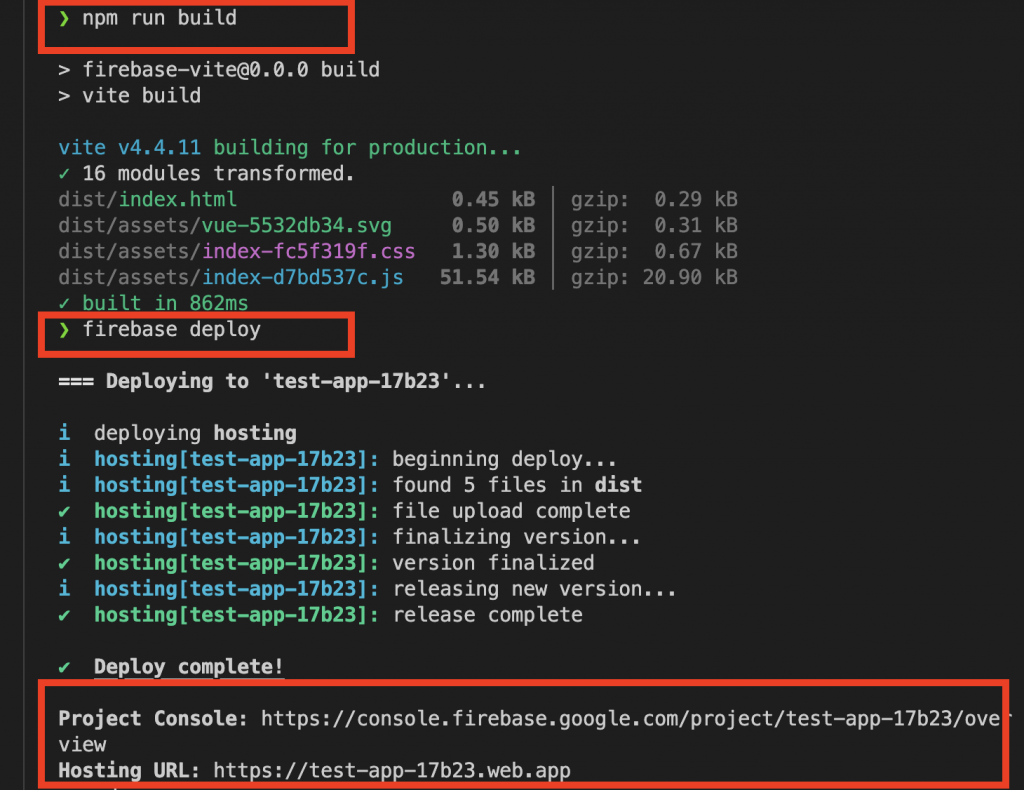
打開網址就可以看到你的網站拉!!
另外回到firebase控制台 打開hosting 就可以看到部署的狀態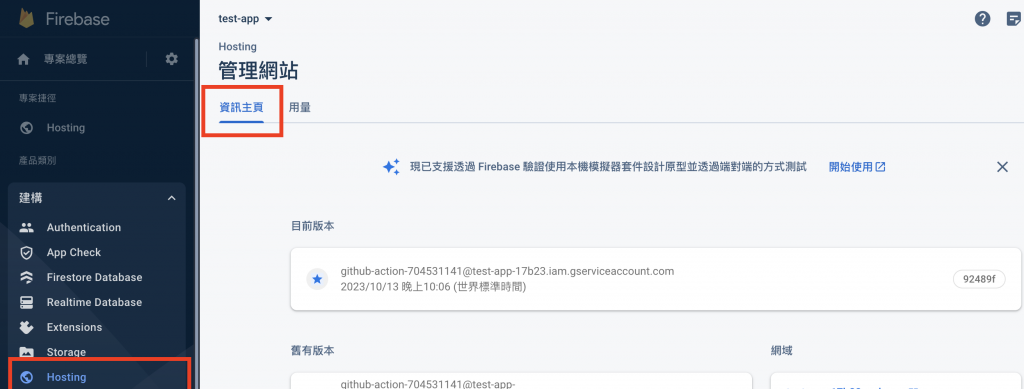
若有需要連結自己的網域,也可以在這邊設定

不過,
姊姊測試發現git push時,網站都無更新
如果你有一樣問題,可前往您的GitHub專案中,檢查"Actions"標籤頁面,查看問題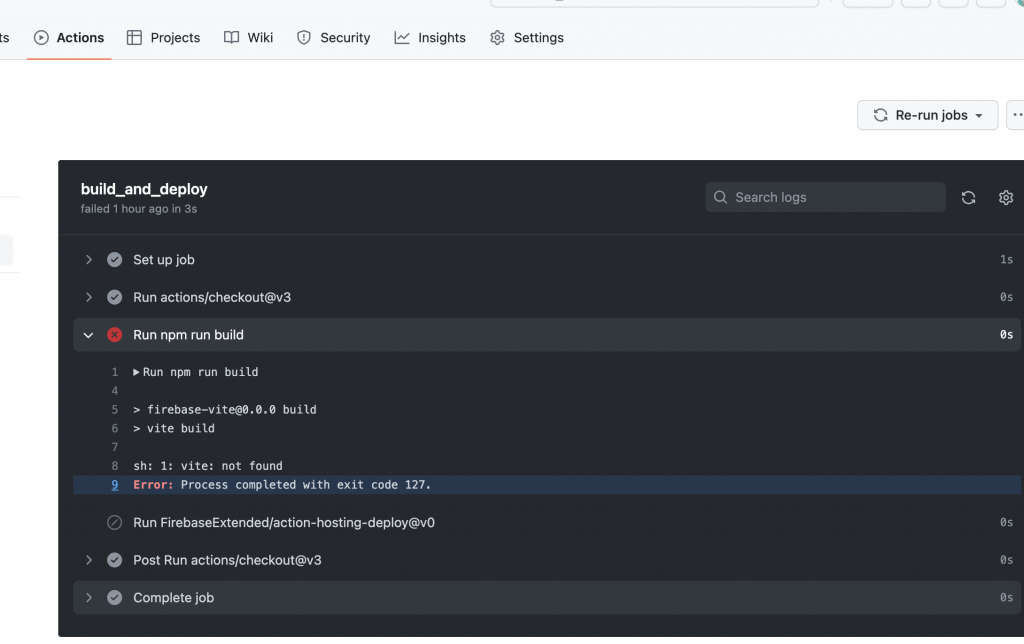
發現
sh: 1: vite: not found
Error: Process completed with exit code 127.
接著我的解法是
安裝專案依賴:
在執行npm run build之前,您需要先安裝專案的npm依賴。請在actions/checkout@v3和npm run build之間加入以下段落:
- name: Install Dependencies
  run: npm ci
使用npm ci可以確保與package-lock.json的一致性,並且它比npm install更快。
(回到專案,修改為以下)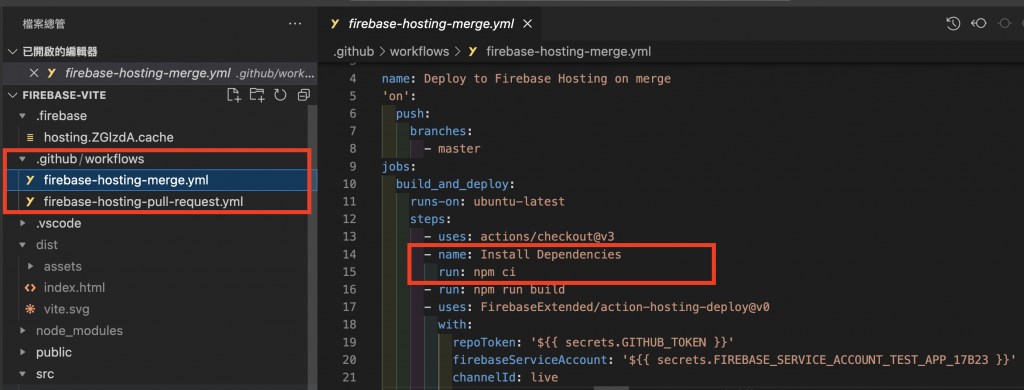
之後再重新git push,就成功自動部署拉!

npm run build
firebase serve --only hosting
會產生Local server: http://localhost...
詳細可看官方文件:Test your web app locally, share changes with others, then deploy live
當您想分享或測試網站的特定版本,但又不想影響主網站時使用。例如,當您想分享一個新功能的草稿版本給客戶或團隊成員查看時。
npm run build
firebase hosting:channel:deploy CHANNEL_ID
CHANNEL_ID 自行命名
那我們明天再見拉~