
今天來到了挑戰的最後一天,接著把剩下的 Videos 和 Tweets 等自訂 Blot 體驗一遍。
我們將以和 images 的實現方式來實現 Videos。從第一個直覺或許可以使用 HTML 的 <video> 標籤,但我們無法用這種方式來播放 Youtube 的影片,考慮到 Youtube 影片是目前主流看影片的其中一種方式,我們就用 <iframe> 標籤來實現。如果希望多個 Blot 使用相同的標籤,除了 tagName 之外,我們還可以使用 className,下一個 Tweets 練習會示範這個部分。
另外,我們將支援對寬度與高度,作為未註冊的 Formats。特定於 Embeds 的 Formats 不需要單獨註冊,只要它們與已註冊的 Formats 沒有命名空間的衝突即可。這樣可以運作是因為 Blots 只是將未知的 Foramts 傳遞給其子元素,最終達到葉節點。這也允許不同的 Embeds 以不同的方式處理未註冊的 Formats。例如,我們之前的插入圖片可能會跟我們在這裡的 Videos 以不同的方式來識別和處理寬度格式。
export class VideoBlot extends BlockEmbed {
  static blotName = 'myVideo';
  static tagName = 'iframe';
  static create(value: { url: string }) {
    const node = super.create();
    node.setAttribute('src', value.url);
    // Set non-format related attributes with static values
    node.setAttribute('frameborder', '0');
    node.setAttribute('allowfullscreen', 'true');

    return node;
  }

  static formats(node: HTMLIFrameElement): Format {
    let format: Format = {};
    if (node.hasAttribute('height')) {
      format['height'] = node.getAttribute('height')!;
    }
    if (node.hasAttribute('width')) {
      format['width'] = node.getAttribute('width')!;
    }
    return format;
  }

  static value(node: HTMLImageElement) {
    return node.getAttribute('src');
  }

  format(name: string, value: number | string) {
    // Handle unregistered embed formats
    if (name === 'height' || name === 'width') {
      if (value) {
        this['domNode'].setAttribute(name, value);
      } else {
        this['domNode'] .removeAttribute(name, value);
      }
    } else {
      super.format(name, value);
    }
  }
}
新增 VideoBlot 之後,和前面幾次練習一樣,註冊到 Quill,並且加上對應的 Click Event 到 Component:
  <button type="button" title="video" id="video-button" (click)="addVideo()">
    <i class="fa fa-play"></i>
  </button>
  registerBasicFormatting() {
    // ...
    Quill.register(VideoBlot);
  }

  addVideo() {
    const range = this.quillInstance.getSelection(true);
    this.quillInstance.insertText(range.index, '\n', Quill.sources.USER);
    this.quillInstance.insertEmbed(range.index + 1, 'myVideo', {
      url: 'https://www.youtube.com/embed/QHH3iSeDBLo',
    });
    this.quillInstance.formatText(range.index + 1, 1, {
      height: '170',
      width: '400',
    });
    this.quillInstance.setSelection(
      { index: range.index + 2, length: 0 },
      Quill.sources.SILENT
    );
  }
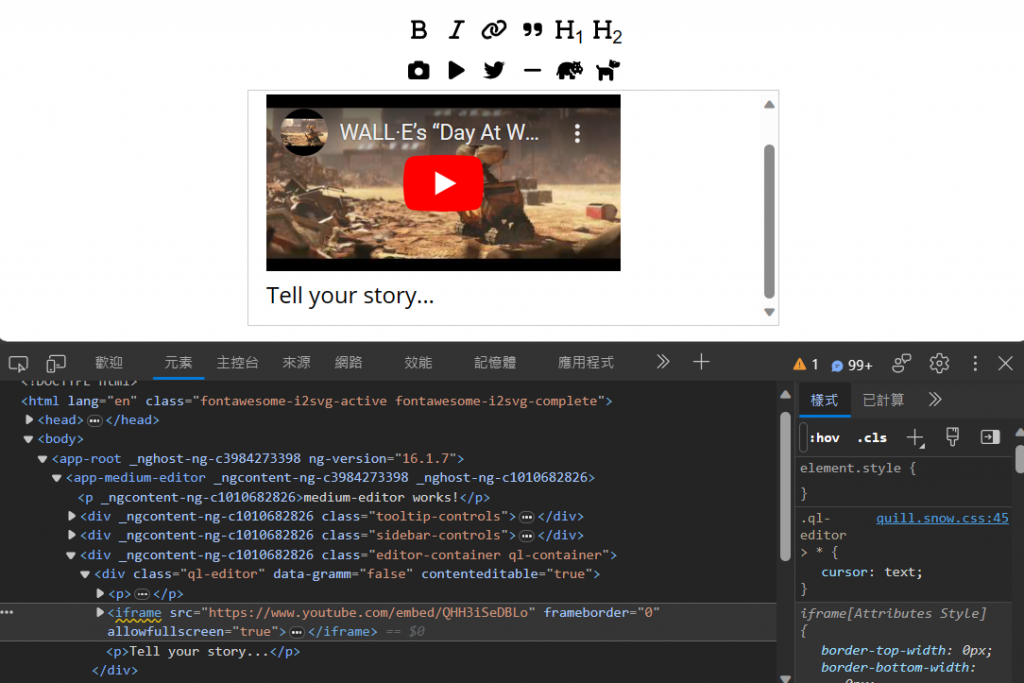
點擊按鈕嵌入 Youtube 影片之後,可以看到編輯器的內容加了一個 iframe 標籤:
如果打開 dev tool 使用 getContents 方法來查看編輯器內容,Quill 會回傳 Video 的 Delta 內容像這樣:
{
  ops: [{
    insert: {
      video: 'https://www.youtube.com/embed/QHH3iSeDBLo?showinfo=0'
    },
    attributes: {
      height: '170',
      width: '400'
    }
  }]
}
Medium 支援多種嵌入類型,但我們練習就只專注於 Tweets。Tweet Blot 的實現方式與 images 幾乎完全相同。我們利用 Embed Blots 不一定要對應到一個空(void)節點的行為。它可以是任何自定義的節點,Quill 會將其視為一個空節點,而不遍歷其子節點或後代節點。這使我們可以使用一個 <div>,並讓原生的 Twitter Javascript 函式庫在我們指定的 <div> 容器內運作。
由於我們的根 Scroll Blot 也使用了一個 <div>,所以我們還指定了一個 className 來消除歧義。需要注意的是,Inline Blots 預設使用 <span>,而 Block Blots 預設使用 <p>。因此,如果想讓自定義的 Blots 使用這些標籤,除了指定 tagName 之外,還要帶上一個 className。
我們使用 Tweet id 作為定義我們 Blot 的值。同樣的,在 Click Event handler 一樣帶入固定值來方便練習。
export class TweetBlot extends BlockEmbed {
  static blotName = 'myTweet';
  static tagName = 'div';
  static className = 'tweet';

  static create(id: string) {
    const node = super.create();
    node.dataset.id = id;
    // Allow twitter library to modify our content
    twttr.widgets.createTweet(id, node);
    return node;
  }

  static value(domNode: HTMLElement) {
    return domNode.dataset['id'];
  }
}
上面這個範例程式中,如果直接加上 twttr 應該會出現 TypeScript 不認得的錯誤訊息,twttr 是 Twitter platform widgets.js 函式庫提供的,因此我們這邊就先使用 declare any 來定義它的型別:
declare var twttr: any;
此外,我們還需要加上 Twitter widgets 的 JS script,這邊我們可以利用 Angular 提供的 Renderer2 來插入外部的 script,當然也可以直接在 index.html 的檔案上加入:
import { CommonModule, DOCUMENT } from '@angular/common';
import {
  AfterViewInit,
  Component,
  ElementRef,
  Inject,
  OnInit,
  Renderer2,
  SecurityContext,
  ViewChild,
} from '@angular/core';

// ...Component
  constructor(
    // ...
    private renderer: Renderer2,
    @Inject(DOCUMENT) private document: Document
  ) {}
  ngOnInit(): void {
    const script = this.renderer.createElement('script');
    script.type = 'text/javascript';
    script.src = 'https://platform.twitter.com/widgets.js';
    script.async = true;
    script.charset = 'utf-8';
    this.renderer.appendChild(this.document.body, script);
  }
建立好 TweetBlot 之後,我們一樣進行 Quill 註冊以及綁定 click event 對應的按鈕:
  <button type="button" title="tweet" id="tweet-button" (click)="addTweet()">
    <i class="fa-brands fa-twitter"></i>
  </button>
使用 Quill Instance 提供的方法取得游標位置,並插入 TweetBlot 的區塊:
  registerBasicFormatting() {
    // ...
    Quill.register(TweetBlot);
  }
  addTweet() {
    const range = this.quillInstance.getSelection(true);
    const id = '464454167226904576';
    this.quillInstance.insertText(range.index, '\n', Quill.sources.USER);
    this.quillInstance.insertEmbed(
      range.index + 1,
      'myTweet',
      id,
      Quill.sources.USER
    );
    this.quillInstance.setSelection(
      { index: range.index + 2, length: 0 },
      Quill.sources.SILENT
    );
  }
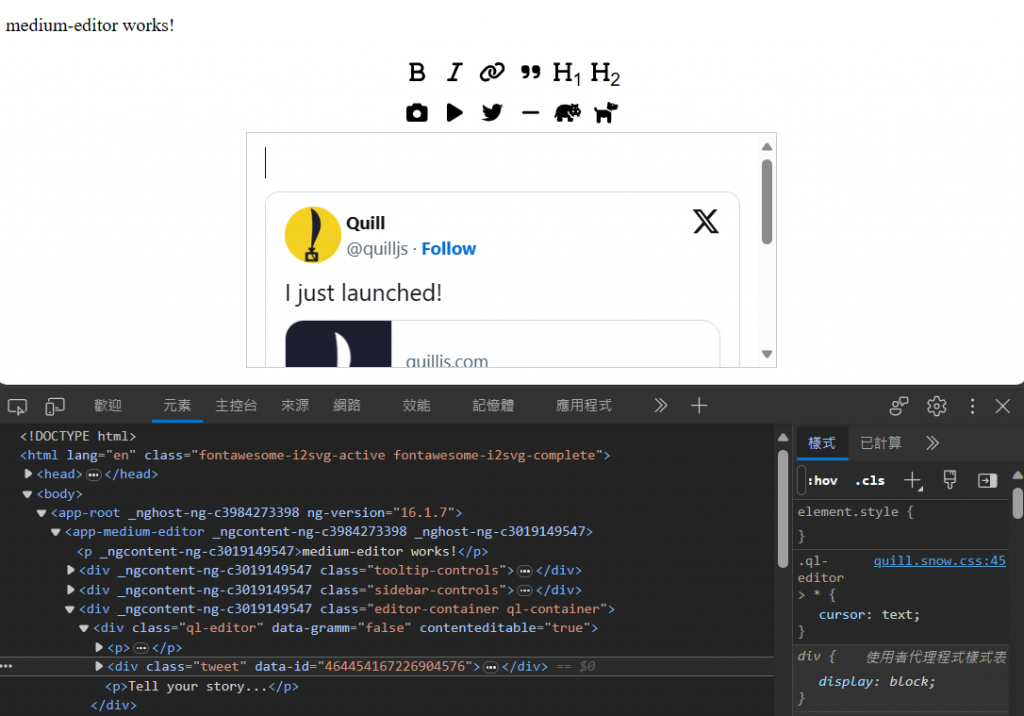
點擊後的效果:
我們從一堆按鈕和只能理解純文本的 Quill 核心開始。通過 Parchment,我們能夠添加粗體、斜體、連結、引用區塊、標題、分隔線、圖片、影片,甚至是 Tweets。所有這些都能在維持一個可預測且一致性的文件實現,這使我們能夠使用 Quill 的 API 來處理這些新的格式和內容。
讓我們為這個範例加上一些最後的潤色。雖然它不能與 Medium 的 UI 相比,但還是盡可能的去貼近它。
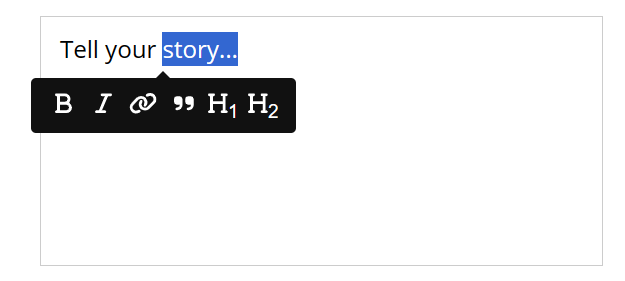
最後的效果,當選擇文本時會顯示工具列:
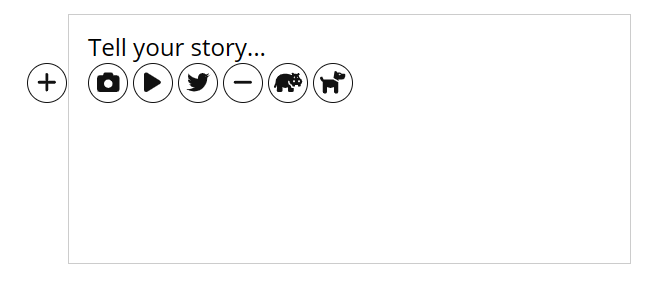
游標換行之後停在最前面的時候顯示插入內容按鈕,點擊之後可以展開內容:
具體的程式碼變更可以參考對應的 commit 紀錄。
終於來到了第 30 天,最後用了這個練習把 Quill 的東西初步都摸過了一遍。今天把剩下的練習像是 Video, Tweets 這些自訂的 Blot 插入,並把整個 UI 改成像是 Medium 的編輯器風格。從中學到不少東西,也因為很久沒碰 Angular,有一些對我來說可能是新的東西也派上用場,目前的實現並不是最好的實現方式,因為官方提供的範例是直接用 jQuery,那我想在 Angular 專案的話,應該要透過 Angular 的生態系統下來實現正確的 UI 操作方式,這個未來可以在持續的探討。同時有機會的話也可以改成 Signal 的版本 XD
今天下午繼續參加週末的 MNH 社群日,遇到很多低等的會想挑戰高階的魔物,想挑戰的心態值得嘉許,但更多的可能是想蹭並獲取材料,對於等級可能剛剛好可以應付魔物的玩家,如果遇到這樣的情況就會很尷尬,因為不一定能夠扛著住,所以現在加入一個組隊之後,都要先觀望一下隊友的等級,才知道這場會不會又整個翻車,畢竟藥水真的不便宜 QQ
