首先到Discord 開發網站點下右上角的New Application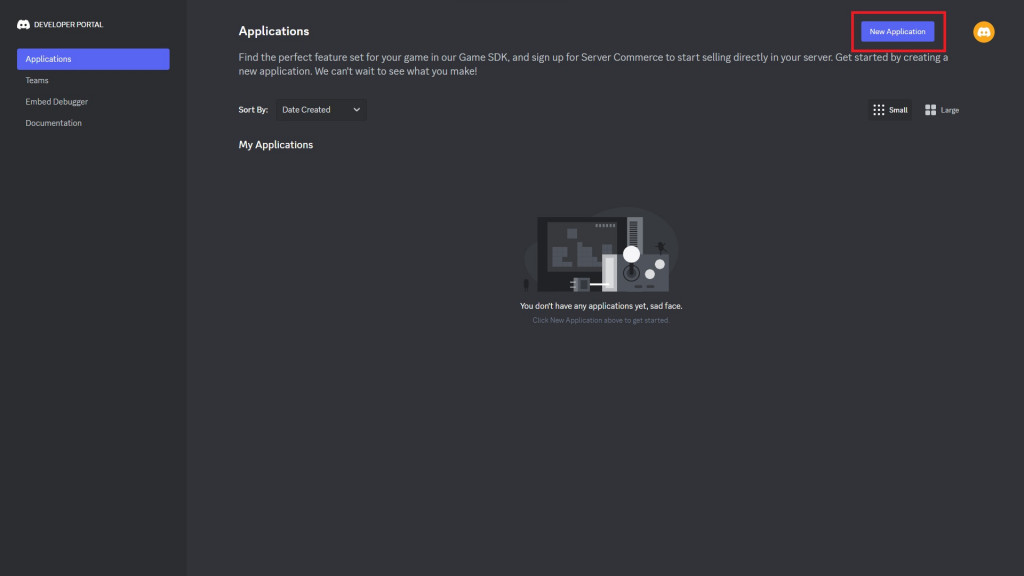
輸入你想要的機器人名稱(名稱不要包含Discord),記得勾選同意條款後再按下創建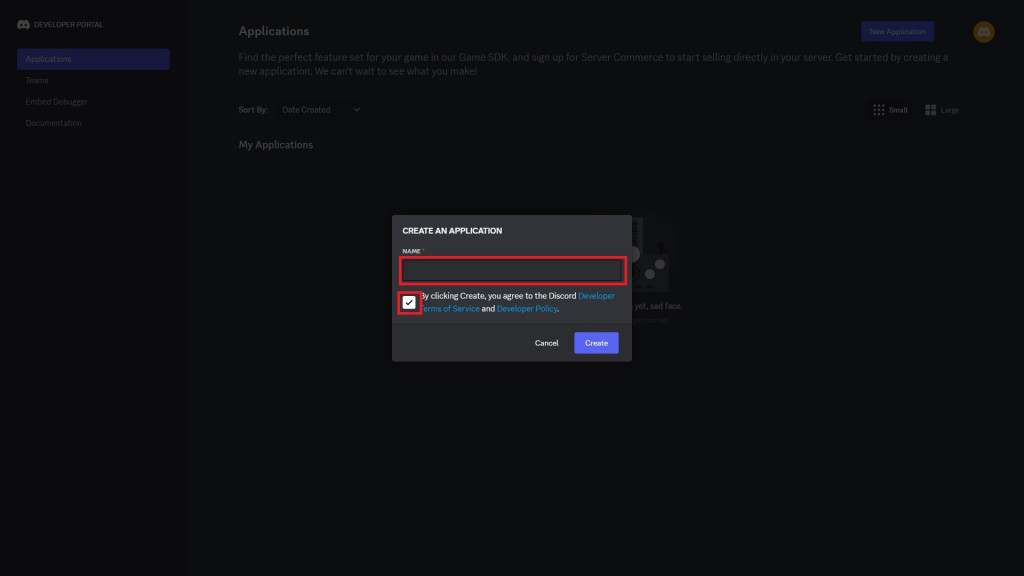
點選左邊的bot,到底下將Privileged Gateway Intents 的三個選項打開
然後按下紫色的Reset Token按鈕並複製Token(Token很重要不能告訴別人,也不行上傳到GitHub,會被官方掃描到並重置Token,可以找個自己的地方記錄下來)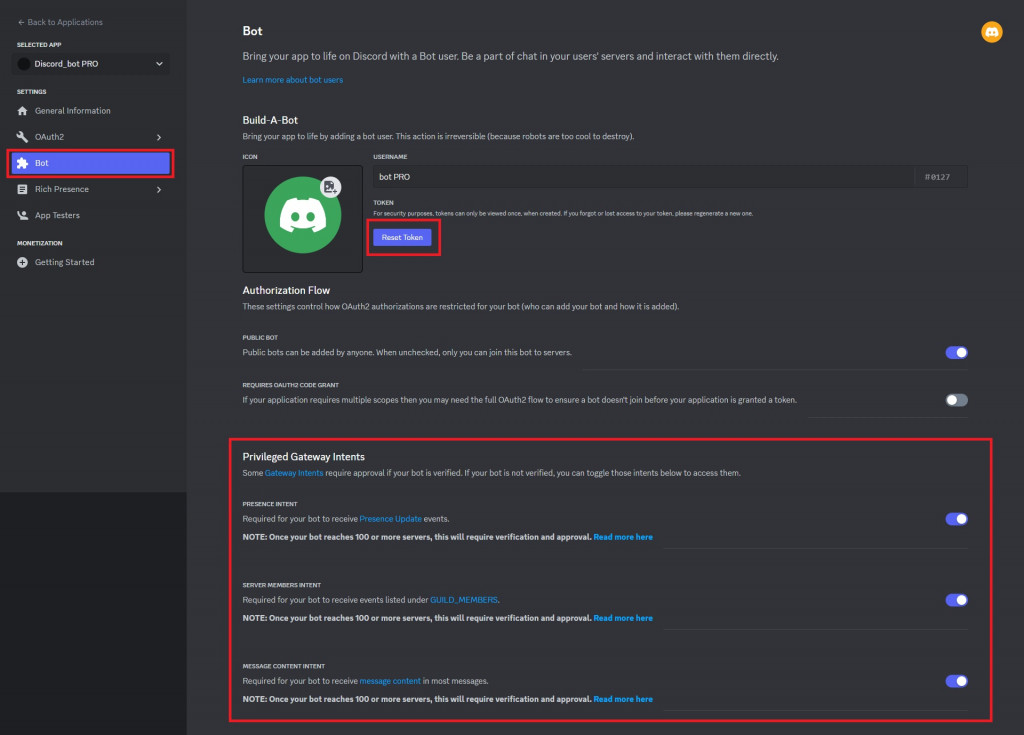
接著找到OAuth2的URL Generator
上下兩區選項分別勾選bot和Administrator,最後複製底下的網址到瀏覽器貼上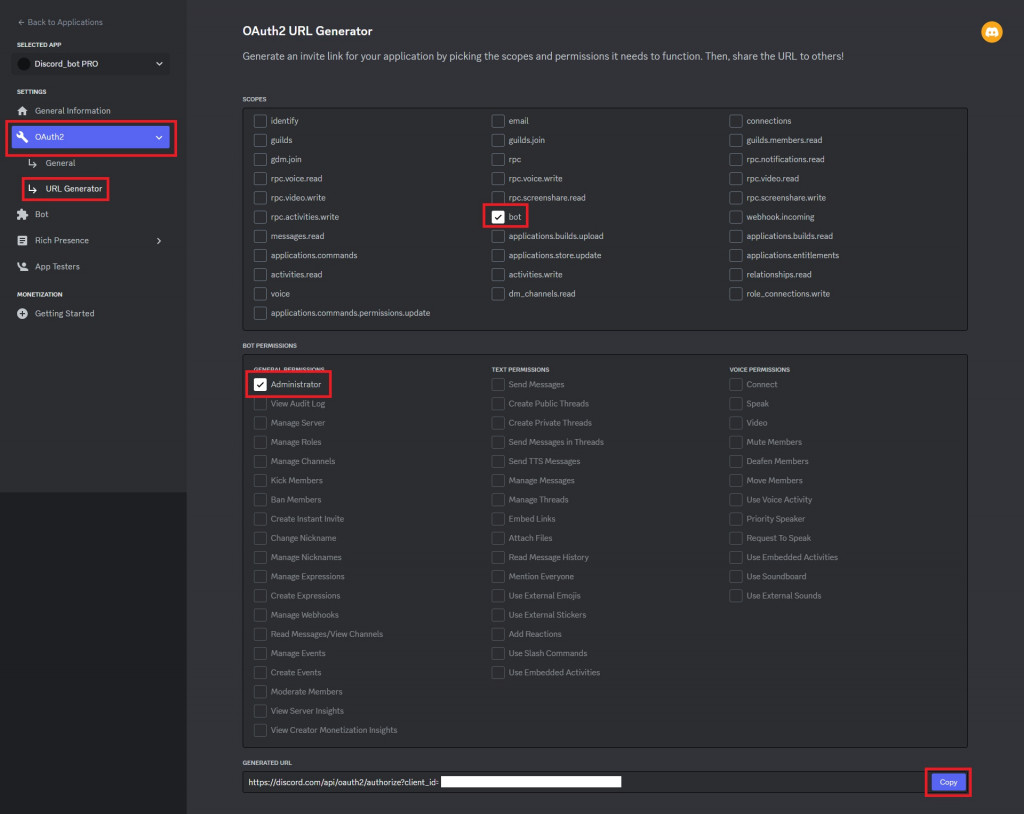
進到貼上的網址,選好想要的伺服器後點選繼續並授權將機器人加入伺服器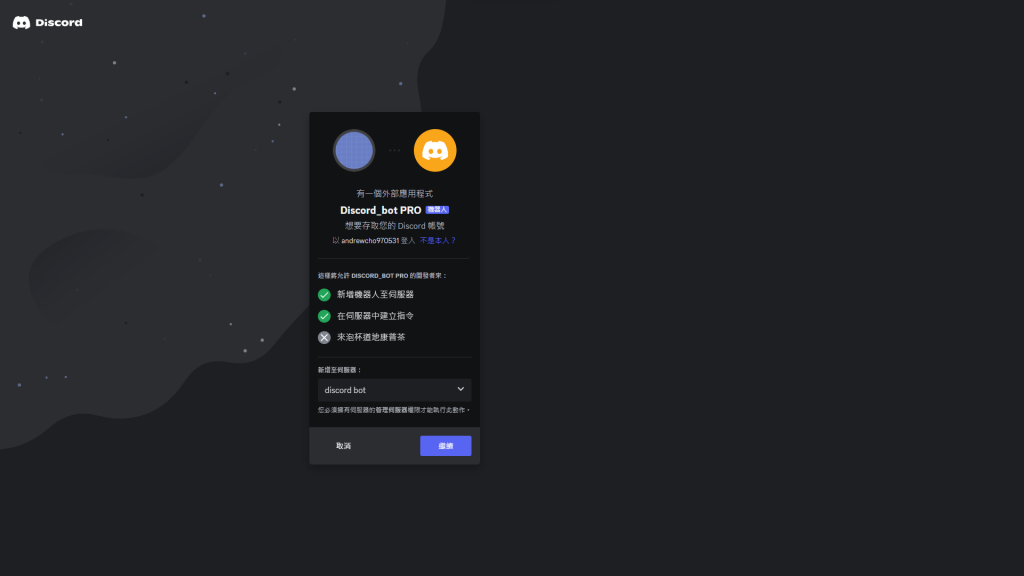
接著進入伺服器檢查機器人是否成功進入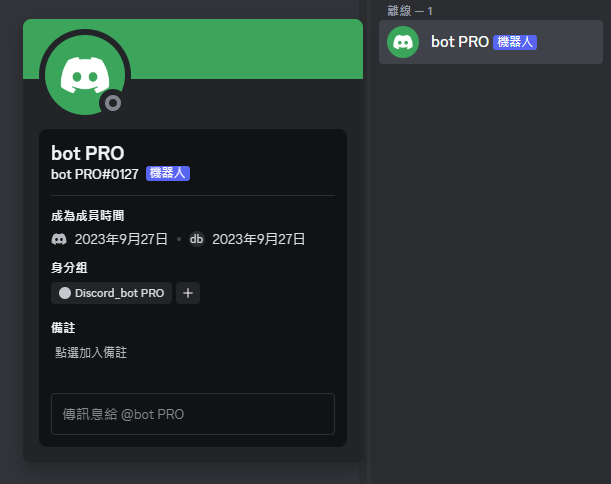
下一步就是要讓機器人上線了!
1.到Replit註冊並登入帳號
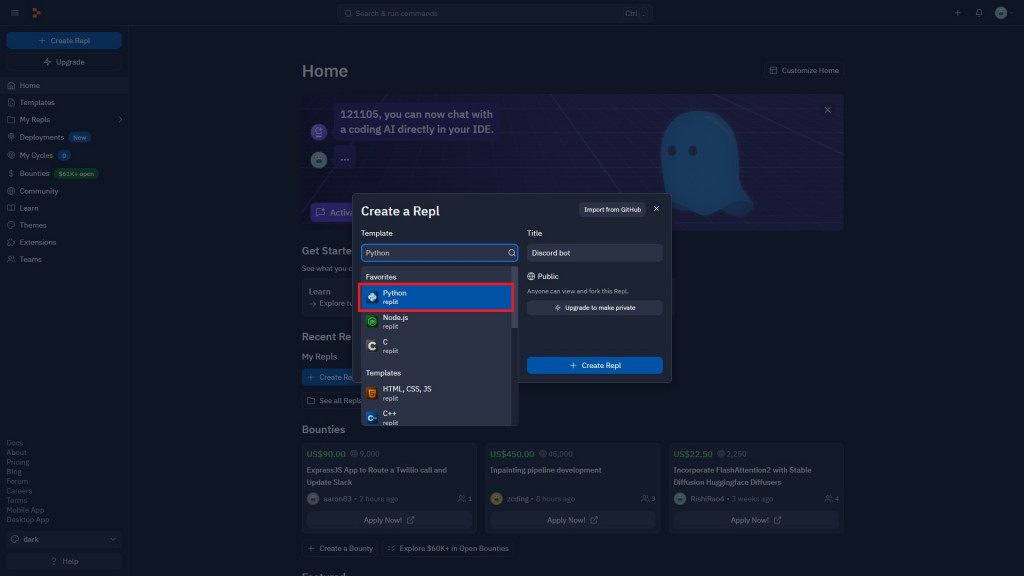
2.點下左上角的Create Repl,選擇Python並在Title輸入自訂名稱,最後按下藍色的Create Repl按鈕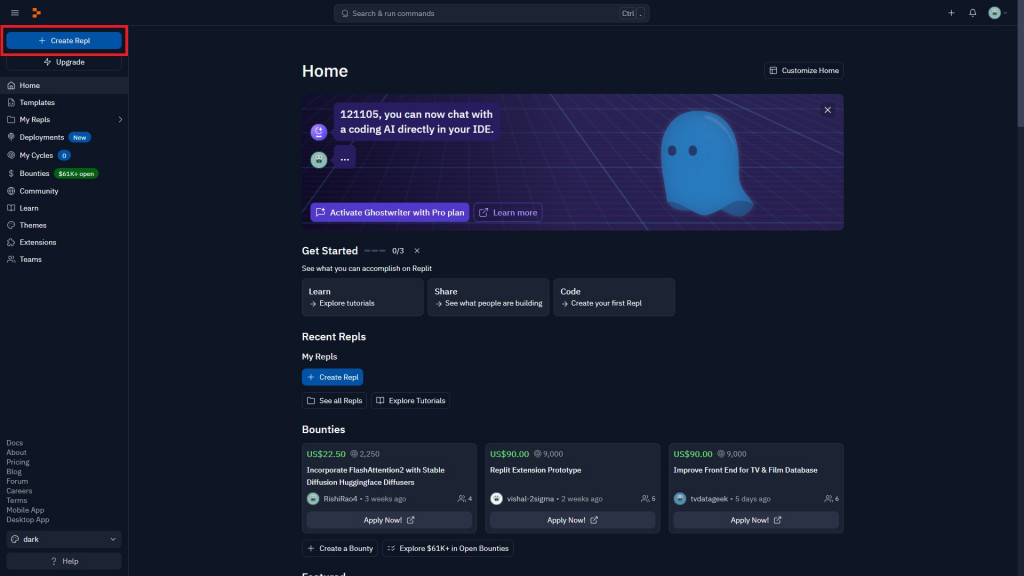
在main.py輸入以下程式碼
import discord
import os
from pathlib import Path

bot = discord.Bot(intents=discord.Intents.all())

for cog in [p.stem for p in Path("cog").glob("*.py")]:
    bot.load_extension(f'cog.{cog}')
    print(f'Loaded {cog}.')
print('Done.')

@bot.event
async def on_ready():
    print(f"「{bot.user}」已登入")

@bot.command()#重新載入Cog
async def reload(ctx, cog):
    bot.reload_extension(f'cog.{cog}')
    print(f'Loaded {cog}.')
    await ctx.respond(f'{cog} reloaded successfully.')

bot.run(os.environ['bot_token']) #運行機器人
然後按下第一次執行
因為擁有token的人就可以操控機器人
而Repl.it的程式碼是網路上所有人都能查看的
來到左下角點選Secrets
按下New Secret
創建一個名為bot_token的Key
Value為前面複製的token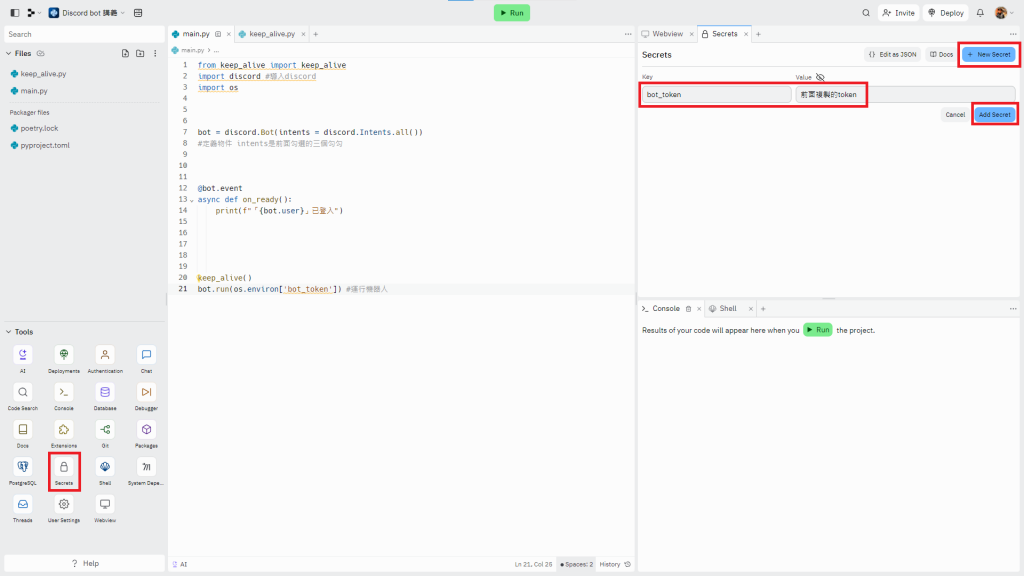
接下來到左下角點選Packages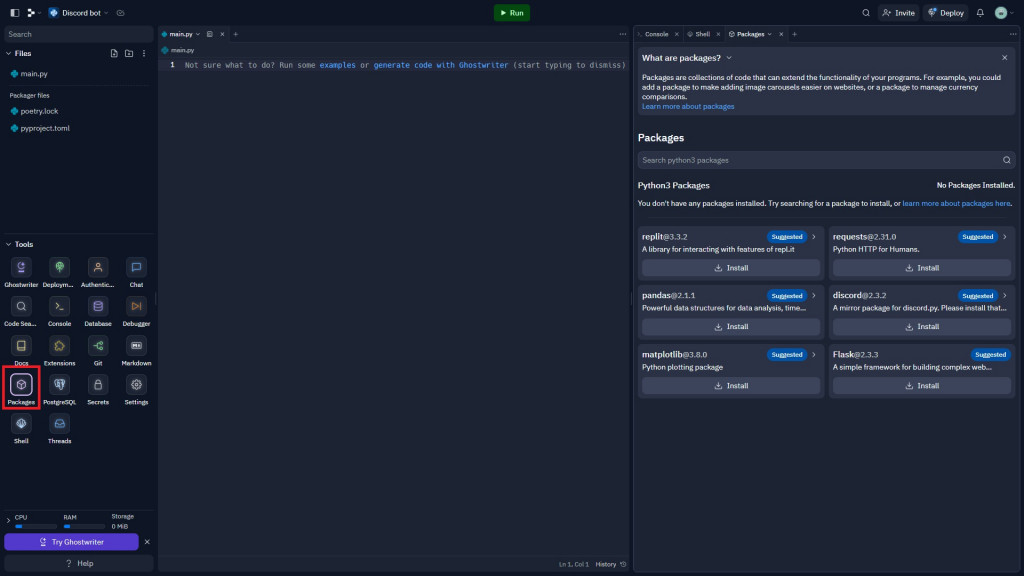
在右邊的搜尋欄打入py-cord並找到下面圖片紅框的選項按下Install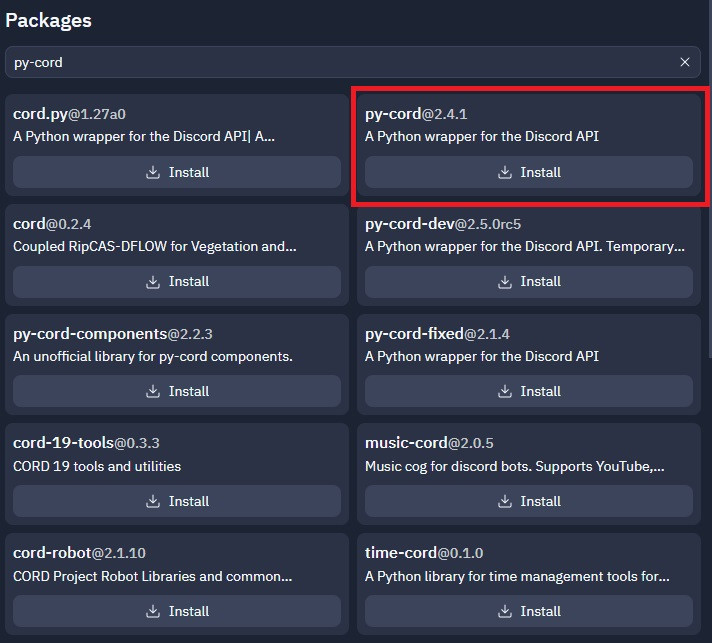
在右邊的搜尋欄打入discord2並找到下面圖片紅框的選項按下Install(discord2一定要最後安裝)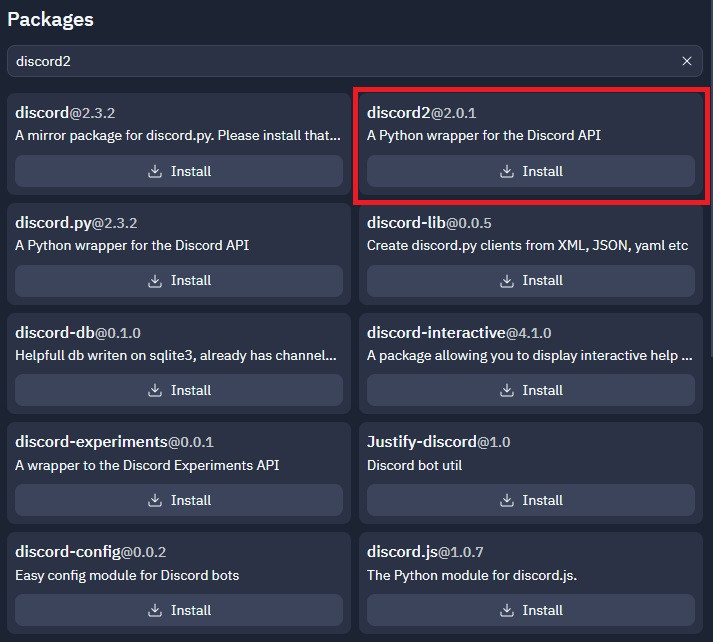
按下第二次執行後你就可以看到機器人已經上線了
如果產生錯誤只需將discord2刪除後再重新安裝即可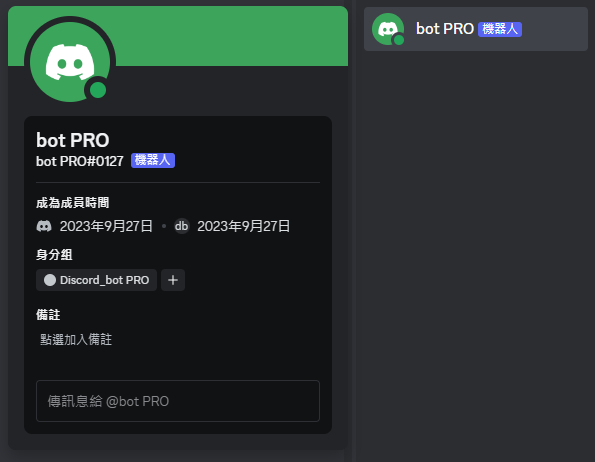
Cog架構和普通架構不太一樣,要依底下表格的變化編寫
| 指令(command) | 事件(event) | |
|---|---|---|
| main.py | @bot.command() | @bot.event |
| Cog | @bot.slash_command | @commands.Cog.listener() |
import discord
from discord.ext import tasks, commands

bot = discord.Bot(intents=discord.Intents.all())

class 檔名(commands.Cog): #需替換檔名為自己的名稱
    def __init__(self, bot):
        self.bot = bot

    @commands.Cog.listener()


    @bot.slash_command


def setup(bot):
    bot.add_cog(檔名(bot)) #需替換檔名為自己的名稱
建立一個名為cog的資料夾
在裡面創建一個Python(.py)檔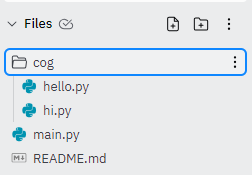
import discord
from discord.ext import tasks, commands

bot = discord.Bot(intents=discord.Intents.all())

class hi(commands.Cog):

  def __init__(self, bot):
    self.bot = bot

  @commands.Cog.listener()
  async def on_message(self, message):
    if message.author == bot.user:
      return
    if message.content == "hi":  #如果有訊息為"hi"
      await message.channel.send("hello!")  #在此頻道發送"hello!"

def setup(bot):
  bot.add_cog(hi(bot))

    bot.add_cog(hi(bot))
import discord
from discord.ext import commands

bot = discord.Bot(intents=discord.Intents.all())

class hello(commands.Cog):
    def __init__(self, bot):
        self.bot = bot

    @bot.command(description="回復world") #定義為slash_command,description為備註(也可不放)
    async def hello(self,ctx): #指令名稱為"hello" 並調用ctx
      await ctx.respond("world") #回復"world"

def setup(bot):
    bot.add_cog(hello(bot))
這次的教學就到這邊
非常感謝OsGa提供教學,以上部份程式由OsGa提供
有問題也可以直接留言訊問
喜歡話可以幫忙按個Like幫我加個油喔!!!
 andrewcho365
