在實作得過程中,我發現上篇超話最多只能簽到20個,原因是因為它超話列表一頁只顯示20個,因此這篇我加上分頁參數,去讓他可以執行到下一頁,以獲取完整的超話列表。
今天要做的就是首先,為了將程式轉化成一個可以被多用戶或多應用程序訪問的 Web 服務,我使用Flask一個輕量級的 Web 框架,將 Python 程式變成一個 Web 應用。透過 Flask,你可以將自動化操作變成 Web API,這樣其他的應用程序或用戶可以通過 HTTP 請求觸發這些操作。
再來,要做的就是把一個本地的 Flask 應用轉化成一個可以在 Google Cloud 上運行的 Web 服務。Google Cloud Functions 的無伺服器架構使得它非常適合處理這樣的簡單 API。
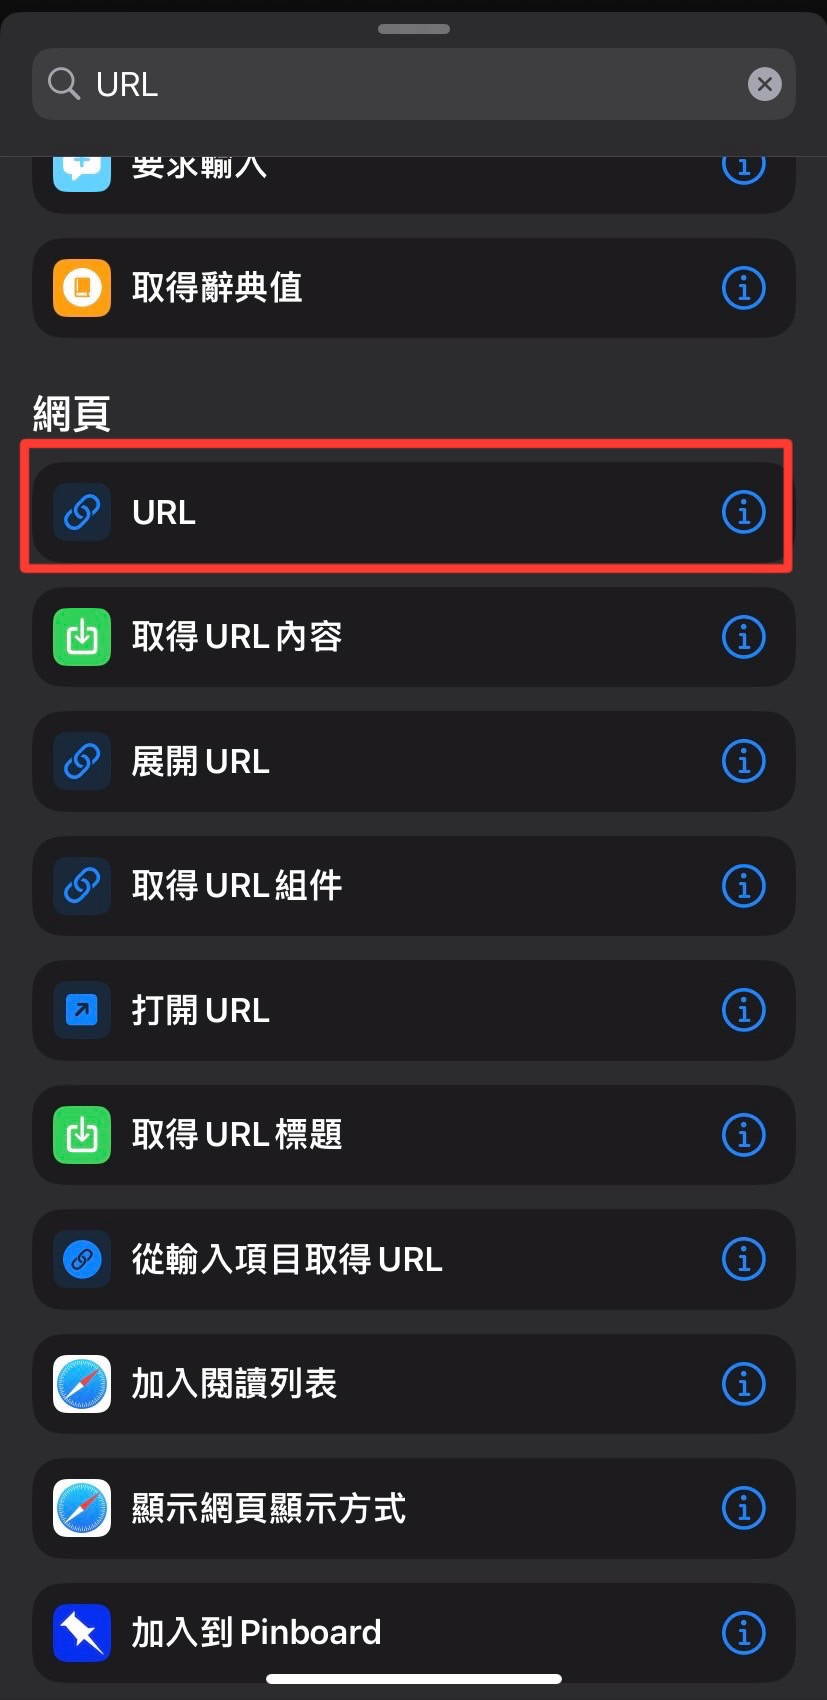
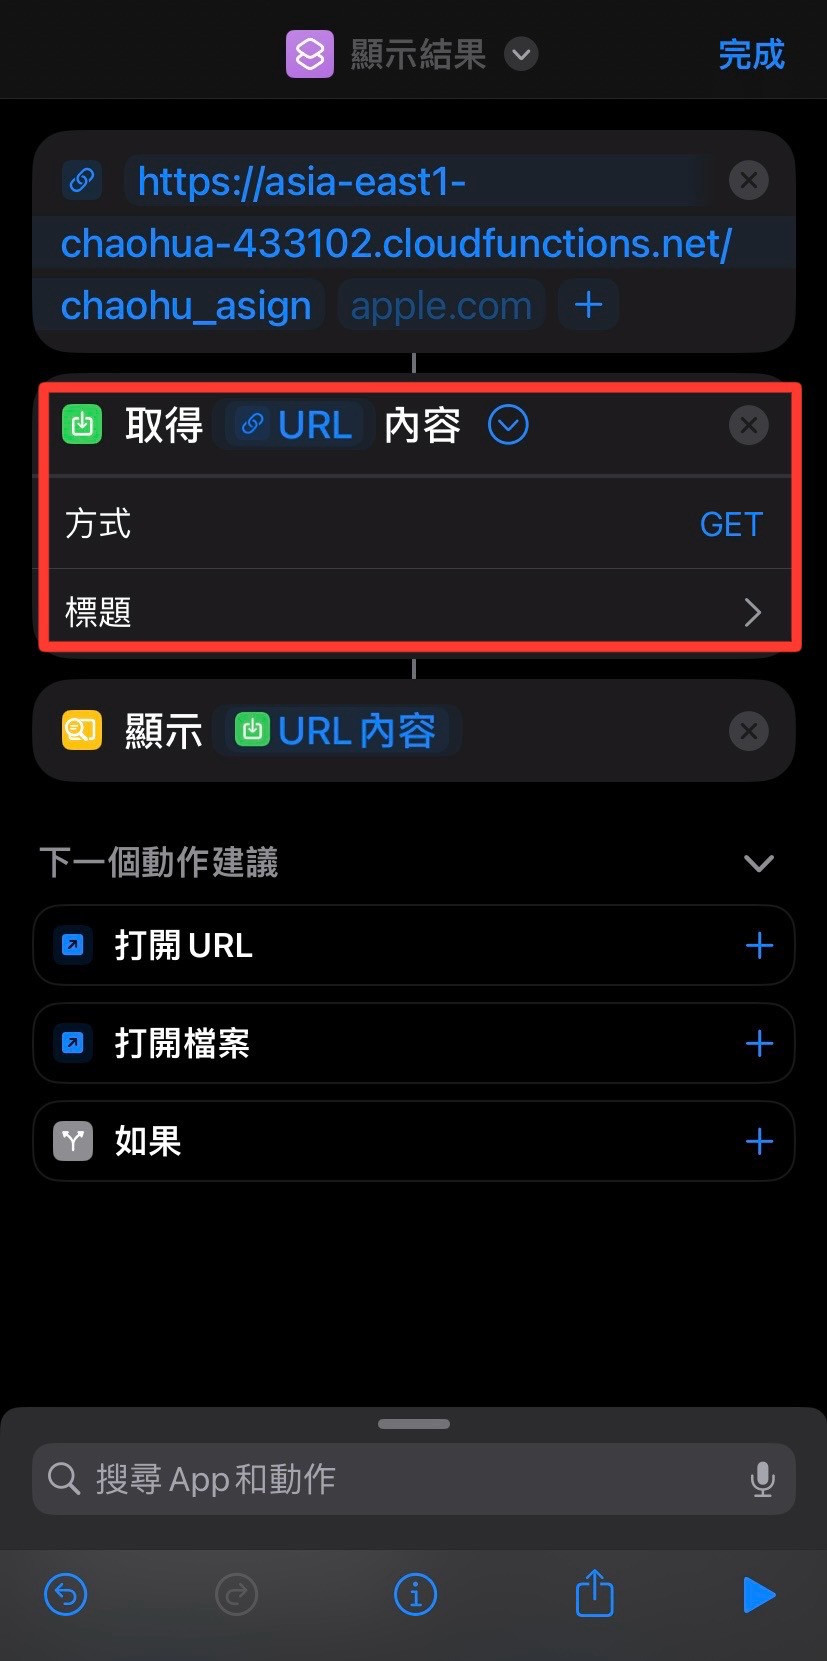
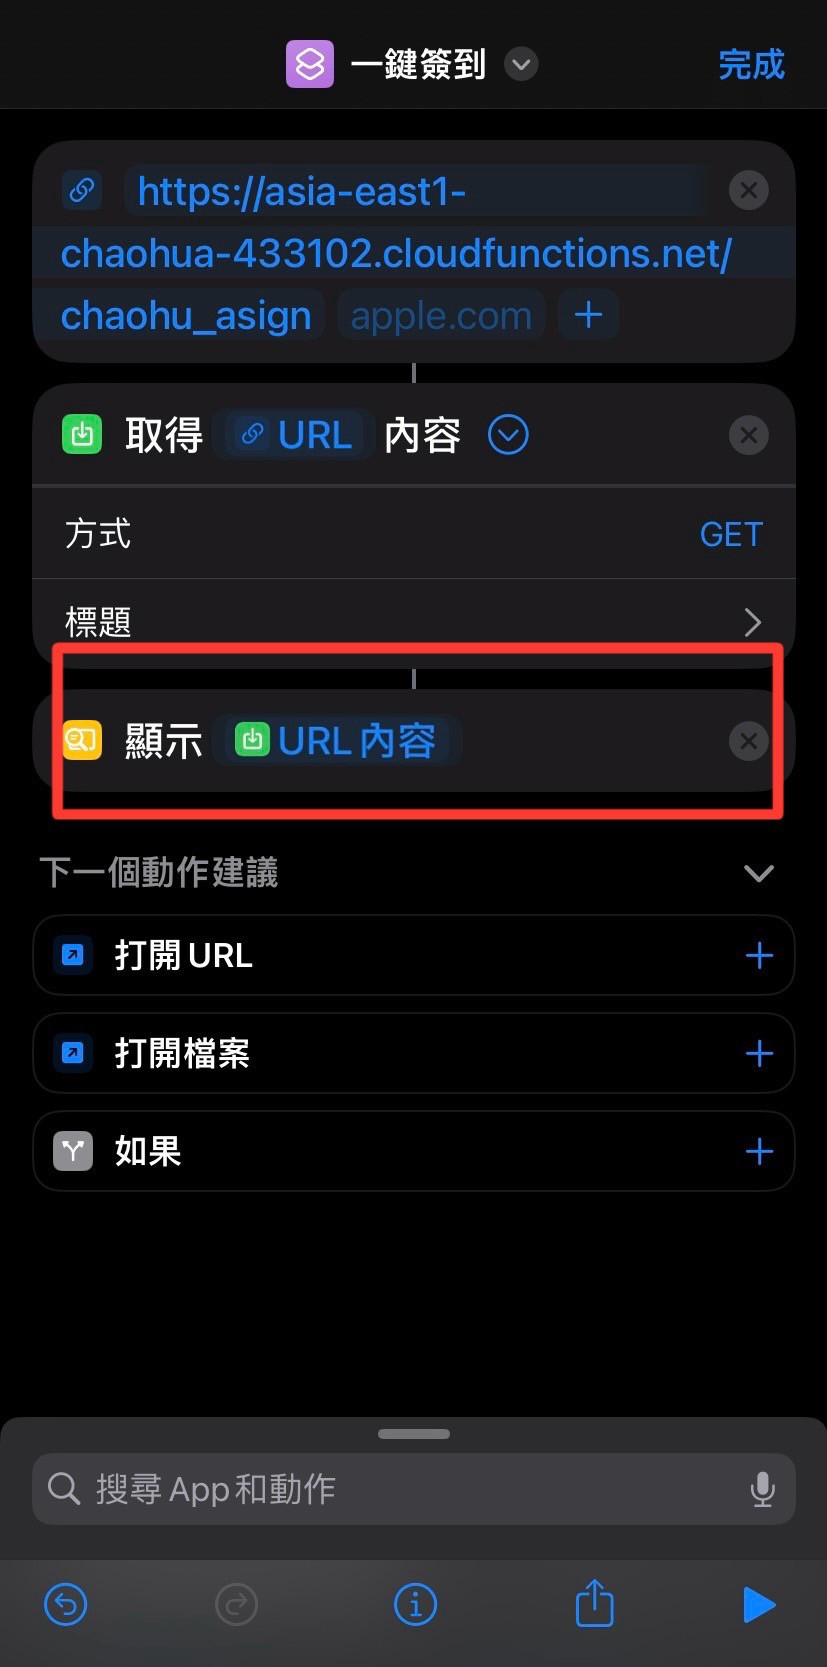
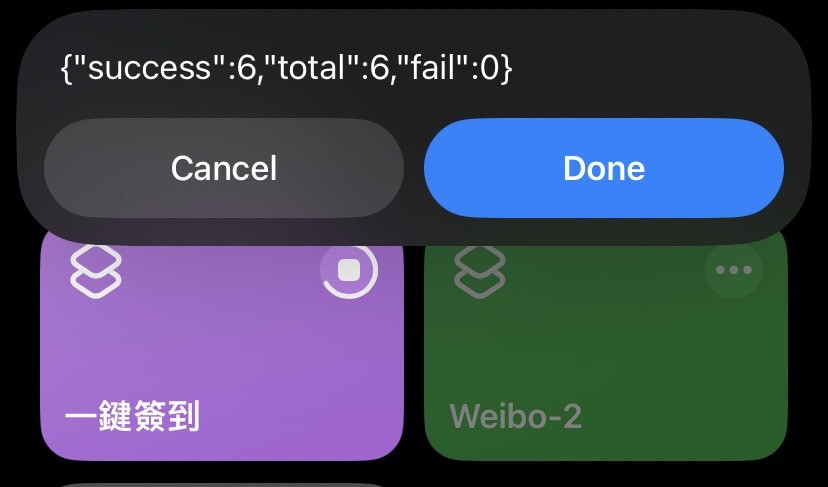
最後使用 ios 捷徑經此 URL 來訪問 Flask 應用,建立一鍵簽到。
什麼是 Google Cloud Functions?
Google Cloud Functions 是 Google Cloud 裡的服務,一個無伺服器的雲端執行環境,可以部署一些簡單或單一用途的程式,當監聽的事件被觸發時,就會觸發 Cloud Function 裡所部署的程式,由於不需要伺服器的特性,常常作為輕量化的 API 以及 webhooks 使用。
建立新專案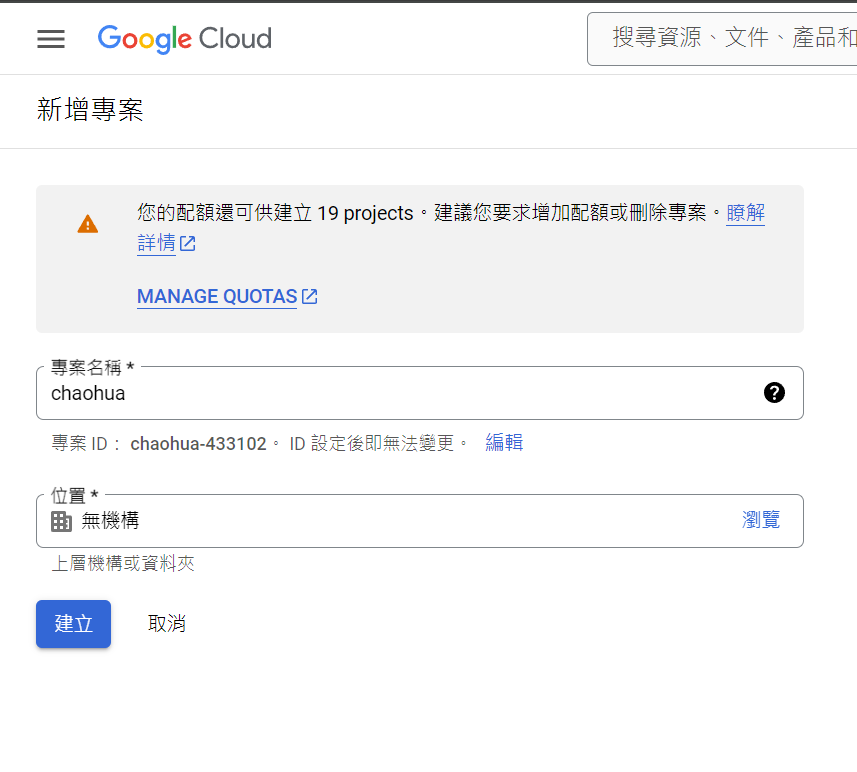
去 "IAM與管理" 增加角色![螢幕擷取畫面 2024-08-20 111015]
啟用以下 Google Cloud API:
Cloud Functions API:允許你在無需管理伺服器的情況下運行程式碼。這是專案的核心服務。
Cloud Storage API:如果你需要在 Cloud Functions 中上傳、下載或處理 JSON 文件,你需要這個 API 來與 Google Cloud Storage 進行互動。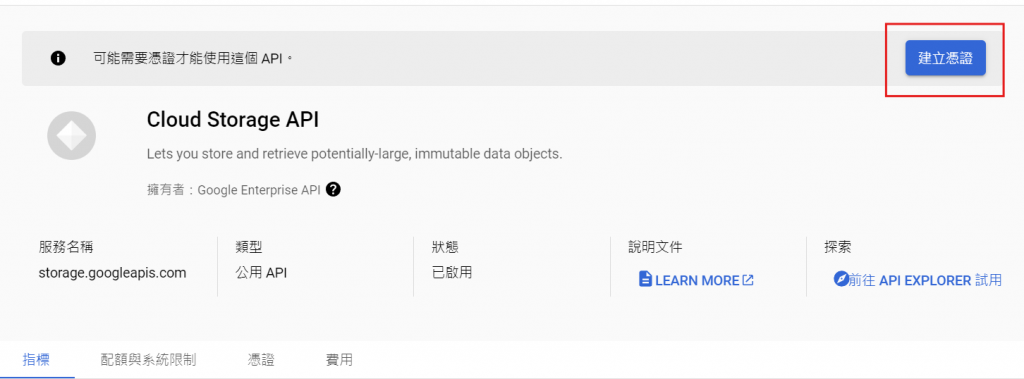
因為我們有 cookies.json 需要被程式碼引用,所以我們先存在Cloud Storage內。
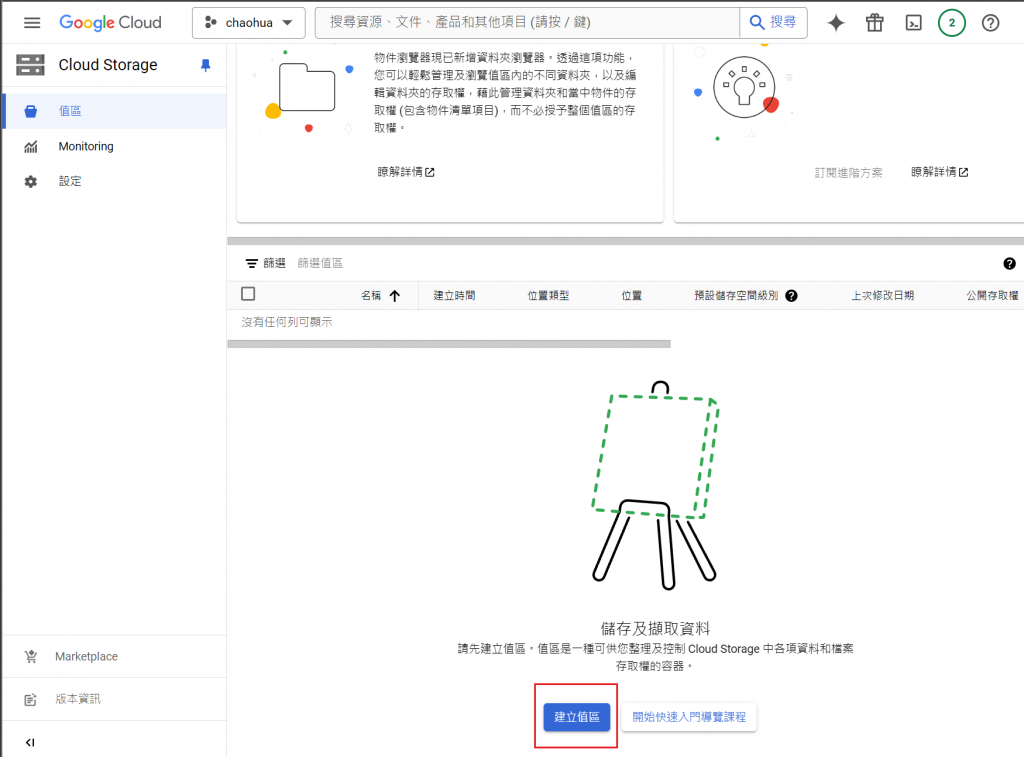
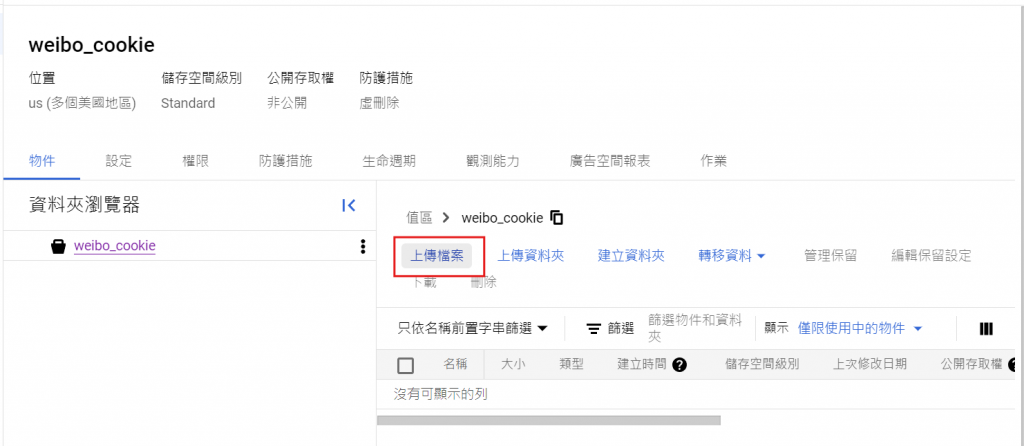

進入 cloud run function , 建立函式
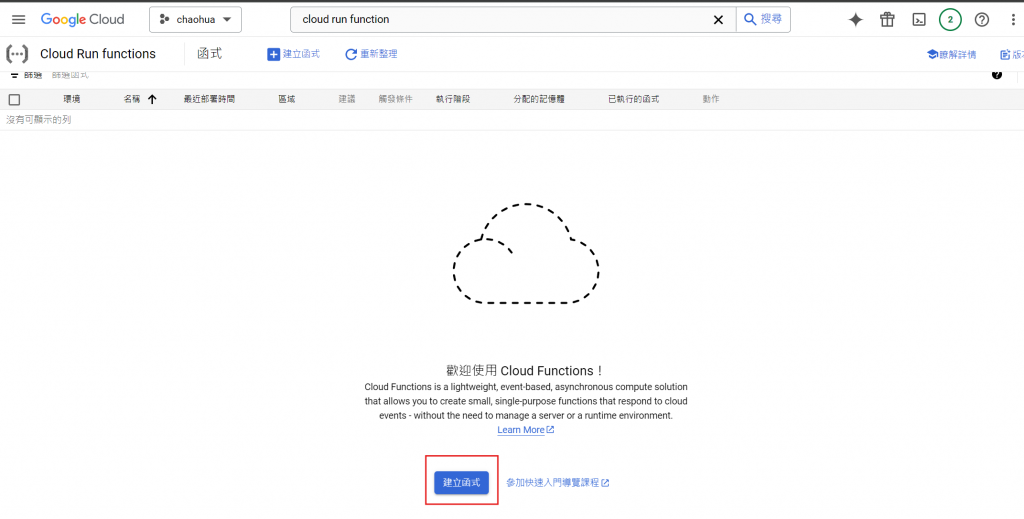
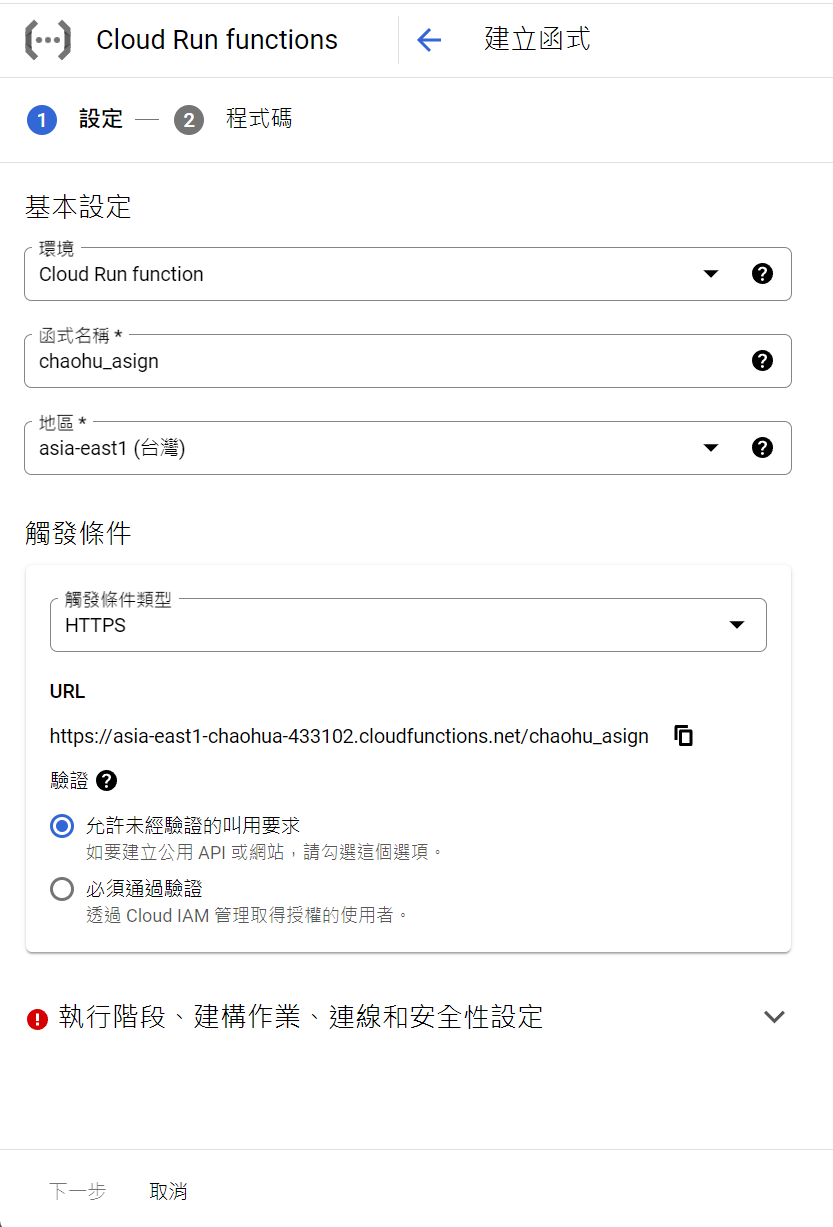
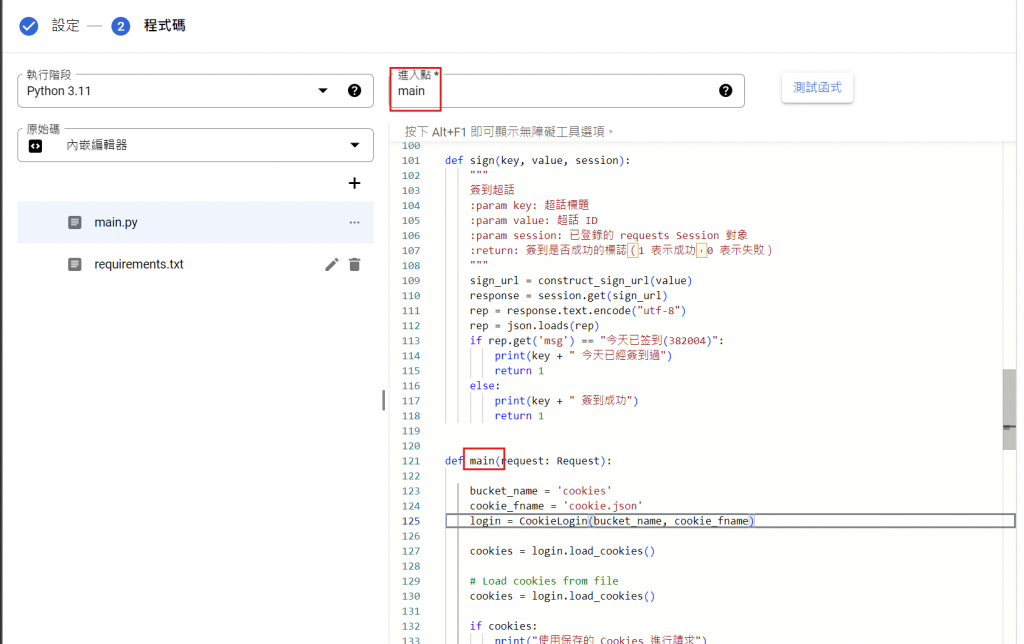

最後按下左下角的部署。
部署成功(顯示綠綠的)
可以複製URL去執行看看
import os
import json
from bs4 import BeautifulSoup
import requests
from selenium import webdriver
from time import sleep
from flask import Request, jsonify
from google.cloud import storage


class CookieLogin:
    def __init__(self, bucket_name, file_name):
        self.bucket_name = bucket_name
        self.file_name = file_name
        self.client = storage.Client()
        self.bucket = self.client.bucket(self.bucket_name)

    def save_cookies(self, data, encoding="utf-8"):
        try:
            blob = self.bucket.blob(self.file_name)
            blob.upload_from_string(json.dumps(data), content_type='application/json')
            print("Cookies 保存成功!")
        except Exception as e:
            print(f"保存 Cookies 時出錯: {e}")

    def load_cookies(self, encoding="utf-8"):
        blob = self.bucket.blob(self.file_name)
        if blob.exists():
            try:
                json_data = blob.download_as_text()
                user_cookies = json.loads(json_data)
                return user_cookies
            except (IOError, json.JSONDecodeError) as e:
                print(f"加載 Cookies 時出錯: {e}")
                return []
        else:
            print("Cookies 文件不存在")
            return []

def get_super_topic_list(session):
    """
    獲取微博超話列表
    :param session: 已登錄的 requests Session 對象
    :return: 包含超話標題和 ID 的字典
    """
    base_url = "https://weibo.com/ajax/profile/topicContent?tabid=231093_-_chaohua"
    page = 1
    all_topics = []

    while True:
        response = session.get(f"{base_url}&page={page}")  # 加上分頁參數
        json_data = json.loads(response.text)  # 將響應文本解析為 JSON 格式

        # 提取 JSON 中的超話列表數據
        topics = json_data.get('data', {}).get('list', [])
        if not topics:
            break  # 如果沒有更多數據,退出循環

        all_topics.extend(topics)  # 將當前頁面的超話添加到列表中
        page += 1  # 繼續到下一頁

    map = {}  # 初始化一個空字典來存儲超話標題和 ID
    for topic in all_topics:
        title = topic.get('title', 'N/A')  # 提取超話標題,默認為 'N/A'
        link = topic.get('link', 'N/A')  # 提取超話鏈接,默認為 'N/A'
        # 找到鏈接中最後一個斜杠的位置
        last_slash_index = link.rfind("/")
        # 獲取最後一個斜杠之後的所有字符,即超話 ID (唯一)
        id = link[last_slash_index + 1:] if last_slash_index != -1 else link
        map[title] = id  # 將超話標題和 ID 添加到字典中

    return map  # 返回包含超話標題和 ID 的字典

def construct_sign_url(value):
    """
    構建簽到請求的 URL
    :param value: 超話 ID
    :return: 完整的簽到請求 URL
    """
    base_url = "https://weibo.com/p/aj/general/button"
    params = {
        "ajwvr": "6",
        "api": "http://i.huati.weibo.com/aj/super/checkin",
        "texta": "%E7%AD%BE%E5%88%B0",
        "textb": "%E5%B7%B2%E7%AD%BE%E5%88%B0",
        "status": "0",
        "id": value,
        "location": "page_100808_super_index",
        "timezone": "GMT+0800",
        "lang": "zh-cn",
        "plat": "Win32",
        "ua": "Mozilla/5.0 (Windows NT 10.0; Win64; x64) AppleWebKit/537.36 (KHTML, like Gecko) Chrome/126.0.0.0 Safari/537.36 Edg/126.0.0.0",
        "screen": "2048*1152",
        "__rnd": "1720793419490"
    }
    query_string = '&'.join(f"{key}={value}" for key, value in params.items())
    full_url = f"{base_url}?{query_string}"
    return full_url


def sign(key, value, session):
    """
    簽到超話
    :param key: 超話標題
    :param value: 超話 ID
    :param session: 已登錄的 requests Session 對象
    :return: 簽到是否成功的標誌(1 表示成功,0 表示失敗)
    """
    sign_url = construct_sign_url(value)
    response = session.get(sign_url)
    rep = response.text.encode("utf-8")
    rep = json.loads(rep)
    if rep.get('msg') == "今天已签到(382004)":
        print(key + " 今天已經簽到過")
        return 1
    else:
        print(key + " 簽到成功")
        return 1


def main(request: Request):

    bucket_name = 'weibo_cookie'
    cookie_fname = 'cookie.json'
    login = CookieLogin(bucket_name, cookie_fname)

    cookies = login.load_cookies()

    # Load cookies from file
    cookies = login.load_cookies()

    if cookies:
        print("使用保存的 Cookies 進行請求")
        session = requests.Session()
        for cookie in cookies:
            session.cookies.set(cookie['name'], cookie['value'], domain=cookie['domain'])
        session.headers.update({
            "User-Agent": "Mozilla/5.0 (Windows NT 10.0; Win64; x64) AppleWebKit/537.36 (KHTML, like Gecko) Chrome/127.0.0.0 Safari/537.36 Edg/127.0.0.0"
        })

        url = "https://s.weibo.com/weibo?q=%E6%96%B0%E5%86%A0%E7%96%AB%E6%83%85"
        response = session.get(url)
        soup = BeautifulSoup(response.text, 'html.parser')

        try:
            user_info = soup.find('script', string=lambda t: t and 'var $CONFIG' in t)
            if user_info:
                script_content = user_info.string
                start_index = script_content.find('nick') + 10
                end_index = script_content.find(';', start_index)
                nick = script_content[start_index:end_index].strip().strip("'")
                print(f"用戶名: {nick}")
            else:
                print("未能找到用戶名")
        except Exception as e:
            print(f"提取用戶名時出錯: {e}")

        map = get_super_topic_list(session)

        success = 0
        fail = 0
        for key in map:
            if sign(key, map[key], session):
                success += 1
            else:
                fail += 1
        result = {
            "total": len(map),
            "success": success,
            "fail": fail
        }
        return jsonify(result)

    else:
        print("Cookies 不存在,使用 Selenium 進行登入")

        options = webdriver.ChromeOptions()
        options.add_experimental_option('prefs', {
            'profile.default_content_setting_values': {'notifications': 2},
            'credentials_enable_service': False,
            'profile.password_manager_enabled': False
        })
        options.add_experimental_option('excludeSwitches', ['enable-automation'])
        options.add_argument('--disable-gpu')

        wd = webdriver.Chrome(options=options)
        url = "https://passport.weibo.com/sso/signin?entry=miniblog&source=miniblog&disp=popup&url=https%3A%2F%2Fweibo.com%2Fnewlogin%3Ftabtype%3Dweibo%26gid%3D102803%26openLoginLayer%3D0%26url%3Dhttp%253A%252F%252Fmcn.weibo.com%252Fintroduce"
        wd.get(url=url)
        sleep(20)
        cookies = wd.get_cookies()
        login.save_cookies(cookies)
        wd.close()
        wd.quit()

        return jsonify({"status": "cookies_saved"})
functions-framework==3.*
requests==2.28.1
beautifulsoup4==4.12.2
Flask==2.3.0
google-cloud-storage
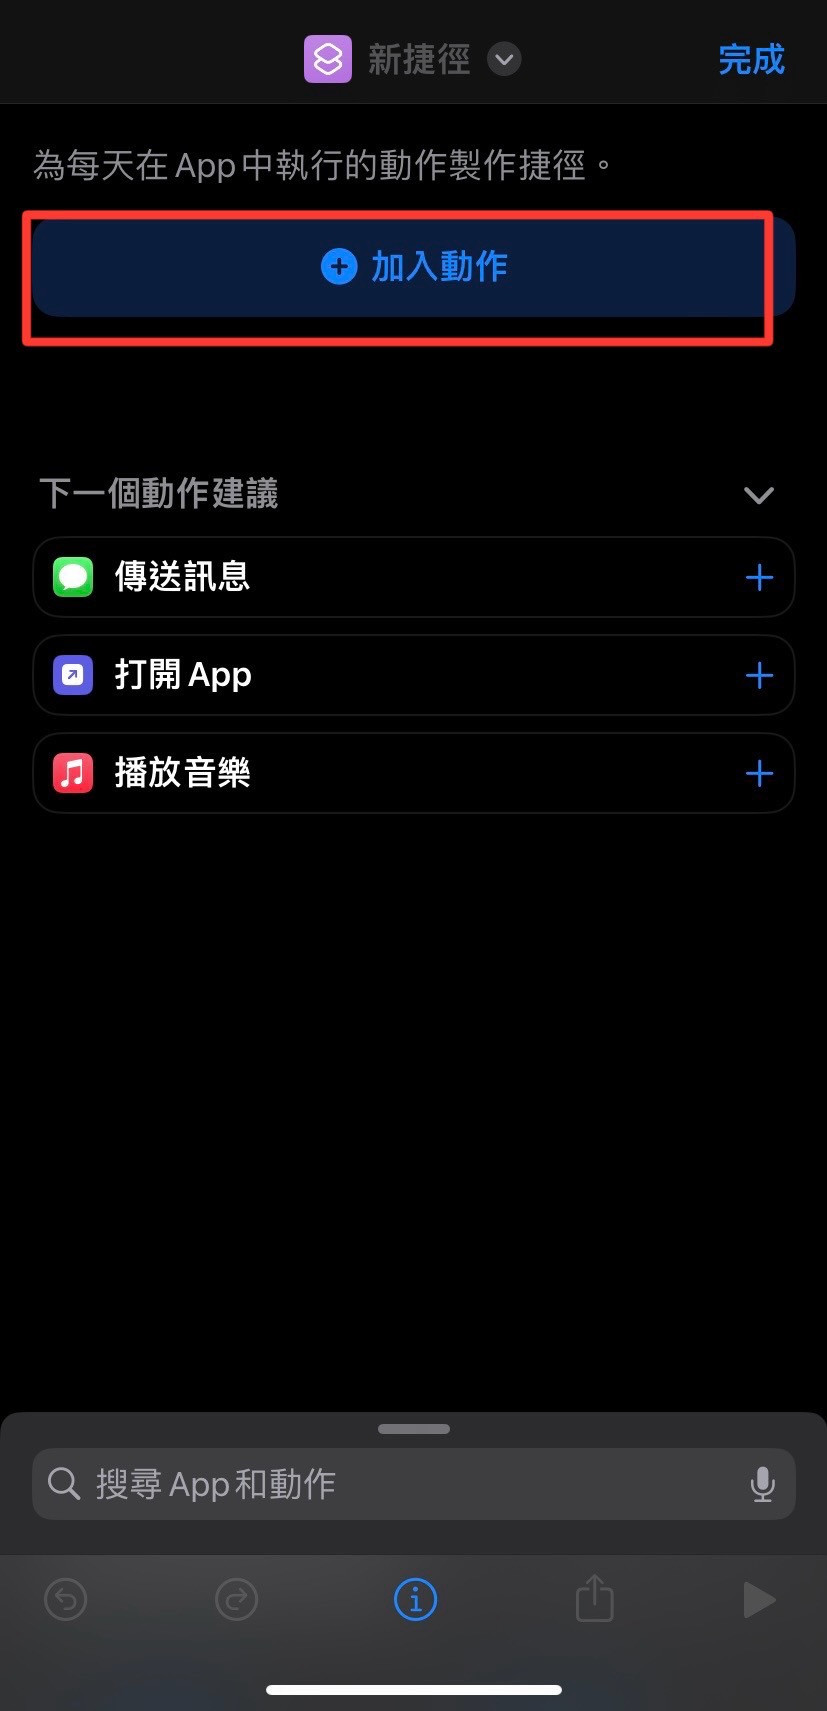
資料來源 :
https://steam.oxxostudio.tw/category/python/example/google-cloud-functions.html
