關於 inpainting,在 Day 14: Comfyui 測試2 中的 mask,原先我是自己做了一張 mask,是有更方便的方式可以處理的,被我給遺漏了。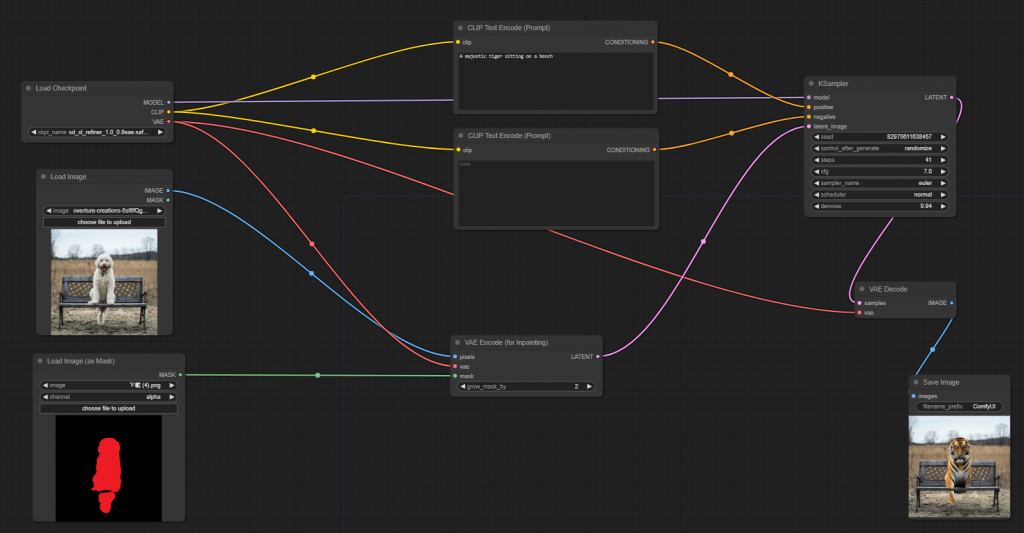
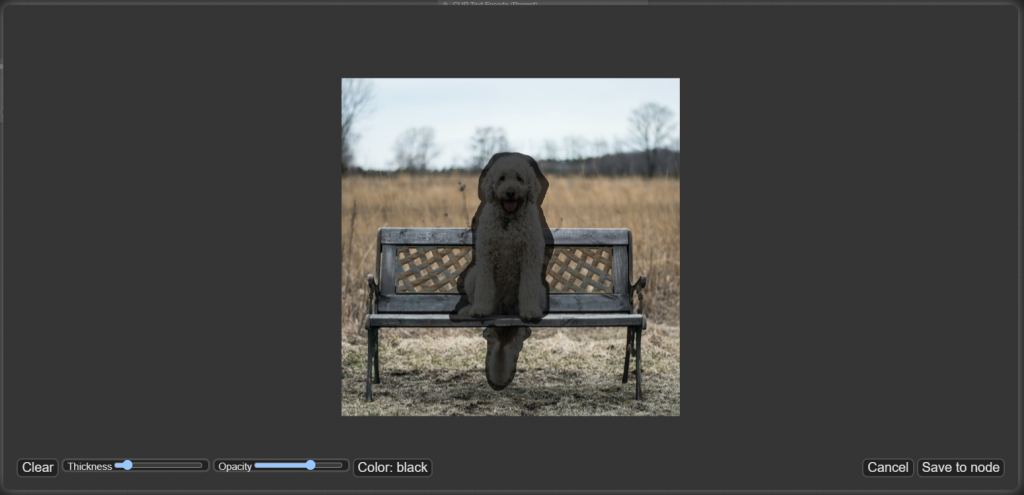
在 Load Image 這個 node 上按右鍵,點選 Open in MaskEditor,會跳出一個小視窗,可以直接用滑鼠在上頭畫出想要的 mask 位置,畫好後按右下角的 Save to node 即可。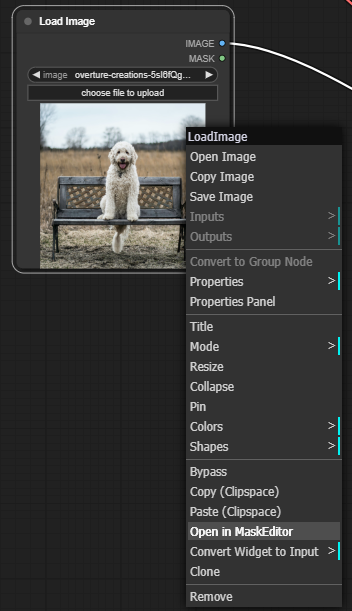
最後把 Load Image node 的 mask 輸出連到 VAE encoder(for inpainting),不需要另外開一個 Load Image(as Mask),可以直接運行。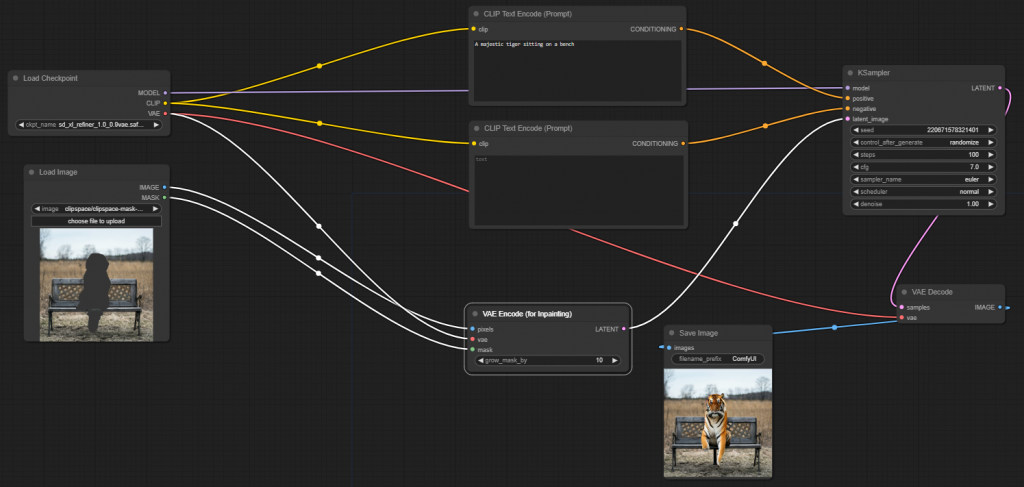
接著是 stable-video-diffusion,先把模型下載下來放到 checkpoints 資料夾下。
https://huggingface.co/stabilityai/stable-video-diffusion-img2vid-xt/tree/main
接下來開始建立流程,要產稱影片的話要用一個特別的 Checkpoint Loader,用來取代掉原本的 Load Checkpoint。這是專門用來讀取 圖片轉影片模型 的 node。
從這裡叫出來,loaders -> video_models -> Image Only Checkpoint Loader (img2vid model)。
https://comfyui-wiki.com/comfyui-nodes/loaders/video-models/image-only-checkpoint-loader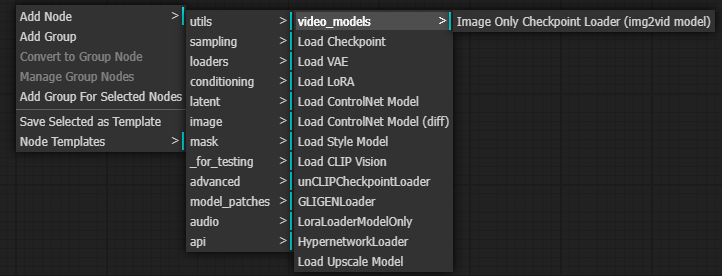
另外找不到的話,可以在空白處點兩下左鍵,會跳出搜尋框,可以直接打字搜尋要的節點。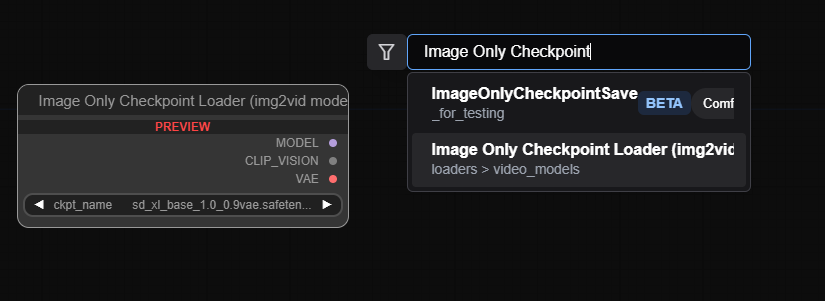
接下來我們需要多增加一個一個 SVD_img2vid_Conditioning。這是為 stable-video-diffusion 特製的,用來接收影像還有設定影像的各項參數。
位置在 conditioning -> video_models -> SVD_img2vid_Conditioning。
https://comfyui-wiki.com/comfyui-nodes/conditioning/video-models/svd-img2vid-conditioning.en-US#documentation
https://comfyui-wiki.com/comfyui-nodes/conditioning/video-models/svd-img2vid-conditioning.en-US#documentation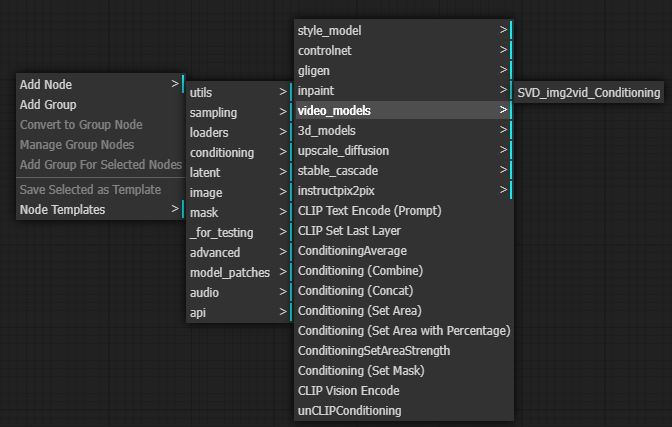
最後還需要加上一個 SaveAnimatedWEBP 用來把 產出的 Frame 組成 WEBP。在這 image -> animation -> SaveAnimatedWEBP。
https://comfyui-wiki.com/comfyui-nodes/image/animation/save-animated-webp.en-US#documentation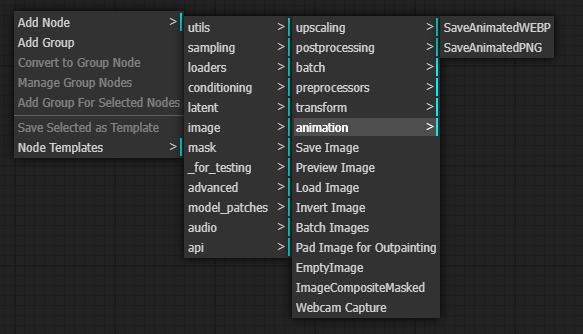
最後把它們像這樣組起來,就行了。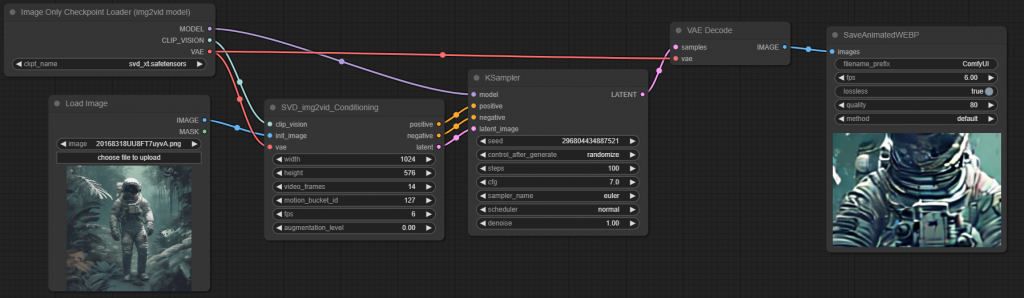
產出的影像可以按右鍵選 save image 存下來。
我們可以再加一個 VideoLinearCFGGuidance,可以提高影像品質。
sampling -> video_models -> VideoLinearCFGGuidance。
https://comfyui-wiki.com/comfyui-nodes/sampling/video-models/video-linear-cfg-guidance.en-US#documentation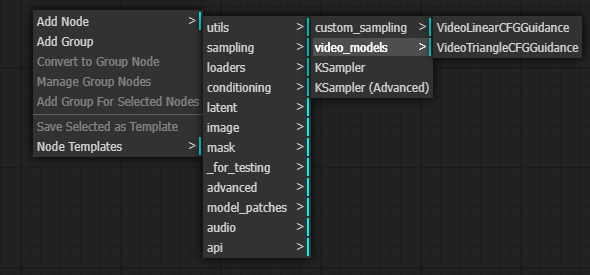
把它放在 Checkpoint Loader 跟 KSampler 之間即可。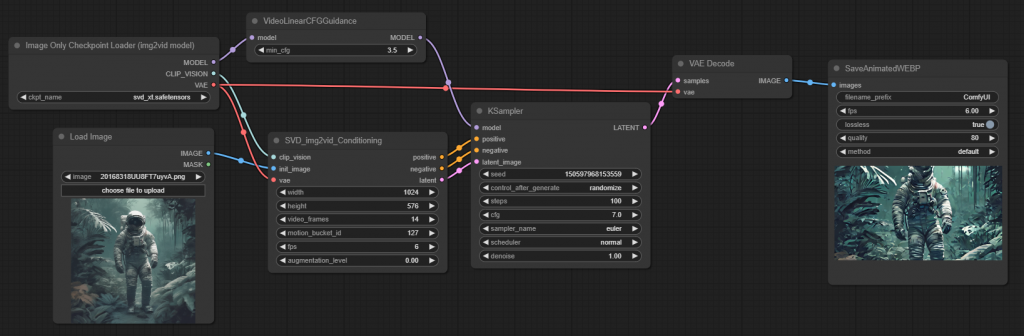
結果與之前的相比,清晰了許多