接下來移到 Colab 上測試,先把 discord.py 裝起來。
pip install -U discord.py
先串串看 Stable Diffusion,參考 Day 7,把 diffusers 裝起來,然後跑跑看 stable-diffusion。
就可以發現架不起來了。
覺得莫名其妙上去 huggingface 看,發現真的不見了。
https://huggingface.co/runwayml/stable-diffusion-v1-5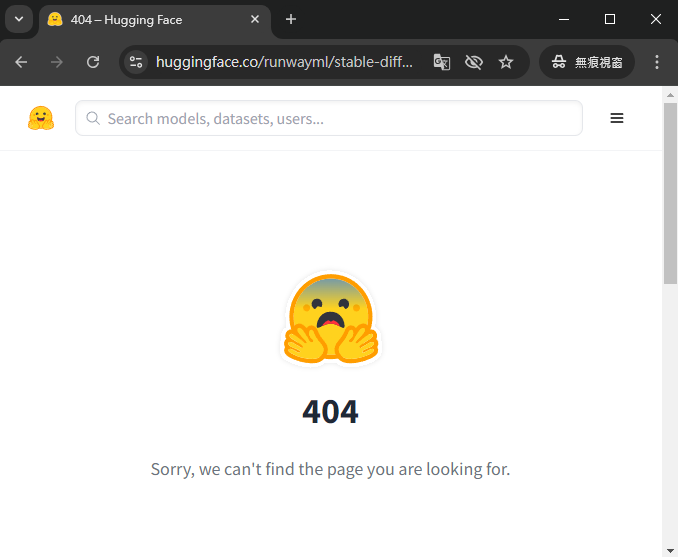
不過還好有 mirror (看了下時間,這是 9/6 建得,AI 發展得真快)。
https://huggingface.co/stable-diffusion-v1-5/stable-diffusion-v1-5
參照著他的說明來試跑一下。
from diffusers import StableDiffusionPipeline
import torch

model_id = "sd-legacy/stable-diffusion-v1-5"
pipe = StableDiffusionPipeline.from_pretrained(model_id, torch_dtype=torch.float16)
pipe = pipe.to("cuda")

prompt = "a photo of an astronaut riding a horse on mars"
image = pipe(prompt).images[0]
image
運行方式雖然跟之前不太一樣,不過也就是換 function 而已,看起來還是順順利利。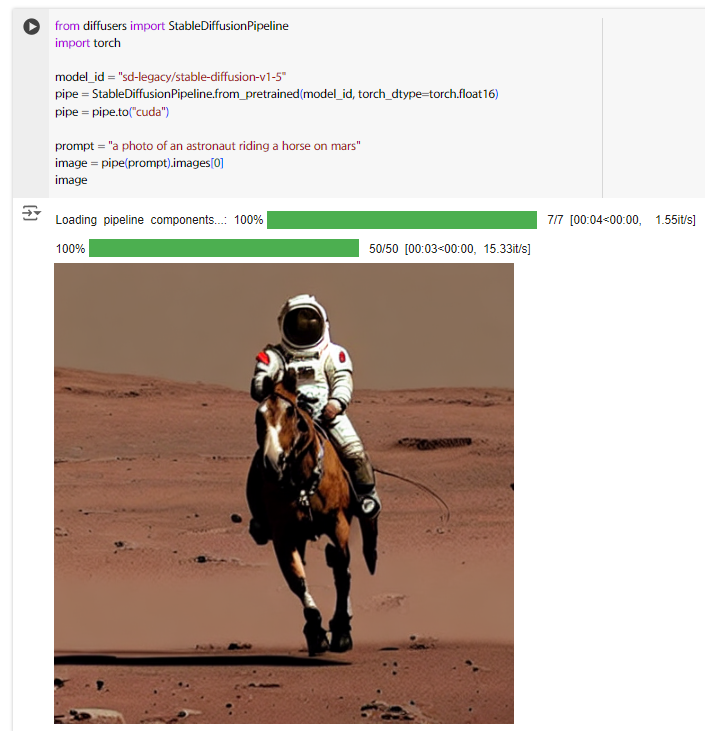
那就可以跟 discord bot 結合了,參考以下程式碼。
另外因為到 Colab 上使用,一樣要使用 nest_asyncio。
import discord
from discord.ext import commands
from diffusers import StableDiffusionPipeline
import torch
import nest_asyncio
nest_asyncio.apply()

model_id = "sd-legacy/stable-diffusion-v1-5"
pipe = StableDiffusionPipeline.from_pretrained(model_id, torch_dtype=torch.float16)
pipe = pipe.to("cuda")

intents = discord.Intents.default()
intents.message_content = True

bot = commands.Bot(command_prefix = "%", intents = intents)

@bot.event
async def on_ready():
    print(f"目前登入身份 --> {bot.user}")

@bot.command()
async def Hello(ctx):
    await ctx.send(f"Hello, {ctx.message.author.global_name}({ctx.message.author.name}).")

@bot.command()
async def StableDiffusion(ctx):
    prompt = ' '.join(str(ctx.message.content).split(' ')[1:])
    image = pipe(prompt).images[0]
    image.save(f"{ctx.message.author.id}.png")

    with open(f"{ctx.message.author.id}.png", "rb") as f:
        picture = discord.File(f)
        await ctx.send(file=picture)

bot.run("your discord token")
看起來是正常的。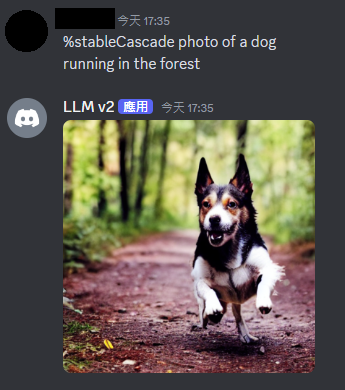
接著來測試看看 Stable Cascade,可以參考 Day 18 ~ Day 21 的說明。
環境裝完、config 改完、model 載好後 cd 到 /content/StableCascade 中,把前置作業處理完。
import yaml
import torch
from tqdm import tqdm

from inference.utils import *
from core.utils import load_or_fail
from train import WurstCoreC, WurstCoreB

device = torch.device("cuda:0" if torch.cuda.is_available() else "cpu")
print(device)

# SETUP STAGE C
config_file = 'configs/inference/stage_c_3b.yaml'
with open(config_file, "r", encoding="utf-8") as file:
    loaded_config = yaml.safe_load(file)

core = WurstCoreC(config_dict=loaded_config, device=device, training=False)

# SETUP STAGE B
config_file_b = 'configs/inference/stage_b_3b.yaml'
with open(config_file_b, "r", encoding="utf-8") as file:
    config_file_b = yaml.safe_load(file)

core_b = WurstCoreB(config_dict=config_file_b, device=device, training=False)

# SETUP MODELS & DATA
extras = core.setup_extras_pre()
models = core.setup_models(extras)
models.generator.eval().requires_grad_(False)
print("STAGE C READY")

extras_b = core_b.setup_extras_pre()
models_b = core_b.setup_models(extras_b, skip_clip=True)
models_b = WurstCoreB.Models(
   **{**models_b.to_dict(), 'tokenizer': models.tokenizer, 'text_model': models.text_model}
)
models_b.generator.bfloat16().eval().requires_grad_(False)
print("STAGE B READY")

models = WurstCoreC.Models(
   **{**models.to_dict(), 'generator': torch.compile(models.generator, mode="reduce-overhead", fullgraph=True)}
)

models_b = WurstCoreB.Models(
   **{**models_b.to_dict(), 'generator': torch.compile(models_b.generator, mode="reduce-overhead", fullgraph=True)}
)
把生成影像的部分包起來。
def createImage(caption):
  batch_size = 1
  height, width = 1024, 1024
  stage_c_latent_shape, stage_b_latent_shape = calculate_latent_sizes(height, width, batch_size=batch_size)

  # Stage C Parameters
  extras.sampling_configs['cfg'] = 4
  extras.sampling_configs['shift'] = 2
  extras.sampling_configs['timesteps'] = 20
  extras.sampling_configs['t_start'] = 1.0

  # Stage B Parameters
  extras_b.sampling_configs['cfg'] = 1.1
  extras_b.sampling_configs['shift'] = 1
  extras_b.sampling_configs['timesteps'] = 10
  extras_b.sampling_configs['t_start'] = 1.0

  # PREPARE CONDITIONS
  batch = {'captions': [caption] * batch_size}
  conditions = core.get_conditions(batch, models, extras, is_eval=True, is_unconditional=False, eval_image_embeds=False)
  unconditions = core.get_conditions(batch, models, extras, is_eval=True, is_unconditional=True, eval_image_embeds=False)
  conditions_b = core_b.get_conditions(batch, models_b, extras_b, is_eval=True, is_unconditional=False)
  unconditions_b = core_b.get_conditions(batch, models_b, extras_b, is_eval=True, is_unconditional=True)

  with torch.no_grad(), torch.cuda.amp.autocast(dtype=torch.float32):
      # torch.manual_seed(42)

      sampling_c = extras.gdf.sample(
          models.generator, conditions, stage_c_latent_shape,
          unconditions, device=device, **extras.sampling_configs,
      )
      for (sampled_c, _, _) in tqdm(sampling_c, total=extras.sampling_configs['timesteps']):
          sampled_c = sampled_c

      # preview_c = models.previewer(sampled_c).float()
      # show_images(preview_c)

      conditions_b['effnet'] = sampled_c
      unconditions_b['effnet'] = torch.zeros_like(sampled_c)

      sampling_b = extras_b.gdf.sample(
          models_b.generator, conditions_b, stage_b_latent_shape,
          unconditions_b, device=device, **extras_b.sampling_configs
      )
      for (sampled_b, _, _) in tqdm(sampling_b, total=extras_b.sampling_configs['timesteps']):
          sampled_b = sampled_b
      sampled = models_b.stage_a.decode(sampled_b).float()

  #image = show_images(sampled,return_images=True)
  return sampled[0]
最後完成 discord Bot 的程式。
import discord
from discord.ext import commands
import urllib.request
import torchvision
import nest_asyncio
nest_asyncio.apply()

intents = discord.Intents.default()
intents.message_content = True

bot = commands.Bot(command_prefix = "%", intents = intents)

@bot.event
async def on_ready():
    print(f"目前登入身份 --> {bot.user}")

@bot.command()
async def Hello(ctx):
    await ctx.send(f"Hello, {ctx.message.author.global_name}({ctx.message.author.name}).")

async def runCreateImage(func, message):
    return await bot.loop.run_in_executor(None, func, message)

@bot.command()
async def stableCascade(ctx):
    message = ' '.join(str(ctx.message.content).split(' ')[1:])

    image = await runCreateImage(createImage, message)
    image = torchvision.transforms.functional.to_pil_image(image.clamp(0, 1))
    image.save(f"{ctx.message.author.id}.png")

    with open(f"{ctx.message.author.id}.png", "rb") as f:
        image = discord.File(f)
        await ctx.send(file=image)

bot.run("your discord token")
結果: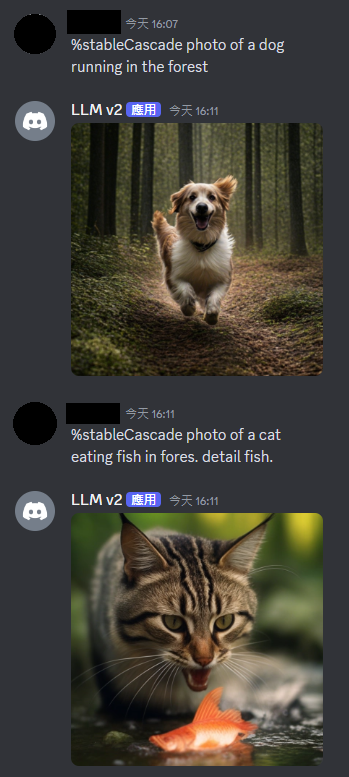


 iThome鐵人賽