接下來移到 colab 上,試試跟 VisualGLM-6B 結合。
一樣參考 Day2 裝環境,接著參考 Day 25 後半段,clone 的方式使用模型。
架好後,一樣把模型讀載下來。
import argparse
from transformers import AutoTokenizer
tokenizer = AutoTokenizer.from_pretrained("THUDM/chatglm-6b", trust_remote_code=True)
from model import chat, VisualGLMModel
model, model_args = VisualGLMModel.from_pretrained('visualglm-6b', args=argparse.Namespace(fp16=True, skip_init=True))
from sat.model.mixins import CachedAutoregressiveMixin
model.add_mixin('auto-regressive', CachedAutoregressiveMixin())
參考以下程式碼,因為是在 colab 上運行,一樣要使用 nest_asyncio。
import logging
from telegram import Update
from telegram.ext import ApplicationBuilder, ContextTypes, CommandHandler, MessageHandler, filters
import nest_asyncio
nest_asyncio.apply()

# Configure logging
logging.basicConfig(
    format='%(asctime)s - %(name)s - %(levelname)s - %(message)s',
    level=logging.INFO
)

history = []
cache_image = None

# Define command handlers
async def start(update: Update, context: ContextTypes.DEFAULT_TYPE):
    await context.bot.send_message(
        chat_id=update.effective_chat.id,
        text="I'm a bot, please talk to me!"
    )

async def ask(update: Update, context: ContextTypes.DEFAULT_TYPE):
    global history, cache_image
    response, history, cache_image = chat(None, model, tokenizer, update.message.text, history=history, image=cache_image)
    await context.bot.send_message(chat_id=update.effective_chat.id, text=response)

async def sendImage(update: Update, context: ContextTypes.DEFAULT_TYPE):
    global history, cache_image
    image = await update.message.effective_attachment.get_file()
    await image.download_to_drive(f'{update.effective_chat.id}.png')

    response, history, cache_image = chat(f'{update.effective_chat.id}.png', model, tokenizer, "描述這張圖片", history=history)
    await context.bot.send_message(
        chat_id = update.effective_chat.id,
        text = response
    )

# Entry point for the script
if __name__ == '__main__':
    token = 'your tg token'

    # Create the application builder and build the application
    application = ApplicationBuilder().token(token).build()

    # Add command handlers
    application.add_handler(CommandHandler('start', start))

    application.add_handler(CommandHandler('ask', ask))

    # Add message handler for sending images
    application.add_handler(MessageHandler(filters.Caption('/sendImage'), sendImage))

    # Start the bot
    application.run_polling()
結果如下。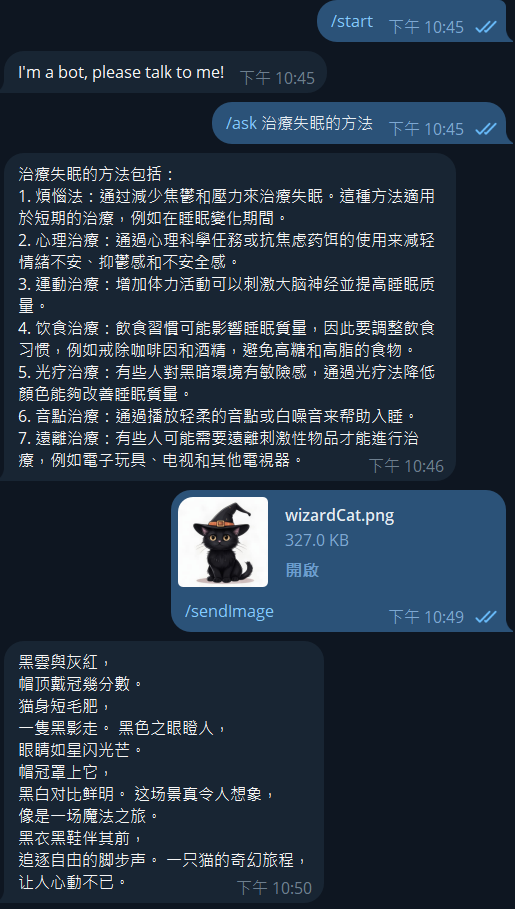
接著來串串看 Gemini API。
參考 Day 3 把環境建好,並輸入 api_key
import google.generativeai as genai
genai.configure(api_key='your api key')
model = genai.GenerativeModel('gemini-1.5-pro')
接著改寫機器人程式。
import logging
from telegram import Update
from telegram.ext import ApplicationBuilder, ContextTypes, CommandHandler, MessageHandler, filters
import PIL.Image
import nest_asyncio
nest_asyncio.apply()

# Configure logging
logging.basicConfig(
    format='%(asctime)s - %(name)s - %(levelname)s - %(message)s',
    level=logging.INFO
)

cache_chat = None
cache_image = None

# Define command handlers
async def start(update: Update, context: ContextTypes.DEFAULT_TYPE):
    await context.bot.send_message(
        chat_id=update.effective_chat.id,
        text="I'm a bot, please talk to me!"
    )
async def ask(update: Update, context: ContextTypes.DEFAULT_TYPE):
    global cache_chat, cache_image
    if cache_chat == None:
       cache_chat = model.start_chat(history=[])
    response = cache_chat.send_message(update.message.text)
    await context.bot.send_message(chat_id=update.effective_chat.id, text=response.text)

async def sendImage(update: Update, context: ContextTypes.DEFAULT_TYPE):
    global history, cache_image
    image = await update.message.effective_attachment.get_file()
    await image.download_to_drive(f'{update.effective_chat.id}.png')

    img = PIL.Image.open(f'{update.effective_chat.id}.png')
    response = model.generate_content(img)

    await context.bot.send_message(
        chat_id = update.effective_chat.id,
        text = response.text
    )

# Entry point for the script
if __name__ == '__main__':
    token = 'your tg token'

    # Create the application builder and build the application
    application = ApplicationBuilder().token(token).build()

    # Add command handlers
    application.add_handler(CommandHandler('start', start))

    application.add_handler(CommandHandler('ask', ask))

    # Add message handler for sending images
    application.add_handler(MessageHandler(filters.Caption('/sendImage'), sendImage))

    # Start the bot
    application.run_polling()
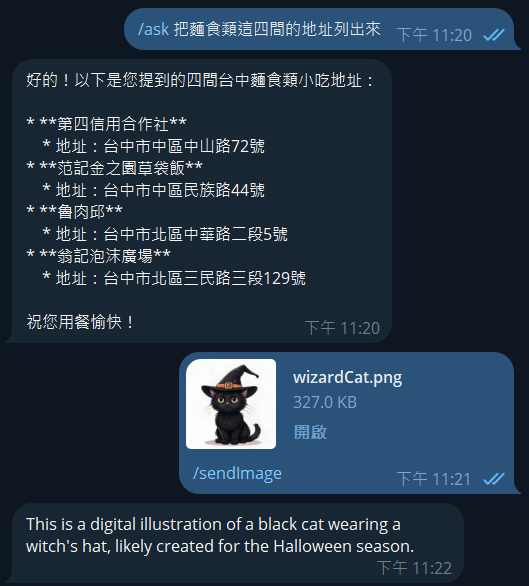
結果如下,測試了所有功能。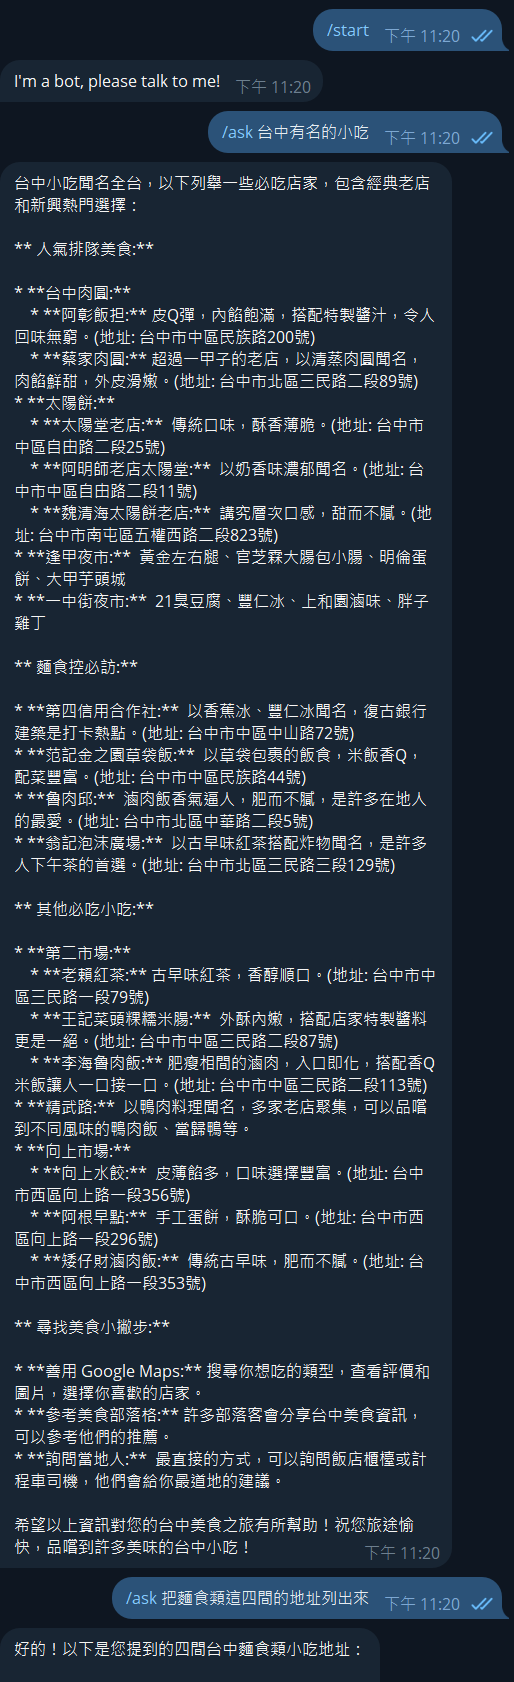
最後是關於剛剛說的,對話是共通的部分。
拿另一個帳號加這個機器人,接續著剛剛的問題繼續問,會發先他是會接著回答的。我沒有另外處理這個問題,要提供給多人使用時要再調整過程式。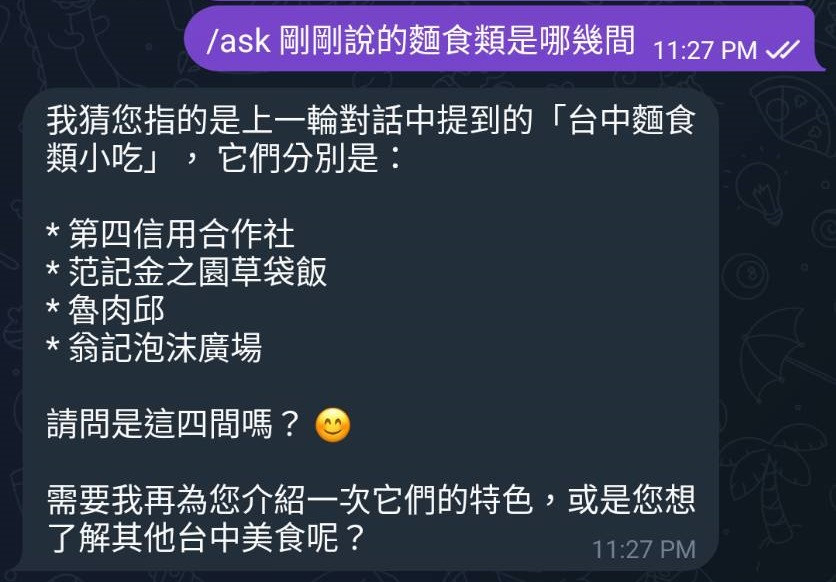


 iThome鐵人賽