我們現在需要管理後台 來管理我們自己的版面
因此我們需要做登入的功能
我們這邊使用Authjs來實作
首先我們需要先安裝Authjs
pnpm install next-auth@beta
NextAuth已經更新到第五版 並且改名叫做authjs
然後讓authjs幫你建立salt跟secret
npx auth secret
在src/auth.ts中實作
import NextAuth from "next-auth";
import Credentials from "next-auth/providers/credentials";

import { NextRequest, NextResponse } from "next/server";
import { Session } from "next-auth";

export const { auth, handlers, signIn, signOut } = NextAuth({
  providers: [
    Credentials({
      credentials: {
        email: {},
        password: {},
      },
      authorize: async (credentials) => {
        let user = null;

        const { email, password } = credentials;

        if (
          email === process.env.LOGIN_EMAIL &&
          password === process.env.LOGIN_PASSWORD
        ) {
          user = {
            id: "admin",
            email: "admin@gmail.com",
            name: "admin",
          };
        }

        if (!user) {
          throw new Error("User not found.");
        }

        return user;
      },
    }),
  ],

  logger: {
    error: (code, ...message) => {
      console.error(code, message);
    },
    warn: (code, ...message) => {
      console.warn(code, JSON.stringify(message));
    },
    debug: (code, ...message) => {
      console.debug(code, JSON.stringify(message));
    },
  },

  callbacks: {
    async jwt({ token, account, profile }) {
      if (account) {
        token.sub = `${account.providerAccountId}`;
      }
      return token;
    },

    async session({ session, token, user }) {
      if (token.sub) {
        session.user.id = token.sub;
      }
      return session;
    },
  },
});

export interface NextAuthRequest extends NextRequest {
  auth: Session | null;
}

export const handleAuth = (
  handler: (req: NextAuthRequest, res: any) => Promise<NextResponse>
) => {
  return auth(async (req, res) => {
    if (!req.auth) {
      return NextResponse.json({ error: "Not authenticated" }, { status: 401 });
    }
    return handler(req, res);
  });
};
我們先暫時用帳號密碼登入 就先不寫入DB 而是直接寫死
const { email, password } = credentials;

if (
  email === process.env.LOGIN_EMAIL &&
  password === process.env.LOGIN_PASSWORD
) {
  user = {
    id: "admin",
    email: "admin@gmail.com",
    name: "admin",
  };
}
為了要讓authjs登入 我們需要在.env.local內新增以下的環境變數
# 你想要的登入的帳號密碼
LOGIN_EMAIL=""
LOGIN_PASSWORD=""

# 下面兩個是剛剛authjs幫你產生的環境變數 通常不需要去動它
AUTH_SALT=...
AUTH_SECRET="..."
你也可以使用接DB的方式 將帳號密碼存在DB內
如果你想要使用google登入 可以參考這裡
寫法大概會是
import Google from 'next-auth/providers/google';
.
.
.
providers: [Google],
不過你會需要去google cloud 申請一個OAuth client ID 跟 client secret
我們這裡就先不做 之後如果有空我們再來玩這個
然後在src/app/api/auth/[...nextauth]/route.ts中實作
import { handlers } from "@/auth";
export const { GET, POST } = handlers;
這個是authjs的預設寫法 你只需要把handlers import進來
他會接手你的登入與登出流程 可以不用管他
先安裝今天會用到的套件
npx shadcn@latest add dropdown-menu alert-dialog
修改你的src/app/layout.tsx
import type { Metadata } from "next";
import { Inter } from "next/font/google";
import "./globals.css";

import { SessionProvider } from "next-auth/react";

const inter = Inter({ subsets: ["latin"] });

export const metadata: Metadata = {
  title: "Create Next App",
  description: "Generated by create next app",
};

export default function RootLayout({
  children,
}: Readonly<{
  children: React.ReactNode;
}>) {
  return (
    <html lang="en">
      <SessionProvider>
        <body className={inter.className}>{children}</body>
      </SessionProvider>
    </html>
  );
}
import React from "react";
import { notFound } from "next/navigation";

import { getService } from "@/lib/database/service";

import { ProfileButton } from "@/components/service/ProfileButton";
import { auth } from "@/auth";
import Link from "next/link";
import { Button } from "@/components/ui/button";
import { Github } from "lucide-react";
import ServiceEditor from "@/components/service/ServiceEditor";
export default async function Page({
  params,
}: {
  params: { serviceId: string };
}) {
  const service = await getService({ serviceId: params.serviceId });
  if (!service) {
    return notFound();
  }

  const session = await auth();
  const userId = session?.user?.id;

  return (
    <div className="container mx-auto space-y-4 max-w-4xl">
      <div className="flex items-center justify-between py-4 border-b">
        <Link href="/" passHref>
          <Button variant="link" className="text-2xl font-bold p-0">
            Akraft
          </Button>
        </Link>
        <nav className="flex items-center space-x-2">
          <Button variant="ghost">About</Button>
          <Button variant="outline" size="icon" asChild>
            <Link
              href="https://github.com/skynocover/akraft"
              target="_blank"
              rel="noopener noreferrer"
            >
              <Github className="h-[1.2rem] w-[1.2rem]" />
              <span className="sr-only">GitHub</span>
            </Link>
          </Button>
          <ProfileButton />
        </nav>
      </div>
      {userId === "admin" ? (
        <>
          <ServiceEditor service={service} serviceId={params.serviceId} />
        </>
      ) : (
        <>
          <div
            className="bg-red-100 border border-red-400 text-red-700 px-4 py-3 rounded relative"
            role="alert"
          >
            <strong className="font-bold">Error:</strong>
            <span className="block sm:inline">
              You are not the owner of this service。
            </span>
          </div>
        </>
      )}
    </div>
  );
}
這裡有一行const session = await auth();
這個是authjs的function 他會回傳一個session 裡面包含了user的資訊
這裡的session.use.id來自於剛剛在auth.ts裡面設定的
callbacks: {
    async jwt({ token, account, profile }) {
      if (account) {
        token.sub = `${account.providerAccountId}`; // 這裡
      }
      return token;
    },

    async session({ session, token, user }) {
      if (token.sub) {
        session.user.id = token.sub; // 跟這裡
      }
      return session;
    },
  },
接著新增src/components/commons/LoadingOverlay.tsx
這個是pending畫面 我們在serviceEditor裡面會用到
"use client";
import React from "react";
import { Loader2 } from "lucide-react";

interface LoadingOverlayProps {
  isLoading: boolean;
  children: React.ReactNode;
}

const LoadingOverlay: React.FC<LoadingOverlayProps> = ({
  isLoading,
  children,
}) => {
  return (
    <div className="relative">
      {children}
      {isLoading && (
        <div className="absolute inset-0 bg-background/50 flex items-center justify-center backdrop-blur-sm">
          <Loader2 className="h-8 w-8 animate-spin text-primary" />
        </div>
      )}
    </div>
  );
};

export default LoadingOverlay;
然後新增src/components/service/ProfileButton.tsx
"use client";

import React from "react";
import { signIn, signOut, useSession } from "next-auth/react";
import { Button } from "@/components/ui/button";
import { User, LogIn } from "lucide-react";
import {
  DropdownMenu,
  DropdownMenuContent,
  DropdownMenuItem,
  DropdownMenuLabel,
  DropdownMenuSeparator,
  DropdownMenuTrigger,
} from "@/components/ui/dropdown-menu";

export const ProfileButton: React.FC = () => {
  const { data: session, status } = useSession();

  if (status === "loading") {
    return <Button variant="outline">Loading...</Button>;
  }

  if (status === "unauthenticated") {
    return (
      <Button variant="outline" onClick={() => signIn()}>
        <LogIn className="mr-2 h-4 w-4" />
        Login
      </Button>
    );
  }

  return (
    <DropdownMenu>
      <DropdownMenuTrigger asChild>
        <Button variant="outline">
          <User className="mr-2 h-4 w-4" />
          {session?.user?.name}
        </Button>
      </DropdownMenuTrigger>
      <DropdownMenuContent>
        <DropdownMenuLabel>UserID: {session?.user?.id}</DropdownMenuLabel>
        <DropdownMenuSeparator />
        <DropdownMenuSeparator />
        <DropdownMenuItem onClick={() => signOut()}>Logout</DropdownMenuItem>
      </DropdownMenuContent>
    </DropdownMenu>
  );
};
以及src/components/service/ServiceEditor.tsx
"use client";
import React, { useState } from "react";
import axios from "axios";
import { Plus, Trash2, Save, X } from "lucide-react";

import { ILinkItem } from "../layout/Title";
import { ServicesRecord } from "@/xata";
import { useRouter } from "next/navigation";
import { Button } from "@/components/ui/button";
import { Input } from "@/components/ui/input";
import { Textarea } from "@/components/ui/textarea";
import { Card, CardContent, CardHeader, CardTitle } from "@/components/ui/card";
import { Tabs, TabsList, TabsTrigger, TabsContent } from "@/components/ui/tabs";
import {
  AlertDialog,
  AlertDialogAction,
  AlertDialogCancel,
  AlertDialogContent,
  AlertDialogDescription,
  AlertDialogFooter,
  AlertDialogHeader,
  AlertDialogTitle,
  AlertDialogTrigger,
} from "@/components/ui/alert-dialog";
import LoadingOverlay from "../commons/LoadingOverlay";

interface ServiceEditorProps {
  service: ServicesRecord;
  serviceId: string;
}

const ServiceEditor: React.FC<ServiceEditorProps> = ({
  service,
  serviceId,
}) => {
  const router = useRouter();
  const [editedService, setEditedService] = useState<ServicesRecord>(service);
  const [isLoading, setIsLoading] = useState(false);

  const handleInputChange = (
    e: React.ChangeEvent<HTMLInputElement | HTMLTextAreaElement>
  ) => {
    const { name, value } = e.target;
    setEditedService({ ...editedService, [name]: value });
  };

  const handleLinkChange = (links: ILinkItem[], key: keyof ServicesRecord) => {
    setEditedService({ ...editedService, [key]: links });
  };

  const handleSave = async () => {
    setIsLoading(true);
    try {
      const serviceToSave: ServicesRecord = {
        ...editedService,
      };
      await axios.put(`/api/service/${serviceId}`, serviceToSave);
      router.refresh();
    } catch (error) {
      console.error("Error saving service:", error);
    } finally {
      setIsLoading(false);
    }
  };

  const handleDelete = async () => {
    setIsLoading(true);
    try {
      await axios.delete(`/api/service/${service.id}`);
      router.push("/services");
    } catch (error) {
      console.error("Error deleting service:", error);
    } finally {
      setIsLoading(false);
    }
  };

  return (
    <LoadingOverlay isLoading={isLoading}>
      <Card className="w-full">
        <CardHeader>
          <CardTitle>
            <Input
              name="name"
              value={editedService.name || ""}
              onChange={handleInputChange}
              placeholder="Service Name"
              className="text-2xl font-bold"
            />
          </CardTitle>
        </CardHeader>
        <CardContent className="space-y-6">
          <Textarea
            name="description"
            value={editedService.description || ""}
            onChange={handleInputChange}
            placeholder="Description"
            className="min-h-[100px]"
          />

          <Tabs defaultValue="topLinks" className="w-full">
            <TabsList className="grid w-full grid-cols-5">
              <TabsTrigger value="topLinks">Top Links</TabsTrigger>
              <TabsTrigger value="headLinks">Head Links</TabsTrigger>
            </TabsList>

            <TabsContent value="topLinks">
              <Card>
                <CardContent className="pt-6">
                  <LinkEditor
                    links={editedService.topLinks || []}
                    onLinksChange={(links) =>
                      handleLinkChange(links, "topLinks")
                    }
                  />
                </CardContent>
              </Card>
            </TabsContent>

            <TabsContent value="headLinks">
              <Card>
                <CardContent className="pt-6">
                  <LinkEditor
                    links={editedService.headLinks || []}
                    onLinksChange={(links) =>
                      handleLinkChange(links, "headLinks")
                    }
                  />
                </CardContent>
              </Card>
            </TabsContent>
          </Tabs>

          <div className="flex justify-between items-center mt-8">
            <AlertDialog>
              <AlertDialogTrigger asChild>
                <Button variant="destructive" size="icon">
                  <Trash2 className="h-4 w-4" />
                </Button>
              </AlertDialogTrigger>
              <AlertDialogContent>
                <AlertDialogHeader>
                  <AlertDialogTitle>
                    Are you sure you want to delete this service?
                  </AlertDialogTitle>
                  <AlertDialogDescription>
                    This action cannot be undone. This will permanently delete
                    the service and all associated data.
                  </AlertDialogDescription>
                </AlertDialogHeader>
                <AlertDialogFooter>
                  <AlertDialogCancel>Cancel</AlertDialogCancel>
                  <AlertDialogAction onClick={handleDelete}>
                    Delete
                  </AlertDialogAction>
                </AlertDialogFooter>
              </AlertDialogContent>
            </AlertDialog>
            <Button onClick={handleSave} size="icon">
              <Save className="h-4 w-4" />
            </Button>
          </div>
        </CardContent>
      </Card>
    </LoadingOverlay>
  );
};

interface LinkEditorProps {
  links: ILinkItem[];
  onLinksChange: (links: ILinkItem[]) => void;
}

const LinkEditor: React.FC<LinkEditorProps> = ({ links, onLinksChange }) => {
  const [localLinks, setLocalLinks] = useState<ILinkItem[]>(links);

  const handleLinkChange = (
    index: number,
    field: keyof ILinkItem,
    value: string
  ) => {
    const newLinks = [...localLinks];
    newLinks[index] = { ...newLinks[index], [field]: value };
    setLocalLinks(newLinks);
    onLinksChange(newLinks);
  };

  const handleAddLink = () => {
    const newLinks = [...localLinks, { name: "", url: "" }];
    setLocalLinks(newLinks);
    onLinksChange(newLinks);
  };

  const handleRemoveLink = (index: number) => {
    const newLinks = localLinks.filter((_, i) => i !== index);
    setLocalLinks(newLinks);
    onLinksChange(newLinks);
  };

  return (
    <div className="space-y-4">
      {localLinks.map((link, index) => (
        <div key={index} className="flex items-center space-x-2">
          <Input
            value={link.name}
            onChange={(e) => handleLinkChange(index, "name", e.target.value)}
            placeholder="Link Name"
            className="flex-1"
          />
          <Input
            value={link.url}
            onChange={(e) => handleLinkChange(index, "url", e.target.value)}
            placeholder="Link URL"
            className="flex-1"
          />
          <Button
            onClick={() => handleRemoveLink(index)}
            size="icon"
            variant="ghost"
          >
            <X className="h-4 w-4" />
          </Button>
        </div>
      ))}
      <Button onClick={handleAddLink} variant="outline" className="w-full">
        <Plus className="h-4 w-4 mr-2" /> Add Link
      </Button>
    </div>
  );
};

export default ServiceEditor;
然後我們進入到
你會看到你被擋住了
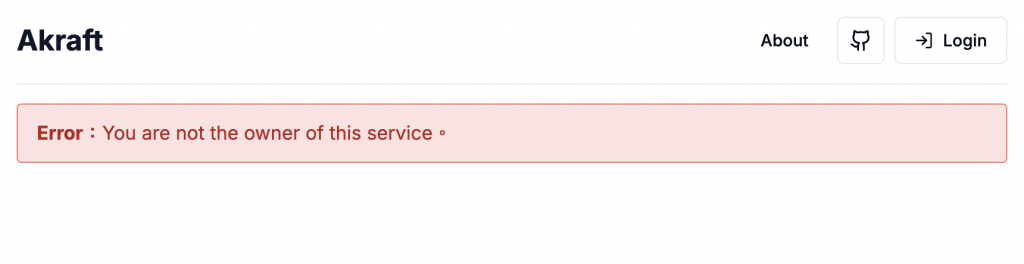
因為你還沒有登入
也就是這裡
{userId === "admin" ? (
  <>
    <ServiceEditor service={service} serviceId={params.serviceId} />
  </>
) : (
  <>
    <div
      className="bg-red-100 border border-red-400 text-red-700 px-4 py-3 rounded relative"
      role="alert"
    >
      <strong className="font-bold">Error:</strong>
      <span className="block sm:inline">
        You are not the owner of this service。
      </span>
    </div>
  </>
)}
點選右上角的Login按鈕
你會來到
http://localhost:3000/api/auth/signin?callbackUrl=http%3A%2F%2Flocalhost%3A3000%2Fdashboard%2Fmain
這個網址
你會看到以下的畫面
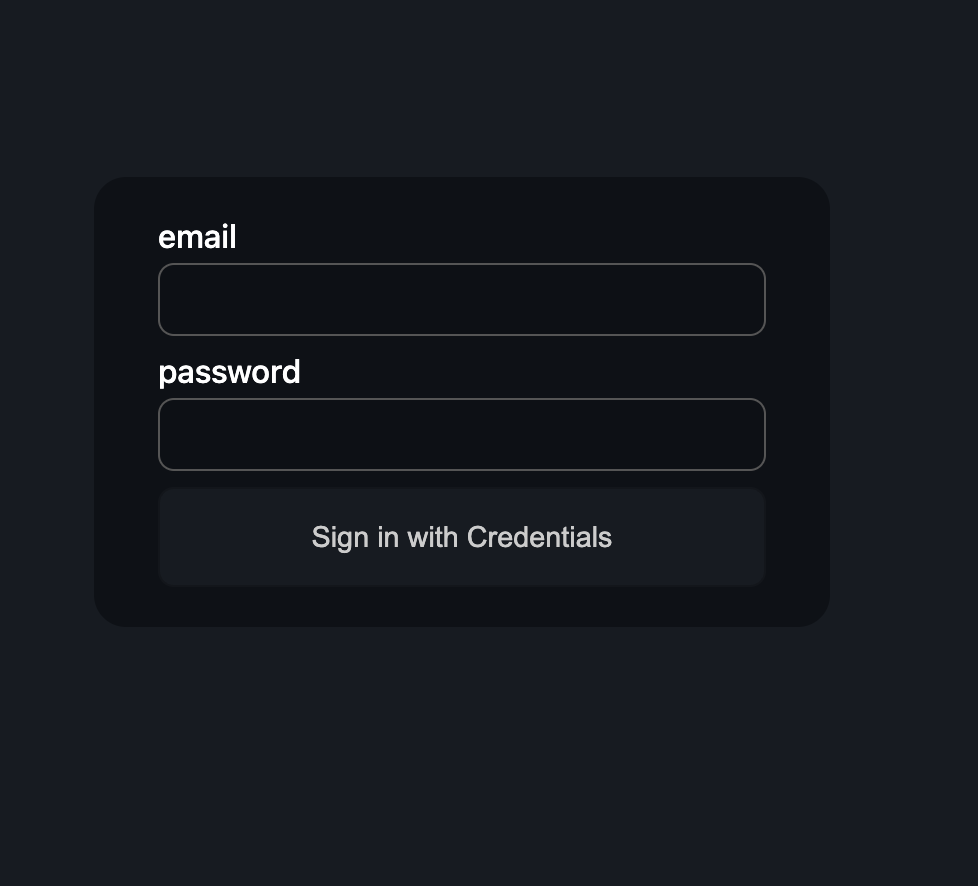
這個api/auth/...路徑就是我們剛剛建立的api路徑api/auth/[...nextauth]/route.ts
這裡的畫面是由authjs幫你生成的
然後輸入你在環境變數內打的帳號密碼來登入吧
然後你就可以看到登入的畫面了
你可以嘗試點看看右上角的user圖示來登出看看
我們今天安裝了authjs 並且實作了登入的流程
然後使用登入的session來確認是否為admin
並且之後登入與登出的功能 都轉交由authjs的api來處理
這樣的好處是 你不需要自己寫登入的邏輯
明天我們來實作修改service的api的
也就是我們今天在ServiceEditor裡面實作的handleSave
await axios.put(`/api/service/${serviceId}`, serviceToSave);