我們採用Stripe,它有幾個優點。
註冊過程有中文,大家應該可以自己完成
提醒一下,註冊時的國家請選擇美國。
@Entity
@Table(name = "orders")
public class Order {
    @Id
    @GeneratedValue(strategy = GenerationType.IDENTITY)
    private Long id;

    private String sessionId;
    private Integer amount;
    private String status;
@Column(length = 1024)設定這個欄位的上限是1024字元。
因為URL可能很長,所以另外設定。
    @Column(length = 1024)
    private String url;
    private Long userId;

    public Order(){

    }

    public Order(Long id, String sessionId, Integer amount, String status, String url, Long userId) {
        this.id = id;
        this.sessionId = sessionId;
        this.amount = amount;
        this.status = status;
        this.url = url;
        this.userId = userId;
    }

    public Long getId() {
        return id;
    }

    public void setId(Long id) {
        this.id = id;
    }

    public String getSessionId() {
        return sessionId;
    }

    public void setSessionId(String sessionId) {
        this.sessionId = sessionId;
    }

    public Integer getAmount() {
        return amount;
    }

    public void setAmount(Integer amount) {
        this.amount = amount;
    }

    public String getStatus() {
        return status;
    }

    public void setStatus(String status) {
        this.status = status;
    }

    public String getUrl() {
        return url;
    }

    public void setUrl(String url) {
        this.url = url;
    }

    public Long getUserId() {
        return userId;
    }

    public void setUserId(Long userId) {
        this.userId = userId;
    }
}
當Order entity的userId和傳入的userId相同時,才符合條件,代表是指定用戶的訂單。
public interface OrderRepository extends JpaRepository<Order, Long> {
    @Query("SELECT o FROM Order o WHERE o.userId = :userId")
    public List<Order> findOrderByUserId(@Param("userId") Long userId);
}
在開始編寫Service部分前,我們先前往Stripe,取得API金鑰。
登入後,前往https://dashboard.stripe.com/test/apikeys。
在網頁上,有公鑰和秘鑰,點擊展示test秘鑰,接著sk_test開頭的內容複製。
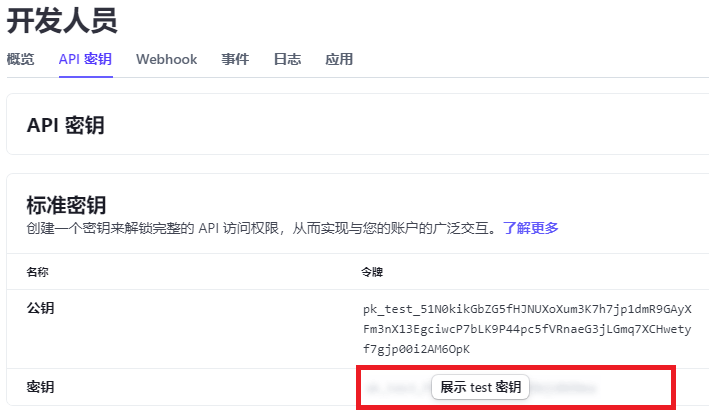
將內容貼到.env中
STRIPE_PRIVATE_KEY=sk_test_xxxxxx
我們可以在API文件找到,將Stripe SDK導入專案的方法https://docs.stripe.com/libraries?lang=java
<dependency>
  <groupId>com.stripe</groupId>
  <artifactId>stripe-java</artifactId>
  <version>26.0.0</version>
</dependency>
或者在https://mvnrepository.com/artifact/com.stripe/stripe-java,找尋最新的穩定版本。
<dependency>
    <groupId>com.stripe</groupId>
    <artifactId>stripe-java</artifactId>
    <version>26.7.0</version>
</dependency>
將dependency加入到pom.xml後,按下maven reload。
我們從.env取得數值,設定Stripe的私鑰,因為沒有私鑰就無法產生支付連結。
當然,錯誤或過期的私鑰也不能產生連結。
//OrderService.java
@Service
public class OrderService {
    private final OrderRepository orderRepository;

    public OrderService(OrderRepository orderRepository){
        this.orderRepository = orderRepository;
        Dotenv dotenv = Dotenv.load();
        Stripe.apiKey = dotenv.get("STRIPE_PRIVATE_KEY");
    }
我們參考Stripe的範例https://docs.stripe.com/api/checkout/sessions/create
自己進行一些改良
建立Stripe支付的Session
import Session時選擇com.stripe.model.checkout
public Session createCheckoutSession(int amount) throws StripeException {
設定創建Session的參數
        SessionCreateParams params =
                SessionCreateParams.builder()
設定為單次付款,不會每月重複收費
.setMode(SessionCreateParams.Mode.PAYMENT)
付款成功後,會前往這個網址
.setSuccessUrl("http://localhost:5173/checkout/success")
建立Stripe的購物車內容
                        .addLineItem(
                                SessionCreateParams.LineItem.builder()
設定數量為1個
.setQuantity(1L)
設定價格的資料
                                        .setPriceData(
                                                SessionCreateParams.LineItem.PriceData.builder()
設定貨幣為新台幣
.setCurrency("twd")
設定商品價格
.setUnitAmount(amount * 100L)
為什麼要乘100呢?
都是為了國際化,例如美國常常出現$9.99,用浮點數運算可能有誤差。
現在我想問大家一個問題,0.1+0.2是多少?
應該沒有人不知道吧。
現在請大家用Java寫一段程式,來計算0.1+0.2,得到的答案和你所想的一樣嗎?
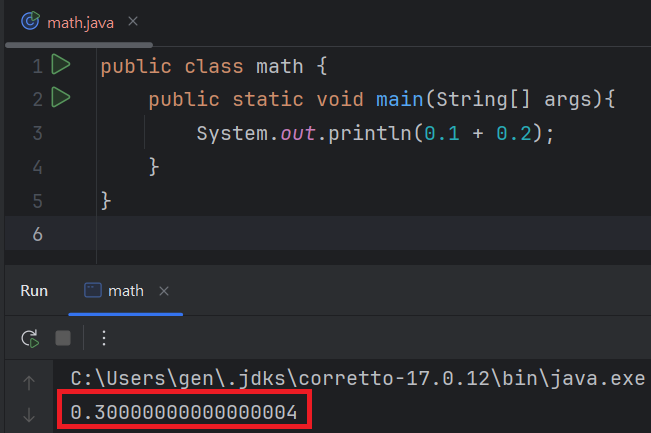
這就是因為浮點數誤差,而產生的錯誤。
為了避免誤差,我們直接乘100。
變成整數的10、20相加,10+20一定等於30,不會有誤差。
想要取得原本的數據時,除以100,30/100就能得到0.3,因為是整數間的運算,所以不會產生浮點數誤差。
設定商品的資料
                                                        .setProductData(
                                                                SessionCreateParams.LineItem.PriceData.ProductData.builder()
設定Stripe顯示的商品名稱,和購物車實際的內容無關。
                                                                        .setName("96gen shopping cart product")
                                                                        .build()
                                                        )
                                                        .build()
                                        )
                                        .build()
                        )
                        .build();
用前面設定的params,產生Session
        return Session.create(params);
    }
建立訂單
public Order createOrder(String sessionId, Integer totalPrice, String status, String url, Long userId) throws Exception {
        Order order = new Order();
        order.setSessionId(sessionId);
        order.setAmount(totalPrice);
        order.setStatus(status);
        order.setUrl(url);
        order.setUserId(userId);
        return orderRepository.save(order);
    }
使用用戶ID查詢用戶的訂單資訊,查詢時同時更新資料
public List<Order> findOrderByUserId(Long userId) throws Exception {
        List<Order> orders = orderRepository.findOrderByUserId(userId);
        List<Order> updated_orders = new ArrayList<>();
        for(Order order: orders){
            updateOrder(order.getId());
            updated_orders.add(order);
        }
        return updated_orders;
    }
更新訂單資訊的付款狀態
public void updateOrder(Long id) throws Exception {
        Optional<Order> opt = orderRepository.findById(id);
        if(opt.isPresent()){
            Order updated = opt.get();
            Session session =
                    //根據SessionId從Stripe API取得Session資料
                    Session.retrieve(
                        opt.get().getSessionId()
                    );
            //更新付款狀態
            updated.setStatus(session.getPaymentStatus());
            orderRepository.save(updated);
            return;
        }
        throw new Exception("Error: Order not found with id: " + id);
    }
//OrderController.java

@RestController
@RequestMapping("/api/order")
public class OrderController {
    private final OrderService orderService;
    private final UserService userService;
    private final CartService cartService;

    public OrderController(OrderService orderService, UserService userService, CartService cartService){
        this.orderService = orderService;
        this.userService = userService;
        this.cartService = cartService;
    }
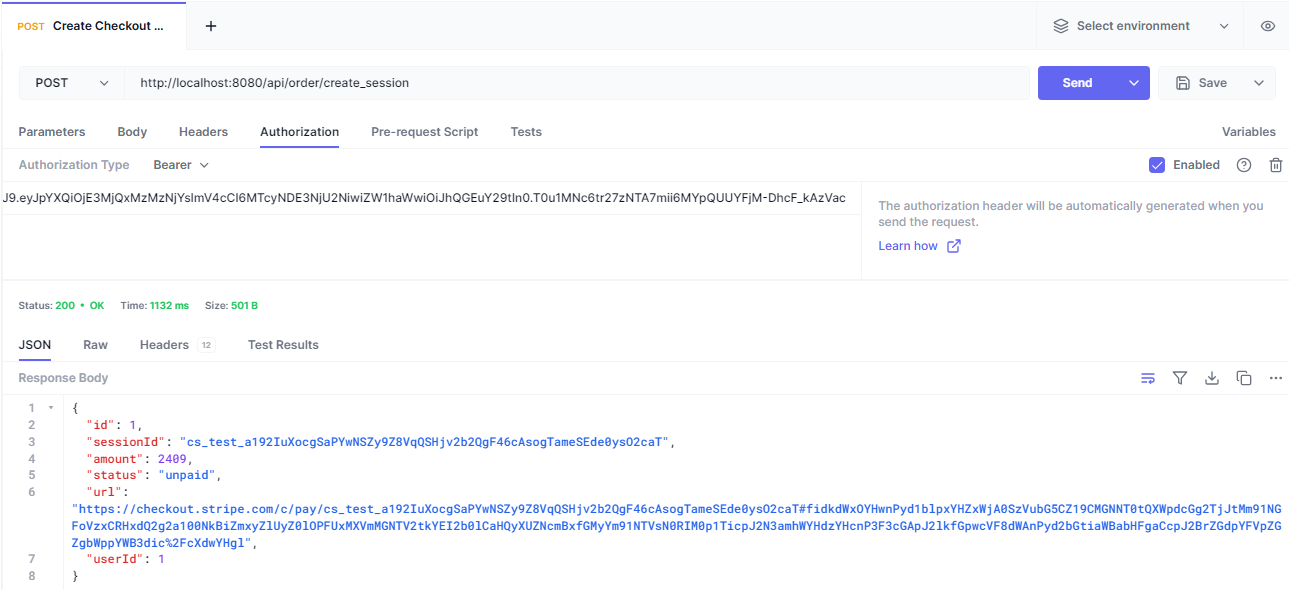
建立Session,並產生新的訂單。
    @GetMapping("/create_session")
    public ResponseEntity<Order> createCheckoutSession(@RequestHeader("Authorization") String jwt) throws Exception {
        User user = userService.findUserByJWT(jwt);
        Long userId = user.getId();
        Integer totalPrice = cartService.clearCart(userId);
        Session session = orderService.createCheckoutSession(totalPrice);
        Order order = orderService.createOrder(session.getId(), totalPrice, session.getPaymentStatus(), session.getUrl(), userId);
        return new ResponseEntity<>(order,HttpStatus.OK);
    }
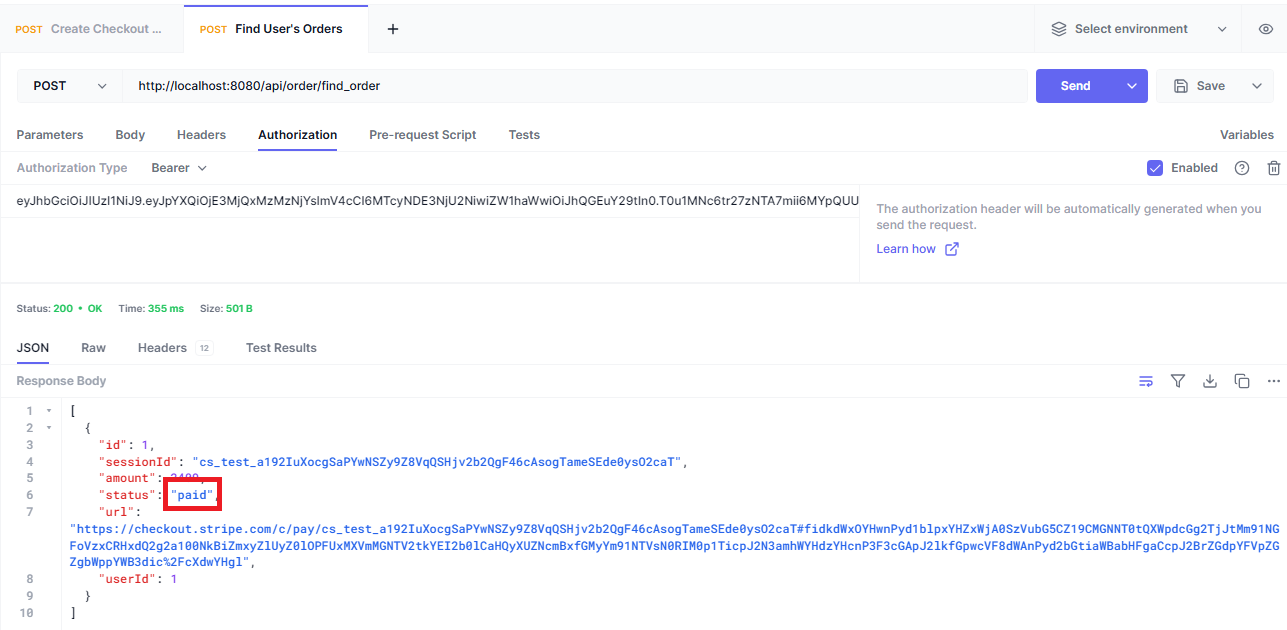
找尋用戶的全部訂單
    @GetMapping("/find_order")
    public ResponseEntity<List<Order>> findOrderByUserId(@RequestHeader("Authorization") String jwt) throws Exception {
        User user = userService.findUserByJWT(jwt);
        return ResponseEntity.ok(orderService.findOrderByUserId(user.getId()));
    }
}
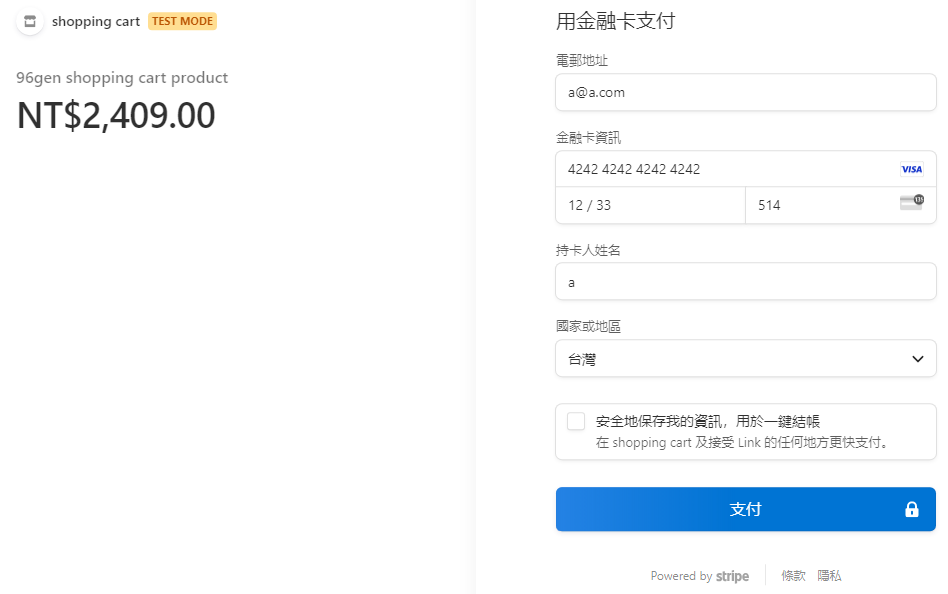
接下來測試支付的部分
email、全名、檢查碼可以隨意填寫,信用卡號要填4242424242424242,月份填未來的時間。
按下支付,成功後來到http://localhost:5173/checkout/success ,現在無法連接,未來會顯示我們的前端頁面。
Stripe用來測試的信用卡號列表:https://docs.stripe.com/testing#cards
需要在根目錄添加.env。
https://mega.nz/file/kRtwVagR#ZA88p2jQAunIWbT23Ox05XZGHfiu4yMsG9AGWZdSvqg
導入SSL可以保護傳送的內容,不被他人竊聽。
我們採用自簽憑證,適合在開發時使用。
當然,可靠度比不上機構認證過的憑證,因為自簽憑證是球員兼裁判,自己發行也自己認證。
需要使用OpenSSL工具,如果有安裝Git for Windows,那麼電腦裡就已經有OpenSSL,位於C:\Program Files\Git\usr\bin,將路徑加入到環境變數。
openssl genrsa -out private.key 2048
[req]
#在產生憑證時,使用者不需要輸入資訊,全部按照openssl.conf的設定。
prompt = no
#指定distinguished_name是dn段落的內容
distinguished_name = dn

[dn]
#國家
C = TW
#州或省份
ST = Taiwan
#城市
L = Taipei
#組織名稱
O = Shopping Cart Inc.
#組織的單位名稱
OU = Software Development
#憑證適用的域名
CN = localhost
openssl req -new -x509 -key private.key -out certificate.crt -days 365 -config openssl.conf
-new 產生一個新的自簽憑證
-x509 採用X.509標準,是一種常見的數位憑證標準,也符合TLS/SSL的規範。
-key private.key 指定使用的私鑰為private.key
-out certificate.crt 指定輸出的憑證檔案名稱為certificate.crt
-days 365 憑證的有效期限是365天,一年後就會過期
-config openssl.conf 使用openssl.conf的內容來配置憑證的相關訊息
過程中,需要輸入兩次的密碼,這邊輸入的密碼會在application.properties用到。
openssl pkcs12 -export -out certificate.p12 -inkey private.key -in certificate.crt
-export 將私鑰和憑證打包成 PKCS#12 格式的文件
-out certificate.p12 輸出的PKCS #12命名為certificate.p12
-inkey private.key 指定被打包的私鑰
-in certificate.crt 指定被打包的憑證
server.ssl.enabled=true
server.ssl.key-store=classpath:certificate.p12 #certificate.p12要放在src/main/resources下
server.ssl.key-store-password=secret #創建p12時,輸入的密碼
server.ssl.key-store-type=PKCS12
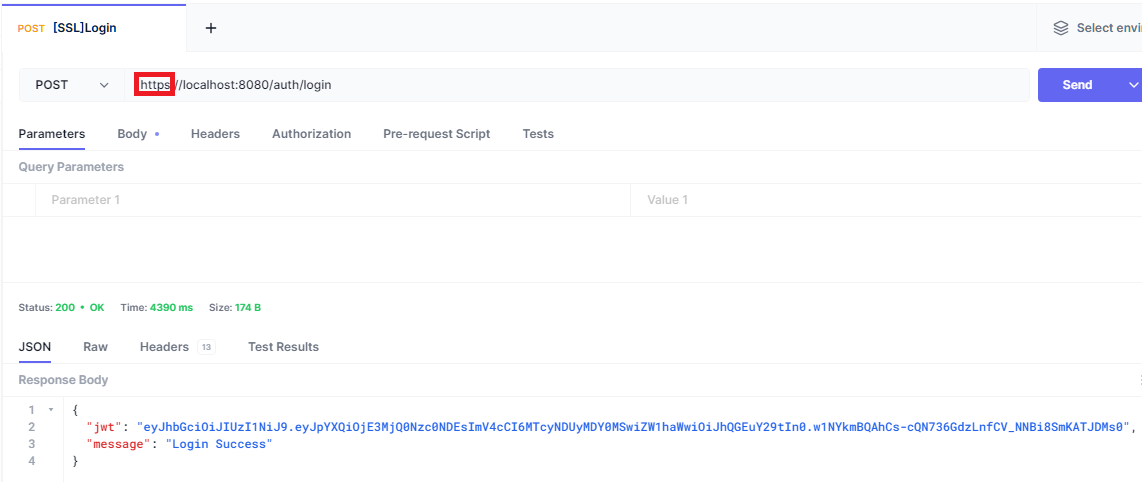
我們測試一下,導入SSL後的專案,原本的網址要加s。