Geolocation API 是 HTML5 Web API 中的一個強大功能,他可以讓網頁存取使用者裝置的地理位置,但安心的是 Web API 很重隱私,我們要經過使用者的同意,才能取得使用者的地理位置唷。
Geolocation API 主要提供以下功能:
那麼,瀏覽器是如何確定使用者的地理位置呢?有下幾種方式,包括:
首先,我們要檢查瀏覽器是否支援這個 API:
if ("geolocation" in navigator) {
	console.log('瀏覽器支援 Geolocation');
} else {
	console.log('瀏覽器不支援 Geolocation');
}
支援的話,就可以使用 getCurrentPosition() 取得使用者當前的位置:
navigator.geolocation.getCurrentPosition(successCallback, errorCallback, options);
這個方法接受三個參數:
successCallback:成功取得位置時調用的函數errorCallback:取得位置失敗時調用的函數,選填options:相關設定參數,選填以下是使用 getCurrentPosition() 的例子:
function successCallback(position) {
  const latitude = position.coords.latitude;
  const longitude = position.coords.longitude;
  console.log(`緯度:${latitude},經度:${longitude}`);
}

function errorCallback(error) {
  console.error(`錯誤:${error.message}`);
}

const options = {
  enableHighAccuracy: true, // 使用高精準度的資訊
  timeout: 5000, // 請求超時時間 (毫秒)
  maximumAge: 0 // 最長緩存時間
};

navigator.geolocation.getCurrentPosition(successCallback, errorCallback, options);
前面有提過,Geolocation API 必須要經過使用者的同意,才能取得地理位置。因此這個錯誤,表示我們在沒有經過使用者允許的情況下,就要使用 Geolocation API 取得使用者的地理位置。
那麼,怎樣算是經過使用者的同意呢?我們可以讓使用者進行明確的動作 (例如點選按鈕、點選連結) 後再要求 Geolocation 的權限。
if ("geolocation" in navigator) {
	console.log('瀏覽器支援 Geolocation');
	// 點選按鈕才會呼叫 getCurrentPosition()
	document.getElementById('geolocation').addEventListener('click', function () {
	function successCallback(position) {
		const latitude = position.coords.latitude;
		const longitude = position.coords.longitude;
		console.log(`緯度:${latitude},經度:${longitude}`);
	}
	function errorCallback(error) {
		console.error(`錯誤:${error.message}`);
	}
	const options = {
		enableHighAccuracy: true, // 使用高精準度的資訊
		timeout: 5000, // 請求超時時間 (毫秒)
		maximumAge: 0 // 快取時間
	};
	navigator.geolocation.getCurrentPosition(successCallback, errorCallback, options);
	});
} else {
	console.log('瀏覽器不支援 Geolocation');
}
此時就可以在 console 面板看到輸出的資訊
瀏覽器支援 Geolocation
緯度:15.0232011,經度:211.2709354
getCurrentPosition() 的 options 參數說明| 參數名稱 | 值的類型 | 預設值 | 說明 |
|---|---|---|---|
enableHighAccuracy |
Boolean | false |
使用 true 可以讓裝置提供更精準的位置,但相對的也會讓處理時間變長、需要更多的電量,或是讓 GPS 晶片耗能增加。 |
timeout |
正整數 | Infinity (單位:毫秒) |
取得使用者地理位置時,超過這個時間就會停止解析。如果有在 errorCallback 顯示 error,會看到錯誤為 Timer expired(圖 1-1) |
maximumAge |
正整數 | 0 (單位:毫秒) |
預設為 0 表示不進行快取,每次都要重新取得最新的使用者地理位置;假如設定為 60000,表示允許使用過去 60 秒內取得的地理位置。 |
取得地理位置時,可能會遇到各種問題,例如使用者拒絕授權,該裝置讀不到位置(本身不支援地理位置的功能),沒有網路或訊號不好… 等等。因此我們可以在 errorCallback 函數中,根據錯誤訊息顯示對應的文字:
function errorCallback(error) {
  switch(error.code) {
    case error.PERMISSION_DENIED:
      console.error("使用者拒絕了地理位置請求。");
      break;
    case error.POSITION_UNAVAILABLE:
      console.error("無法取得地理位置");
      break;
    case error.TIMEOUT:
      console.error("請求超時。");
      break;
    case error.UNKNOWN_ERROR:
      console.error("發生未知錯誤。");
      break;
  }
}
再次提醒,Geolocation API 非常注重隱私 XD,所以如果使用者拒絕分享地理位置,我們是無法使用 JavaScript 重新觸發請求的對話框唷。
但我們可以引導使用者,讓他們修改瀏覽器設定分享地理位置,以 Chrome 為例,選擇網址左側的 icon,再選擇「位置」 → 「重設權限」,然後重新載入頁面,就會跳出請求的對話框了。

除了取得使用者當前的地理位置外,我們還能使用 Geolocation API 監控地理位置的變化,可用於導航類的 APP。
使用 watchPosition() 方法來監控變化:
const watchId = navigator.geolocation.watchPosition(successCallback, errorCallback, options);
這個方法會返回一個 watchId,我們可以用它來停止監控:
navigator.geolocation.clearWatch(watchId);
Geolocation API 本身並不提供地圖顯示的功能,所以我們會將取得的位置資訊與第三方地圖服務結合使用,常見的就是 Google Maps 或 OpenStreetMap。
鑒於 Googel Mpas 的設定較為繁瑣,我們就用 OpenStreetMap 和 Leaflet 來做一個追蹤位置變化的地圖功能吧。
<script src="<https://cdnjs.cloudflare.com/ajax/libs/leaflet/1.7.1/leaflet.js>"></script>
<link rel="stylesheet" href="<https://cdnjs.cloudflare.com/ajax/libs/leaflet/1.7.1/leaflet.css>" />

<script>
let map;
let marker;

function initMap(lat, lon) {
  map = L.map('map').setView([lat, lon], 13);
  L.tileLayer('https://{s}.tile.openstreetmap.org/{z}/{x}/{y}.png', {
    attribution: '© OpenStreetMap contributors'
  }).addTo(map);
  marker = L.marker([lat, lon]).addTo(map);
}

if ("geolocation" in navigator) {
  console.log('瀏覽器支援 Geolocation');
  document.getElementById('geolocation').addEventListener('click', function () {
    function successCallback(position) {
      const latitude = position.coords.latitude;
      const longitude = position.coords.longitude;
      initMap(latitude, longitude);
      console.log(`緯度:${latitude},經度:${longitude}`);
    }

    function errorCallback(error) {
      console.error(`錯誤:${error.message}`);
    }
    navigator.geolocation.getCurrentPosition(successCallback, errorCallback, options);
  });
} else {
  console.log('瀏覽器不支援 Geolocation');
}
</script>
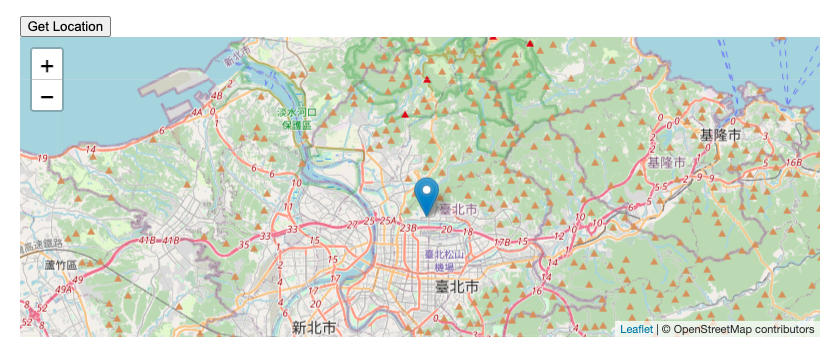
按下 Get Location 按鈕後,就會在地圖上顯示自己的所在位置
再來放三個按鈕,分別是追蹤與模擬移動的功能
<div id="map"></div>
<!-- status 顯示當前經緯度 -->
<div id="status"></div>
<!-- 加入三個按鈕 -->
<div>
  <button onclick="startTracking()">開始追蹤</button>
  <button onclick="stopTracking()">停止追蹤</button>
  <button onclick="simulateMovement()">模擬移動</button>
</div>
原本是按下「Get Location」按鈕才會顯示位置,現在改成按下「startTracking」按鈕,才會在地圖上顯示位置。
用 watchPosition() 取代 getCurrentPosition(),用 watchPosition() 的 successCallback 將經緯度傳入 initMap()
// watchPosition 的 successCallback
function updatePosition(position) {
  const { latitude, longitude } = position.coords;
  if (!map) {
    initMap(latitude, longitude);
  } else {
    map.setView([latitude, longitude], 13);
    marker.setLatLng([latitude, longitude]);
  }
  document.getElementById('status').textContent = `緯度: ${latitude}, 經度: ${longitude}`;
}

// watchPosition 的 errorCallback
function handleError(error) {
  document.getElementById('status').textContent = `錯誤: ${error.message}`;
}

function startTracking() {
  if ("geolocation" in navigator) {
    watchId = navigator.geolocation.watchPosition(updatePosition, handleError);
    document.getElementById('status').textContent = "正在追蹤位置...";
  } else {
    document.getElementById('status').textContent = "您的瀏覽器不支援地理位置功能。";
  }
}
開發中可以自己寫一個模擬移動的功能,隨機修改經緯度來模擬裝置的移動:
function simulateMovement() {
  if (simulationInterval) {
    clearInterval(simulationInterval);
    simulationInterval = null;
    document.getElementById('status').textContent = "模擬移動已停止。";
  } else {
    let lat = 48.860611; // 起始緯度
    let lon = 2.3327785; // 起始經度
    simulationInterval = setInterval(() => {
      lat += (Math.random() - 0.5) * 0.001;
      lon += (Math.random() - 0.5) * 0.001;
      updatePosition({ coords: { latitude: lat, longitude: lon } });
    }, 1000);
    document.getElementById('status').textContent = "正在模擬移動...";
  }
}
線上範例網址:https://mukiwu.github.io/web-api-demo/geo.html
請先點選「開始追蹤」並允許瀏覽器取得你的地理位置。
Geolocation API 是 HTML5 Web API 中的一個強大功能,允許網頁存取使用者裝置的地理位置,但需要經過使用者的同意以保護隱私,建議大家在取得使用者的地理位置前,應清楚解釋需求,並能提供如何修改瀏覽器設定,以便重新授權地理位置存取,避免日後爭議。
以上就是 Geolocation API 的介紹,有任何問題歡迎留言討論唷。