

在使用 App 時,比如 Line, Messenger, X, ... 我們只需要在一開始使用時登入,後續再開啟時就不需要再登入了。這個是因為這些 App 會把登入的資訊存在手機中,而這些資料是即使 App 結束運行仍然存在的。
如同前面的介紹,我們這次也會從不同平台的視角下手,首先我們先以 Web 實作,再針對 Android 平台以 Kotlin 實作 Shared Preferences。
本次的程式碼可以從這裡取得:https://github.com/ksw2000/ironman-2024/blob/master/flutter-practice/shared_preferences_practice/
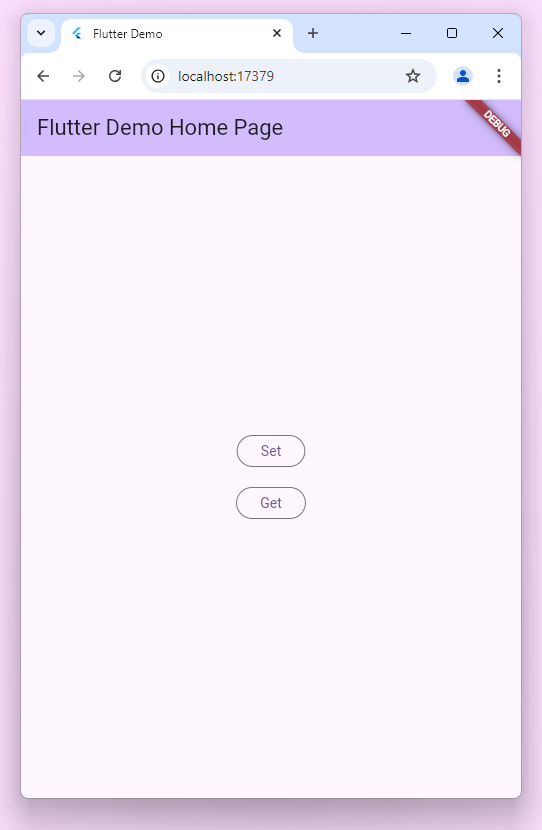
為了簡單 Demo,我們可以先設計一個非常簡單的 UI
class MyApp extends StatelessWidget {
  const MyApp({super.key});

  // This widget is the root of your application.
  @override
  Widget build(BuildContext context) {
    return MaterialApp(
      title: 'Flutter Demo',
      theme: ThemeData(
        colorScheme: ColorScheme.fromSeed(seedColor: Colors.deepPurple),
        useMaterial3: true,
      ),
      home: const MyHomePage(),
    );
  }
}

class MyHomePage extends StatelessWidget {
  const MyHomePage({super.key});

  @override
  Widget build(BuildContext context) {
    return Scaffold(
      appBar: AppBar(
        backgroundColor: Theme.of(context).colorScheme.inversePrimary,
        title: const Text('Flutter Demo Home Page'),
      ),
      body: Center(
        child: Column(
          mainAxisAlignment: MainAxisAlignment.center,
          children: <Widget>[
            OutlinedButton(
              child: const Text('Set'),
              onPressed: () {
                sharedPreferenceSet('foo', 'bar');
              },
            ),
            const SizedBox(
              height: 20,
            ),
            OutlinedButton(
              child: const Text('Get'),
              onPressed: () {
                var val = sharedPreferenceGet('foo');
                print(val);
              },
            ),
          ],
        ),
      ),
    );
  }
}
畫面上為兩個按鈕,當按鈕 Set 按下時,會呼叫我們自訂的函式 sharedPreferenceSet ,儲存一個鍵值對 (foo, bar),接著當我們按下另一個 Get 按鈕時,則呼叫 sharedPreferenceGet,嘗試從 Shared preference 取出值。
在 web 的環境中,我們可以利用 localStorage 來實現,直接修改 web/index.html 並加入 saveData 和 getData 兩個 function
<script>
function saveData(key, value) {
  localStorage.setItem(key, value);
}

// Get data from localStorage
function getData(key) {
  return localStorage.getItem(key) || null;
}
</script>
接著我們另外建立一個檔案 shared_pref_web.dart
import 'dart:js';

void sharedPreferenceSet(String key, String value) {
  context.callMethod('saveData', [key, value]);
}

dynamic sharedPreferenceGet(String key) {
  return context.callMethod('getData', [key]);
}
我們可以利用 dart:js 中的 context.callMethod 呼叫函式,並將參數傳入。如此一來就完成了!
如果我們需要從 Flutter 調用 Kotlin 函式又該如何實作呢?通常,我們會使用平台通道 (Platform Channels)。平台通道允許 Flutter 和原生平台進行通訊。在 Flutter 中,我們會使用 MethodChannel 發送訊息到 Kotlin。
import 'package:flutter/services.dart';

class PlatformService {
  // 新建 MethodChannel
  static const platform = MethodChannel('com.github.ksw2000.my_shared_preferences_channel');

  // 調用 Kotlin 函式
  Future<String> callKotlinFunction() async {
    try {
      // 利用 invokeMethod 呼叫函式
      // 另外可以用 Map 的方式代入參數 (參數鍵值)
      final String result = await platform.invokeMethod('shared_preference_set', {
          'param0': 'value0',
          'param1': 'value1'
      });
      return result;
    } catch (e) {
      print("Failed to invoke method: $e");
      return 'Error';
    }
  }
}
在 Kotlin 端設置對應的通道來接收並回應訊息。./android/app/src/main/kotlin/com/example/[project-name]/MainActivity.kt
import io.flutter.embedding.android.FlutterActivity
import io.flutter.plugin.common.MethodChannel

class MainActivity: FlutterActivity() {
    private val CHANNEL = "com.github.ksw2000.my_shared_preferences_channel"

    override fun configureFlutterEngine(flutterEngine: FlutterEngine) {
        super.configureFlutterEngine(flutterEngine)

        MethodChannel(flutterEngine.dartExecutor.binaryMessenger, CHANNEL).setMethodCallHandler { call, result ->
            if (call.method == "shared_preference_set") {
                // 利用 call.argument 取得 flutter 傳來的參數
                val param0 = call.argument<String>("param0")
                val param1 = call.argument<String>("param1")
                // ...
                result.success(kotlinResult) // 將結果返回 Flutter
            } else {
                result.notImplemented()
            }
        }
    }
}
在 Android 中如使用 shared preferences 呢?我們可以參考這個文件:https://developer.android.com/training/data-storage/shared-preferences
在 kotlin 中如果要使用 shared preferences 首先要先導入 android.content.SharedPreferences
import android.content.SharedPreferences

val sharedPreferences: SharedPreferences = getSharedPreferences("FlutterSharedPrefs", MODE_PRIVATE)
val editor: SharedPreferences.Editor = sharedPreferences.edit()

// 利用 editor.putString 將 key-value 存入 SharedPreferences
// 此方法只會更改記憶體內容
editor.putString(key, value)

// 利用 apply 將結果以異步的方式寫回檔案系統
editor.apply()

// 也可以用同步的方式寫回檔案系統
editor.commit()

// 取得值,第一個參數是 key 值,第二個參數是預設值
// 當鍵值對不存在時返回預設值
sharedPreferences.getString(key, "")
可以看出在 Kotlin 上實作的方式較為麻煩,以下是完整程式碼:
注意,在更改 kotlin 程式碼時,若使用 Android Studio 做修改,必需以
android資料夾做為專案,而不是以 flutter 根目錄開啟。這樣 Android Studio 才可以更容易建設環境。
import android.content.SharedPreferences
import io.flutter.embedding.android.FlutterActivity
import io.flutter.embedding.engine.FlutterEngine
import io.flutter.plugin.common.MethodChannel

class MainActivity: FlutterActivity(){
    private val Channel = "com.github.ksw2000.my_shared_preferences_channel"

    override fun configureFlutterEngine(flutterEngine: FlutterEngine) {
        super.configureFlutterEngine(flutterEngine)

        val sharedPreferences: SharedPreferences = getSharedPreferences("FlutterSharedPrefs", MODE_PRIVATE);
        val editor = sharedPreferences.edit();

        MethodChannel(flutterEngine.dartExecutor.binaryMessenger, Channel).setMethodCallHandler {call, result ->
            if (call.method == "shared_preferences_set") {
                val key = call.argument<String>("key")
                val value = call.argument<String>("value")
                if (key != null && value != null) {
                    editor.putString(key, value)
                    editor.apply()
                    result.success("Data saved successfully")
                } else {
                    result.error("INVALID_ARGUMENTS", "Key or Value missing", null)
                }
            }else if (call.method == "shared_preferences_get"){
                val key = call.argument<String>("key")
                if (key != null) {
                    // 第一個參數是 key 值,第二個參數是預設值
                    val value = sharedPreferences.getString(key, "")
                    result.success(value)
                } else {
                    result.error("INVALID_ARGUMENTS", "Key missing", null)
                }
            }
        }
    }
}
Flutter
import 'package:flutter/services.dart';

const platform =
    MethodChannel('com.github.ksw2000.my_shared_preferences_channel');

void sharedPreferenceSet(String key, String value) async {
  await platform
      .invokeMethod('shared_preferences_set', {'key': key, 'value': value});
}

Future<dynamic> sharedPreferenceGet(String key) async {
  return await platform.invokeMethod('shared_preferences_get', {'key': key});
}
如同昨天的主題,以上跨平台不同的操作方式過於麻煩,因此我們也可以直接使用第三方套件 shared_preferences | Flutter package 這個套件允許我們在不同平台上都能使用 shared preferences 的功能,首先我們先安裝這個插件
flutter pub add shared_preferences
根據文檔做初始化,生成一個 SharedPreferences 物件。注意:初始化是一個異步操作
final SharedPreferences prefs = await SharedPreferences.getInstance();
接著我們可以根據不同型態去存取鍵值對
Set
// Save an integer value to 'counter' key.
await prefs.setInt('counter', 10);
// Save an boolean value to 'repeat' key.
await prefs.setBool('repeat', true);
// Save an double value to 'decimal' key.
await prefs.setDouble('decimal', 1.5);
// Save an String value to 'action' key.
await prefs.setString('action', 'Start');
// Save an list of strings to 'items' key.
await prefs.setStringList('items', <String>['Earth', 'Moon', 'Sun']);
Get
// Try reading data from the 'counter' key. If it doesn't exist, returns null.
final int? counter = prefs.getInt('counter');
// Try reading data from the 'repeat' key. If it doesn't exist, returns null.
final bool? repeat = prefs.getBool('repeat');
// Try reading data from the 'decimal' key. If it doesn't exist, returns null.
final double? decimal = prefs.getDouble('decimal');
// Try reading data from the 'action' key. If it doesn't exist, returns null.
final String? action = prefs.getString('action');
// Try reading data from the 'items' key. If it doesn't exist, returns null.
final List<String>? items = prefs.getStringList('items');
Remove
// Remove data for the 'counter' key.
await prefs.remove('counter');
由於在初始化時是一個異步函式,因此我們可以使用 FutureBuilder 來管理狀態,另外,由於異步的過程太快了,所以 demo 時另外再幫他延遲 2 秒。
class MyHomePage extends StatefulWidget {
  const MyHomePage({super.key});

  @override
  State<MyHomePage> createState() => _MyHomePageState();
}

class _MyHomePageState extends State<MyHomePage> {
  String? _received;

  @override
  Widget build(BuildContext context) {
    return Scaffold(
        appBar: AppBar(
          backgroundColor: Theme.of(context).colorScheme.inversePrimary,
          title: const Text('Flutter Demo Home Page'),
        ),
        // 使用 FutureBuilder 建構
        body: FutureBuilder(
            // 等待 SharedPreferences 初始化
            future: Future.delayed(const Duration(seconds: 2),
                () => SharedPreferences.getInstance()),
            builder: (context, snapshot) {
              if (snapshot.hasData) {
                return Center(
                  child: Column(
                    mainAxisAlignment: MainAxisAlignment.center,
                    children: <Widget>[
                      OutlinedButton(
                        child: const Text('Set (foo => bar)'),
                        onPressed: () {
                          final prefs = snapshot.data;
                          prefs?.setString('foo', 'bar');
                        },
                      ),
                      const SizedBox(
                        height: 20,
                      ),
                      OutlinedButton(
                        child: const Text('Get (foo)'),
                        onPressed: () {
                          final prefs = snapshot.data;
                          final res = prefs?.getString('foo');
                          setState(() {
                            _received = res;
                          });
                        },
                      ),
                      const SizedBox(
                        height: 10,
                      ),
                      _received != null ? Text(_received!) : const SizedBox(),
                      const SizedBox(
                        height: 10,
                      ),
                      OutlinedButton(
                        child: const Text('Remove (foo)'),
                        onPressed: () {
                          final prefs = snapshot.data;
                          prefs?.remove('foo');
                          setState(() {
                            _received = "";
                          });
                        },
                      ),
                    ],
                  ),
                );
              } else if (snapshot.hasError) {
                return Center(
                    child: Text("Unexpected error ${snapshot.error}"));
              }
              // 初始化前先放個轉圈圈動畫
              return const Center(child: CircularProgressIndicator());
            }));
  }
}
Demo:
9/16 凌晨偷偷更新
後記:這篇文真的卡了有點久我很抱歉
