在開發環境介紹那一天已經簡單介紹過了,這次來交大教如何自訂義屬於自己的Button,並結合ImageView應用
一開始我們用到Button,想必有些人會覺得內建的不是特別喜歡
還會發現設置background是無效的
因此需要去做出一個自訂義Button來符合我們的需求,這次一樣會用到drawable去做自訂義
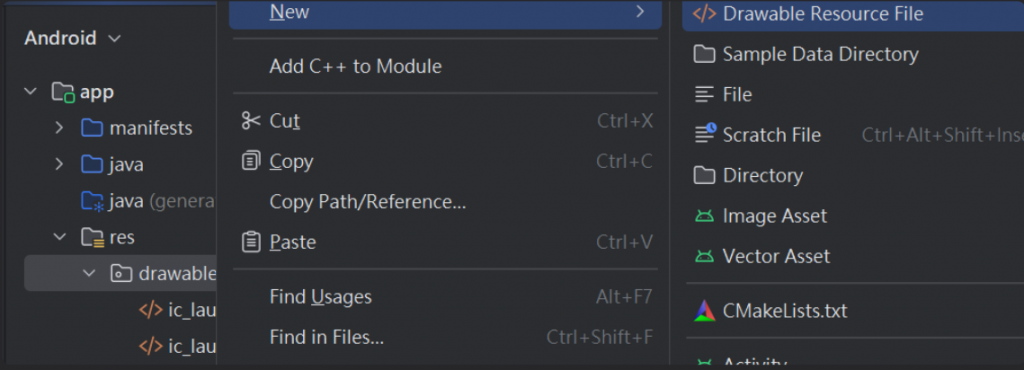
會有兩種寫法,一個是讓Buttno能做出點擊前後出現變化(後面一篇會介紹),一個是單純更改Button
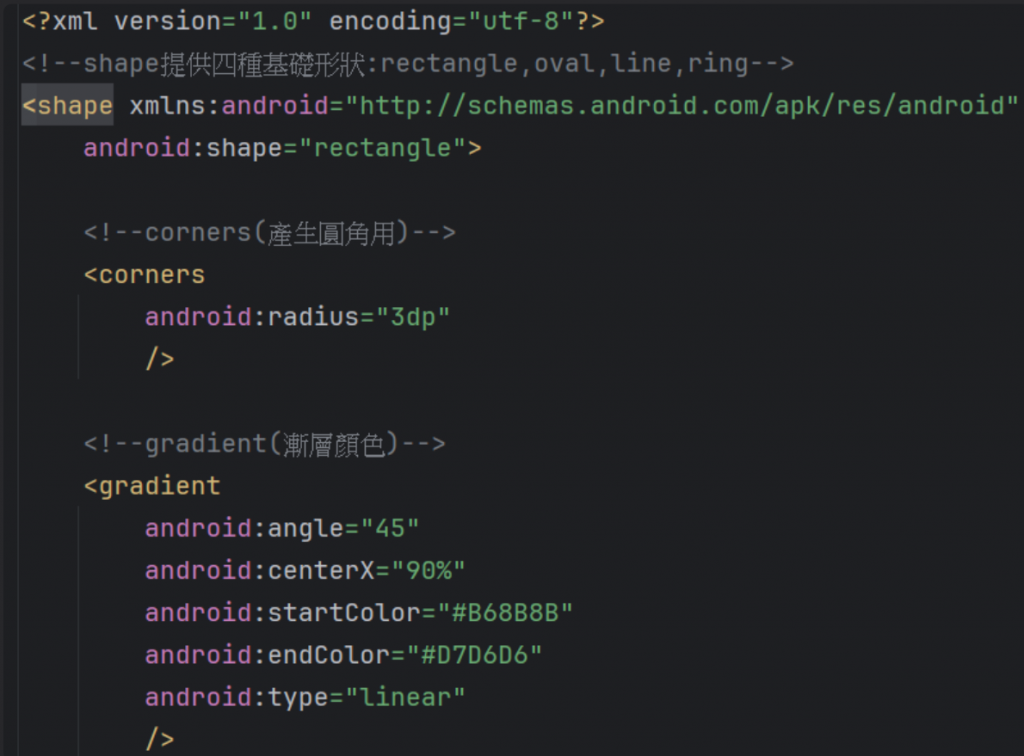
shape
rectangle(長方形)、oval(橢圓形)、ring(圓環狀)、line(線條)
corners
android:radius => 改變全部的原角半徑
android:topLeftRadius =>左上角的圆角半径
android:topRightRadius =>右上角的圆角半径
android:bottomLeftRadius => 左下角的圆角半径
android:bottomRightRadius =>右下角的圆角半径
gradient
android:angle => 設定顏色漸變的角度
android:centerX => 漸變中心為X的相對位置
android:centerY => 漸變中心為Y的相對位置
android:startColor => 開始點的漸變顏色
android:endColor => 結束點的漸變顏色
android:centerColor => 中間點的漸變顏色
android:type => 漸變類型:默認linear(線性漸變),redial(放射性漸變),sweep(掃描式漸變)
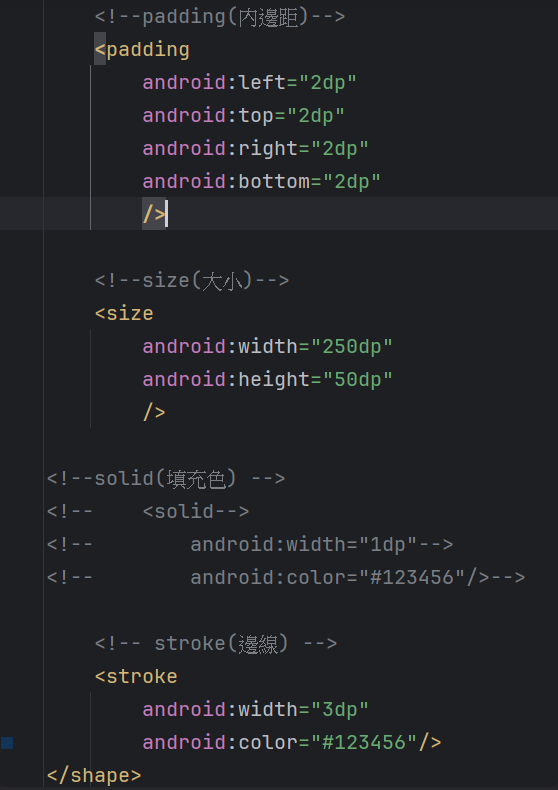
<?xml version="1.0" encoding="utf-8"?>
<!--shape提供四種基礎形狀:rectangle,oval,line,ring-->
<shape xmlns:android="http://schemas.android.com/apk/res/android"
    android:shape="rectangle">

    <!--corners(產生圓角用)-->
    <corners
        android:radius="3dp"
        />

    <!--gradient(漸層顏色)-->
    <gradient
        android:angle="45"
        android:centerX="90%"
        android:startColor="#B68B8B"
        android:endColor="#D7D6D6"
        android:type="linear"
        />

    <!--padding(內邊距)-->
    <padding
        android:left="2dp"
        android:top="2dp"
        android:right="2dp"
        android:bottom="2dp"
        />

    <!--size(大小)-->
    <size
        android:width="250dp"
        android:height="50dp"
        />

<!--solid(填充色) -->
<!--    <solid-->
<!--        android:width="1dp"-->
<!--        android:color="#123456"/>-->

    <!-- stroke(邊線) -->
    <stroke
        android:width="3dp"
        android:color="#123456"/>
</shape>
右邊可以看到目前設定的樣式預覽狀態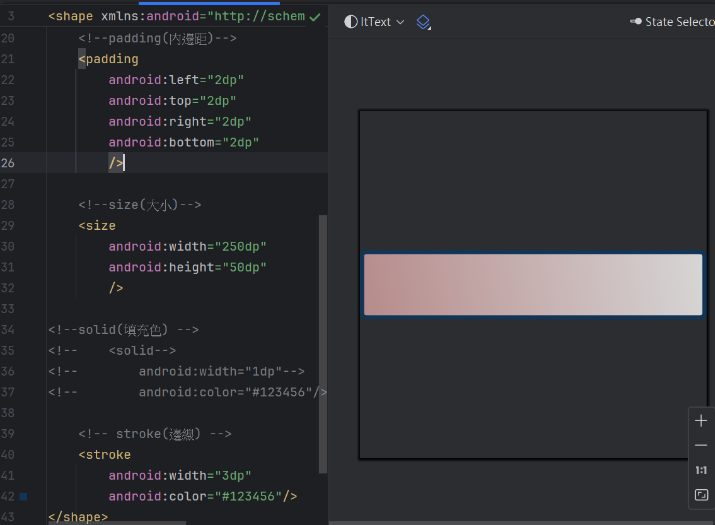
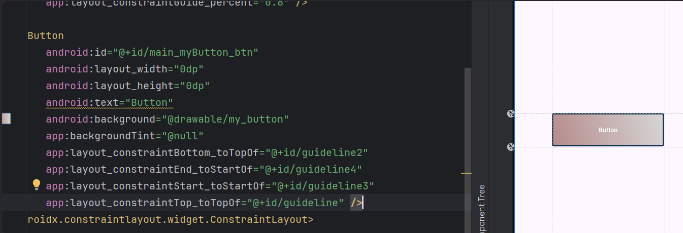
<?xml version="1.0" encoding="utf-8"?>
<androidx.constraintlayout.widget.ConstraintLayout xmlns:android="http://schemas.android.com/apk/res/android"
    xmlns:app="http://schemas.android.com/apk/res-auto"
    xmlns:tools="http://schemas.android.com/tools"
    android:id="@+id/main"
    android:layout_width="match_parent"
    android:layout_height="match_parent"
    tools:context=".MainActivity">


    <androidx.constraintlayout.widget.Guideline
        android:id="@+id/guideline"
        android:layout_width="wrap_content"
        android:layout_height="wrap_content"
        android:orientation="horizontal"
        app:layout_constraintGuide_percent="0.6" />

    <androidx.constraintlayout.widget.Guideline
        android:id="@+id/guideline2"
        android:layout_width="wrap_content"
        android:layout_height="wrap_content"
        android:orientation="horizontal"
        app:layout_constraintGuide_percent="0.7" />

    <androidx.constraintlayout.widget.Guideline
        android:id="@+id/guideline3"
        android:layout_width="wrap_content"
        android:layout_height="wrap_content"
        android:orientation="vertical"
        app:layout_constraintGuide_percent="0.2" />

    <androidx.constraintlayout.widget.Guideline
        android:id="@+id/guideline4"
        android:layout_width="wrap_content"
        android:layout_height="wrap_content"
        android:orientation="vertical"
        app:layout_constraintGuide_percent="0.8" />

    <Button
        android:id="@+id/main_myButton_btn"
        android:layout_width="0dp"
        android:layout_height="0dp"
        android:text="Button"
        android:background="@drawable/my_button"
        app:backgroundTint="@null"
        app:layout_constraintBottom_toTopOf="@+id/guideline2"
        app:layout_constraintEnd_toStartOf="@+id/guideline4"
        app:layout_constraintStart_toStartOf="@+id/guideline3"
        app:layout_constraintTop_toTopOf="@+id/guideline" />
</androidx.constraintlayout.widget.ConstraintLayout>
是不是很簡單阿~熟悉上方這些之後就可以隨心所欲做出自己喜歡的Button啦(o゚v゚)ノ
