Spring boot除了遵循MVC的概念之外,在開發的過程還會遵循Controller-Service-Repository的邏輯開發API,這三個項目分是規範API進來的方法,實踐API的服務、實踐與資料庫的操作三個功能,當一個指令進來時,會由Controller決定是由哪個function去執行,在執行的時候會使用不同的Service層的指令,而Service層的指令會去呼叫Repository來跟資料庫做操作,所以這一連串的指令都是相互有關連的。
在我們開發的時候,會跟API進來的順序相反,是以Repositroy-Service-Controller的方式建立整個邏輯,因為這樣的過程會遇到最少的錯誤提示,也比較符合實際上開發的順序。
在Repository的部分,我們在前一天已經開發完成,如果沒有JPA,我門就真的要從0開始,先創建SQL指令,然後再去做後續的操作,但因為已經使用的JPA,大部分對於SQL的操作都已經設置好了,接下來我們要做的就只有使用這些功能而已。
今天的開發可能比較長,需要大家花點時間耐心學習,慢慢Debug,但我相信只要大家能夠完全理解今天的功能,對於後端操作就進了一大步。
在前面的章節我們知道,Entity是Java操作後端資料庫的方式,但是前面提供給我們的資料跟後面我們要儲存的資料可能會不同,所以我們要把前面傳過來的參數跟後面的參數分開,於是我們要創建Dto,代表的是前端在使用的參數。
我們一樣要在accounting中創建一個dto的資料夾,然後新增一個AccountDto的class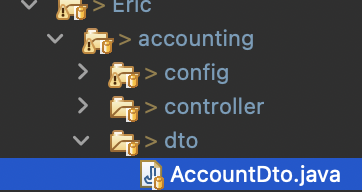
Dto的程式碼如下,整體的概念跟Entity一樣,但因為不用對資料庫操作,我們不用宣告那些對資料庫的指令。
package net.Eric.accounting.dto;
import java.time.LocalDateTime;
public class AccountDto {
	private Long id;
	private String name;
	private Boolean expensed ;
	private String category;
	private Long amount ;
	private LocalDateTime createDate;
	public AccountDto() {
	}
	public AccountDto(Long id,String name, Boolean expensed, String category, Long amount, LocalDateTime createDate) {
		this.id = id;
		this.name = name;
		this.expensed = expensed;
		this.category = category;
		this.amount = amount;
		this.createDate = createDate;
	}

	public Long getId() {
		return id;
	}
	public void setId(Long id) {
		this.id = id;
	}

	public boolean getExpensed() {
		return expensed;
	}
	public void setExpensed(Boolean expensed) {
		this.expensed = expensed;
	}
	public String getCategory() {
		return category;
	}
	public void setCategory(String category) {
		this.category = category;
	}
	public Long getAmount() {
		return amount;
	}
	public void setAmount(Long amount) {
		this.amount = amount;
	}
	public LocalDateTime getCreateDate() {
		return createDate;

	}
	public void setCreateDate(LocalDateTime createDate) {
		this.createDate = createDate;
	}
	public String getName() {
		return name;
	}

	public void setName(String name) {
		this.name = name;
	}
}
接下來,我們要開發Service層。Service層跟其他層不同的是,這一層有分成Service跟Impl兩層,這兩個類別也都不同,分別是Interface跟class,Interface就是接口,規範這個Service能夠做的有哪些function,而實際上怎麼食用則是由Impl這一層指令決定,所以我們要先來建置Service第一層interface的街口
首先,到accounting資料夾中創建Service,再到Service層中創建一個資料夾叫做Impl,然後在Service資料夾中,創建一個Interface叫做AccountsService的Java程式。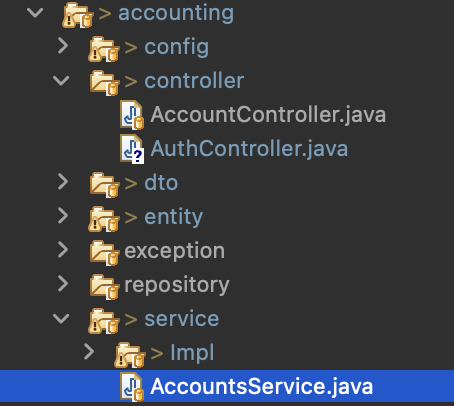
我們要做的第一個功能,是給新增記帳的資料到資料庫中,所以我們在這個AccountsService中填入以下的程式碼:
package net.Eric.accounting.service;

import net.Eric.accounting.dto.AccountDto;

public interface AccountsService {

	AccountDto createAccount(AccountDto accountDto);
}
這個function就是宣告我們要建立一個createAccount這個方程式,回傳的是AccountDto(function左邊),然後要輸入的參數也是AccountDto(function裡面)
到這裡,我們就完成了Service的createAccount。
接下來我們要建立實作的內容,讓createAccount得以實作。
在Impl底下的資料夾創建一個class,叫做AccountServiceImpl
在創建之後後面寫上implements AccountsService,這個時候你會發現這個class會寫上紅色標示,因為當它導入這個AccountsService的時候,會自動匯入這層Service所需要的功能,但因為我們現在什麼功能都沒有,所以他會認為我們是錯的,這個時候,只要把滑鼠移動到紅底下面,就會出現指令問我們要不要自動填入,這個時候只要點第一行add unimplement即可。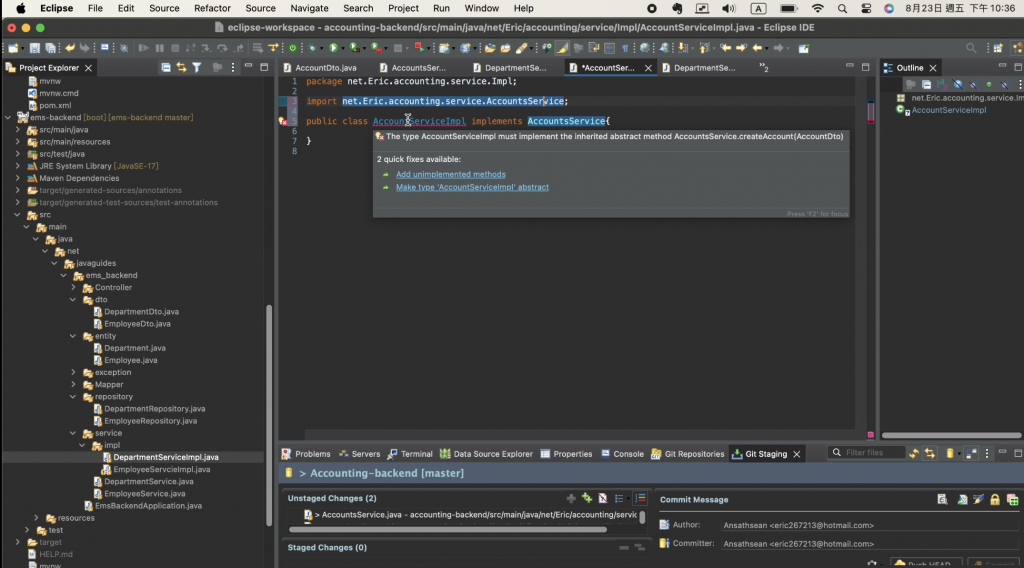
按完之後會出下以下的程式碼
package net.Eric.accounting.service.Impl;

import net.Eric.accounting.dto.AccountDto;
import net.Eric.accounting.service.AccountsService;

public class AccountServiceImpl implements AccountsService{

	@Override
	public AccountDto createAccount(AccountDto accountDto) {
		// TODO Auto-generated method stub
		return null;
	}
}
接著我們就要來實作了。在實作之前,我們要先在系統中引入一個非常有用的功能,我們先去整個專案最底下,pom這個地方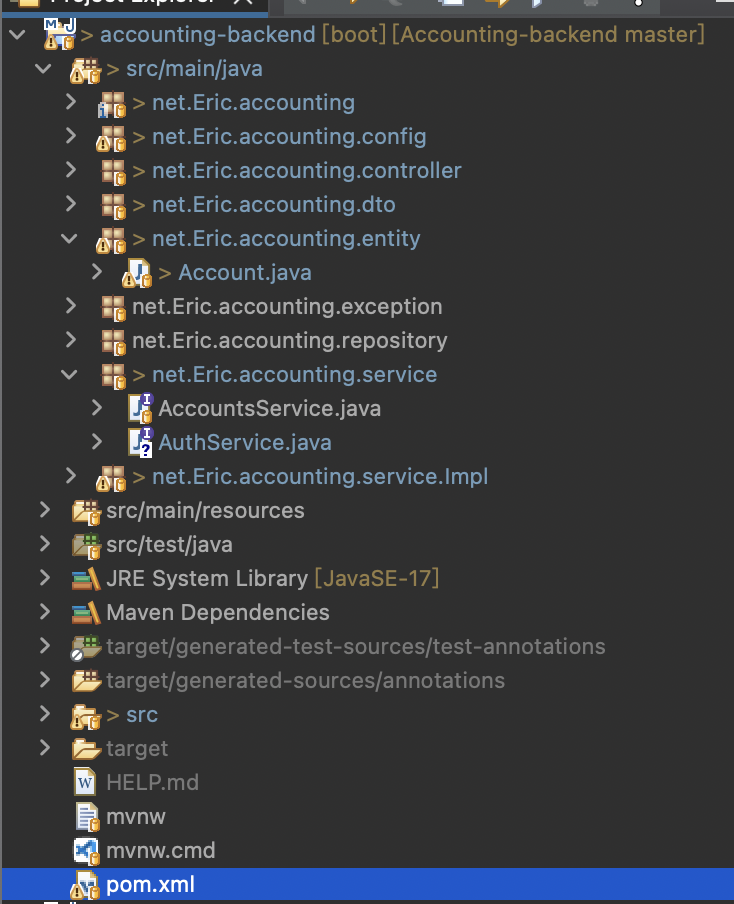
請到底下複製貼上這個功能
    <dependency>
      <artifactId>modelmapper</artifactId>
      <version>3.2.0</version>
    </dependency>
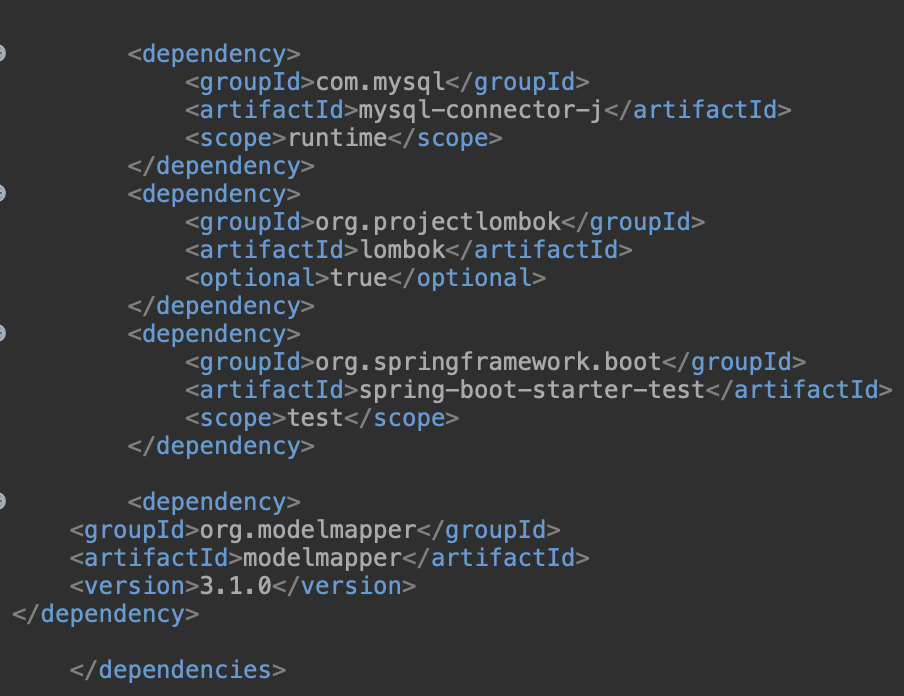
匯入之後確認沒有出現任何的錯誤提示,然後要到我們的AccountingBackendApplication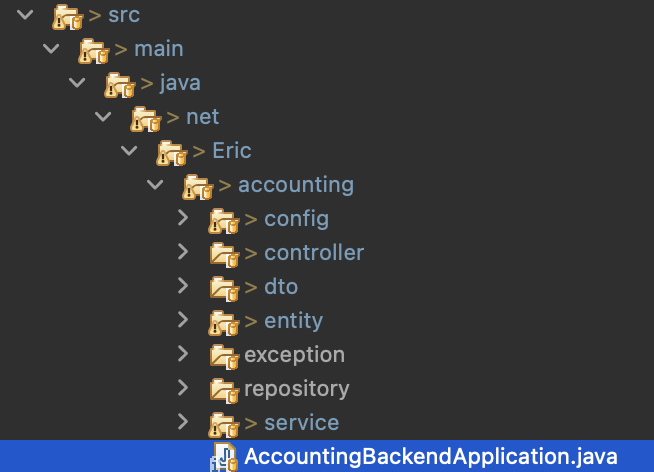
點開後在這個地方新增一個Bean
	@Bean
	public ModelMapper modelMapper() {
		return new ModelMapper();
	}
完整的程式碼會長這樣
package net.Eric.accounting;

import org.modelmapper.ModelMapper;
import org.springframework.boot.SpringApplication;
import org.springframework.boot.autoconfigure.SpringBootApplication;
import org.springframework.context.annotation.Bean;

@SpringBootApplication
public class AccountingBackendApplication {

	@Bean
	public ModelMapper modelMapper() {
		return new ModelMapper();
	}

	public static void main(String[] args) {
		SpringApplication.run(AccountingBackendApplication.class, args);
	}

}
到這邊就是正式的匯入了這個功能,這個功能是用來新增資料轉換的功能。
接下來到ServiceImpl中寫下以下的程式
package net.Eric.accounting.service.Impl;

import java.sql.Date;
import java.time.LocalDateTime;
import java.time.ZoneId;
import java.time.ZonedDateTime;

import org.modelmapper.ModelMapper;
import org.springframework.beans.factory.annotation.Autowired;
import org.springframework.stereotype.Component;
import org.springframework.stereotype.Service;

import net.Eric.accounting.dto.AccountDto;
import net.Eric.accounting.entity.Account;
import net.Eric.accounting.repository.AccountRepository;
import net.Eric.accounting.service.AccountsService;

@Service
@Component
public class AccountsServiceImpl implements AccountsService{

	@Autowired
	private AccountRepository accountRepository;

	@Autowired
	private ModelMapper modelMapper;

	@Override
	public AccountDto createAccount(AccountDto accountDto) {

	    // 獲得 UTC+8 時區與時間
	    ZonedDateTime utcPlus8 = ZonedDateTime.now(ZoneId.of("Asia/Taipei"));
	    LocalDateTime currentDateTime = utcPlus8.toLocalDateTime();

		Account account = modelMapper.map(accountDto, Account.class);

	    // 設置 createDate
	    account.setCreateDate(currentDateTime);


		Account savedAccount = accountRepository.save(account);
		return modelMapper.map(savedAccount, AccountDto.class);
	}

}
這邊要注意的是要寫上@Service、@Component。前幾天有教大家這個區塊指令的意義,在這邊,這兩個指令是告訴程式這兩個是Service,要在執行時先存起來讓後續使用。
而@Autowired指的是要使用哪些我們已經開發寫好的程式Class,這邊就是使用到我們昨天開發的accountRepository,以及剛剛引入的modelMapper。
@Override就是我們每個要開發的功能都要寫入的,底下的指令是獲得時間,跟accountDto轉換
最後就是存擋,存擋完成後會回傳Dto給Controller層。
在寫完這個程式我們即完成了Service的實作。
接下來要創建Controller,我們要新增一個Controller資料夾,然後建置AccountController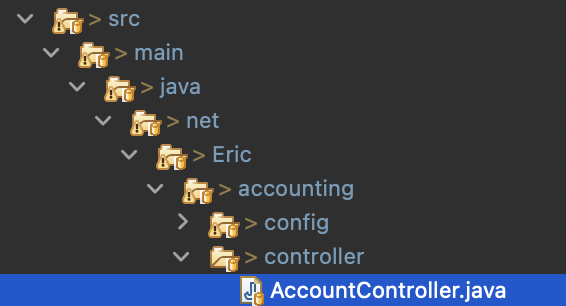
接下來輸入以下的程式碼
package net.Eric.accounting.controller;


import org.springframework.beans.factory.annotation.Autowired;
import org.springframework.http.HttpStatus;
import org.springframework.http.ResponseEntity;
import org.springframework.web.bind.annotation.PostMapping;
import org.springframework.web.bind.annotation.RequestBody;
import org.springframework.web.bind.annotation.RequestMapping;
import org.springframework.web.bind.annotation.RestController;

import net.Eric.accounting.dto.AccountDto;
import net.Eric.accounting.service.AccountsService;


@RestController
@RequestMapping("/api/accounts")
public class AccountController {


	@Autowired
	private AccountsService accountsService;

	//Build Add Account REST API
	@PostMapping
	public ResponseEntity<AccountDto> createAccount(@RequestBody AccountDto accountDto){
		AccountDto savedAccountDto = accountsService.createAccount(accountDto);
		return new ResponseEntity<>(savedAccountDto,HttpStatus.CREATED);
	}
}
當我們寫完這個,就是大功告成了。接下來就是啟動程式,然後再啟動Postman測試,windows的用戶可以直接啟動postman,mac的用戶記得先開起postman Agent,然後再從Web登入系統中操作。
當我們輸入以下參數,有回傳200OK,即完成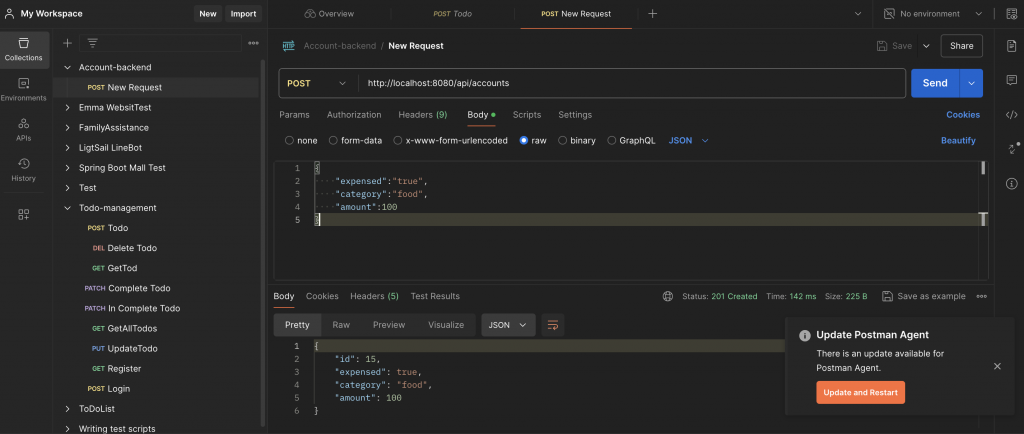
回傳的結果如下
{
    "expensed":"true",
    "category":"food",
    "amount":100
}
到了這裡,恭喜你完成了屬於自己的API功能!
