前一篇文章我們找到了專案的路由架構並找到了’product-list’,本篇文章要從ProductListComponent開始建立元件之間的關係。
在Angular的世界中,元件主要可以跟以下項目建立關係:
- 其他元件
- service
- 路由
- pipe
- directive
本章我們主要討論元件、Service、路由,其中路由與元件之間的關係我們已經聊過,接著我們來看元件與其他元件之間的關係。
元件之間主要可以透過以下方式互動:
// 子元件
@Component({
  selector: 'child-component',
  template: `<button (click)="notifyParent()">Notify Parent</button>`
})
export class ChildComponent {
  @Input() childData: string;
  @Output() childEvent = new EventEmitter<string>();

  notifyParent() {
    this.childEvent.emit('Message from Child');
  }
}

// 父元件
@Component({
  selector: 'parent-component',
  template: `
    <child-component [childData]="parentData" (childEvent)="handleEvent($event)"></child-component>
  `
})
export class ParentComponent {
  parentData = 'Data from Parent';

  handleEvent(message: string) {
    console.log(message);
  }
}
// 子元件
@Component({
  selector: 'child-component',
  template: `<p>Child Component</p>`
})
export class ChildComponent {
  public childMethod() {
    console.log('Child Method Called');
  }
}

// 父元件
@Component({
  selector: 'parent-component',
  template: `<child-component></child-component>`
})
export class ParentComponent implements AfterViewInit {
  @ViewChild(ChildComponent) childComponent: ChildComponent;

  ngAfterViewInit() {
    this.childComponent.childMethod();
  }
}
回到範例,我們主要要找的就是,HTML 裡有無 <app-*> 標籤,TS 檔案裡有無 @ViewChild 或 @ViewChildren,且同時,我們所在的 component 本身有沒有被其他人所引用。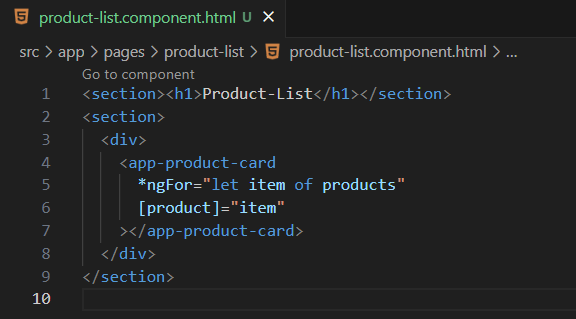
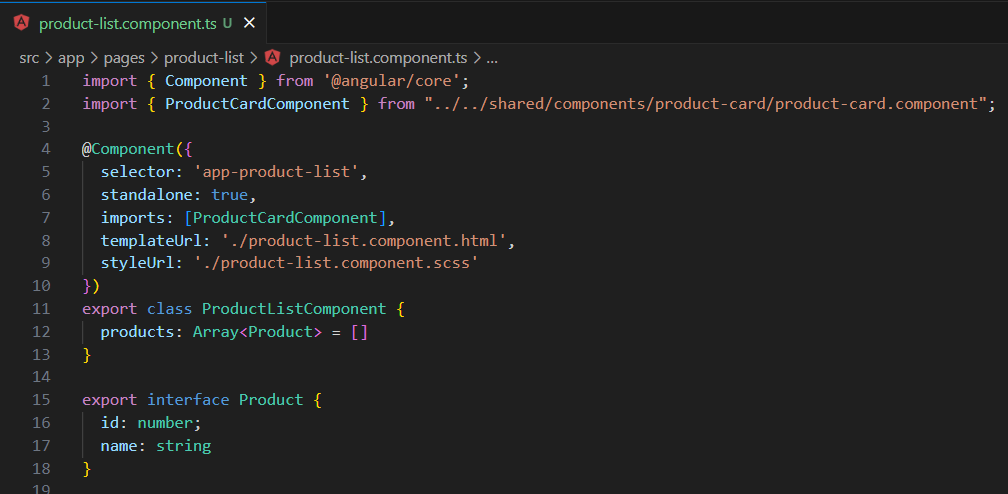
可以發現範例很單純,只有使用了 ProductCardComponent 作為子元件,不過切記,我們所在的 component 本身也有可能被其他人所引用。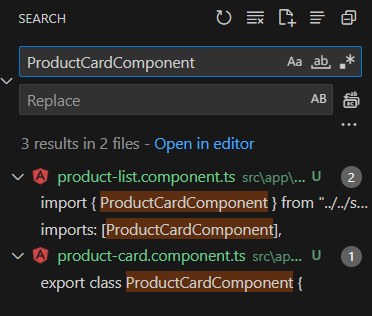
調查完畢後,將我們的架構圖更新,並且按照資料夾結構區分檔案,並補上 component 的用途。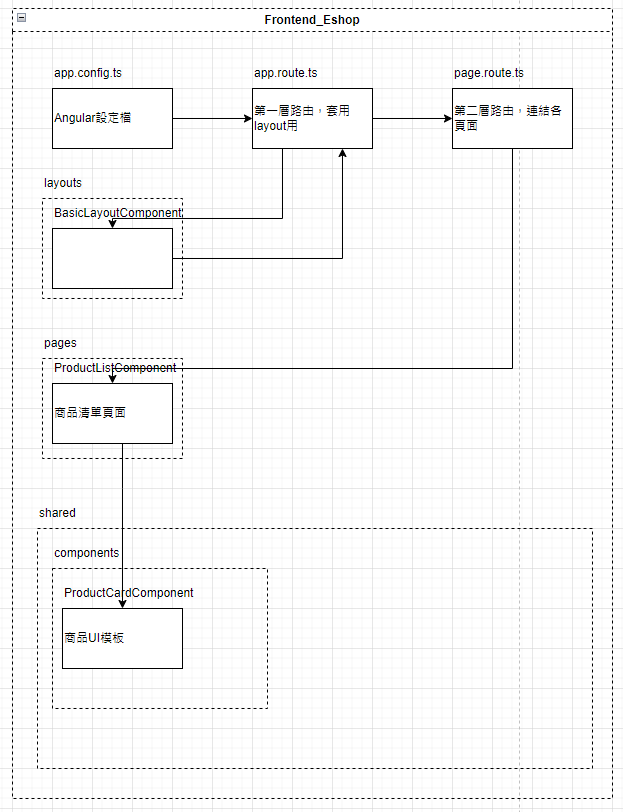
Component 的重點整理:
- 找子元件
- 找 ViewChild / ViewChildren
- 找 component 本身有無被他人引用
最後我們來講 Service,在 Angular 中,服務(Service)是一個用於封裝共享邏輯和資料的類別,通常透過依賴注入(Dependency Injection)進行使用。服務主要可以與以下項目互動:
@Injectable({ providedIn: 'root' })
export class DataService {
  private data = new BehaviorSubject<string>('Initial Data');
  currentData = this.data.asObservable();

  updateData(newData: string) {
    this.data.next(newData);
  }
}

// 元件中使用
@Component({ /*...*/ })
export class SomeComponent {
  constructor(private dataService: DataService) {}

  update() {
    this.dataService.updateData('New Data');
  }
}
@Injectable({ providedIn: 'root' })
export class AuthService {
  constructor(private http: HttpClient) {}

  login(credentials: any) {
    return this.http.post('/api/login', credentials);
  }
}

@Injectable({ providedIn: 'root' })
export class UserService {
  constructor(private authService: AuthService) {}

  authenticateUser(credentials: any) {
    return this.authService.login(credentials);
  }
}
@Injectable({ providedIn: 'root' })
export class ApiService {
  constructor(private http: HttpClient) {}

  fetchData() {
    return this.http.get('/api/data');
  }
}
可以發現 Service 的應用層面非常廣,上述也只是其中幾種用法,所以不建議一開始從 Service 當作切入點,會很容易找到頭暈。
雖然 Service 的用途如此廣大,但我們現在要 Focus 的是 ProductList 這個 component,換言之,我們要看的就是 ProductListComponent 與那些 Service 進行互動,並且按照前述的繪圖方式記錄下來。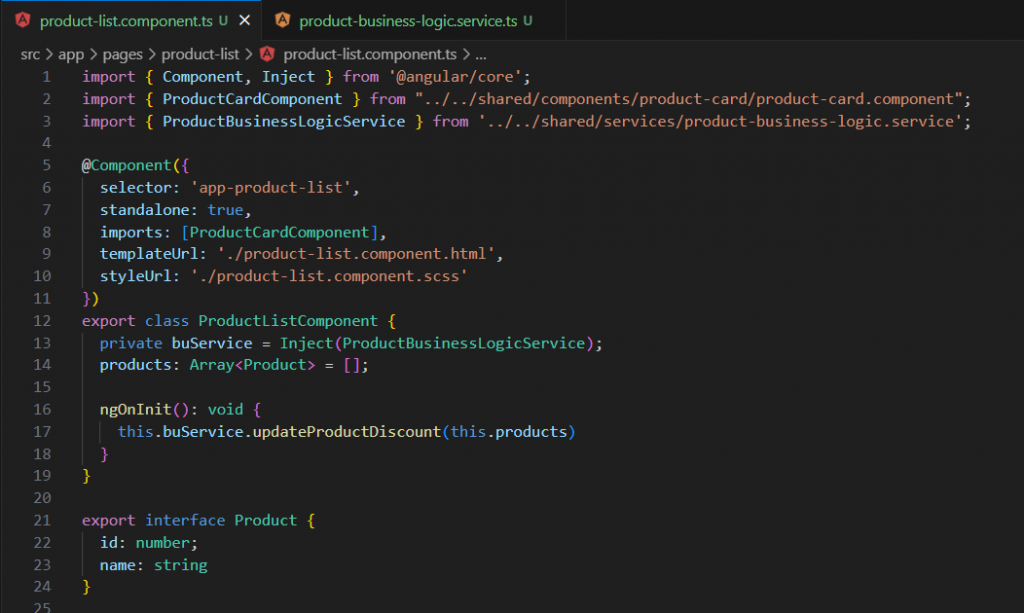
可以發現範例中,ProductList 使用了 ProductBusinessLogicService,先不用急著閱讀 Service 內的邏輯,先專注在我們的目標 ProductListComponent 上,這樣在一開始理解專案時比較不容易混亂。
接著一樣更新圖表。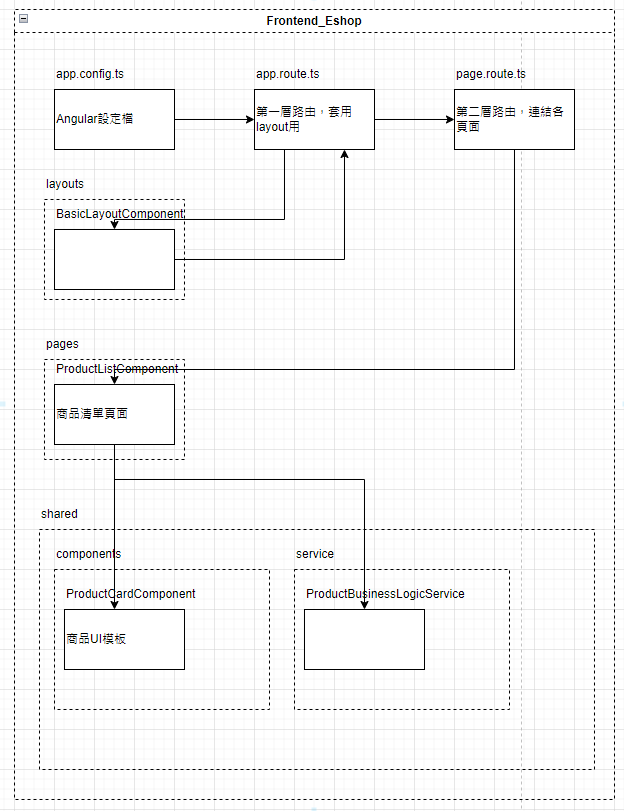
接著其實就是重複上述步驟,一次以一個 component 或是 Service 為目標搭配資料夾結構,逐一把圖表填滿,重點放在檔案和檔案之間的階層和關係上。
下一篇文章我們會補上前端專案與外部依賴和 API 的關聯。


 iThome鐵人賽