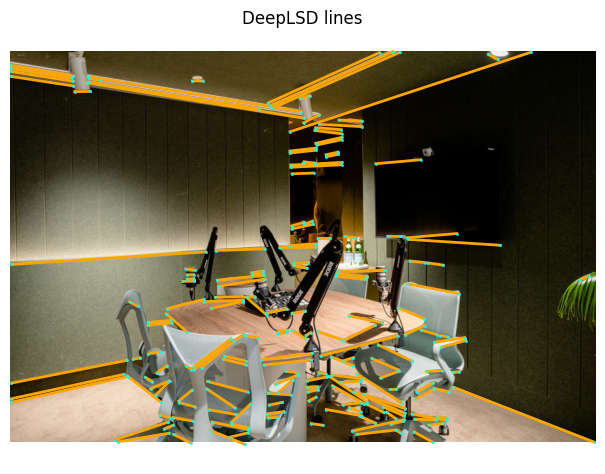
在前一天探討了利用 Deeplsd 來進行進行線段檢測並區分垂直&水平線,有了這些資料便可以來推估場景的透視關係。在接下來的內容主要會針對利用垂直與水平線根據邊來進行平移使得合成更加真實。
這邊的想法是以日常在貼海報時的動作進行拆解,通常在貼海報首先會先想要找到對齊的牆壁或物品,接著呢把左上角貼到想要的位置上,再來把右上角的點根據物品的邊之斜率去對齊,對齊完成後即可完成。
圖片來源:https://news.gamme.com.tw/1524774
接著將想法拆解成 to-do list 整理:
- [ ]根據前篇分出水平射線找尋適合的線
- [ ]根據適合的線斜率進行調整
首先在先前已經取得了水平以及垂直的線,再來要解決的的問題是我們該怎麼找到適合的線呢?
這邊一樣用先前提到的貼海報動作,我們一般在貼海報通常會往上看有沒有參考的線(EX.牆壁縫),這邊一樣用同樣的邏輯去實作:
x1_rect, y1_rect = rect[0] #左上角
x2_rect, y2_rect = rect[1] #右下角
center_x = (x1_rect + x2_rect) / 2
center_y = (y1_rect + y2_rect) / 2
edge_length = max(x2_rect - x1_rect, y2_rect - y1_rect)
min_length = min_length_ratio * edge_length

# 初始化默認值
up_line = down_line = None
max_up_length = max_down_length =  0
首先輸入會是想要貼上海報得框框,可以看到 rect[0] 為海報右上角座標,而 rect[1] 為海報右下角座標,接著初始化設定最小長度以防找到會造成貼上問題的線條(我們要找的是最長&被當成視線基礎的那條)。
接著要先確認的會是,在想要貼上的範圍內是否有牆壁線條?因為若是不依照此線條去貼,該線條與海報會造成視覺上極大的不平橫。就像是下圖這樣。
圖片來源:https://playing.ltn.com.tw/article/2881/1
再來因為圖片不可能跟我們貼海報時一樣永遠是正面可能會出現側邊的狀況。像是以下方這張圖來看,左邊的牆面便是屬於透視的角度。因此我們比須找出上方最適合的線以及下方最適合的線來面對所有的情況。
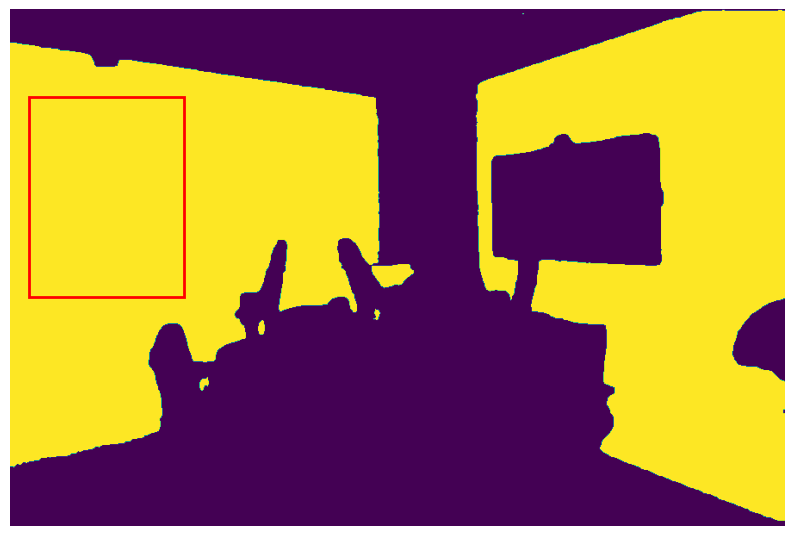
我們可以先來看看框框內是否有想要合成的圖像?框框的話可能較難想像但畫出來就像是下方這樣。
首先先找矩形內的線。
# 偏好框框內
for line in edges:
        (lx1, ly1), (lx2, ly2) = line
        line_length = np.linalg.norm(np.array([lx2, ly2]) - np.array([lx1, ly1]))
        if line_length >= min_length:
            if line_in_rect(line, rect):
                down_line = ((lx1, ly1), (lx2, ly2))
                print('上方矩形內')


# 偏好框框內
for line in edges:
        (lx1, ly1), (lx2, ly2) = line
        line_length = np.linalg.norm(np.array([lx2, ly2]) - np.array([lx1, ly1]))
        if line_length >= min_length:
            if line_in_rect(line, rect):
                up_line = ((lx1, ly1), (lx2, ly2))
                print('下方矩形內')
接著若是矩形內沒有便開始往外找。
closest_distance_down = float('inf')
if down_line is None:
    for line in edges:
        (x1, y1), (x2, y2) = line
        line_length = np.linalg.norm(np.array([x2, y2]) - np.array([x1, y1]))
        if line_length >= min_length:
            if int(x1_rect) in range(int(x1), int(x2)) or int(x2_rect) in range(int(x1), int(x2)) or x1 in range(x1_rect, x2_rect) or x2 in range(x1_rect, x2_rect):
                if line_length > max_down_length:
                    distance = center_y - max(y1, y2)

                    if distance > 0 and distance < closest_distance_down:
                        closest_distance_down = distance
                        max_down_length = line_length
                        down_line = ((x1, y1), (x2, y2))
                        print('往下找到')
    if down_line is None:
        for line in edges:
            (x1, y1), (x2, y2) = line
            line_length = np.linalg.norm(np.array([x2, y2]) - np.array([x1, y1]))
            if line_length >= min_length:
                if y1 <= center_y and y2 <= center_y:
                    if line_length > max_down_length:
                        max_down_length = line_length
                        down_line = ((x1, y1), (x2, y2))
                        print('下方都沒找到全圖找')

closest_distance_up = float('inf')
if up_line is None:
    for line in edges:
        (x1, y1), (x2, y2) = line
        line_length = np.linalg.norm(np.array([x2, y2]) - np.array([x1, y1]))
        if line_length >= min_length:
            if int(x1_rect) in range(int(x1), int(x2)) or int(x2_rect) in range(int(x1), int(x2))or x1 in range(x1_rect, x2_rect) or x2 in range(x1_rect, x2_rect):
                if y1 >= center_y and y2 >= center_y:
                    distance = center_y - max(y1, y2)

                    if distance > 0 and distance < closest_distance_up:
                        closest_distance_up = distance
                        up_line = ((x1, y1), (x2, y2))
                        print('往上找到')
    if up_line is None:
        for line in edges:
            (x1, y1), (x2, y2) = line
            line_length = np.linalg.norm(np.array([x2, y2]) - np.array([x1, y1]))
            if line_length >= min_length:
                if y1 >= center_y and y2 >= center_y:

                    if line_length > max_up_length:
                        max_up_length = line_length
                        up_line = ((x1, y1), (x2, y2))
                        print('上方都沒找到全圖找')
closest_distance_down 和 closest_distance_up 都初始化為無限大 (float('inf')),表示一開始沒有找到任何符合條件的線。down_line 和 up_line 分別表示最靠近下方和上方的線。down_line 尚未定義,程式會從 edges(邊緣線條)中遍歷每一條線。min_length 的要求。center_y 之下,並計算垂直距離。closest_distance_down 和 down_line。center_y 之下的線,不再受限於 x 座標範圍。center_y 之上的線條。up_line。如果最初的搜索未能找到合適的上下線,程式會進行全圖範圍的搜尋,即不再受限於 x 座標的範圍,只要滿足 y 座標和線長度的條件即可。
最終在找尋出最適合上方以及下方的線條。
接下來根據線的斜率調整就簡單了,只需要一個簡單的 Function 計算新的座標點即可完成~
def mcompute_adjusted_region_points(line_points, horizontal_line):
    """
    根據指定的線段和新起點生成平行線段

    Args:
        line_points: 線段的兩個座標點
        horizontal_line: 目標線段的兩個座標點

    Returns:
        list: 返回新線段的起點和終點座標 (new_x1, new_y1, new_x2, new_y2)
    """
    (hx1, hy1), (hx2, hy2) = horizontal_line

    # 計算目標線段的斜率
    if hx2 != hx1:
        m = (hy2 - hy1) / (hx2 - hx1)
    else:
        # 如果線段是垂直的,斜率無限大
        m = float('inf')

    # 提取線段的起點和終點
    x1, y1 = line_points[0]
    x2, y2 = line_points[1]

    # 計算新線段的起點和終點
    if m != float('inf'):
        # 斜率不無限大情況下的計算
        length = np.sqrt((x2 - x1)**2 + (y2 - y1)**2)
        new_x1 = x1
        new_y1 = y1 + m * (new_x1 - x1)
        new_x2 = new_x1 + length / (1 + m**2)**0.5
        new_y2 = new_y1 + m * (new_x2 - new_x1)
    else:
        print('inf')
        # 垂直線段的計算
        new_x1 = x1
        new_y1 = y1
        new_x2 = x1
        new_y2 = y1 + (y2 - y1)

    return [(new_x1, new_y1), (new_x2, new_y2)]
line_points: 表示原始線段的兩個端點座標 ((x1, y1) 和 (x2, y2))。horizontal_line: 目標線段的兩個端點座標 ((hx1, hy1) 和 (hx2, hy2)),主要用來計算斜率。horizontal_line 的兩個點來計算該線段的斜率 m。如果 hx2 != hx1,則斜率為 (hy2 - hy1) / (hx2 - hx1)。hx2 == hx1,這代表目標線段是一條垂直線,斜率為無限大 (float('inf'))。以上就完成所有的 to-do list !
-[✅]根據前篇分出水平射線找尋適合的線
-[✅]根據適合的線斜率進行調整

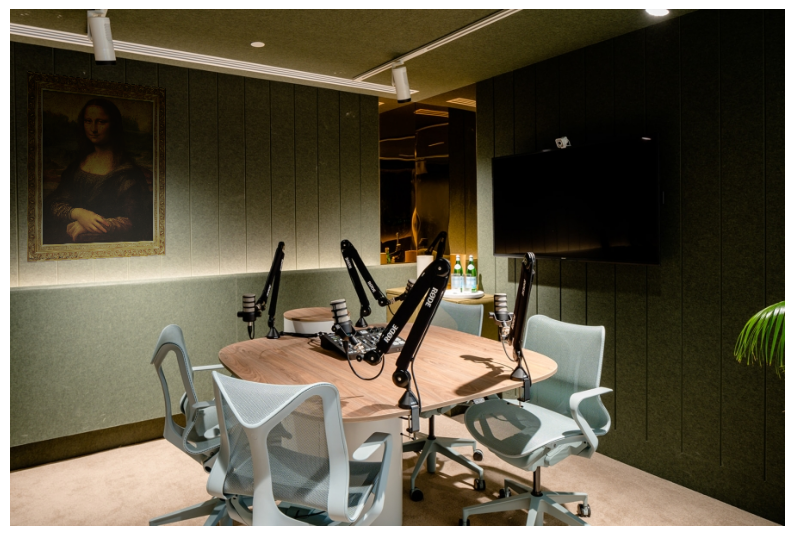
我們就可以得到一張調整過後之圖片,可以看到在此案例上能夠很好的去融入場景!

但是呢像是這樣子的場景透視的感覺便會有點不自然,因此在下一篇我們將探討另一種轉換的演算法!
如有任何問題歡迎在下方留言提問!
