在之前的文章中,我們探討了如何透過本地 JSON 檔案來管理多語言支援(i18n)。隨著專案的擴展和多語言需求的增加,本地管理翻譯檔案可能變得不夠靈活。今天,我們將專注於後端,講述如何使用 Node.js 來建立一個 API,讓我們能夠動態管理翻譯資料,實現更高效的多語言支援架構。
首先,我們創建一個 Node.js 專案來搭建伺服器,並且安裝必要的依賴。
mkdir react-webpack-starter
cd react-webpack-starter
npm init -y
npm install express cors
npm install -g vercel
express:用來建立伺服器的框架。cors:解決跨域問題。vercel :用於最終部署伺服器。接下來,我們會創建一個簡單的 Express 伺服器,並透過 API 提供多語言翻譯資料。這些翻譯資料將以 JSON 的形式返回給前端,並根據請求中的語言參數動態提供對應的翻譯。在根目錄下建立 server.js 文件,這是我們的後端伺服器主檔案。
// server.js
const express = require('express');
const cors = require('cors');
const app = express();
const PORT = process.env.PORT || 3000;

// 中間件
app.use(cors());
app.use(express.json());

// 翻譯資料
const translations = {
  en: {
   //...其他英文翻譯資料
   projectData: [
            {
                id: 1,
                date: "2024",
                category: "React Project",
                title: "Portfolio Website",
                description: `Created a personal portfolio website to showcase projects, blog posts, and professional experience.
                    The website includes an interactive homepage, project filtering, and a blog section, all integrated into a smooth single-page application experience.`,
                stack: ['React', 'Figma'],
                image: "project1.png",
                live: {
                    icon: "projects/live.png",
                    url: "https://luma-c.com/home"
                },
            {
                id: 2,
                date: "2024",
                category: "UI/UX Design",
                title: "Recipe App Design",
                description: `Designed a recipe app for iPhone 14 with popular recipe recommendations, meal suggestions, live shopping, and ingredient purchase features. The interface is simple and intuitive, optimizing the browsing and buying experience.`,
                stack: ["Figma"],
                image: "project2.png",
                live: "",
            }
        ]
  },
  zh: {
     //...其他中文翻譯資料
       projectData: [
            {
                id: 1,
                date: "2024",
                category: "React 專案",
                title: "個人作品網站",
                description: `建立一個個人作品網站,展示項目、博客文章和專業經驗。網站包含互動首頁、項目過濾和博客部分,所有內容集成於單頁應用之中。`,
                stack: ['React', 'Figma'],
                image: "project1.png",
                live: {
                    icon: "projects/live.png",
                    url: "https://luma-c.com/home"
                },
            },
            {
                id: 2,
                date: "2024",
                category: "UI/UX 設計",
                title: "食譜APP設計",
                description: `針對 iPhone 14 設計的食譜APP,具備熱門食譜推薦、三餐推薦、購物直播及食材購買功能。界面設計簡潔直觀,並優化了使用者的瀏覽與購買體驗。`,
                stack: ["Figma"],
                image: "project2.png",
                live: "",
        }
  },
};

// 翻譯 API 端點
app.get('/api/translations', (req, res) => {
  const lang = req.query.lang || 'en'; // 預設語言為英文
  res.json(translations[lang] || translations.en); // 返回對應語言的翻譯
});

// 啟動伺服器
app.listen(PORT, () => {
  console.log(`Server running on port ${PORT}`);
});
在 vercel.json 文件中配置路由:
{
    "version": 2,
    "builds": [
        {
            "src": "server.js",
            "use": "@vercel/node"
        }
    ],
    "routes": [
        {
            "src": "/api/translations",
            "dest": "/server.js"
        }
    ]
}
以系統管理員開啟命令提示字元,使用 Vercel CLI 登入並部署專案:
vercel
Vercel 會自動檢測專案並進行部署。部署成功後,你會看到以下的執行結果:

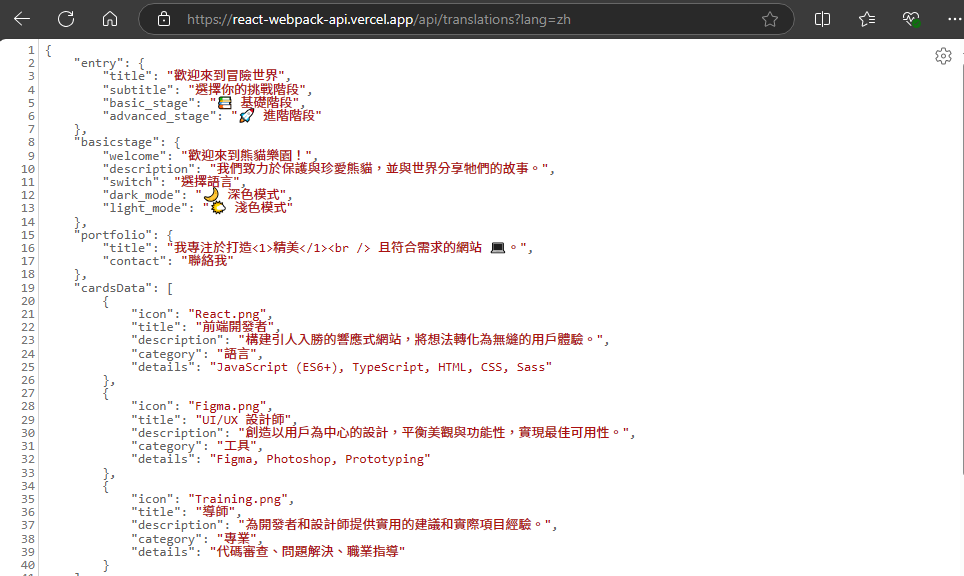
你可以通過該 URL 你可以測試 API,
今天,我們專注於後端,介紹了如何使用 Node.js 搭建一個簡單的 API 來動態管理多語言翻譯資料。這樣的架構能夠讓我們更靈活地管理和更新翻譯資料,減少了本地 JSON 文件的複雜性,並提升了應用程式的可擴展性與靈活性。
明天,我們將繼續討論如何在前端應用中使用這個 API,實現動態的 i18n 資料加載與切換。如果你對更多前端技術或專案實作有興趣,請持續關注我們的後續文章!
✨ 流光館Luma<∕> ✨ 期待與你繼續探索更多技術知識!
