前一篇文章我們畫出了使用者進入商品頁面的序列圖,今天我們要繼續完成序列圖。還差兩個功能,使用者過濾商品和前往商品明細頁,我們開始吧!
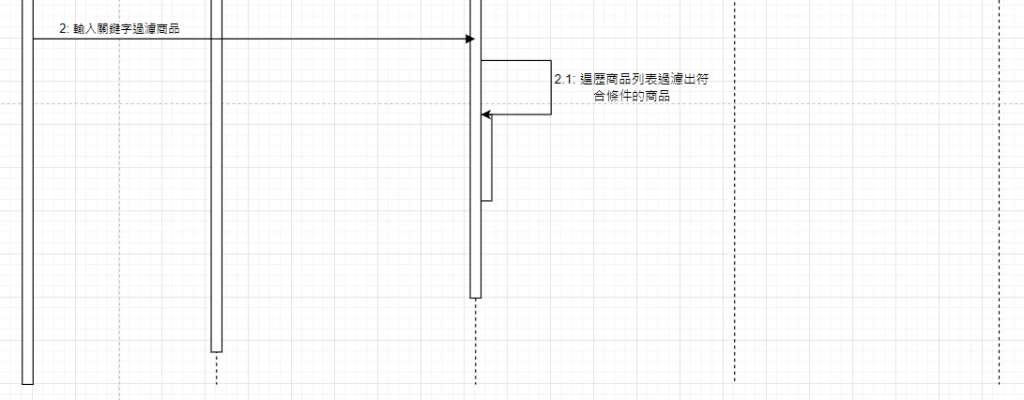
商品列表頁面,載入完畢後,使用者進行下一個操作,在輸入框輸入關鍵字進行商品過濾。
<input type="text" placeholder="Search products" (input)="filterProducts($event.target.value)" />
  // 商業邏輯: 根據關鍵字過濾產品
  filterProducts(keyword: string): void {
    this.filteredProducts = this.products.filter(product =>
      product.name.toLowerCase().includes(keyword.toLowerCase())
    );
  }
可以看到這邊的流程相對單純,”使用者輸入關鍵字的行為” → “ProductList發出遞迴訊息進行商品過濾”
補充一下,你可能會好奇為什麼ProductList的html和ts檔案並沒有分開成兩個對象而是同一個對象呢?
主要的原因是因為Angular對Component的定義是一個自包含的 UI 單位。
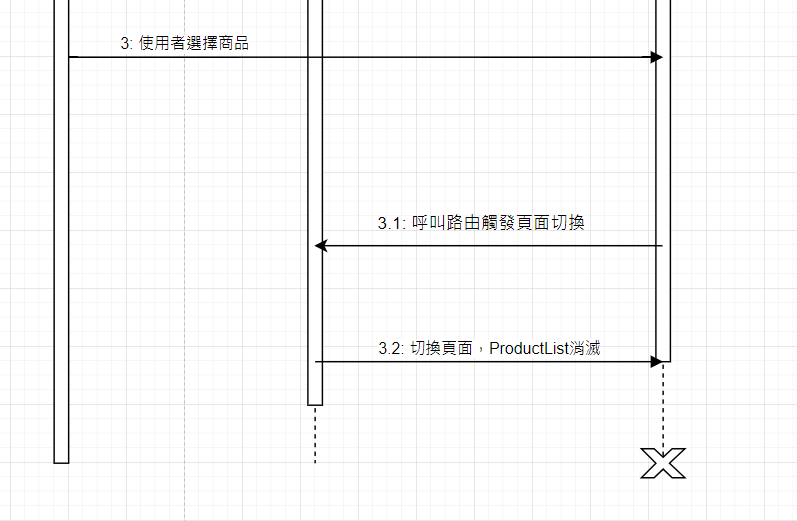
接著使用者點選商品,前往商品明細頁。
<ul>
  <li *ngFor="let product of filteredProducts">
    <h3>{{ product.name }}</h3>
    <p>{{ product.description }}</p>
    <button (click)="viewProduct(product.id)">View Details</button>
	</li>
 </ul>
// 使用者互動: 導頁至產品詳情
viewProduct(productId: number): void {
  this.router.navigate(['/product', productId]);
}
”使用者點選商品” → “ProductList發出呼叫訊息給Router” → “Router觸發導頁機制發出消滅訊息” → “ProductList消滅”
到這裡我們的程序圖也告一段落,我們在這張圖中使用了:
- 角色(Actor)
- 生命週期(Lifeline)
- 運作 (Activations)
- 呼叫訊息 (Call Message)
- 返回訊息 (Return Message)
- 自述訊息 (Self Message)
- 遞迴訊息 (Recursive Message)
- 創建訊息 (Create Message)
- 銷毀訊息 (Destroy Message)
- 註解 (Note)
除了持續時間訊息外,全都用上了。整張圖長這樣。
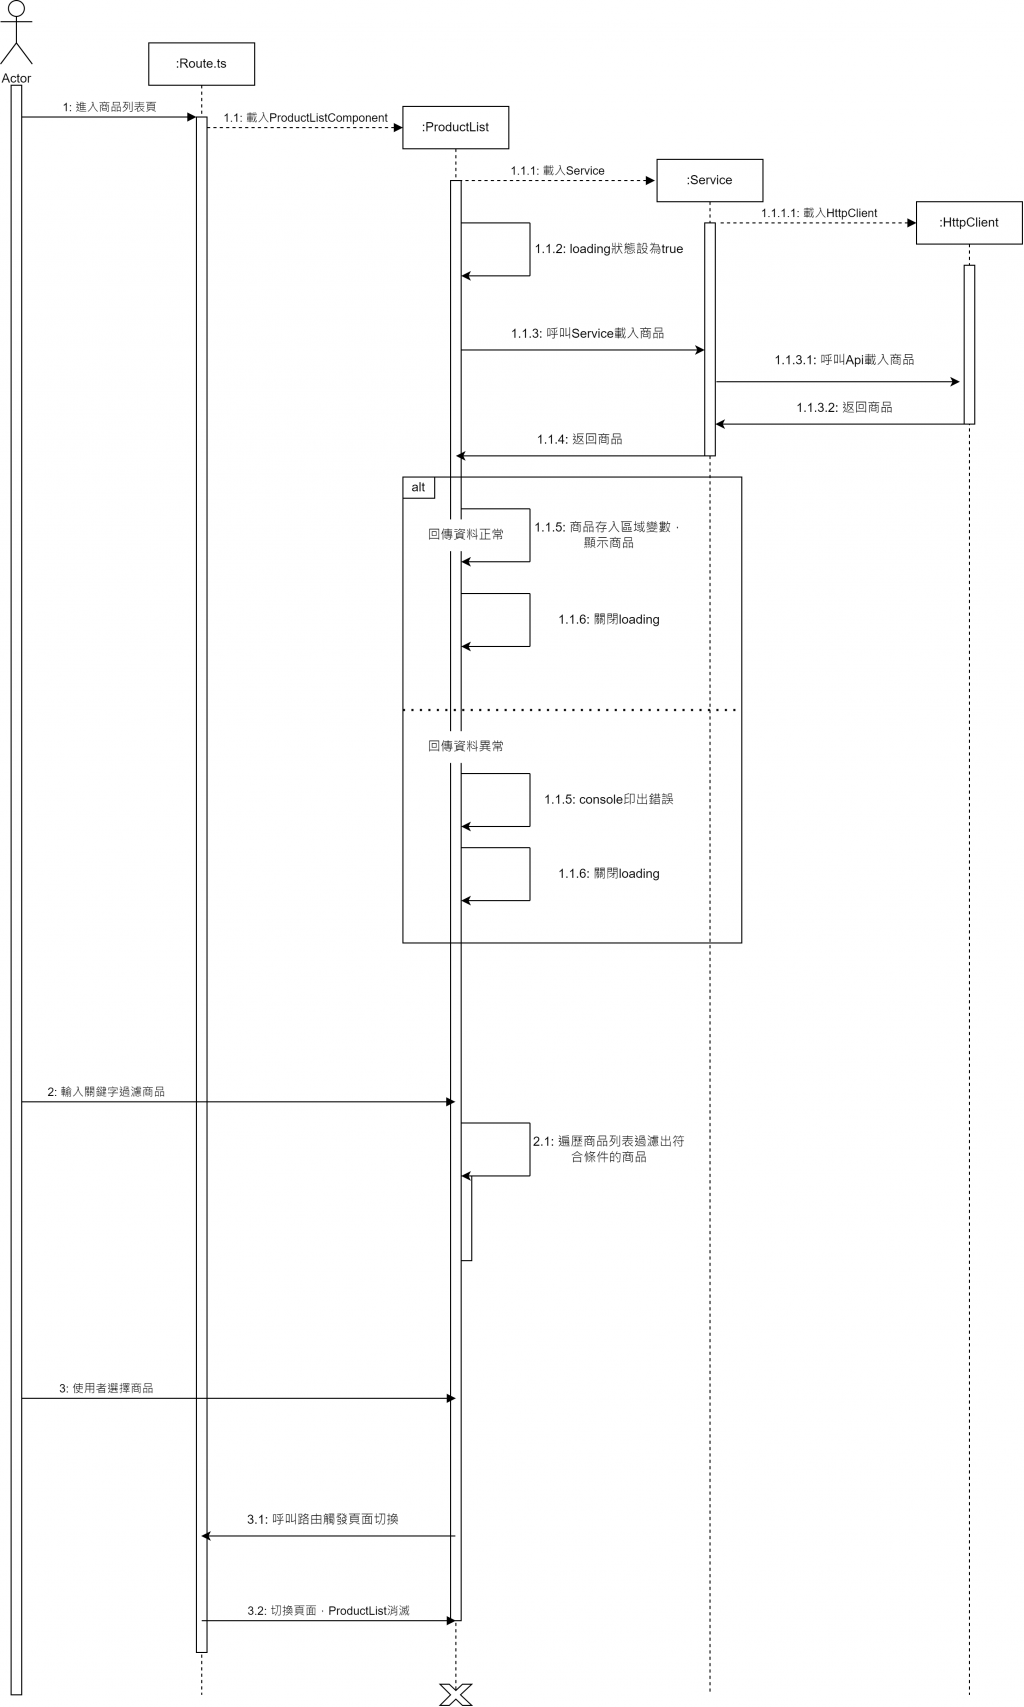
但其實,這張圖上有一個很大的錯誤!
相信眼尖的你已經發現了,照理來說Component發出創建訊息,建立Service,Service發出創建訊息建立HttpClient。
那銷毀的時候應該也是如此,但怎麼最後只有Component銷毀了呢?
回頭看看Service的範例程式碼可以發現上方的providedIn: ‘root’
@Injectable({
  providedIn: 'root'
})
export class ProductService {
這是什麼意思呢?
在 Angular 中,Service 的生命週期是基於它的「提供範圍」來決定的,而不是單純依賴某個 Component 或 AppComponent 的生命週期。
提供範圍分成 應用程序級別 和 組件級別
- 如果你在 應用程序級別 提供一個
Service,例如在AppModule或@Injectable({ providedIn: 'root' })中宣告,這個Service將與應用程序共存,也就是說,它會在應用啟動時被創建,並在應用整體銷毀時一起銷毀。這樣的Service是全局單例,無論在哪個Component中使用,它都是同一個實例。
//log.service.ts
import { Injectable } from '@angular/core';

// 應用程序級別
@Injectable({
  providedIn: 'root'
})
export class LogService {
  log(message: string) {
    console.log(message);
  }
}
// my-component.component.ts
import { Component, OnInit, OnDestroy } from '@angular/core';
import { LogService } from './log.service';

@Component({
  selector: 'app-my-component',
  templateUrl: './my-component.component.html',
  styleUrls: ['./my-component.component.css'],
	// 不需要提供 LogService
})
export class MyComponent implements OnInit, OnDestroy {
	 // LogService 為單一實例,隨Angular應用的生命週期產生和消滅
  constructor(private logService: LogService) {}

  ngOnInit(): void {
    // LogService 不被影響
  }

  ngOnDestroy(): void {
	  // LogService 不被影響
  }
}
- 如果你在 組件級別 提供一個
Service,例如在某個Component的providers陣列中宣告,這個Service的生命週期就與這個Component綁定,當這個Component被創建時,該Service會被創建,當Component被銷毀時,該Service也會被銷毀。這樣的Service是局部實例,只在該組件及其子組件內部共享。
//log.service.ts
import { Injectable } from '@angular/core';

// 組件級別
@Injectable()
export class LogService {
  log(message: string) {
    console.log(message);
  }
}
// my-component.component.ts
import { Component, OnInit, OnDestroy } from '@angular/core';
import { LogService } from './log.service';

@Component({
  selector: 'app-my-component',
  templateUrl: './my-component.component.html',
  styleUrls: ['./my-component.component.css'],
  providers: [LogService] // 這裡提供了 LogService
})
export class MyComponent implements OnInit, OnDestroy {

  constructor(private logService: LogService) {}

  ngOnInit(): void {
    // LogService 實作獨立的實例
  }

  ngOnDestroy(): void {
	  // LogService 隨之消滅
  }
}
所以我們的序列圖應該這麼修改。

可以發現Route.ts,Service,HttpClient都在使用者進入App的時候(Angular應用生命週期開始)的時候就出現了,而非ProductList被創建時才出現。
修改完的整張圖如下。
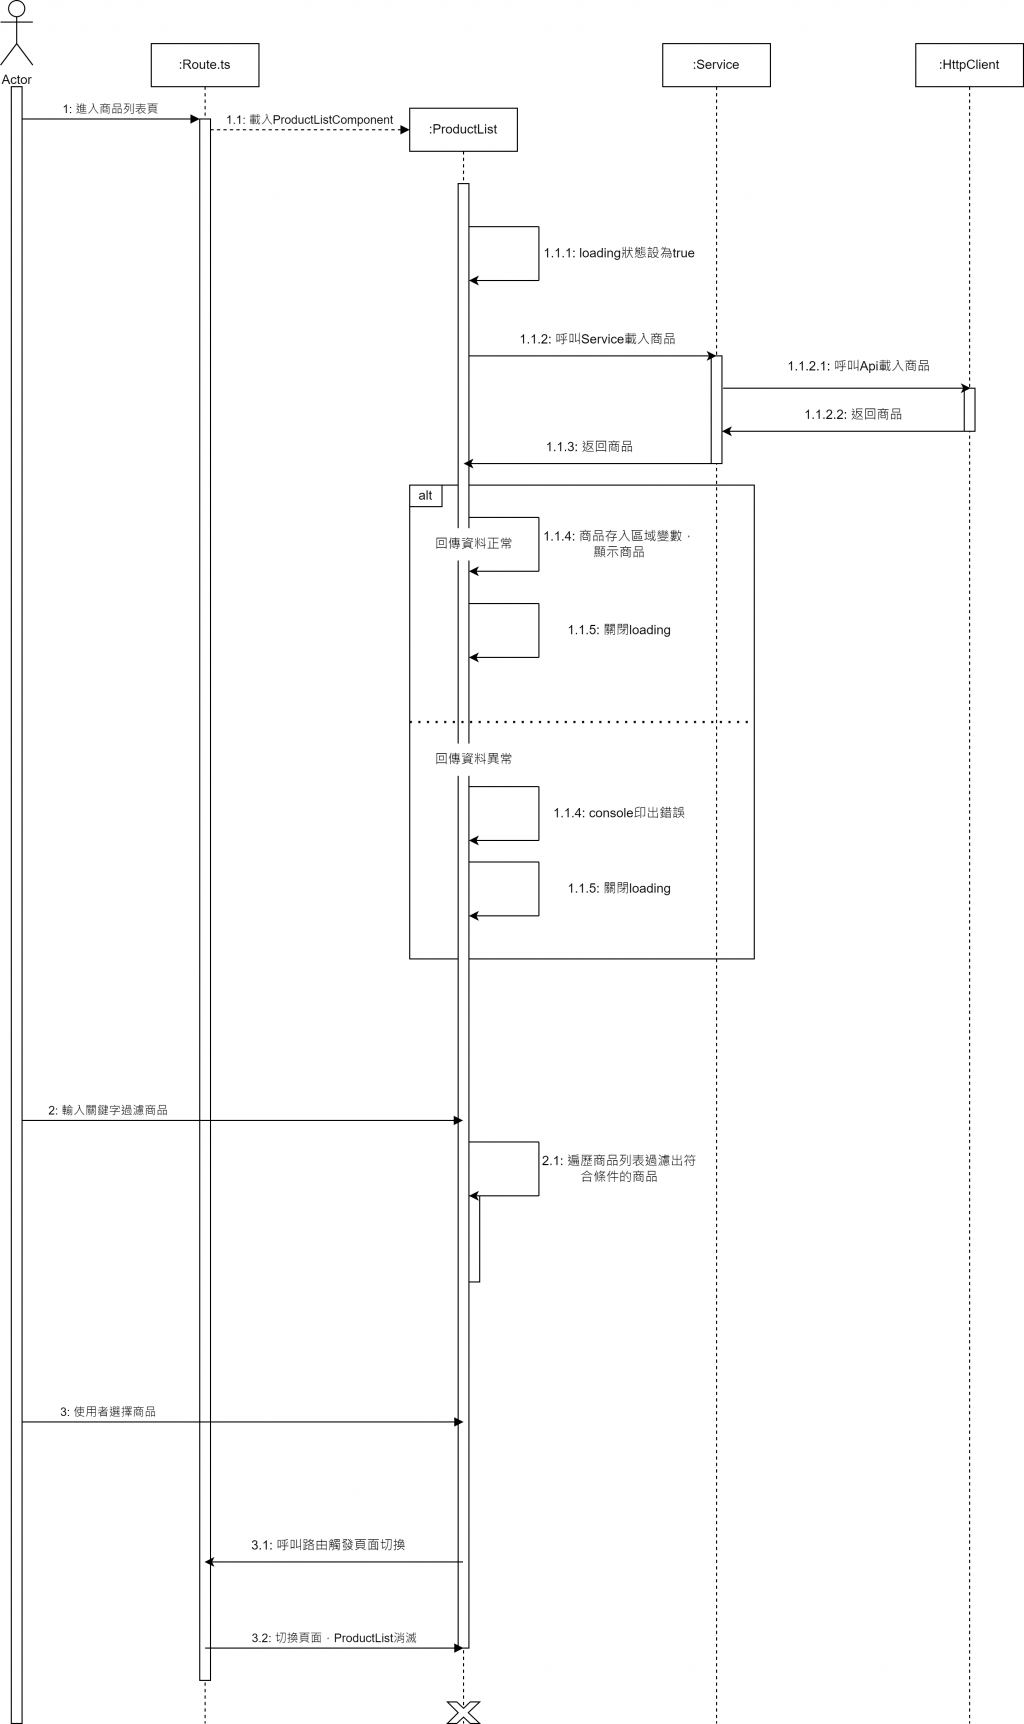
到此我們的序列圖就算是真的完成了!
下一篇文章我們會進入開發的階段,讓我們一起看下去~