

這是今天的參考程式碼:https://github.com/ksw2000/ironman-2024/tree/256542976e83a1b53dfb81ba84815c0bc8260de8/whisper
今天開始處理一些細節,在主頁點選好友時,我們可以使用 showDialog 彈出好友的頭像以及是否要向他傳送訊息,如下圖:
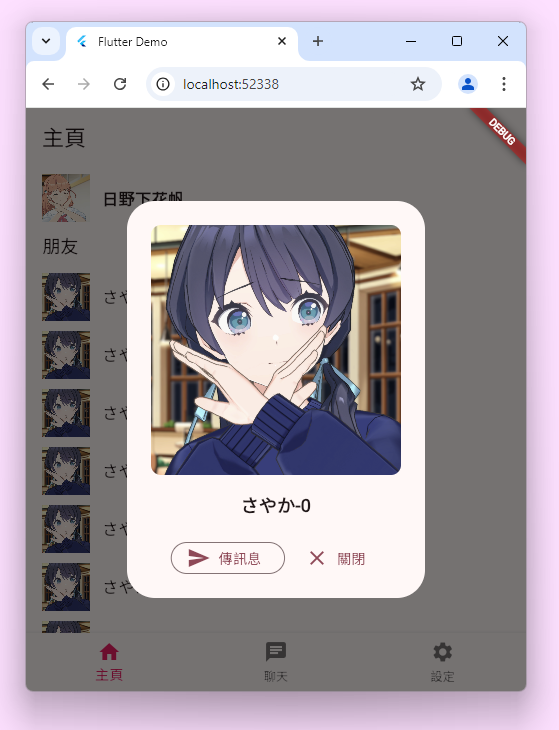
這個 Card 看起來怎麼有點像什麼交友軟體的感覺😂
官方參考文檔:https://api.flutter.dev/flutter/material/showDialog.html
我們可以在 FriendCard 被點擊時,呼叫 showDialog 函式,showDialog 會需要我們將 context 傳入,並且我們要 build 出一個 AlertDialog,或者如果是更簡單的場景我們可以用 SimpleDialog。另外在 AlertDialog 中可以設定 scrollable,預設是可以卷動的,這樣如果手機是横放的話可能導致整個畫面塞不下,無法點到下面的按鈕。當我們按下傳訊息時,另外,跳轉進頻道頁面 ChannelPage 這部分會在後續進行設計。至於當按下取消按鈕後則觸發 Navigator.pop 關閉彈窗。
class FriendCard extends StatelessWidget {
  const FriendCard({super.key, required this.friend});
  final Friend friend;

  @override
  Widget build(BuildContext context) {
    return ListTile(
        contentPadding: const EdgeInsets.symmetric(horizontal: 16, vertical: 5),
        leading: friend.profile == null
            ? Image.asset("assets/default_profile.png")
            : Image.network(friend.profile!),
        title: Text(friend.userName),
        onTap: () {
          showDialog(
              context: context,
              builder: (BuildContext context) =>
                  FriendCardDialog(friend: friend));
        });
  }
}
class FriendCardDialog extends StatelessWidget {
  const FriendCardDialog({super.key, required this.friend});
  final Friend friend;

  @override
  Widget build(BuildContext context) {
    return AlertDialog(
        scrollable: true,
        title: ClipRRect(
            borderRadius: BorderRadius.circular(10),
            child: friend.profile == null
                ? Image.asset("assets/default_profile.png",
                    width: 250, height: 250)
                : Image.network(friend.profile!, width: 250, height: 250)),
        content: Text(friend.userName,
            textAlign: TextAlign.center,
            style: const TextStyle(fontWeight: FontWeight.w700, fontSize: 18)),
        actionsAlignment: MainAxisAlignment.center,
        actions: <Widget>[
          OutlinedButton.icon(
              icon: const Icon(Icons.send),
              onPressed: () {
                Navigator.of(context)
                    .push(MaterialPageRoute(builder: (context) {
                  return ChannelPage(channelID: friend.channelID);
                }));
              },
              label: const Text("傳訊息")),
          TextButton.icon(
            icon: const Icon(Icons.close),
            onPressed: () => Navigator.pop(context),
            label: const Text('關閉'),
          )
        ]);
  }
}
除了主頁的 FriendCard 要連到聊天室,我們也要將 ChatPage 中的 ChatCard 連到聊天室。由於之前 class 沒設計好,於是又稍微更新了一下🫠
我打算將原本的 MessageList 改成只抓最新的 Message,另外也增加了一個 channelID 欄位,用來連結到聊天室。
class Chat {
  Chat({
    this.profile,
    required this.userName,
    required this.userID,
    required this.lastMessage,
    required this.channelID,
  });
  String? profile;
  String userName;
  int userID;
  int channelID;
  String? lastMessage;
}
更改 ChatCard 按鈕的 onTap 行為
class ChatCard extends StatelessWidget {
  const ChatCard(this.chatInfo, {super.key});
  final Chat chatInfo;

  @override
  Widget build(BuildContext context) {
    return ListTile(
      leading: chatInfo.profile != null
          ? Image.network(chatInfo.profile!)
          : Image.asset("assets/default_profile.png"),
      title: Text(
        chatInfo.userName,
        style: const TextStyle(fontWeight: FontWeight.bold),
      ),
      subtitle: Text(chatInfo.lastMessage ?? ""),
      onTap: () {
        Navigator.of(context).push(MaterialPageRoute(builder: (context) {
          return ChannelPage(channelID: chatInfo.channelID);
        }));
      },
    );
  }
}
想像中的聊天室:
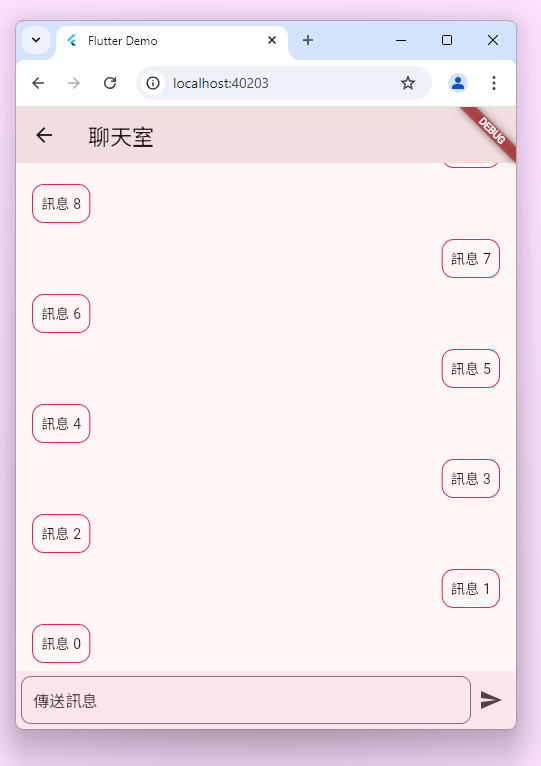
我們主要要解決幾個問題:第一個是要怎麼在畫面建立一個置底的傳送訊息區塊,這個區塊我們就以 Row 來看
Row(children: [
  Expanded(
      child: TextField(
          controller: ctrl,
          decoration: InputDecoration(
              hintText: '傳送訊息',
              border: OutlineInputBorder(
                  borderRadius: BorderRadius.circular(10),
                  borderSide: const BorderSide(
                      color: Colors.white, width: 2.0))))),
  IconButton(
      onPressed: () {
        print(ctrl.text);
      },
      icon: const Icon(Icons.send))
])
外面再包一個 Container 加入粉色底色。
Container(
  color: Colors.pink[50],
  padding: const EdgeInsets.symmetric(horizontal: 5, vertical: 5),
  child: Row(
      // ...
  )
)
至於訊息的部分我們可以使用 ListView 來實作,由於我們預設訊息一開始是滑到底,瀏覽舊訊息則要往上滑。要達到這個效果,可以將 reverse 設為 true
ListView.builder(
    reverse: true,
    itemBuilder: (context, index) {
      return Padding(
          padding: const EdgeInsets.symmetric(
              vertical: 8.0, horizontal: 16.0),
          child: Align(
              alignment: index % 2 == 0
                  ? Alignment.centerLeft
                  : Alignment.centerRight,
              child: Container(
                  constraints:
                      const BoxConstraints(maxWidth: 100),
                  padding: const EdgeInsets.all(8.0),
                  decoration: BoxDecoration(
                      border: Border.all(color: Colors.pink),
                      borderRadius: BorderRadius.circular(12)),
                  child: Text('訊息 $index'))));
    },
    itemCount: 20)
接著,我們會需要一個 Column 包裝訊息以及底部的傳送欄。
Column(
  children:[
    ListView.builder(
        //...
    ),
    Container(
        //...
    )
  ]
)
然後就噴錯了,也許是因為 ListView.builder 不知道可以佔用多大的空間。其實詳細的原因我自己也不太理解,此時有一個簡單的方法就是在 ListView 外面再包一個 Expanded。或者改用 CustomScrollView 實作。
Column(
  children:[
    Expanded(
      child: ListView.builder(
        //...
    )),
    Container(
        //...
    )
  ]
)
(9/26 更新)
由於載入訊息會向伺服器或緩存取得訊息,屬於異步處理的動作,因此我們還要再更改我們的邏輯。開始更改前我們再加入一個 Message class,用來儲存訊息。
class Message {
  Message(
      {required this.senderUID, required this.plaintext, required this.time});
  int senderUID;
  String plaintext;
  DateTime time;
}
將原本的 ListView.builder 額外建立一個 Widget。在建立測試用訊息時,我們將偶數 index 的 senderID 設為 0 因為目前 me 的 uid 是 0 ;反之 senderID 設為 1。並且我們把傳送時間也打上。這是一個最簡單的實作,我們省略了很多功能,比如:顯示頭貼、將同一個人的訊息合併起來、日期醜醜的...
class _MessageListViewState extends State<MessageListView> {
  final _scrollCtrl = ScrollController();
  final List<Message> _messageList = [];
  bool _isLoadingMore = false;

  @override
  void initState() {
    _loadMoreItems();
    _scrollCtrl.addListener(() {
      if (_scrollCtrl.position.pixels == _scrollCtrl.position.maxScrollExtent) {
        _loadMoreItems();
      }
    });
    super.initState();
  }

  @override
  void dispose() {
    _scrollCtrl.dispose();
    super.dispose();
  }

  Future<void> _loadMoreItems() async {
    if (!_isLoadingMore) {
      if (mounted) {
        setState(() {
          _isLoadingMore = true;
        });
      }

      await Future.delayed(const Duration(seconds: 1));

      if (mounted) {
        setState(() {
          _messageList.addAll(List<Message>.generate(
              20,
              (index) => Message(
                  senderUID: index % 2 == 0 ? 0 : 1,
                  plaintext: "message $index",
                  time: DateTime.now().subtract(Duration(hours: index)))));
          _isLoadingMore = false;
        });
      }
    }
  }

  @override
  Widget build(BuildContext context) {
    int myUID = MeDataLayer.of(context).user!.uid;

    return ListView.builder(
        controller: _scrollCtrl,
        reverse: true,
        itemBuilder: (context, index) {
          if (index == _messageList.length) {
            return const Padding(
                padding: EdgeInsets.all(8.0),
                child: Center(child: CircularProgressIndicator()));
          }
          var t = _messageList[index].time;
          var showTime = "${t.month}/${t.day} ${t.hour}:${t.minute}";
          return Padding(
              padding:
                  const EdgeInsets.symmetric(vertical: 8.0, horizontal: 16.0),
              child: Align(
                  alignment: _messageList[index].senderUID != myUID
                      ? Alignment.centerLeft
                      : Alignment.centerRight,
                  child: Column(children: [
                    Container(
                        constraints: const BoxConstraints(maxWidth: 100),
                        padding: const EdgeInsets.all(8.0),
                        decoration: BoxDecoration(
                            border: Border.all(color: Colors.pink),
                            borderRadius: BorderRadius.circular(12)),
                        child: Text(_messageList[index].plaintext)),
                    const SizedBox(height: 3),
                    Text(showTime)
                  ])));
        },
        itemCount: _messageList.length + (_isLoadingMore ? 1 : 0));
  }
}
更改過後的整體畫面:
後記:剩下 UI 的部分還會再調整,但目前就先完成到這裡,後面幾天的實作會以後端為主
