本篇將使用 Next.js 顯示 Sanity 內部落格文章的內容。
首先會建立文章列表,並且透過 next/link 將頁面導入個別文章內容。
頁面 css 的話就不會在本篇著墨太多。
可以算是比較淺層的一篇,多半是 Next.js 跟 Sanity 的基礎互動。
有點久沒回到 Next.js 專案了,重新整理一下這段。
這次的 Next.js 適用 App Router,目前的目錄結構是這樣的
.
├── app
│   ├── layout.tsx
│   ├── page.tsx
│   └── sanity
│       ├── env.ts
│       ├── lib
│       │   ├── client.ts
│       │   └── queries.ts
│       └── types.ts
├── package.json
└── tsconfig.json
跟 Sanity 相關的內容會放在 app/sanity 內,等到要新增查詢語法的時候才會去動到。
文章列表的話之前在 Day 7, Day 8, Day 9 的時候其實已經把文章都查詢出來並且顯示 title 在畫面上了。
import { client } from "@/app/sanity/lib/client";
import { BLOG_POSTS_QUERY } from "@/app/sanity/lib/queries";

export default async function Home() {
  const posts = await client.fetch(BLOG_POSTS_QUERY);
  return (
    <ul className="home-page">
      {posts.map((post) => (
        <li key={post._id}>
          <a href={`/posts/${post.slug}`}>{post.title}</a>
        </li>
      ))}
    </ul>
  );
}
這邊要改動的是改用 next/link 的 Link 來做頁面的跳轉。
import Link from "next/link"; // 引入 Link
import { client } from "@/app/sanity/lib/client";
import { BLOG_POSTS_QUERY } from "@/app/sanity/lib/queries";

export default async function Home() {
  const posts = await client.fetch(BLOG_POSTS_QUERY);
  return (
    <ul className="home-page">
      {posts.map((post) => (
        <li key={post._id}>
	        {/* 使用 Link 取代 a tag */}
          <Link href={`/${post.slug}`}>{post.title}</Link>
        </li>
      ))}
    </ul>
  );
}
至於顯示文章的頁面則是 app/[slug]/page.tsx。
.
├── app
│   ├── [slug]
│   │   ├── not-found.tsx // <- 404 頁面
│   │   └── page.tsx // <- 文章顯示頁
│   ├── layout.tsx
│   ├── page.tsx
// ...
文章頁面會收到 slug,再用 slug 去搜尋出個別文章的內容。
文章頁面連結會是這樣:http://localhost:3000/centos-離線安裝-docker-ce。
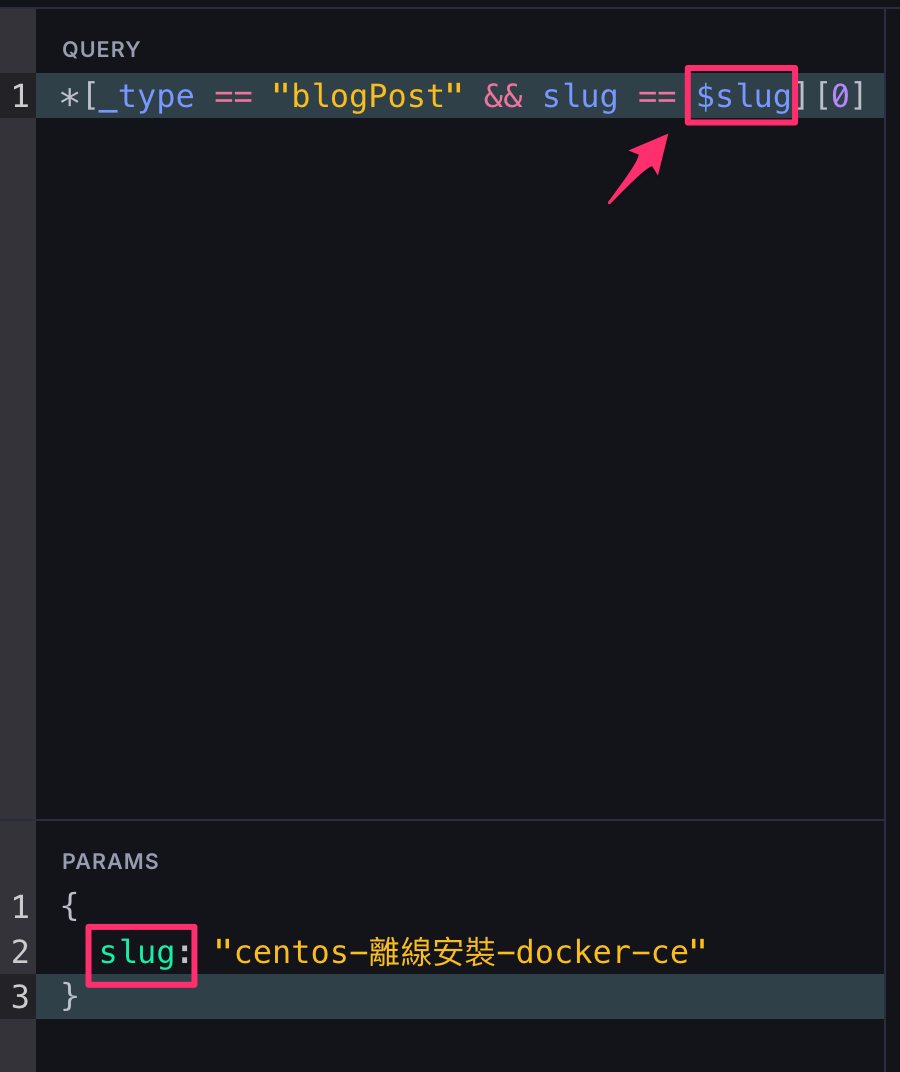
新增一個 Sanity query 語法來取出個別文章:
import { defineQuery } from "next-sanity";

export const BLOG_POSTS_QUERY = defineQuery(`*[_type == "blogPost"]`);
// 新增單個文章查詢語法
export const BLOG_POSTS_BY_SLUG_QUERY = defineQuery(
  `*[_type == "blogPost" && slug == $slug][0]`,
);
( 記得新加 Sanity 查詢語法的話,要回到 Sanity 專案執行 sanity typegen generate 才會有正確的型別推斷 )
這種 $slug 的表示法就是 GROQ 語法中變數的表示,使用上只要帶入同 key 的物件就會自動 mapping 到對應的變數中了。

import { client } from "@/app/sanity/lib/client";
import { notFound } from "next/navigation";
import { BLOG_POSTS_BY_SLUG_QUERY } from "@/app/sanity/lib/queries";

export default async function Post({ params }: { params: { slug: string } }) {
	// 取得 slug ( 也就是 "centos-離線安裝-docker-ce" )
  const { slug } = params;

  const post = await client.fetch(BLOG_POSTS_BY_SLUG_QUERY, {
    slug: decodeURI(slug),
  });

  if (!post) {
	  // 如果沒有查詢到文章則顯示 404 頁面的內容
    return notFound();
  }

  return (
    <div className="post">
      <div className="flex">
        <span>{post.publishedAt}</span>
        <div>{post.tags?.map((tag) => <span key={tag}>{tag}</span>)}</div>
      </div>
      <h1 className="text-3xl">{post.title}</h1>
      <h2 className="text-lg">{post.subtitle}</h2>
      {/* <Image
        src={post.heroImage}
        alt={post.title || "Hero Image"}
        width={770}
        height={480}
      /> */}
      <p className="mt-3">{post.content}</p>
    </div>
  );
}
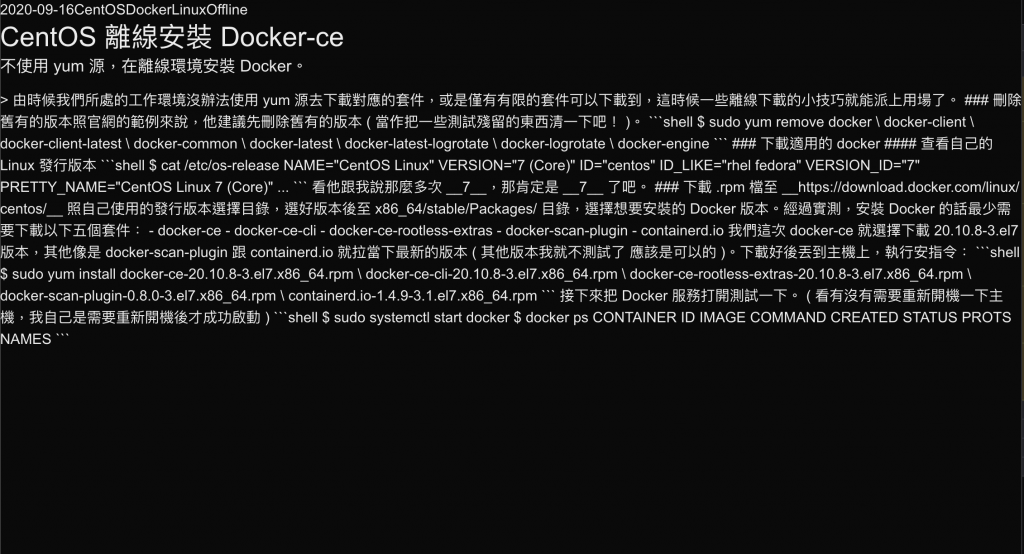
顯示文章的內容會像是這樣的 ( 樣式先從簡設定 ):

可以看到除了排版以外,還是存在著幾個明顯的問題:
本篇會先試著用簡單的方式把圖片沒有顯示的問題解決掉,
文章內容 ( content ) 顯示的話牽扯得比較深,會引出更後面的主題,在這篇幾篇先不會處理。
圖片無法顯示的問題是因為:
*[_type == "blogPost" && slug == $slug][0]
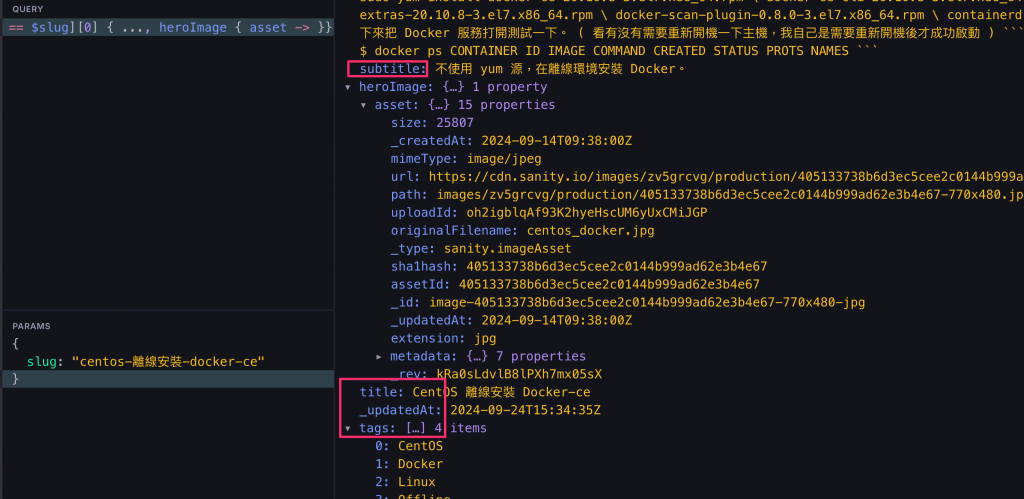
所查詢出來的 heroImage 是一個參照物件,並沒有圖片的詳細訊息。
需要圖片物件的話最簡單的處理法在上一篇 Sanity GROQ 語法 中有提到過,可以使用 -> 符號來把參照資料的細節列出來,照這樣使用,查詢語法可以改成:
*[_type == "blogPost" && slug == $slug][0] { heroImage { asset -> }}
對吧? 恩… 不太對,因為這樣除了圖片其他資訊都不見了。

要怎麼保留其他欄位並且互叫出圖片內容的細節呢?
可以使用 ... 來叫出其他的內容。
*[_type == "blogPost" && slug == $slug][0] { ..., heroImage { asset -> }}

可以看到其他欄位也都出來了,這樣一來圖片資料顯示就沒問題了!
可以把引入圖片了。
使用 Next.js 的 Image component 來顯示圖片:
// ...
import Image from "next/image";

export default async function Post({ params }: { params: { slug: string } }) {
  // ...
  return (
    <div className="post">
      {/* ... */}
      <Image
        src={post.heroImage.asset?.url || ""}
        alt={post.heroImage.asset?.title || "Hero Image"}
        width={770}
        height={480}
      />
      {/* ... */}
    </div>
  );
}
但因為圖片的來源並不是 localhost:3000 ,而是 Sanity,不同源,所以要去 next.config.mjs 設定 remotePatterns 才能正常顯示。
/** @type {import('next').NextConfig} */
const nextConfig = {
  images: {
    remotePatterns: [
      {
        protocol: "https",
        hostname: "cdn.sanity.io",
      },
    ],
  },
};

export default nextConfig;
這樣圖片就會正常顯示了!

Sanity 在顯示圖片是一件可以很簡單也可以很複雜的事情,為了一次解決圖片的問題,下一篇將會好好的來把 Sanity 圖片使用介紹一遍。
