好的,前面關於 ES 的知識應該足夠我們開始 auto-complete 的 task 了,首先我們需要有資料!
之前實作的時候,使用的是 2016 年美國總統競選前的 X(tweeter ) 上的 tweet 內容,那份資料目前已不可得,我在 kaggle 上找到 covid 期間的 tweeter 資料,就會以這份資料做接下來的實作內容。
這份資料總共有 13 個欄位,挑選其中一筆的內容如下:
{'name': 'MaggieBreathnac',
 'user_id': 487990281,
 'tweet': 'Making memories #nanny #anpost #isolation #happy #corona @ An Rinn '
          'https://t.co/byA9uSVxFc',
 'tweet_id': 1244969855058677766,
 'retweets': 0,
 'favorites': 0,
 'created': '31-Mar-2020',
 'followers': 522,
 'is_user_verified': False,
 'geo': {'type': 'Point', 'coordinates': [52.04681279, -7.56678938]},
 'coordinates': {'type': 'Point', 'coordinates': [-7.56678938, 52.04681279]},
 'location': 'dublin',
 'primary_location': {'type': 'Point',
                      'coordinates': [-7.56678938, 52.04681279]}}
根據資料內容,設計 field mapping 如下:
{
	"properties": {
			"name": { "type": "keyword" },
			"user_id": { "type": "keyword" },
			"tweet": { "type": "text" },
			"tweet_id": { "type": "keyword" },
			"retweets": { "type": "integer" },
			"favorites": { "type": "integer" },
			"created": { "type": "date", "format": "yyyy-MM-dd||yyyy-MM-ddTHH:mm:ss" },
			"followers": { "type": "integer" },
			"is_user_verified": { "type": "boolean" },
			"geo": { "type": "geo_point" },
			"location": { "type": "keyword" }
	}
}
就不一一說明,根據目前設定的主題,比較重要的是 tweet 這個欄位,會先將這個欄位 mapping type 設定為 text ,其他欄位有使用 date 、 integer 、keyword 、geo_point等,另外會移除 coordinates 和 primary_location 這兩個 fields。
接下來寫一個 python script 來把資料寫入 ES,elasticsearch 有 python 的 client ,如果跟 python 不熟,用 WEB API 工具也可以,只不過如果要進行資料處理就要另外想辦法了。
import csv
import json
import elasticsearch
import itertools

from elasticsearch import helpers

index_mapping_file = 'index_mapping.json'
data_folder = 'covid_20200330'
data_file_name = '2020-03-31_afternoon.json'
index_name = 'covid19_tweets'

# initiate es client
es_cli = elasticsearch.Elasticsearch("http://localhost:9200")

# read index mapping file
with open(index_mapping_file, 'r') as f:
    index_mapping = json.load(f)

# delete index
# es_cli.indices.delete(index=index_name)
# create index
r = es_cli.indices.create(index=index_name, mappings=index_mapping)

def data_to_es(json_file: str, index_name: str):
    with open(json_file, 'r') as f:
        data = json.load(f)
    fields_to_rm = ['primary_location', 'geo_location']
    for d in data:
        for f in fields_to_rm:
            if d.get(f):
                d.pop(f)
        if d.get('geo'):
            d['geo'] = d['geo']['coordinates'].reverse()
        if d.get('created'):
            d['created'] = datetime.strptime(d['created'], "%d-%b-%Y")
        d['_index'] = index_name
        yield d

json_file = f'{data_folder}/{data_file_name}'
result = helpers.bulk(es_cli, data_to_es(json_file, index_name), raise_on_error=False)
這個 script 稍微複雜的部分只有在 data_to_es 這個 method,他的 inptu 參數有兩個:
這個 method 讀取 json 後以迴圈遍歷 json 中的每一個文件並執行:
這個 method 會被 es api 中的 helpers.bulk 使用,這個 method 已經幫我們做好錯誤處理、chunk process 等步驟,如果有錯誤的資料會被跳過並把錯誤訊息回傳出來。
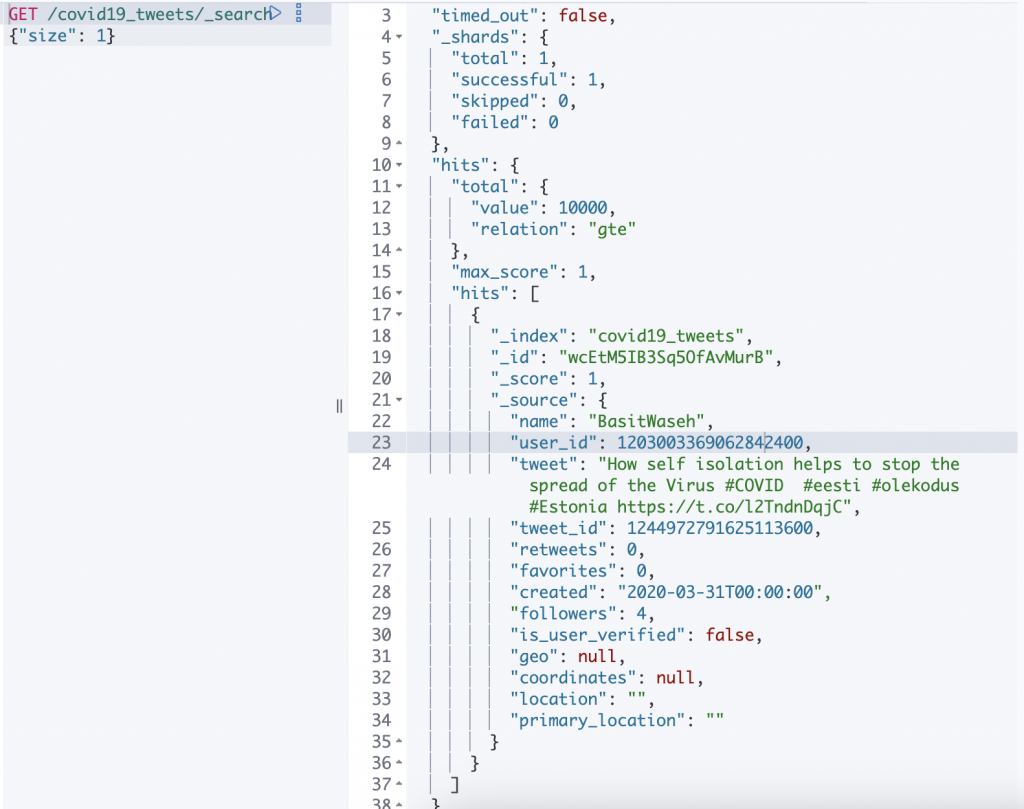
讓我們到 kibana 的 dev-tool 看一下內容:

看起來蠻合理的 ~ ~
等等!前面在 index mapping 內沒有針對 analyzer 進行任何的設定不是嗎?難道要實作 auto-compelete 跟 analyzer 一點關係都沒有嗎?
當然不是,因為這系列文章帶一點實驗的性質,資料的處理、index-mapping 等都會不斷的修正。
在開始實作 auto-compelete 之前,可能要先想想一些可能的做法,因此,下一篇,會稍微說明之前實作的思路,看是否有可用的內容。
