iT邦幫忙

2024 iThome 鐵人賽

DAY 0
0
自我挑戰組

重新開始 elasticsearch 系列 第 27

2024 鐵人賽 Day28: Ingest Pipeline

  • 分享至 

  • xImage
  •  

前幾篇不論在 tweet 資料寫入或 ML 資料寫入,都不免透過 python 進行了一些簡單的資料清理才寫入 ES;如果想要進行的資料處理邏輯很簡單,不想為此多一個環境、多一份 script 要維護管理,ES 有內建資料管線工具:Ingest Pipeline。

Ingest Pipeline 由一個或多個 Processor 組成,一個 Processor 是一個單純的資料處理步驟,例如將文字轉換成數值、擷取文字內容等;如果有多個 Processors 依序組成序列,資料會依照著這個序列依序進行處理,Processor 清單請參考 ES 官網

Ingest Pipeline 可以於 Kibana UI 上設定,也可以透過 ingest pipeline API 操作,假設想要把 CSV 檔案的內容寫入 ES 的 Index,在 Kibana 和 Ingest API 的處理步驟如下:

Kibana

  1. 在 Kibana 入口畫面左上的漢堡 icon,最下方的 Stack Management

https://ithelp.ithome.com.tw/upload/images/20241013/20169448wexPfuvtxe.png

  1. 左側欄選單的 Ingest Pipeline
    https://ithelp.ithome.com.tw/upload/images/20241013/20169448e3JUdbZIdn.png

  2. Create pipeline → new pipeline → 填寫 pipeline 名稱和描述
    https://ithelp.ithome.com.tw/upload/images/20241013/20169448gwB7hxBZAL.png

  3. Add Processor → CSV
    https://ithelp.ithome.com.tw/upload/images/20241013/20169448L4shUQ37bi.png

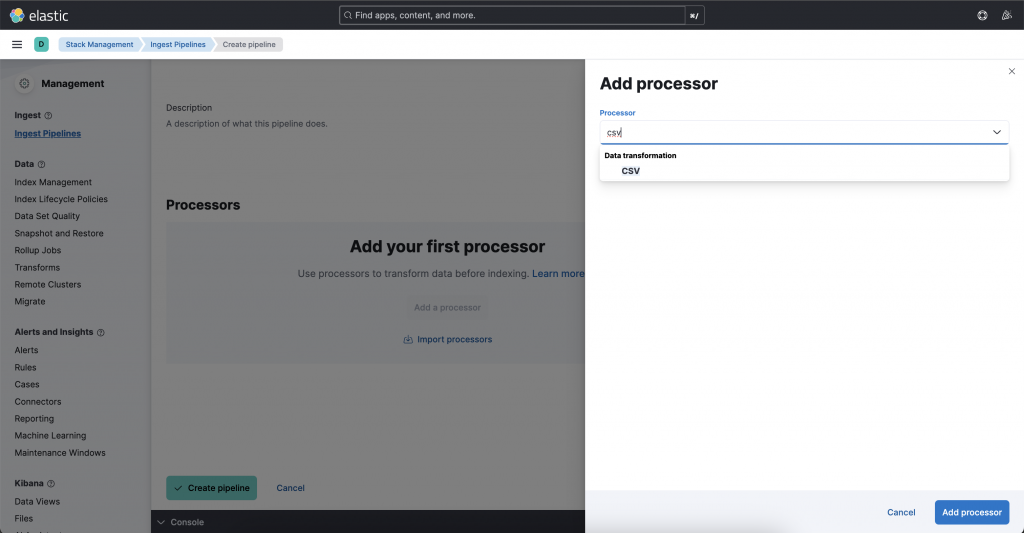
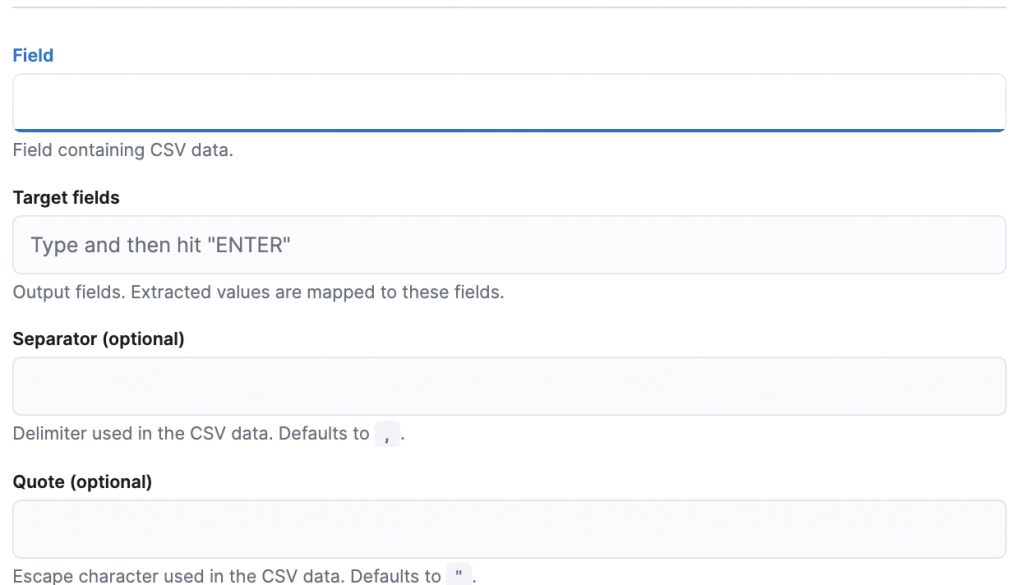
  4. 填寫 ingest 設定,主要的設定項目如下:
    a. Field:資料來源的 field name,例如 content
    b. Target fields:寫入資料對應的欄位,例如 csv 中有 2 個欄位,這兩個欄位要對應到 index 的哪兩個 fields,例如 ["user.id", "user.name"]
    c. Separator:(Optional)欄位分隔符號,預設為 ,
    e. Quote:(Optional)引用符號,預設為 "

https://ithelp.ithome.com.tw/upload/images/20241013/20169448OOMnmmpti4.png

  1. Add Processor
    https://ithelp.ithome.com.tw/upload/images/20241013/20169448kjsgZehe0K.png

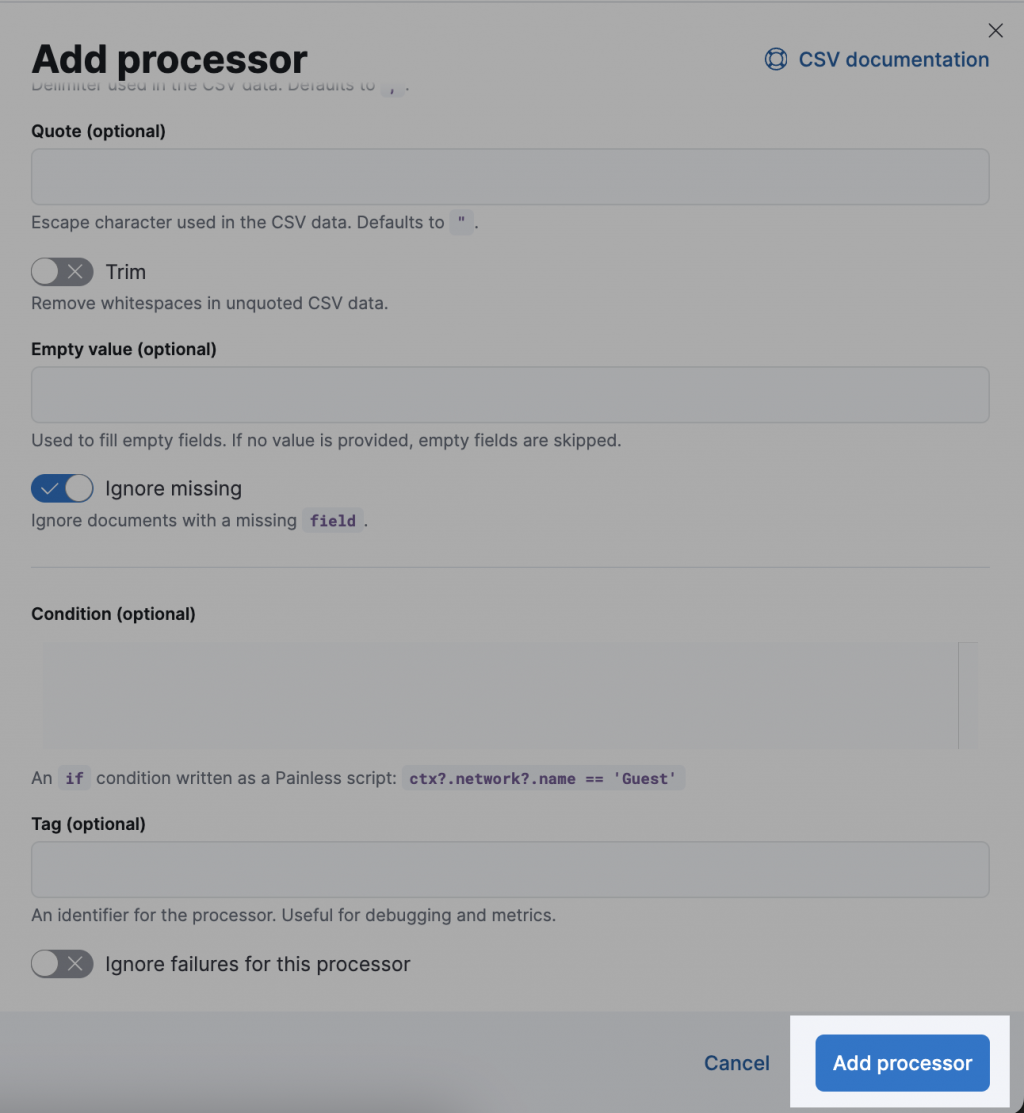
  2. 測試 pipeline:Add Documents
    https://ithelp.ithome.com.tw/upload/images/20241013/20169448fgeCObYgB4.png

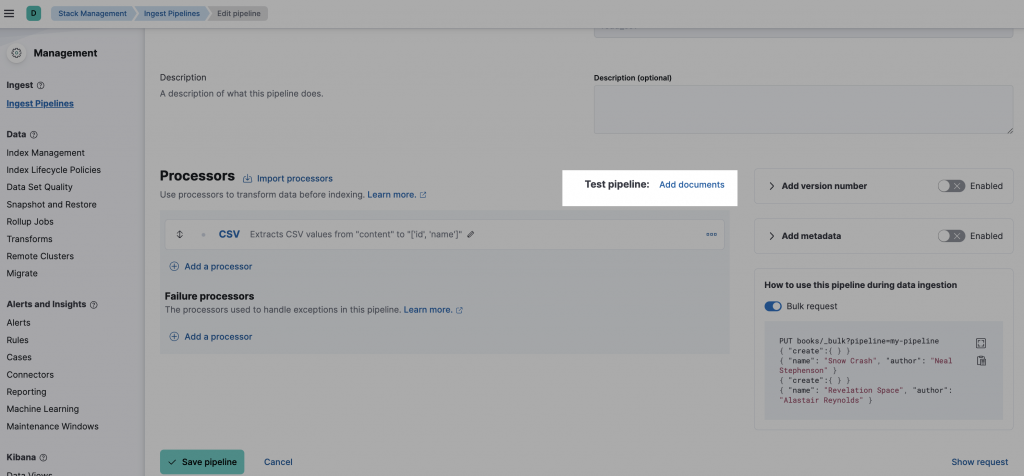
    a. 在 Documents 寫上你要測試的 document 內容,index 為你要使用的 index,資料放在 _source 這個 field 內,例如:

     ```python
     [
       {
         "_index": "test_csv",
         "_source": {
           "content": "121, Mary"
         }
       }
     ]
     ```
     ![https://ithelp.ithome.com.tw/upload/images/20241013/20169448hDgb06fUx8.png](https://ithelp.ithome.com.tw/upload/images/20241013/20169448hDgb06fUx8.png)
    

    b. 按下 Run the pipeline

  3. 如果上一步測試成功,就可以按下 create pipeline。
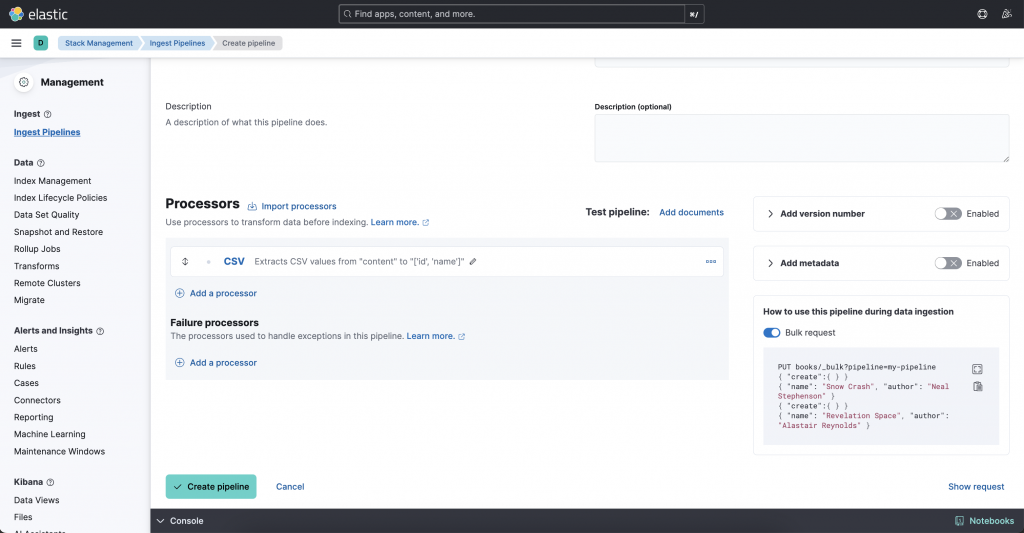
    https://ithelp.ithome.com.tw/upload/images/20241013/20169448lul9gzf7Hp.png

  4. 透過 Bulk API 寫資料

    PUT test_csv/_bulk?pipeline=read_csv
    { "create":{ } }
    { "content": "125, Tom" }
    { "create":{ } }
    { "content": "126, Harry" }
    

Ingest API

  1. create pipeline

    PUT _ingest/pipeline/read_csv_2
    {
      "processors": [
        {
          "csv": {
            "field": "content",
            "target_fields": [
              "['id', 'name']"
            ]
          }
        }
      ]
    }
    
  2. 測試 pipeline

    POST _ingest/pipeline/read_csv_2/_simulate
    {
      "docs": [
        {
          "_index": "test_csv2",
          "_source": {
            "content": "121,Mary"
          }
        }
      ]
    }
    
  3. 透過 Bulk API 寫資料

    PUT test_csv2/_bulk?pipeline=read_csv_2
    { "create":{ } }
    { "content": "125, Tom" }
    { "create":{ } }
    { "content": "126, Harry" }
    

如果要轉換的邏輯沒有很複雜,我覺得用 ES 的 ingest pipeline 蠻方便的;下一篇來實際試試看用 ingest pipeline 轉換 tweeter 資料會遇到什麼問題吧~


上一篇
2024 鐵人賽 Day27: How to RAG - Provide Context
下一篇
2024 鐵人賽 Day29: Ingest Pipeline - Tweeter Data
系列文
重新開始 elasticsearch 29
圖片
  直播研討會
圖片
{{ item.channelVendor }} {{ item.webinarstarted }} |
{{ formatDate(item.duration) }}
直播中

尚未有邦友留言

立即登入留言