在後端開發的時候我們有開發CRUD的功能,在前端我們也要實作這個功能,我們在開發的時候不難發現,新增跟修改應該是可以當作同一個頁面,這樣既可以減少開發的時間,也能夠方便我們維護跟修改。
所以接下來我們要教大家如何跟後端串接修改的功能,並且把前端addAccount頁面跟修改頁面整合起來。
今天要先教大家前面的動作如何操作,也就是先教大家如何讓前端的頁面呈現出我們要修改的內容,明天再教大家如何與後端連接,修改我們的頁面
那我們就開始吧!
我們回到Service.js這個頁面中,新增getAccount這個功能,這個功能是用來取得我們要修改的帳目的資料,然後把這個資料顯示到前端中
import axios from "axios";
const BASE_REST_API_URL = "http://localhost:8080/api/accounts"
export const getAllAccounts = () => axios.get(BASE_REST_API_URL);
export const addAccount = (account) => axios.post(BASE_REST_API_URL,account);
export const getAccount = (id) => axios.get(BASE_REST_API_URL+'/'+id);
當我們完成這個之後,我們接下來要去App.jsx新增修改ACCOUNT的頁面
我們昨天有教大家如何使用Router,接下來就要用到昨天的技巧,新增一個update-account的頁面。我們在path中輸入update-account/:id,這裡的:id指的是我們要提供的變數,這個變數會被當作id讀進React中,我們的element同樣輸入AccountComponent,代表著當網頁轉到update-Account後,我們仍然使用AccountComponent這個JSX
import { useState } from 'react'
import reactLogo from './assets/react.svg'
import viteLogo from '/vite.svg'
import './App.css'
import HelloWorld from './Helloworld'
import HeaderComponent from './Component/HeaderComponent'
import FooterComponent from './Component/FooterComponent'
import AccountComponent from './Component/AccountComponent'
import ListAccountCompinent from './Component/ListAccountCompinent'
import { BrowserRouter, Routes,Route} from 'react-router-dom'
function App() {

  return (
    <>
    <BrowserRouter>
        <HeaderComponent />
        <Routes>
          {/* http://localhost:8080 */}
          <Route path='/' element={<ListAccountCompinent />}></Route>
          {/* http://localhost:8080/add-account */}
          <Route path='/add-account' element={<AccountComponent />}></Route>
          {/* http://localhost:8080/add-account/1 */}
          <Route path='/update-account/:id' element={<AccountComponent />}></Route>
        </Routes>
        <FooterComponent />
    </BrowserRouter>
    </>
  )
}
export default App
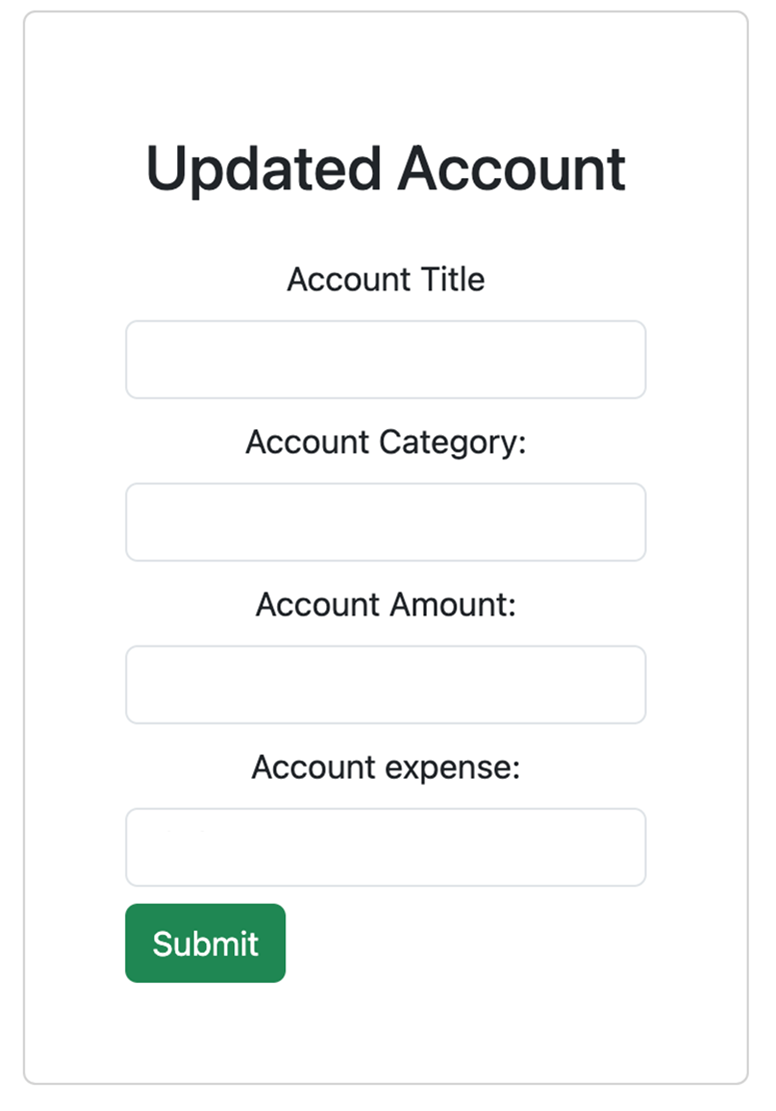
這個時候,我們會發現新增頁面有出現Add Acount這個字,我們可以先修改成Update Account。
    <div className='container'>
        <br></br>
        <div className='card col-md-6 offest-md-3 offset-md-3'>
        <br></br>
        <h2 className='text-center'>Updated Account</h2>
修改完後,存檔就會看到字已經更新
但大家會發現幾個問題
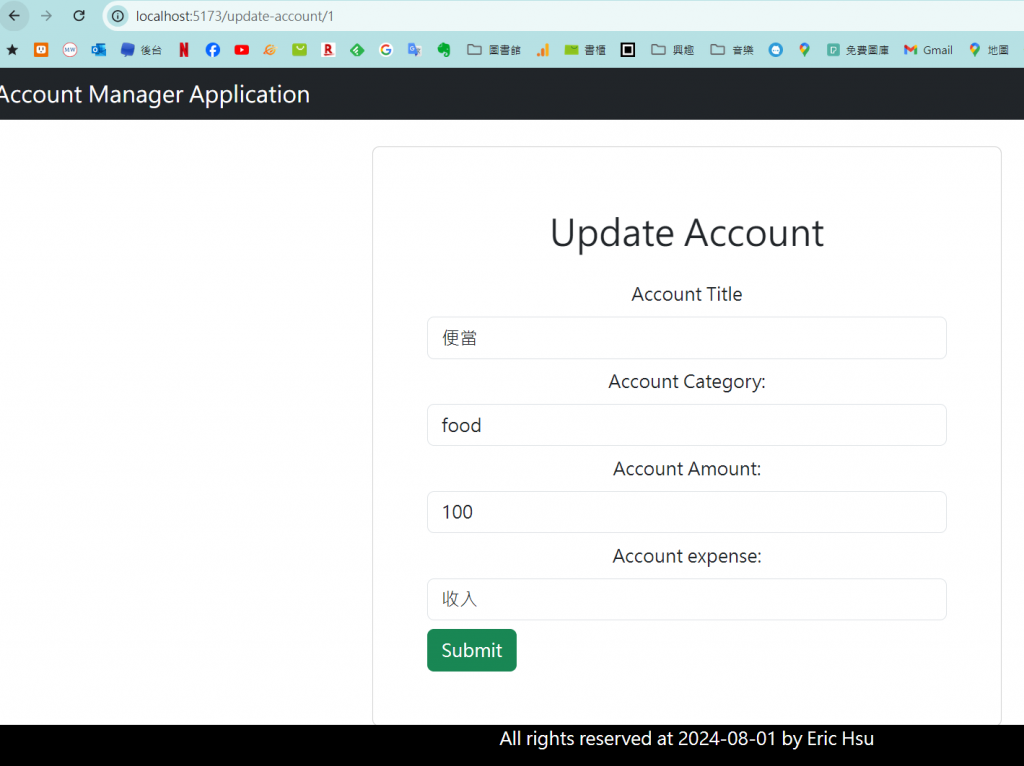
1.仍然還沒有出現要修改的帳目
2.我改了字之後,Add Account這個字就會消失
接下來我們就要來解決這兩個問題,首先,我們要來修改第一個問題。
我們剛剛已經教大家建置Service去取得id對應的帳目,那接下來就是要從網址中取得id,然後呼叫那個Service
在這裡我們同樣使用react-router-dm的功能,所以要使用以下兩個功能
import { useNavigate,useParams } from 'react-router-dom'
useNavigate是昨天已經使用的,我們要做的是新增useParams,這個功能就是可以取得網址上的相關資訊
輸入之後我們要在Component中宣告我們的資料id就是從useParams而來。
import React, { useState } from 'react'
import { addAccount } from '../Service/AccountService'
import { useNavigate,useParams } from 'react-router-dom'
const AccountComponent = () => {
    const [name, setName] = useState('')
    const [category,SetCategory] = useState('')
    const [amount,setAmount] = useState('')
    const [expensed,setExpensed] = useState(false)
    const navigate = useNavigate()
    const {id} = useParams()
完成之後,接下來我們要告訴React當我們在載入網頁時,要取得id的資訊,並且從中取得對應的帳目,要在React一載入立刻操作的話,就需要使用到useEffect這個功能
因為我們是跟add account共用的,在執行add account的時候並不需要有甚麼useEffect,而修改帳目跟新增帳目的差別在於,網址上是否有id這個資訊,所以在裡面我們要新增一個if的判斷,如果id有值,就代表我們這個是修改的頁面,我們就要開始取得帳目資訊,並且把這些資訊都填寫上去。
接下來,我們要讓html的程式碼可以隨著這些資訊更換,我們需要改變網頁內容,我們可以利用這個function來改變
    function pageTitle(){
      if(id){
        return <h2 className='text-center' >Update Account</h2>
      }else{
        return <h2 className='text-center'>Add Todo</h2>
      }
    }
把這個function放到html中,React就會根據當下的情況判斷要如何呈現
完整的程式碼會如以下內容
import { useState , useEffect } from 'react'
import { addAccount, getAccount } from '../Service/AccountService'
import { useNavigate,useParams } from 'react-router-dom'
const AccountComponent = () => {
    const [name, setName] = useState('')
    const [category,setCategory] = useState('')
    const [amount,setAmount] = useState('')
    const [expensed,setExpensed] = useState(false)
    const navigate = useNavigate()
    const {id} = useParams()
    useEffect(()=>{

      if(id){
        getAccount(id).then((res)=>{
          //console.log("This is the res"+res.data)
          setName(res.data.name)
          setCategory(res.data.category)
          setAmount(res.data.amount)
          setExpensed(res.data.expensed)
        }).catch(error =>{
          console.error(error)
        })
      }
    },[id])
    function saveAccount(e){
        e.preventDefault()
        const account = {name,category,amount,expensed}
        console.log(account)
        //將資料傳給後端
        navigate('/')
        addAccount(account).then((response)=>{
          console.log(response.data)
        }).catch(error =>{
          console.log(error)
        }
      )
    function pageTitle(){
      if(id){
        return <h2 className='text-center' >Update Account</h2>
      }else{
        return <h2 className='text-center'>Add Todo</h2>
      }
    }
    }
  return (
    <div className='container'>
        <br></br>
        <div className='card col-md-6 offest-md-3 offset-md-3'>
        <br></br>
        <h2 className='text-center'>add Account</h2>
        <div className='card-body'>
              <form>
                <div className='form-group mb-2 text-center'>
                     <label className='form-label'>Account Title</label>
                     <input
                            type='text'
                            className='form-control'
                            placeholder='Enter Account Name'
                            value={(name)}
                           onChange={(e)=>setName(e.target.value)}
                       ></input>
                </div>
                <div className='form-group mb-2 text-center'>
                       <label className='form-label'>Account Category:</label>
                       <input
                            type='text'
                            className='form-control'
                            placeholder='Enter Account Category'
                            value={(category)}
                           onChange={(e)=>setCategory(e.target.value)}
                       ></input>
                </div>
                <div className='form-group mb-2 text-center'>
                       <label className='form-label'>Account Amount:</label>
                       <input
                            type='text'
                            className='form-control'
                            placeholder='Enter Account Amount'
                            value={(amount)}
                           onChange={(e)=>setAmount(e.target.value)}
                       ></input>
                </div>
                <div className='form-group mb-2 text-center'>
                      <label className='form-label'>Account expense:</label>
                      <select
                      className='form-control'
                      value={expensed}
                      onChange={(e)=> setExpensed(e.target.value)}
                         >
                      <option value='false'>支出</option>
                      <option value='true'>收入</option>
                    </select>
                </div>
                <button className='btn btn-success' onClick={(e)=>saveAccount(e)}>Submit</button>
              </form>
            </div>
        </div>
    </div>
  )
}
export default AccountComponent
這樣一來,我們就完成了更新頁面
但更新頁面是從哪裡來的呢?這是當我們讀取了所有資料後,如果看到有想要修改的地方就要去修改,所以這個update Account的位置應該在我們的每一筆帳目旁邊,所以我們要在ListAccountComponent中去新增這個按鈕
首先,我們要先新增這個更新Account功能,底下要輸入轉指,並且輸入對應的id
    function updateAccount(id){
        // 更新Account
        console.log(id)
        navigate(`/update-account/${id}`)
    }
然後在往下,去把每一筆資料都新增一個update的button
在Retun中新增Update的button
import { useState , useEffect } from 'react'
import { addAccount, getAccount } from '../Service/AccountService'
import { useNavigate,useParams } from 'react-router-dom'
const AccountComponent = () => {
    const [name, setName] = useState('')
    const [category,setCategory] = useState('')
    const [amount,setAmount] = useState('')
    const [expensed,setExpensed] = useState(false)
    const navigate = useNavigate()
    const {id} = useParams()
    useEffect(()=>{

      if(id){
        getAccount(id).then((res)=>{
          //console.log("This is the res"+res.data)
          setName(res.data.name)
          setCategory(res.data.category)
          setAmount(res.data.amount)
          setExpensed(res.data.expensed)
        }).catch(error =>{
          console.error(error)
        })
      }
    },[id])
    function saveAccount(e){
        e.preventDefault()
        const account = {name,category,amount,expensed}
        console.log(account)
        //將資料傳給後端
        navigate('/')
        addAccount(account).then((response)=>{
          console.log(response.data)
        }).catch(error =>{
          console.log(error)
        }
      )}
      function pageTitle(){
        if(id){
          return <h2 className='text-center' >Update Account</h2>
        }else{
          return <h2 className='text-center'>Add Todo</h2>
        }
      }

  return (
    <div className='container'>
        <br></br>
        <div className='card col-md-6 offest-md-3 offset-md-3'>
        <br></br>
        {pageTitle()}
        <div className='card-body'>
              <form>
                <div className='form-group mb-2 text-center'>
                     <label className='form-label'>Account Title</label>
                     <input
                            type='text'
                            className='form-control'
                            placeholder='Enter Account Name'
                            value={(name)}
                           onChange={(e)=>setName(e.target.value)}
                       ></input>
                </div>
                <div className='form-group mb-2 text-center'>
                       <label className='form-label'>Account Category:</label>
                       <input
                            type='text'
                            className='form-control'
                            placeholder='Enter Account Category'
                            value={(category)}
                           onChange={(e)=>setCategory(e.target.value)}
                       ></input>
                </div>
                <div className='form-group mb-2 text-center'>
                       <label className='form-label'>Account Amount:</label>
                       <input
                            type='text'
                            className='form-control'
                            placeholder='Enter Account Amount'
                            value={(amount)}
                           onChange={(e)=>setAmount(e.target.value)}
                       ></input>
                </div>
                <div className='form-group mb-2 text-center'>
                      <label className='form-label'>Account expense:</label>
                      <select
                      className='form-control'
                      value={expensed}
                      onChange={(e)=> setExpensed(e.target.value)}
                         >
                      <option value='false'>支出</option>
                      <option value='true'>收入</option>
                    </select>
                </div>
                <button className='btn btn-success' onClick={(e)=>saveAccount(e)}>Submit</button>
              </form>
            </div>
        </div>
    </div>
  )
}
export default AccountComponent
成功的話點去Update會出現參數
到這裡,就恭喜大家把這個複雜的邏輯串接起來!到這裡的夥伴非常值得給自己一個掌聲!
