我們在前一天成功的讀取到資料庫的資料,並且顯示到React中,接下來我們要進一步,讓資料能夠更新並且存到後端中,當這些都完成之後,就只剩下刪除這個功能,而刪除這個功能也很簡單,我們合併到今天來製作。
那就讓我們開始,學習如何更新記帳資訊與刪除資料吧!
首先,我們要先去Service.js這個地方,去新增更新資料的功能。
更新資料的程式碼如下,我們需要提供的是id跟我們要更新的資訊,我們使用put的方法來執行更新,並且要輸入id跟account這些資料
export const updateAccount = (id,account) => axios.put(BASE_REST_API_URL+'/'+id,account);
接下來,我們回到AccountComponet,也就是新增/修改的頁面中。
我們之前已經實作了根據是否有id帳號來決定呈現的是add或者是update資料,也教大家如何寫出function來控制呈現的畫面,再來就是調整saveAccount這個function,同樣根據是否有id數值來調整項目。
這裡可以看到,我們新增了一個if的判斷,如果id存在,那我們就執行update的動作,並且引導到主頁面中,若有錯誤訊息則顯示再console中,如果沒有id,我們就當作是新增資料,進行單純的新增資料操作
    function saveAccount(e){
        e.preventDefault()
        if(id){
          const account = {id,name,category,amount,expensed}
          updateAccount(id,account).then((res)=>
            navigate('/')
          ).catch(error =>{
           console.log(error)
          })
        }else{
          const account = {name,category,amount,expensed}
          console.log(account)
          //將資料傳給後端
          navigate('/')
          addAccount(account).then((response)=>{
            console.log(response.data)
            }).catch(error =>{
            console.log(error)
          })
        }
      }
完整的程式碼如下
import { useState , useEffect } from 'react'
import { addAccount, getAccount, updateAccount } from '../Service/AccountService'
import { useNavigate,useParams } from 'react-router-dom'
const AccountComponent = () => {
    const [name, setName] = useState('')
    const [category,setCategory] = useState('')
    const [amount,setAmount] = useState('')
    const [expensed,setExpensed] = useState(false)
    const navigate = useNavigate()
    const {id} = useParams()
    useEffect(()=>{

      if(id){
        getAccount(id).then((res)=>{
          //console.log("This is the res"+res.data)
          setName(res.data.name)
          setCategory(res.data.category)
          setAmount(res.data.amount)
          setExpensed(res.data.expensed)
        }).catch(error =>{
          console.error(error)
        })
      }
    },[id])
    function saveAccount(e){
        e.preventDefault()
        if(id){
          const account = {id,name,category,amount,expensed}
          updateAccount(id,account).then((res)=>
            navigate('/')
          ).catch(error =>{
           console.log(error)
          })
        }else{
          const account = {name,category,amount,expensed}
          console.log(account)
          //將資料傳給後端
          navigate('/')
          addAccount(account).then((response)=>{
            console.log(response.data)
            }).catch(error =>{
            console.log(error)
          })
        }
      }
      function pageTitle(){
        if(id){
          return <h2 className='text-center' >Update Account</h2>
        }else{
          return <h2 className='text-center'>Add Todo</h2>
        }
      }

  return (
    <div className='container'>
        <br></br>
        <div className='card col-md-6 offest-md-3 offset-md-3'>
        <br></br>
        {pageTitle()}
        <div className='card-body'>
              <form>
                <div className='form-group mb-2 text-center'>
                     <label className='form-label'>Account Title</label>
                     <input
                            type='text'
                            className='form-control'
                            placeholder='Enter Account Name'
                            value={(name)}
                           onChange={(e)=>setName(e.target.value)}
                       ></input>
                </div>
                <div className='form-group mb-2 text-center'>
                       <label className='form-label'>Account Category:</label>
                       <input
                            type='text'
                            className='form-control'
                            placeholder='Enter Account Category'
                            value={(category)}
                           onChange={(e)=>setCategory(e.target.value)}
                       ></input>
                </div>
                <div className='form-group mb-2 text-center'>
                       <label className='form-label'>Account Amount:</label>
                       <input
                            type='text'
                            className='form-control'
                            placeholder='Enter Account Amount'
                            value={(amount)}
                           onChange={(e)=>setAmount(e.target.value)}
                       ></input>
                </div>
                <div className='form-group mb-2 text-center'>
                      <label className='form-label'>Account expense:</label>
                      <select
                      className='form-control'
                      value={expensed}
                      onChange={(e)=> setExpensed(e.target.value)}
                         >
                      <option value='false'>支出</option>
                      <option value='true'>收入</option>
                    </select>
                </div>
                <button className='btn btn-success' onClick={(e)=>saveAccount(e)}>Submit</button>
              </form>
            </div>
        </div>
    </div>
  )
}
export default AccountComponent
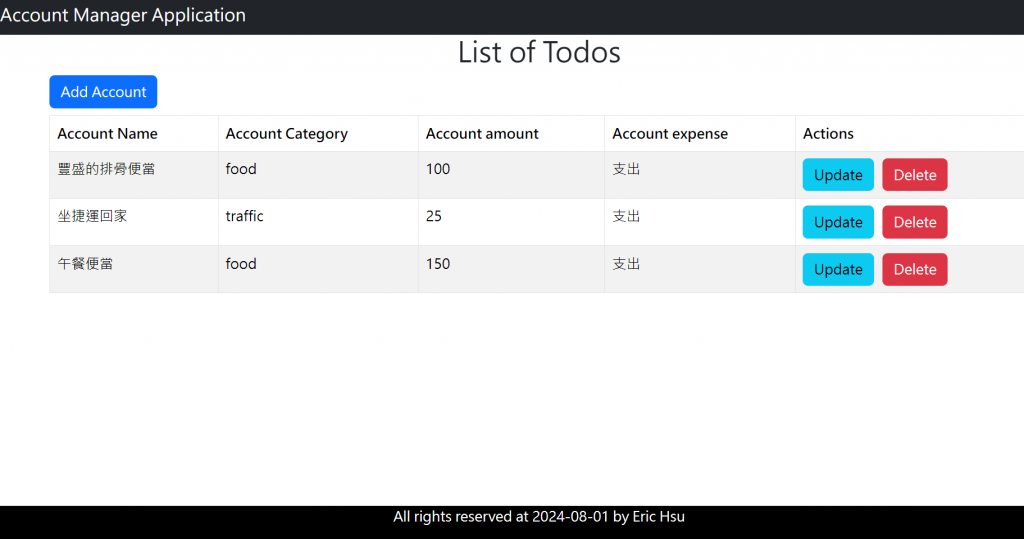
當我們修改好之後,儲存回到主頁,就會看到以下的清單。
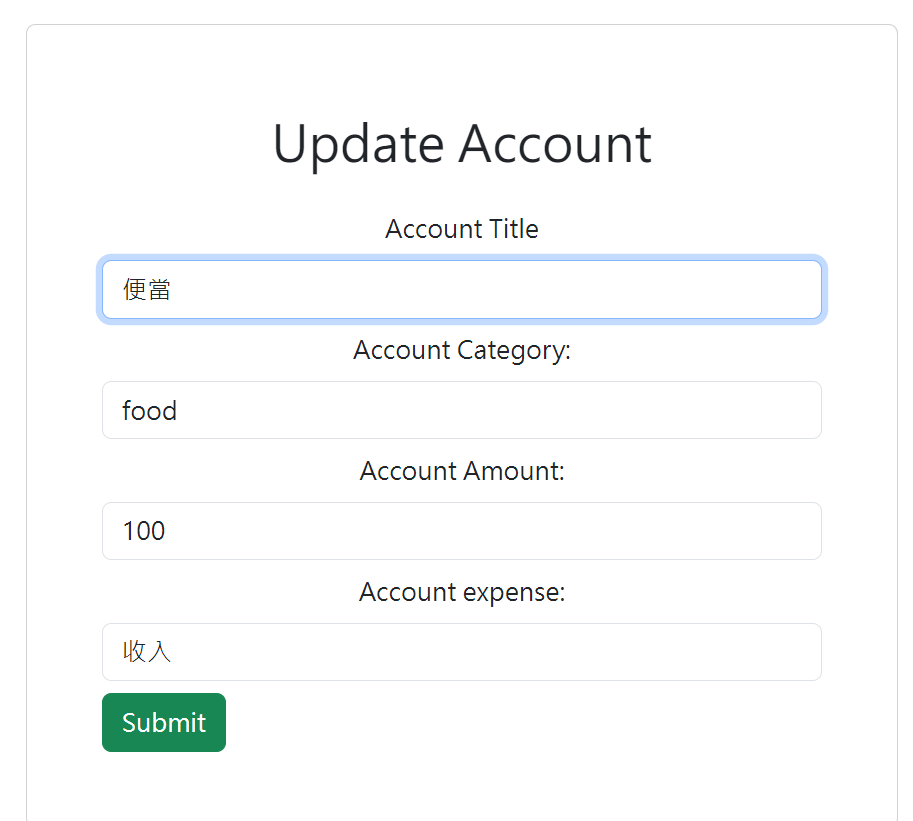
接下來,我們來更新資料,我這邊以午餐便當為例,點選Update,然後就會跳出以下畫面
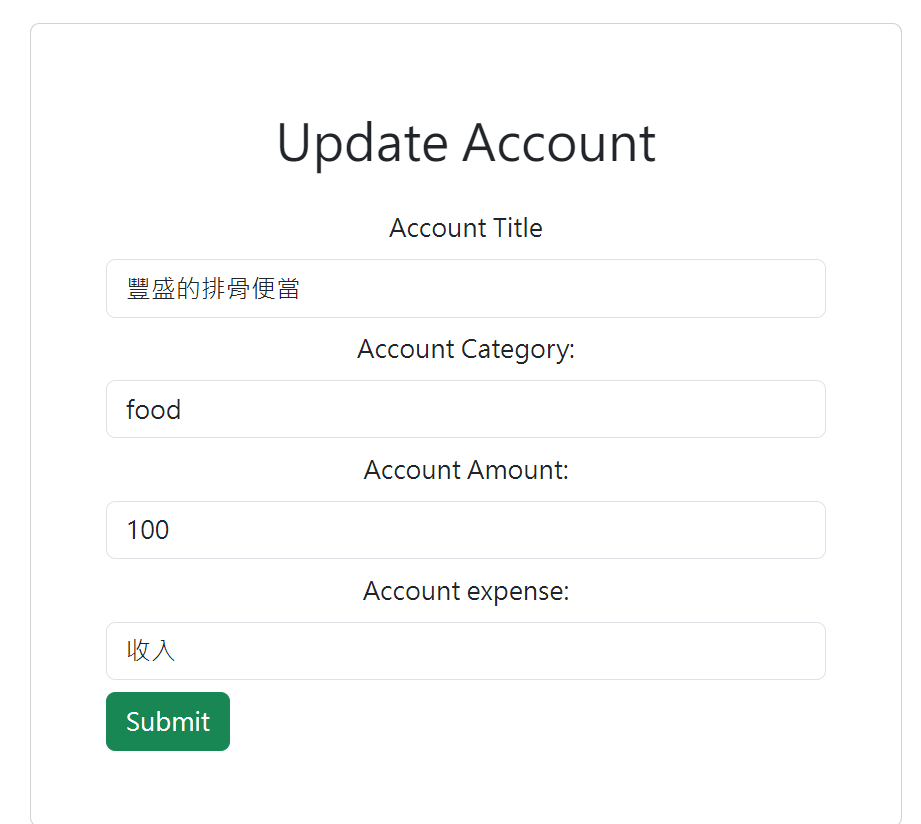
接下來,修改內容變成豐盛的排骨便當,其他的內容都不改變。大家要改變也可以根據喜好修改,要注意的是Category盡量保持一致,可以是food,也可以是食物,但相同類型都需要有相同的名稱。
都修改完成之後,按下Submit鍵。
修改完成之後,就會跳回主頁,然後就看到我們的便當資訊變成了豐盛的排骨便當
再來,我們就要新增刪除功能了
我們在前面的頁面中已經新增好了刪除資料的按鈕與空的功能,接下來就要開始正式實作了。
我們先回到Service.js中新增deleteAccount
export const deleteAccount = (id)=>axios.delete(BASE_REST_API_URL+'/'+id);
再來回到ListAccounyComponent中,在delete中新增這個功能
function deletedAccount(id){
        //刪除Account
        deleteAccount(id).then(()=>{
            listAccounts()
        }).catch(error =>{
            console.log(error)
        })
    }
完整的程式碼如下
import React, { useEffect, useState } from 'react'
import { deleteAccount, getAllAccounts } from '../Service/AccountService'
import {useNavigate} from 'react-router-dom'
function ListAccountCompinent() {
    const [accounts,setAccounts] = useState([])
    const navigate = useNavigate()
    useEffect(()=>{
        listAccounts();
    },[])
    function listAccounts(){
        getAllAccounts().then((response)=>{
            setAccounts(response.data);
        }).catch(error =>{
            console.error(error)
        })
    }
    function addNewAccount(){
     navigate('/add-account')
    }
    function updateAccount(id){
        // 更新Account
        console.log(id)
        navigate(`/update-account/${id}`)
    }
    function deletedAccount(id){
        //刪除Account
        deleteAccount(id).then(()=>{
            listAccounts()
        }).catch(error =>{
            console.log(error)
        })
    }
  return (
    <div className='container'>
        <h2 className='text-center'>List of Todos</h2>
        <button className='btn btn-primary mb-2' onClick={addNewAccount}>Add Account</button>
        <div>
          <table className='table table-bordered table-striped'>
                <thead>
                    <tr>
                        <th>Account Name</th>
                        <th>Account Category</th>
                        <th>Account amount</th>
                        <th>Account expense</th>
                        <th>Actions</th>
                    </tr>
                </thead>
                <tbody>
                    {
                        accounts.map(account =>
                            <tr key={account.id}>
                                <td>{account.name}</td>
                                <td>{account.category}</td>
                                <td>{account.amount}</td>
                                <td>{account.expesned ? '收入':'支出'}</td>
                                <td>
                                    <button className='btn btn-info' onClick={()=> updateAccount(account.id)}>Update</button>
                                    <button className='btn btn-danger' onClick={()=> deletedAccount(account.id)} style={{marginLeft:"10px"}}>Delete</button>
                                </td>
                            </tr>
                        )
                    }
                </tbody>
            </table>
        </div>
    </div>
  )
}
export default ListAccountCompinent
撰寫完之後記得儲存,然後先新增一個帳目,我這邊先新增了123這個資料,然後對這個資料按下delete
成功的話你就會看見,資料被你正確的刪除了!
完成刪除動作後,我們就完成了完整的前端CRUD。
能做到這裡的你,已經學會了完整個前端、後端的CRUD,以及React的操作,我相信已經初步的掌握了前後端開發的基礎了。
