接下來更進階一點的RecyclerView,也是接著上一篇,如果想學如何使RecyclerView下滑更新也可以回去看看喔~
這次我們來新增一個功能,當我們點擊任何一行(項)資料,可以做出跳轉Activity(Intent)的功能。
跳轉Activity也在之前介紹過,同樣可以回去看看,我們開始進入主題。
新增一個Activity,作為要跳轉的Activity,在com.example.(名稱)右鍵>New>Activity> 點擊Empty Views Activity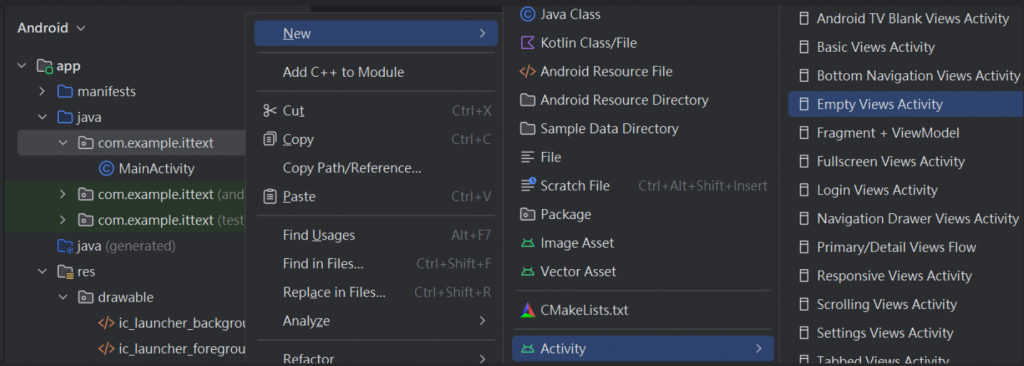
命名完,點選Finish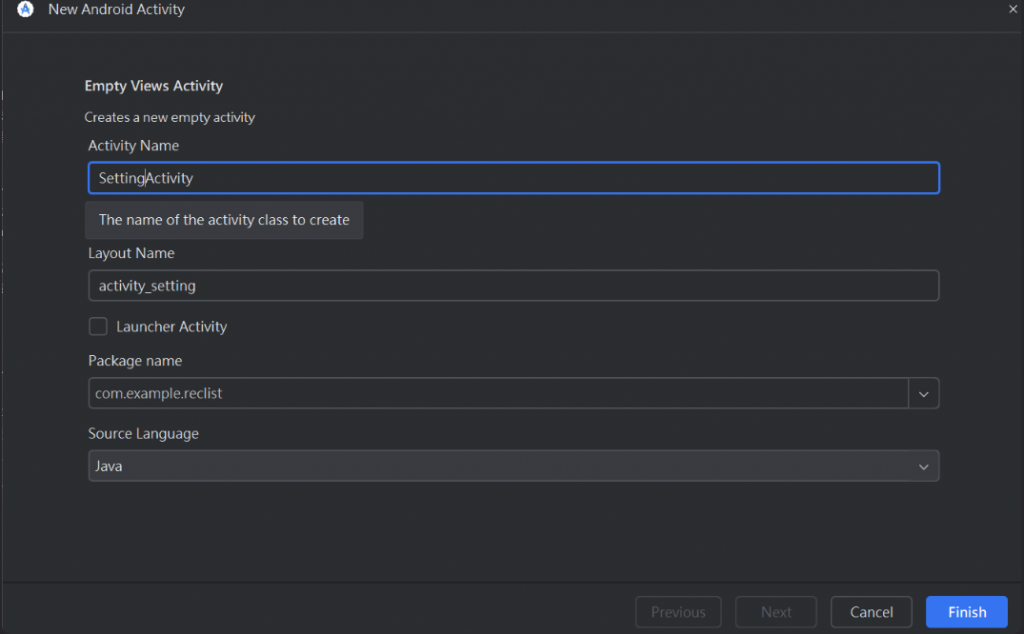
簡單設置一下第二個Activity的.xml 介面(可以使用更美觀的方式,但我比較懶)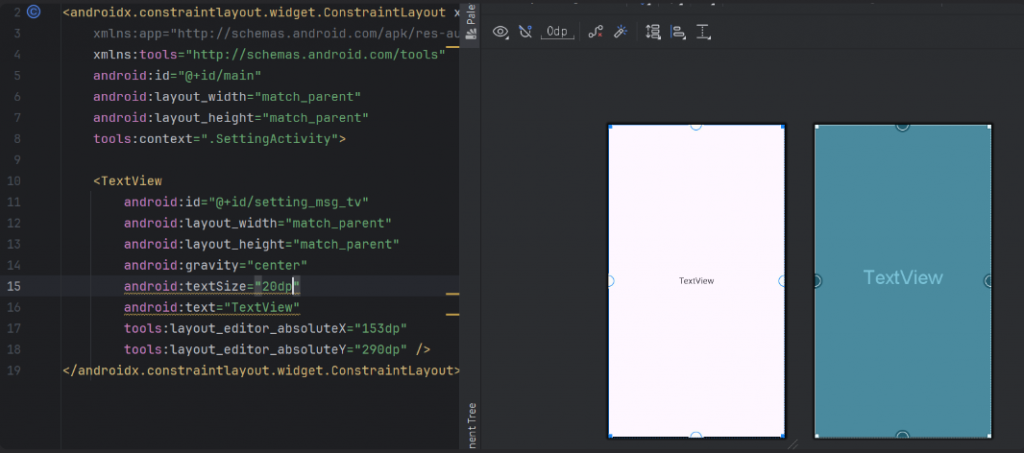
(完整程式碼)
<?xml version="1.0" encoding="utf-8"?>
<androidx.constraintlayout.widget.ConstraintLayout xmlns:android="http://schemas.android.com/apk/res/android"
    xmlns:app="http://schemas.android.com/apk/res-auto"
    xmlns:tools="http://schemas.android.com/tools"
    android:id="@+id/main"
    android:layout_width="match_parent"
    android:layout_height="match_parent"
    tools:context=".SettingActivity">

    <TextView
        android:id="@+id/setting_msg_tv"
        android:layout_width="match_parent"
        android:layout_height="match_parent"
        android:gravity="center"
        android:textSize="20dp"
        android:text="TextView"
        tools:layout_editor_absoluteX="153dp"
        tools:layout_editor_absoluteY="290dp" />
</androidx.constraintlayout.widget.ConstraintLayout>
於MainActivity 於new MainAdapter(marrayList) 多方入this,方便在MainAdapter中使用MainActivity的方法
在到MainAdapter 的建構元中加入Activity activity,且需要宣告一個activity 變數名稱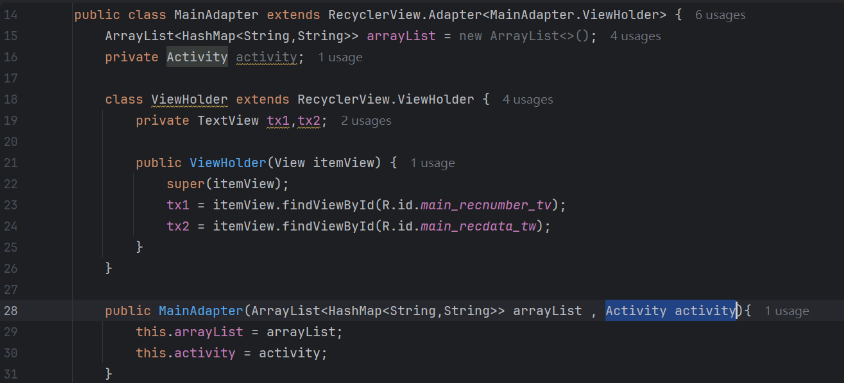
(完整程式碼)
public class MainActivity extends AppCompatActivity implements MainContract.view{

    //設定RecycleView類別的變數名稱recycleView
    private RecyclerView recyclerView;
    MainAdapter mainAdapter;
    private MainPresenter mainPresenter;
    SwipeRefreshLayout swipeRefreshLayout;

    //新增一個HashMap存放每筆資料
    ArrayList<HashMap<String, String>> marrayList = new ArrayList<>();

    @Override
    protected void onCreate(Bundle savedInstanceState) {
        super.onCreate(savedInstanceState);
        setContentView(R.layout.activity_main);

        mainPresenter = new MainPresenter(this);
        mainPresenter.Data();

        //設置RecycleView
        recyclerView = findViewById(R.id.main_list_rv);
        recyclerView.setLayoutManager(new LinearLayoutManager(this));
        recyclerView.addItemDecoration(new DividerItemDecoration(this, DividerItemDecoration.VERTICAL));
        mainAdapter = new MainAdapter(marrayList, this);
        recyclerView.setAdapter(mainAdapter);

        //下拉刷新
        swipeRefreshLayout = findViewById(R.id.main_swip_sl);
        swipeRefreshLayout.setColorSchemeColors(getColor(R.color.blue_RURI));
        swipeRefreshLayout.setOnRefreshListener(()->{
            marrayList.clear();
            mainPresenter.Data();
            mainAdapter.notifyDataSetChanged();
            swipeRefreshLayout.setRefreshing(false);

        });
    }

    @Override
    public void getData(ArrayList arrayList) {
        marrayList = arrayList;
    }
}
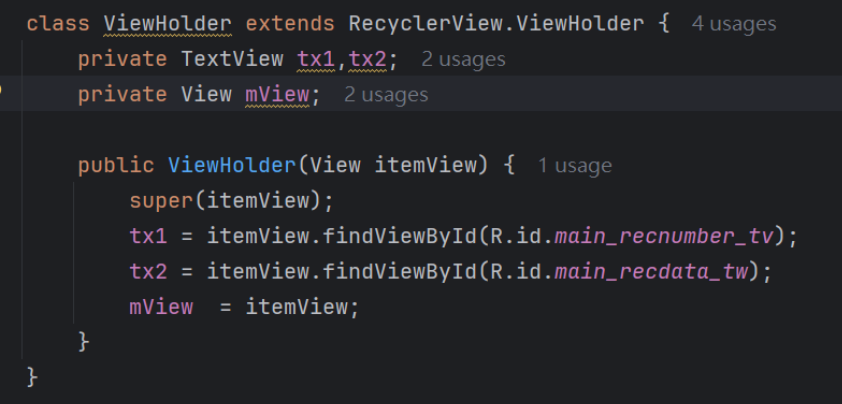
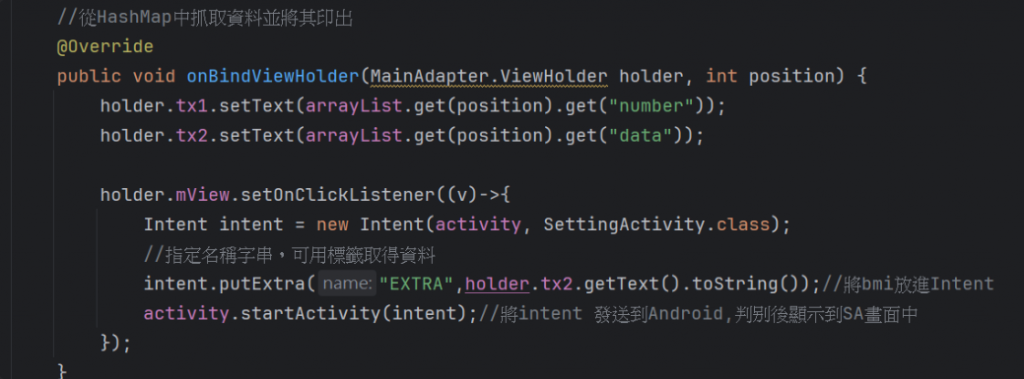
(完整程式碼)
public class MainAdapter extends RecyclerView.Adapter<MainAdapter.ViewHolder> {
    ArrayList<HashMap<String,String>> arrayList = new ArrayList<>();
    private Activity activity;

    class ViewHolder extends RecyclerView.ViewHolder {
        private TextView tx1,tx2;
        private View mView;

        public ViewHolder(View itemView) {
            super(itemView);
            tx1 = itemView.findViewById(R.id.main_recnumber_tv);
            tx2 = itemView.findViewById(R.id.main_recdata_tw);
            mView  = itemView;
        }
    }

    public MainAdapter(ArrayList<HashMap<String,String>> arrayList , Activity activity){
        this.arrayList = arrayList;
        this.activity = activity;
    }

    @Override
    public MainAdapter.ViewHolder onCreateViewHolder(ViewGroup parent, int viewType) {
        View view = LayoutInflater.from(parent.getContext())
                .inflate(R.layout.recyclerview, parent, false);
        return new MainAdapter.ViewHolder(view);
    }

    //從HashMap中抓取資料並將其印出
    @Override
    public void onBindViewHolder(MainAdapter.ViewHolder holder, int position) {
        holder.tx1.setText(arrayList.get(position).get("number"));
        holder.tx2.setText(arrayList.get(position).get("data"));

        holder.mView.setOnClickListener((v)->{
            Intent intent = new Intent(activity, SettingActivity.class);
            //指定名稱字串,可用標籤取得資料
            intent.putExtra("EXTRA",holder.tx2.getText().toString());//將bmi放進Intent
            activity.startActivity(intent);//將intent 發送到Android,判別後顯示到SA畫面中
        });
    }

    //回傳arrayList的大小
    @Override
    public int getItemCount() {
        return arrayList.size();
    }
}
public class SettingActivity extends AppCompatActivity {
    //宣告
    private TextView msgTextView;
    @Override
    protected void onCreate(Bundle savedInstanceState) {
        super.onCreate(savedInstanceState);
        EdgeToEdge.enable(this);
        setContentView(R.layout.activity_setting);
        //綁定
        msgTextView = findViewById(R.id.setting_msg_tv);

        //取資料
        Intent intent = getIntent();
        String Name = intent.getStringExtra("EXTRA");

        msgTextView.setText("你點擊了 \n"+Name);
    }
}
完成上面的步驟後就完成了,如果沒有成功的可以重新看一下或試試使用快捷鍵Alt + Enter 看問題有沒有解決。
(剛開始)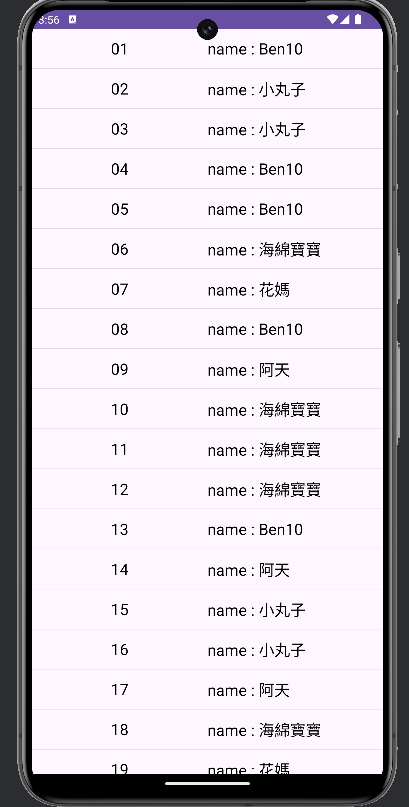
(點擊了9號,出現9號後方的資訊)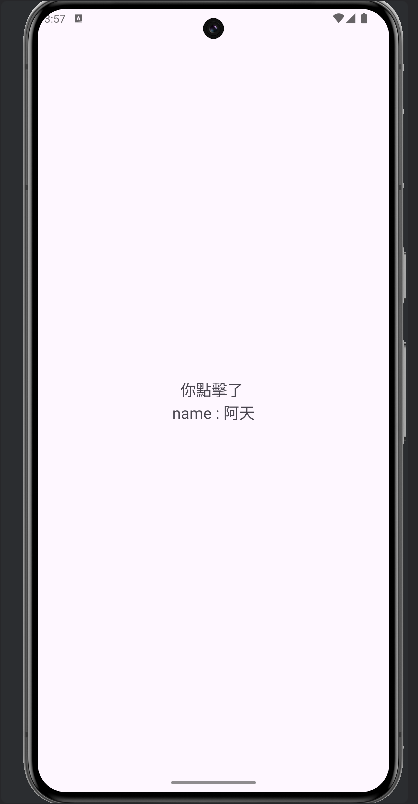
(右滑返回(可以自行新增返回鍵,之前跳轉Activity中做過不知道的可以回去看一下),刷新)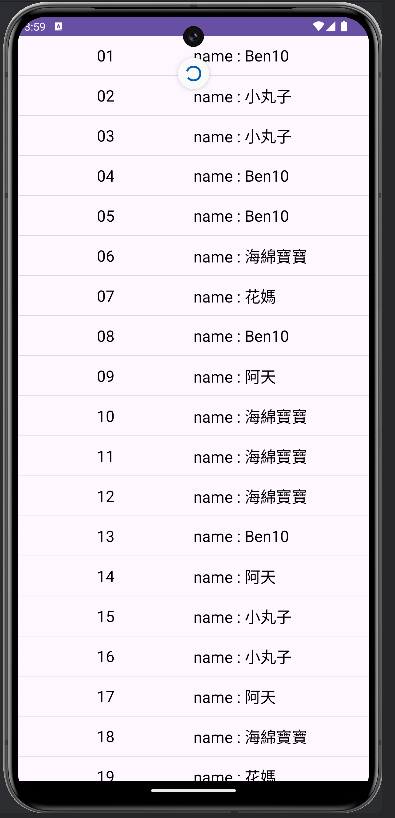
(刷新後資料,同樣點擊9)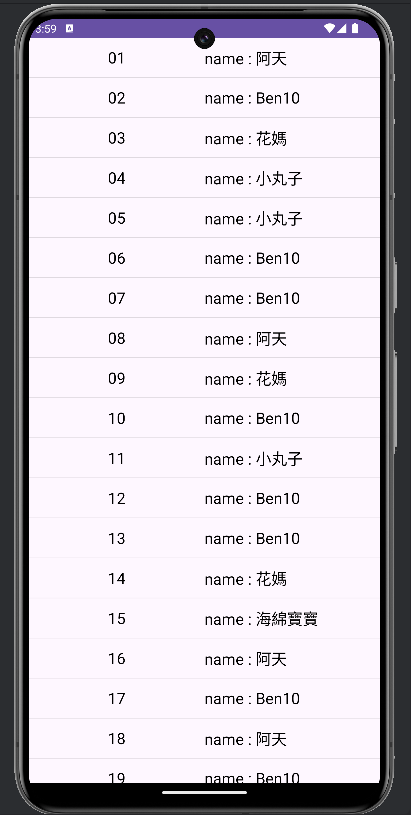
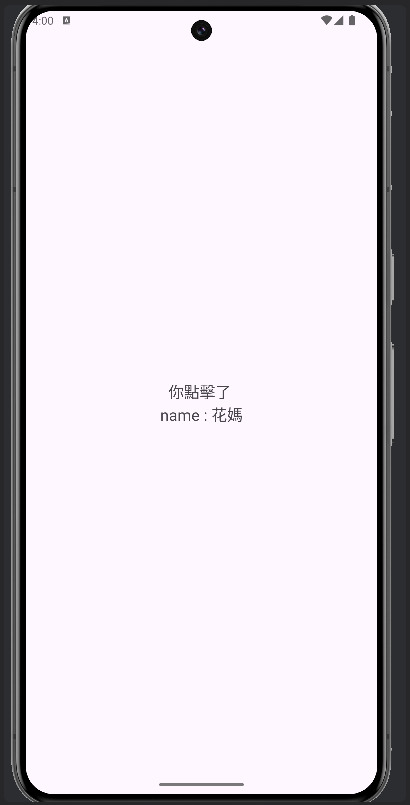
確認無誤就成功做出RecyclerView+Intent的功能啦~
這樣子RecyclerView就告一段落,下一邊介紹一下Fragment,我們下一篇見(≧∇≦)ノ
