Fragment代表應用程式介面的可重複使用部分,片段可讓介面分為不同的區塊,藉此將模組性和可重複使用性導入活動介面中。
Fragment可以因應各種螢幕大小調整畫面,如:較小螢幕可以用線性版面配置顯示底部導覽列和清單。(如下圖)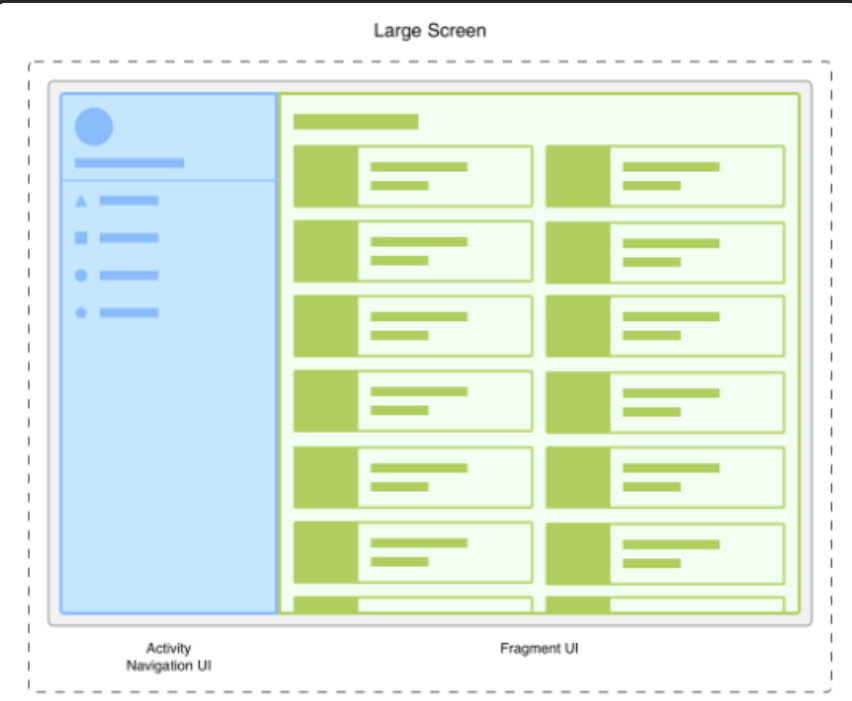
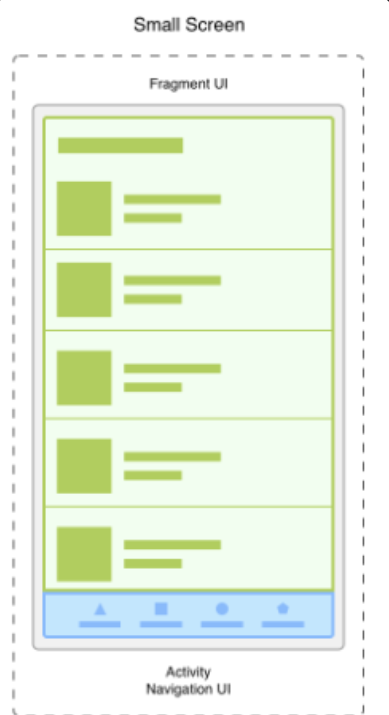
因此一個Activity裡可以有多個Fragment,且一個Fragment可以被多個Activity重用。
來源資訊官網可看更仔細的訊息。
了解大概關於Fragment的資訊後,我們開始上首簡單的範例吧~
這次我們需要新增三個Fragment
在自己的com.example.檔名 右鍵 > New > Fragment > 點擊 Fragment(Blank)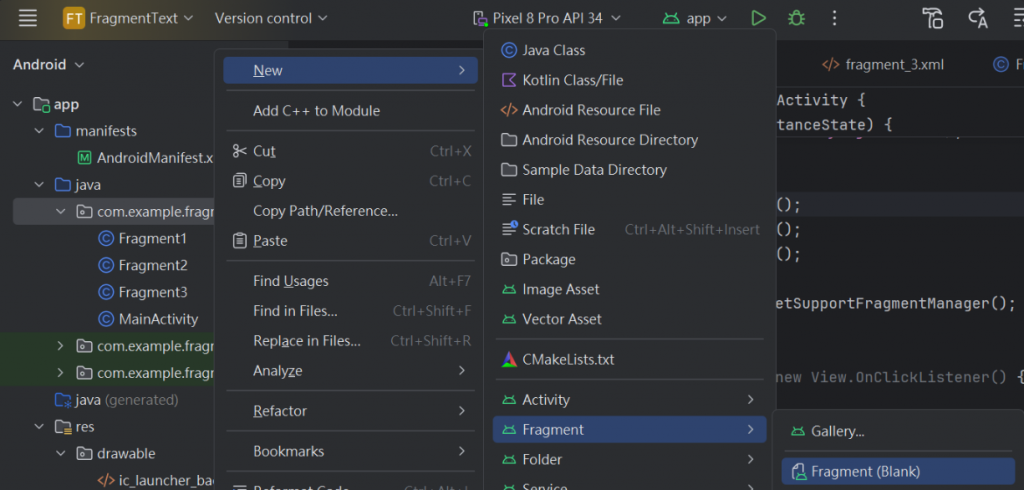
命名完,點擊Finish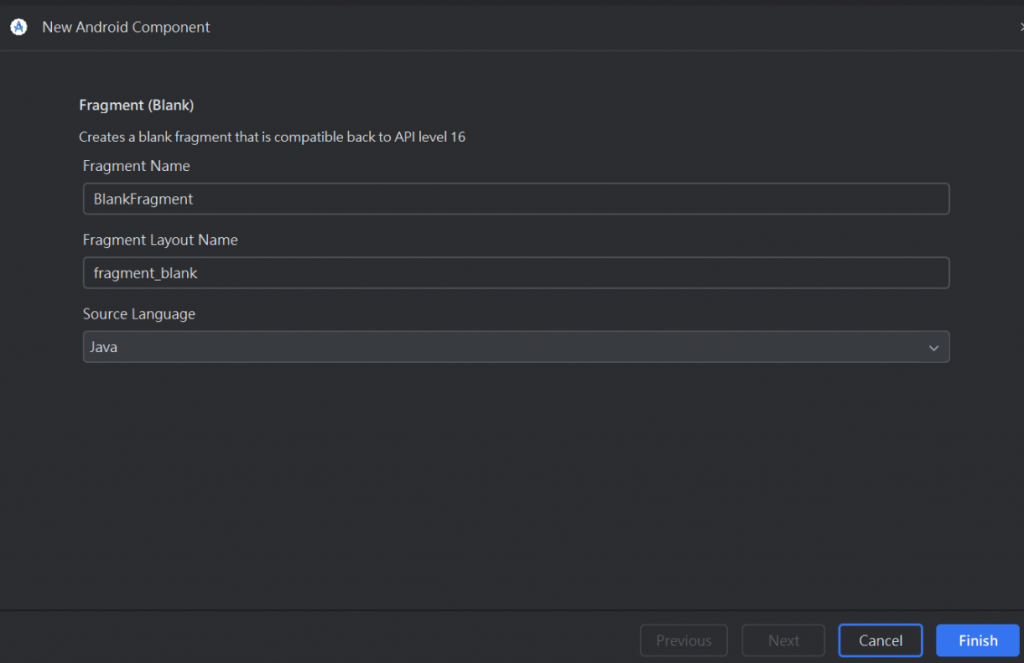
activity_main.xml 利用LinearLayout設置FrameLayout與Button
(實作會利用Button觸發)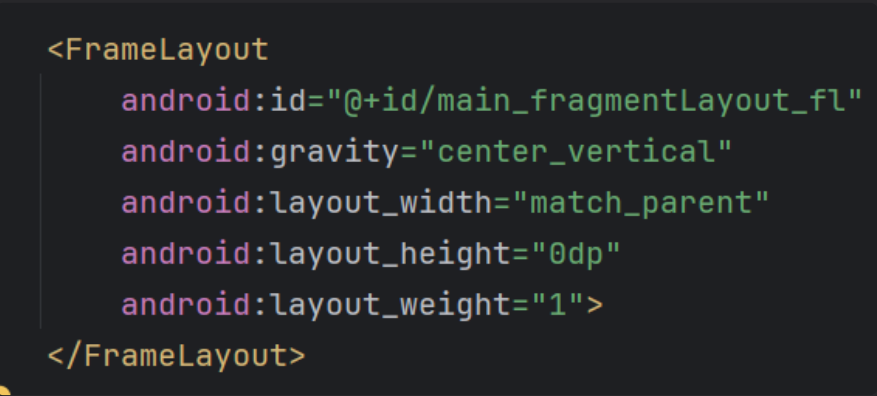
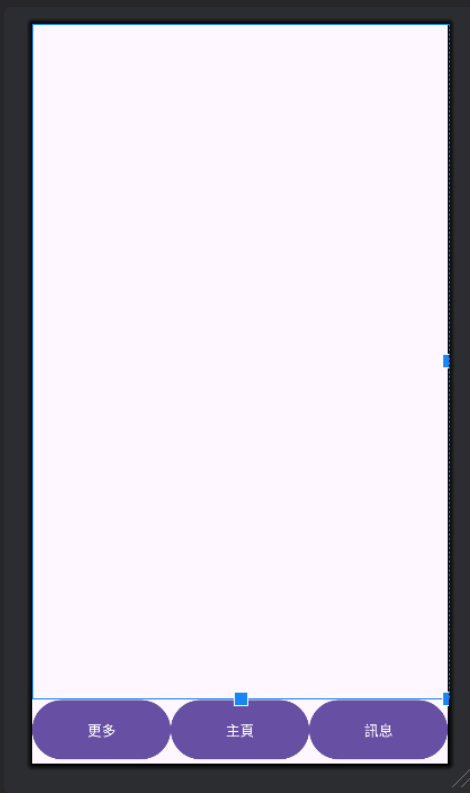
(完整程式碼)
<?xml version="1.0" encoding="utf-8"?>
<LinearLayout xmlns:android="http://schemas.android.com/apk/res/android"
    xmlns:app="http://schemas.android.com/apk/res-auto"
    xmlns:tools="http://schemas.android.com/tools"
    android:layout_width="match_parent"
    android:layout_height="match_parent"
    android:orientation="vertical"
    tools:context=".MainActivity">

    <FrameLayout
        android:id="@+id/main_fragmentLayout_fl"
        android:gravity="center_vertical"
        android:layout_width="match_parent"
        android:layout_height="0dp"
        android:layout_weight="1">
    </FrameLayout>

    <LinearLayout
        android:layout_width="match_parent"
        android:layout_height="0dp"
        android:orientation="horizontal"
        android:layout_weight="0.1">

        <Button
            android:id="@+id/main_fragment1_btn"
            android:layout_width="0dp"
            android:layout_height="match_parent"
            android:layout_weight="1"
            android:text="更多" />

        <Button
            android:id="@+id/main_fragment2_btn"
            android:layout_width="0dp"
            android:layout_height="match_parent"
            android:layout_weight="1"
            android:text="主頁" />

        <Button
            android:id="@+id/main_fragment3_btn"
            android:layout_width="0dp"
            android:layout_height="match_parent"
            android:layout_weight="1"
            android:text="訊息" />
    </LinearLayout>

</LinearLayout>
public class MainActivity extends AppCompatActivity {
    //宣告
    private Button leftFragmentButton,middleFragmentButton,
            rightFragmentButton;

    @Override
    protected void onCreate(Bundle savedInstanceState) {
        super.onCreate(savedInstanceState);
        EdgeToEdge.enable(this);
        setContentView(R.layout.activity_main);
        //綁定
        leftFragmentButton = findViewById(R.id.main_fragment1_btn);
        middleFragmentButton = findViewById(R.id.main_fragment2_btn);
        rightFragmentButton = findViewById(R.id.main_fragment3_btn);

        //建立Fragment
        LeftFragment leftFragment = new LeftFragment();
        MiddleFragment middleFragment = new MiddleFragment();
        RightFragment rightFragment = new RightFragment();

        FragmentManager fragmentManager = getSupportFragmentManager();

        //按鈕觸發,呼叫setFragment
        leftFragmentButton.setOnClickListener(new View.OnClickListener() {
            @Override
            public void onClick(View view) {
                //使用FragmentTransaction置換(replace) Fragment 的物件
                fragmentManager.beginTransaction().replace(R.id.main_fragmentLayout_fl,leftFragment).commit();
            }
        });

        middleFragmentButton.setOnClickListener(new View.OnClickListener() {
            @Override
            public void onClick(View view) {
                //使用FragmentTransaction置換(replace) Fragment 的物件
                //呼叫 commit 來確認執行
                fragmentManager.beginTransaction().replace(R.id.main_fragmentLayout_fl,middleFragment).commit();
            }
        });

        rightFragmentButton.setOnClickListener(new View.OnClickListener() {
            @Override
            public void onClick(View view) {
                //使用FragmentTransaction置換(replace) Fragment 的物件
                fragmentManager.beginTransaction().replace(R.id.main_fragmentLayout_fl,rightFragment).commit();
            }
        });
    }

}
FragmentTransaction => 用來操作新增(add)、刪除(delete)或置換(replace) Fragment
通常Fragment的佈局會添加在像是FrameLayout的容器中,在容器裡可以同時存在多個fragment。
replace做的就是取代容器內「所有」Fragment,且容器內不管有幾個Fragment都會被移除。
public class LeftFragment extends Fragment {
    private TextView msgTextView;

    @Override
    public void onCreate(Bundle savedInstanceState) {
        super.onCreate(savedInstanceState);
    }

    @Override
    public View onCreateView(LayoutInflater inflater, ViewGroup container,
                             Bundle savedInstanceState) {
        //這裡通常是用於創建Fragment的View
        return inflater.inflate(R.layout.fragment_left, container, false);
    }

    @Override
    public void onViewCreated(@NonNull View view, @Nullable Bundle savedInstanceState) {
        super.onViewCreated(view, savedInstanceState);

        msgTextView = view.findViewById(R.id.fragment_msg1_tv);
        msgTextView.setText("更多頁面");
    }
}
這些就是我們這次Fragment會用到的程式碼~
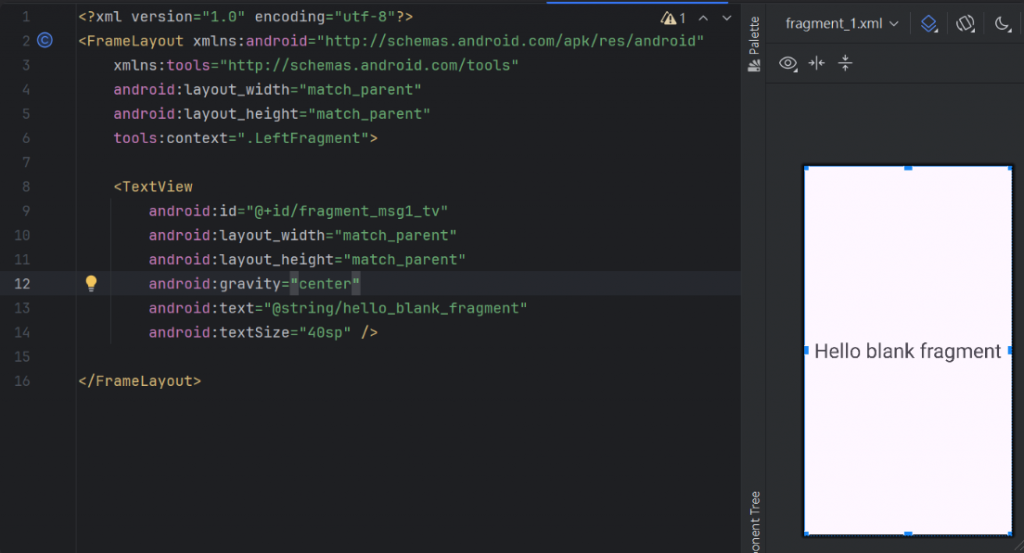
<?xml version="1.0" encoding="utf-8"?>
<FrameLayout xmlns:android="http://schemas.android.com/apk/res/android"
    xmlns:tools="http://schemas.android.com/tools"
    android:layout_width="match_parent"
    android:layout_height="match_parent"
    tools:context=".LeftFragment">

    <TextView
        android:id="@+id/fragment_msg1_tv"
        android:layout_width="match_parent"
        android:layout_height="match_parent"
        android:gravity="center"
        android:text="@string/hello_blank_fragment"
        android:textSize="40sp" />

</FrameLayout>
這樣就完成了,試試執行起來是甚麼樣子~
執行一開始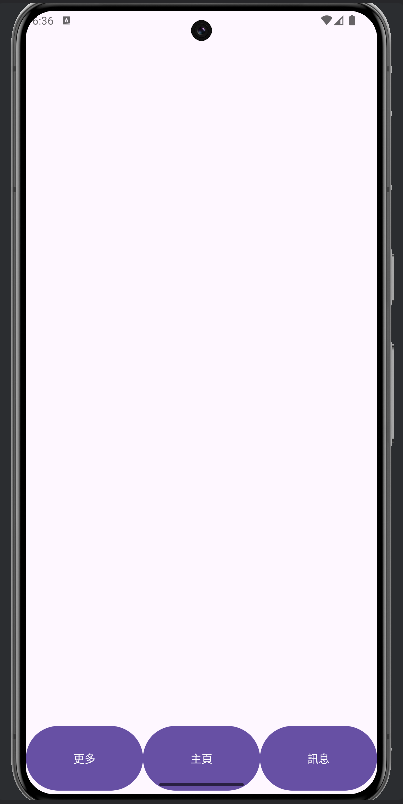
左邊按鈕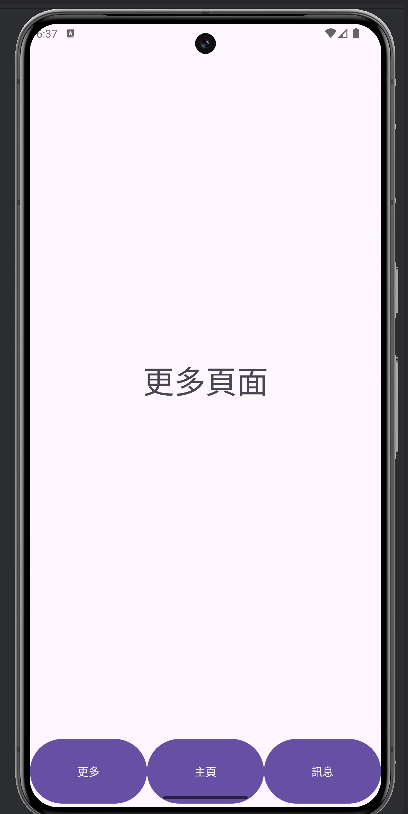
中間按鈕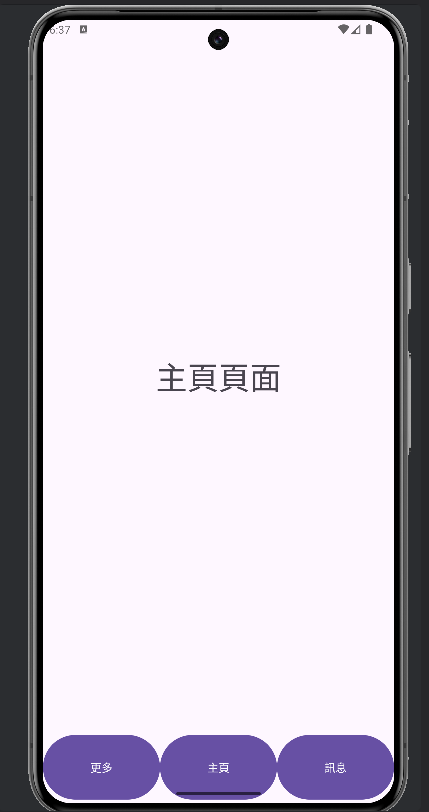
右邊按鈕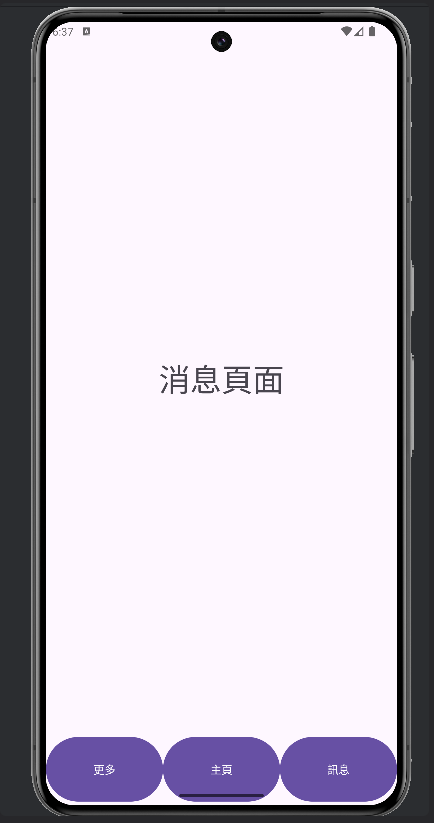
恭喜成功做出簡單的Fragment範例啦(。・∀・)ノ゙
