iT邦幫忙

2024 iThome 鐵人賽

DAY 16
0
DevOps

現代化應用程式開發與維運 - GitHub Codespace 與 GitHub Copilot系列 第 16

如何在 Visual Studio Code 內設定與使用 GitHub Copilot

  • 分享至 

  • xImage
  •  

在 Visual Studio Code 安裝 Copilot

在前一篇 GitHub Copilot - 訂閱方案與功能說明 中我們有提到,GitHub Copilot支援 Visual Stuido、Visual Studio Code、Azure Data Studio、JetBrains IDEs 與 Vim/Neovim 等 IDE 上使用。在本篇文章我們將簡單介紹,如何設定適用於 Visual Studio Code 的 GitHub Copilot 延伸模組,其中包含:

  • GitHub Copilot
  • GitHub Copilot Chat

當安裝 GitHub Copilot 時,也會同時安裝 GitHub Chat 延伸模組


接下來,我們將逐一步驟說明如何在 在 Visual Studio Code 安裝 Copilot

  1. 開啟 Visual Stuido Code

  2. 在左側選單選擇延伸模組 (Extension)
    https://ithelp.ithome.com.tw/upload/images/20240929/20091494aqArlhHHJ9.png

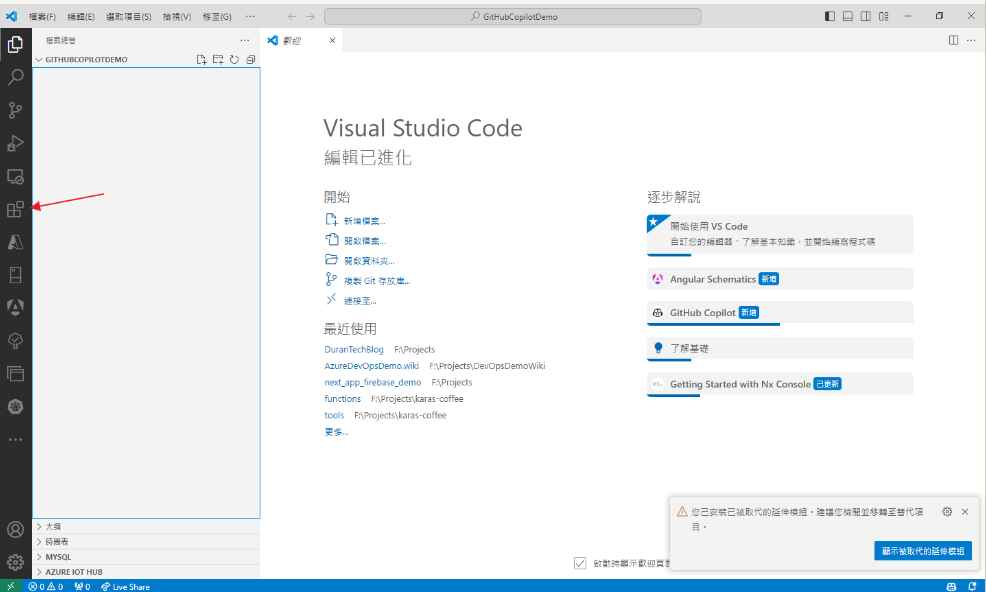
  3. 在延伸模組搜尋搜尋欄內輸入 Copilot 進行搜尋
    https://ithelp.ithome.com.tw/upload/images/20240929/20091494ffh7dap7hj.png

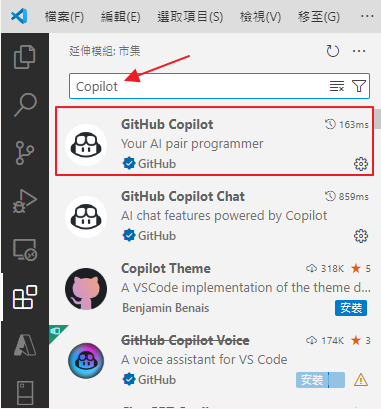
  4. 在畫面上點選安裝按鈕 (如果已經安裝則會顯示下圖)
    https://ithelp.ithome.com.tw/upload/images/20240929/20091494KEwg72NX84.png

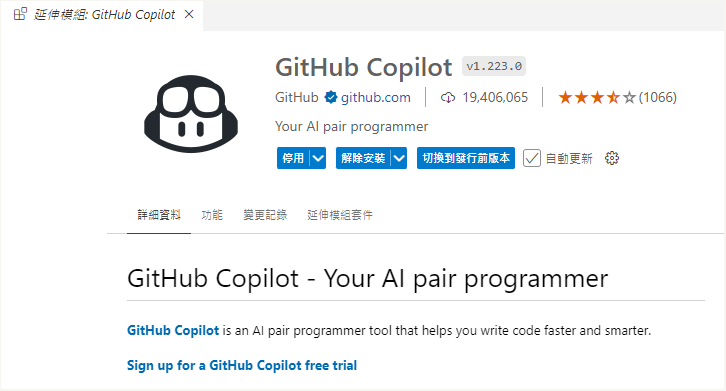
  5. 如果你尚未 GitHub 尚未授權 Visual Studio Code,則會提示登入 GitHub;如果已經完成授權,則會自動獲得 GitHub Copilot 授權。當瀏覽器開啟時,GitHub 會要求 GitHub Copilot 必要權限。

  6. 當你完成安裝與授權流程,你可以點選右下角 GitHub Copilot 圖示,上方選單會出現 Copilot 選單
    https://ithelp.ithome.com.tw/upload/images/20240929/20091494BF0I670iFy.png


程式碼建議自動完成功能

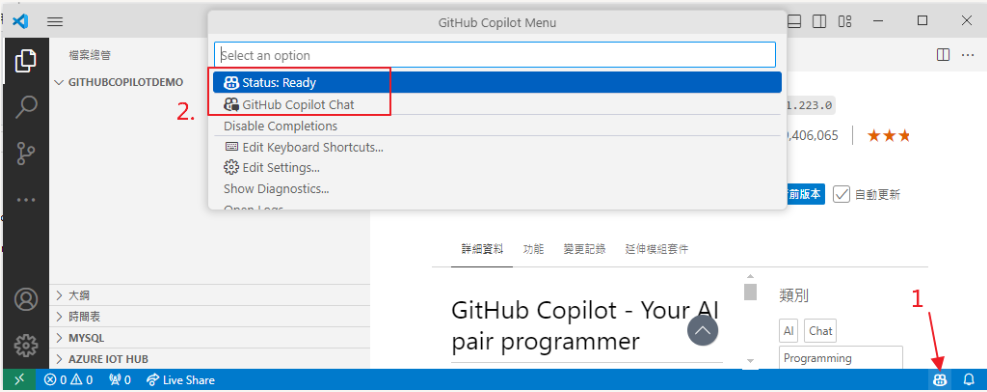
完成 GitHub Copilot 安裝後,相信身為開發者的你已經迫不及待地來測試相關功能。我們將以簡單的 C# 程式來測試自動完成功能:於 Visual Studio Code 內建立一個新檔案,點選儲存並命名為 Program.cs。
https://ithelp.ithome.com.tw/upload/images/20240929/20091494kvLk5eHokv.png

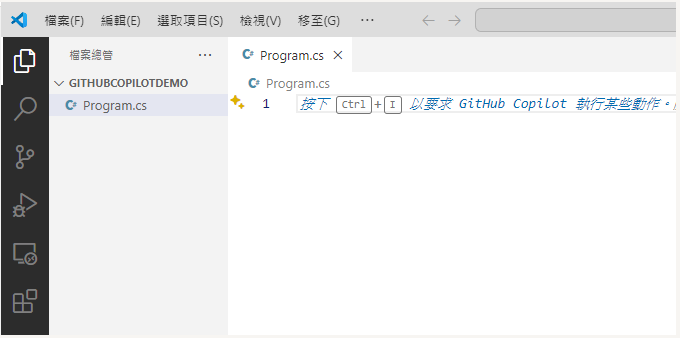
輸入 int addInt 後,Visual Studio Code 會自動建議你可能想要建立的程式碼。
https://ithelp.ithome.com.tw/upload/images/20240929/20091494JXtCtwjRhv.png

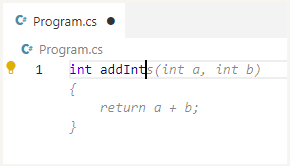
如果這是你想要的,按下 Tab 鍵則會自動完成;否則按下 Esc 鍵關閉建議。
https://ithelp.ithome.com.tw/upload/images/20240929/20091494cxiVN9OffF.png

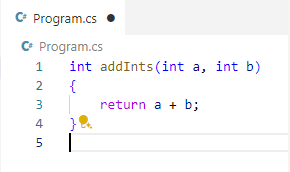
如此一來,我們確認 Copilot 已經成功啟用。如果您對於自動建議與完成功能有興趣,想要了解更多實務操作,可以參考後續的文章 "GitHub Copilot 自動完成建議功能說明與使用技巧"。


測試 GitHub Copilot Chat 功能

理所當然,你也能透過 GitHub Copilot Chat 功能建立新的函式:按下快捷鍵 Ctrl + i,在對話框上輸入新增一個簡易整數加總函式,按下 Enter。
https://ithelp.ithome.com.tw/upload/images/20240929/20091494tNRYEd4QUV.png

https://ithelp.ithome.com.tw/upload/images/20240929/20091494hWEfqLzajx.png

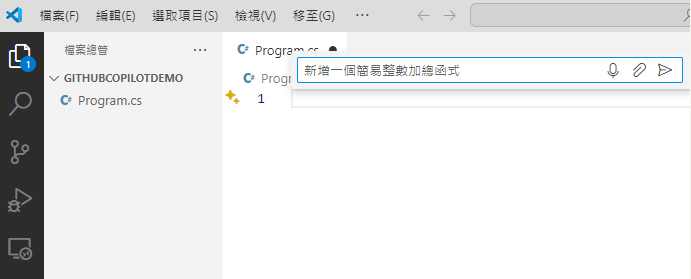
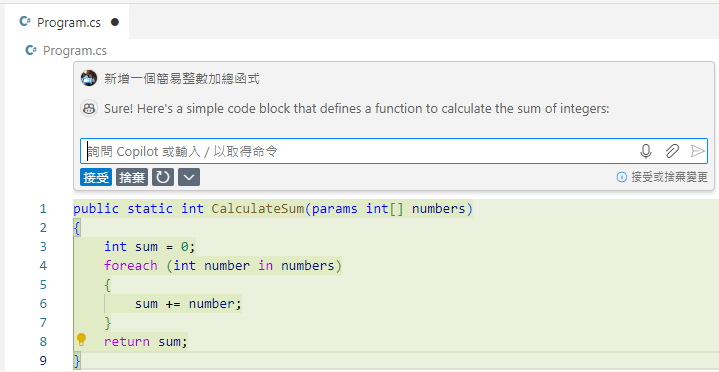
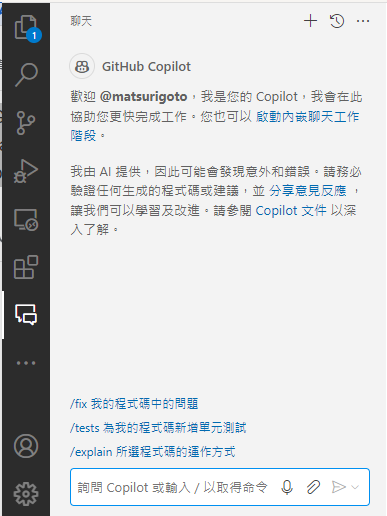
您可以確認產生的內容是否符合需求,進而接受、捨棄或修改您的詞句以產生更符合需求。理所當然,您也能開啟聊天視窗,一邊撰寫程式碼的同時,一邊與 AI 助理協同開發。
https://ithelp.ithome.com.tw/upload/images/20240929/200914949uIfV2xyDv.png

https://ithelp.ithome.com.tw/upload/images/20240929/200914944NmgpVjIPA.png

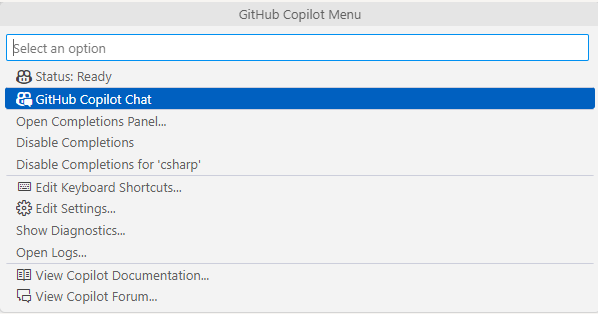
如此一來,我們也確認 Copilot Chat 已經成功啟用。


GitHub Copilot Chat 的使用案例

經過上面的測試,多數的開發人員應該開始摩拳擦掌想要知道更多的使用案例:這位 AI 助理還能幫我做哪些事情?下列我們提供一些常見的使用案例

  • 説明和記錄程式碼
  • 回答撰寫程式碼問題
  • 提議錯誤 (bug) 修正程式
  • 產生單元測試案例
  • 產生文件
  • 建議對現有程式碼基底進行改進

使用者可以在 Visual Studio Code 編輯區域中點選右鍵使用 Copilot Chat 基本功能。理所當然,我們在後續的章節會分享更多進階內容與使用案例。如果您對於 GitHub Copilot Chat 功能有興趣,想要了解更多實務操作,可以參考後續的文章 "GitHub Copilot Chat 基礎介紹" 與 GitHub Copilot Chat 進階說明" 了解更多使用方式。
https://ithelp.ithome.com.tw/upload/images/20240929/20091494HWtQxUjIzk.png


總結

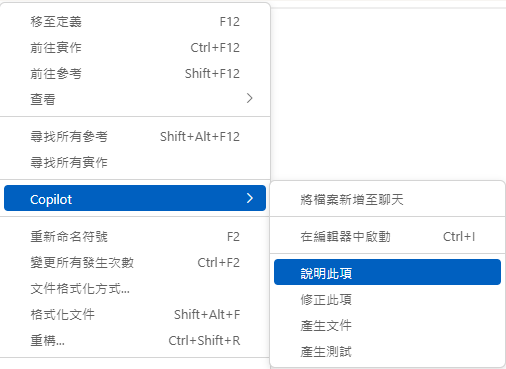
透過本篇文章,您應該對於如何在 Visual Studio Code 內透過 GitHub Copilot 有初步的認識並理解如何操作。在下一篇文章,將詳細說明 Visual Studio Code 內 GitHub Copilot 相關設定。理所當然,會建議每一位使用者都應該瀏覽過一次其設定內容。


上一篇
GitHub Copilot - 訂閱方案與功能說明
下一篇
Visual Studio Code - GitHub Copilot 相關設定
系列文
現代化應用程式開發與維運 - GitHub Codespace 與 GitHub Copilot30
圖片
  直播研討會
圖片
{{ item.channelVendor }} {{ item.webinarstarted }} |
{{ formatDate(item.duration) }}
直播中

尚未有邦友留言

立即登入留言