Fragment 是 Android 應用的一部分,可以是 Activity 的一個子組件。它可以在一個 Activity 中創建多個高度可重用的介面片段。每個 Fragment 都擁有獨立且靈活的佈局、行為和完整的生命周期,可以無縫地與主要 Activity 緊密協作,共同構建動態且高效的應用體驗。
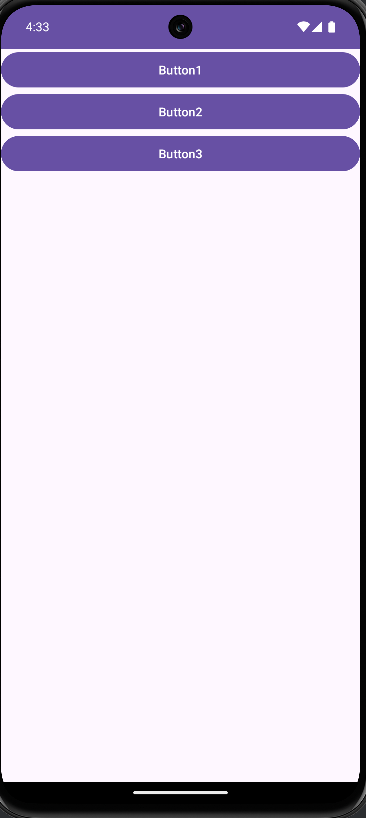
去製作農產品選單
首先,還是一樣我們先拉布局介面(res/layout)按右鍵New ->點layout

看你想製作幾個農產品品選單,就自己設置幾個介面
新增二個 Fragment.xml檔案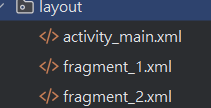
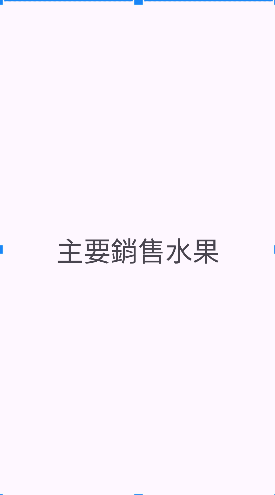
現在開始設計商品選單,我會先將我二個Fragment.xml商品的布局介面先設置完成
Fragment1.xml
<FrameLayout xmlns:android="http://schemas.android.com/apk/res/android"
    xmlns:tools="http://schemas.android.com/tools"
    android:layout_width="match_parent"
    android:layout_height="match_parent"
    tools:context=".Fragment1">

    <TextView
        android:id="@+id/tv_fragment_1"
        android:layout_width="match_parent"
        android:layout_height="match_parent"
        android:text="主要銷售水果"
        android:textSize="40sp"
        android:gravity="center"/>


</FrameLayout>
Fragment2.xml
<FrameLayout xmlns:android="http://schemas.android.com/apk/res/android"
    xmlns:tools="http://schemas.android.com/tools"
    android:layout_width="match_parent"
    android:layout_height="match_parent"
    tools:context=".Fragment2">


    <TextView
        android:id="@+id/tv_fragment_2"
        android:layout_width="match_parent"
        android:layout_height="match_parent"
        android:textSize="40sp"
        android:text="主要銷售蔬菜"
        android:gravity="center"/>

</FrameLayout>

再回到activity_main.xml做連接二個Fragment的button的布局
activity_main.xml
<LinearLayout
    xmlns:android="http://schemas.android.com/apk/res/android"
    xmlns:app="http://schemas.android.com/apk/res-auto"
    xmlns:tools="http://schemas.android.com/tools"
    android:id="@+id/main"
    android:layout_width="match_parent"
    android:layout_height="match_parent"
    tools:context=".MainActivity"
    android:orientation="vertical">

    <LinearLayout
    android:layout_width="match_parent"
    android:layout_height="50dp"
    android:orientation="horizontal">

        <Button
            android:id="@+id/fragment_1"
            android:layout_width="match_parent"
            android:layout_height="wrap_content"
            android:layout_weight="1"
            android:text="水果" />

        <Button
            android:id="@+id/fragment_2"
            android:layout_width="match_parent"
            android:layout_height="wrap_content"
            android:layout_weight="1"
            android:text="蔬菜" />

    </LinearLayout>

    <FrameLayout
        android:id="@+id/fragmentLayout"
        android:layout_width="match_parent"
        android:layout_height="match_parent">  //  連接Fragment的布局介面

    </FrameLayout>

</LinearLayout>
橘色 ->指的綠框就是Fragment的布局介面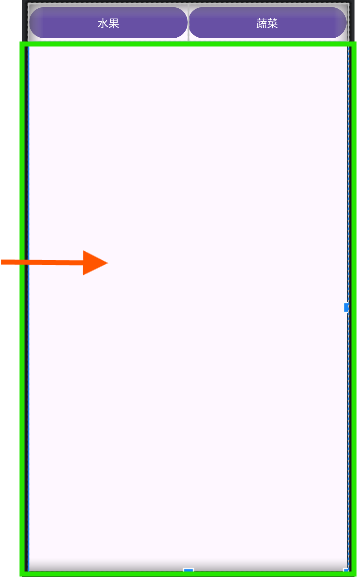
布局介面都設置完後,就開始連接程式碼,讓製作的農產品選單呈現你想要的效果
Fragment1.java
public class Fragment1 extends Fragment {
    private TextView textView;
    @Override
    public void onCreate(Bundle savedInstanceState) {
        super.onCreate(savedInstanceState);

    }
    @Override
    public View onCreateView(LayoutInflater inflater, ViewGroup container,
                             Bundle savedInstanceState) {

        return inflater.inflate(R.layout.fragment_1, container, false);
    }
    @Override
    public void onViewCreated(@NonNull View view,@Nullable Bundle savedInstanceState){
        super.onViewCreated(view,savedInstanceState);
        textView = view.findViewById(R.id.tv_fragment_1);
        textView.setText("水果專區");
    }
}
Fragment2.java
public class Fragment2 extends Fragment {
    private TextView textView2;

    @Override
    public void onCreate(Bundle savedInstanceState) {
        super.onCreate(savedInstanceState);
    }
    @Override
    public View onCreateView(LayoutInflater inflater, ViewGroup container,
                             Bundle savedInstanceState) {
        return inflater.inflate(R.layout.fragment_2, container, false);
    }
    @Override
    public void onViewCreated(@NonNull View view, @Nullable Bundle savedInstanceState){
        super.onViewCreated(view,savedInstanceState);
        textView2 = view.findViewById(R.id.tv_fragment_2);
        textView2.setText("蔬菜專區");
    }
}
MainActivity.java
public class MainActivity extends AppCompatActivity {
    private Button button1,button2;  // 宣告兩個按鈕變數

    @Override
    protected void onCreate(Bundle savedInstanceState) {
        super.onCreate(savedInstanceState);
        setContentView(R.layout.activity_main);


        button1 = findViewById(R.id.fragment_1);  //透過 ID 綁定第一個按鈕
        button2 = findViewById(R.id.fragment_2);  //透過 ID 綁定第二個按鈕


        Fragment1 fragment1 = new Fragment1();
        Fragment2 fragment2 = new Fragment2();

        //增加點擊事件
        button1.setOnClickListener(view -> setFragment(fragment1));   //當按下 button1 時,顯示 Fragment1
        button2.setOnClickListener(view -> setFragment(fragment2));  //當按下 button2 時,顯示 Fragment2

    }
    void setFragment(Fragment fragment){
        FragmentManager fragmentManager = getSupportFragmentManager();
        fragmentManager.beginTransaction().replace(R.id.fragmentLayout,fragment).commit();
    }
}
顯示成果:
