相信大家在開發 API 時,不能單只有後端程式內可以看到對應個別端口需要的參數或是回應的內容,很多時候必須要提供這些規格給其他不同單位,像是前端或 PM 或甚至需要導入的客戶等需要了解這些 API 規格的人員,這時候應用到 Open Api Document 來呈現就相當方便,其中 Swagger 的名聲相信在大家都不陌生。
目前 Spring Boot 可引用 springdoc-openapi-starter-webmvc-ui 這個套件能夠更友善整合 SpringBoot 和 Swagger UI,他可以整合許多 Spring Boot 大家開發時常用的註解去呈現 API 的規格,像是 @NotNull @Max @Min @Size 等等針對參數的驗證都可以自動幫我們轉成可視化的 UI 介面,方便其他人可以快速了解。
<dependency>
    <groupId>org.springdoc</groupId>
    <artifactId>springdoc-openapi-starter-webmvc-ui</artifactId>
    <version>2.6.0</version>
</dependency>
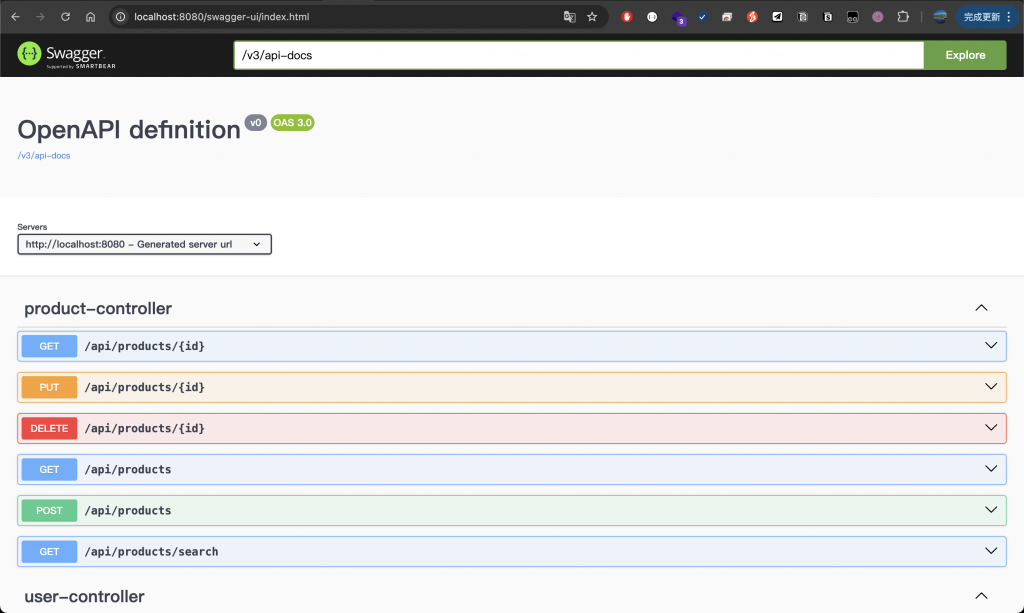
通常我們導入之後其實就可以直接於下面的位置看到前端頁面
預設 Swagger UI Json (下面 UI 需要呈現資料的 Json 原始資料)
http://localhost:8080/v3/api-docs
預設 Swagger UI 介面頁面http://localhost:8080/swagger-ui/index.html
**補充如果使用 Security 記得要在 SecurityConfig 開啟上面那些區域的路徑存取權限才可以看到。
 @Bean
    public SecurityFilterChain filterChain(HttpSecurity httpSecurity) throws Exception {
        return httpSecurity
                .csrf(customizer -> customizer.disable())
                .authorizeHttpRequests((registry) -> registry
									              // ...略
																// 允許 swagger 相關路徑
                                .requestMatchers( "/v3/api-docs/**","/swagger-ui/**").permitAll()
                                .anyRequest().authenticated()
                )
                .sessionManagement(session -> session.sessionCreationPolicy(SessionCreationPolicy.STATELESS))
                .addFilterBefore(jwtFilter, UsernamePasswordAuthenticationFilter.class)
                .build();
    }
如果希望可以更改 API 文件頁面呈現的一些資訊可以新增一個 Config 來設定
@Bean
public OpenAPI springOpenApi() {
    return new OpenAPI()
				.info(new Info()
              .title("Restful-Shop + Spring Security Doc")
              .version("1.0.0")
              .description("Spring doc")
              .license(new License()
                      .name("許可協議")
                      .url("https://oseanchen.github.io/"))
              .contact(new Contact()
                      .name("Sean Chen")
                      .email("abbb123p@gmail.com")))
				      .externalDocs(new ExternalDocumentation()
              .description("Sean 的部落格")
              .url("https://oseanchen.github.io/")
                );
}
不過一般應該只要用到基本的 Description 就差不多了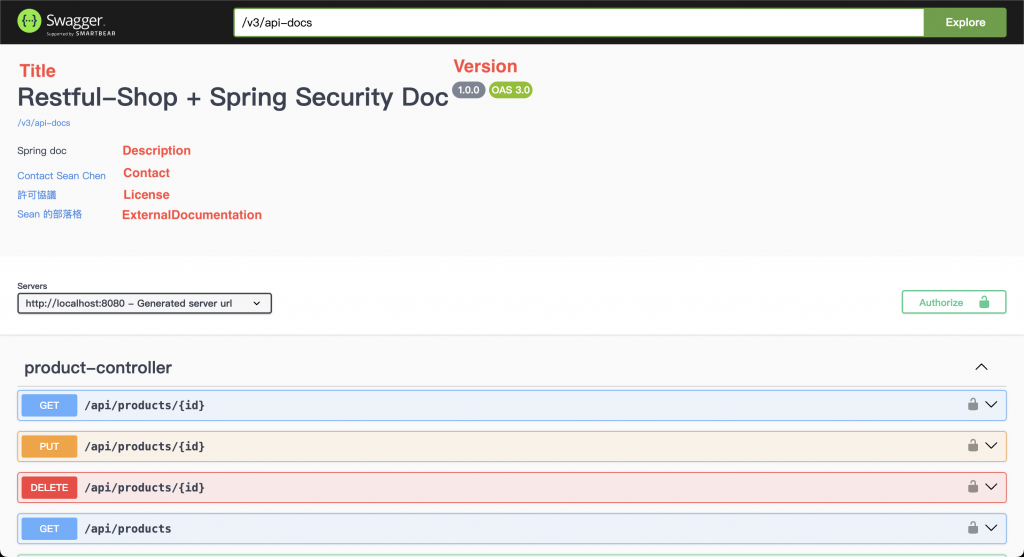
如果有需要多個端口或是不同版本需要分開頁面呈現可以使用 GroupedOpenApi,可以依照路徑的開頭區分,前端頁右上方會有切換選項,就只會呈現有匹配路徑上的 API。
@OpenAPIDefinition
@Configuration
public class SpringdocConfig {
    //... 文檔配置

		@Bean
    public GroupedOpenApi publicApi() {
        return GroupedOpenApi.builder()
                .group("users")
                .pathsToMatch("/api/users/**")
                .build();
    }

    @Bean
    public GroupedOpenApi adminApi() {
        return GroupedOpenApi.builder()
                .group("products")
                .pathsToMatch("/api/products/**")
                .build();
    }
}
右上角可以看到有選項可以切換 products/users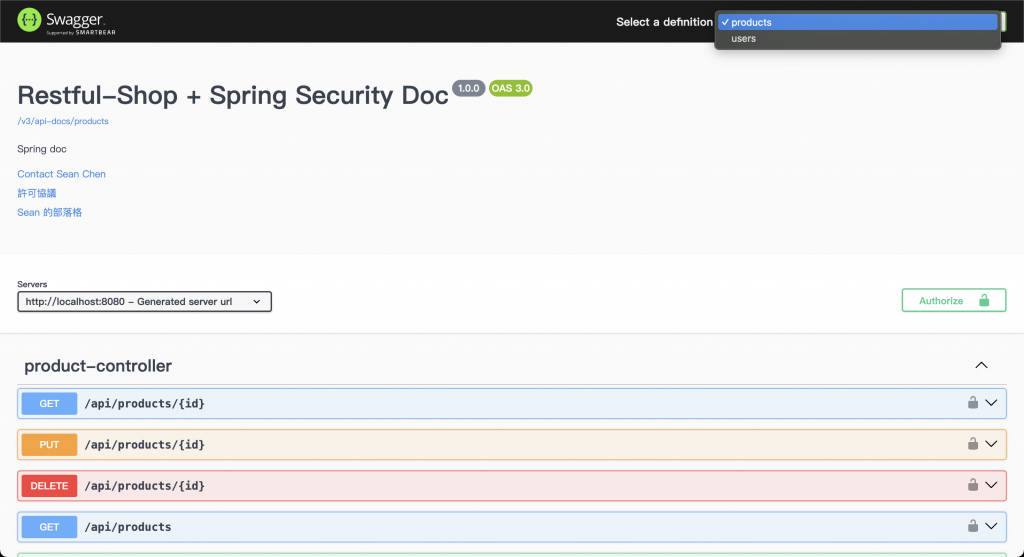
切換後可以看到我們設定匹配這設定的所有端口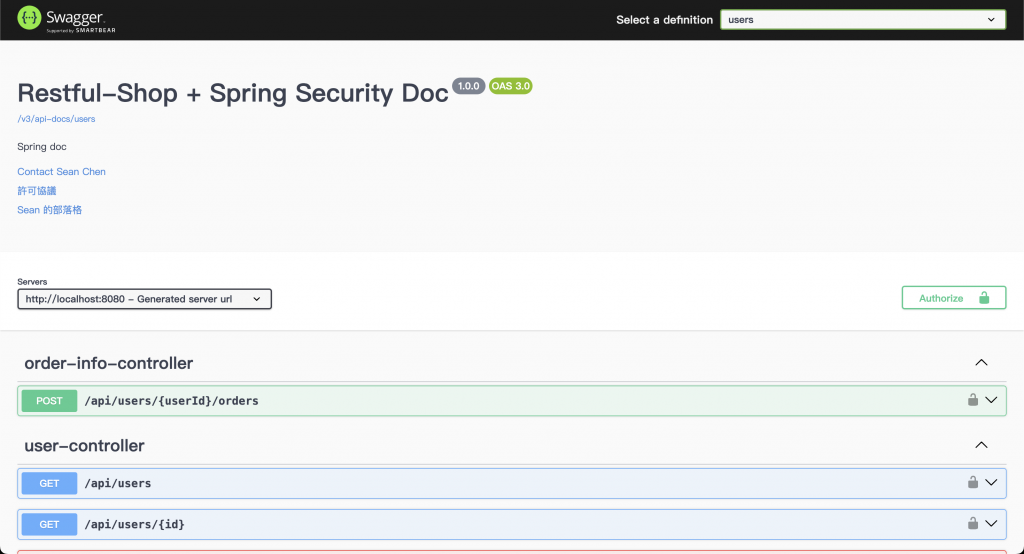
@Bean
    public OpenAPI springOpenApiWithSecurity(){
        final String securitySchemeName = "bearerAuth";
        return new OpenAPI()
                .addSecurityItem(new SecurityRequirement().addList(securitySchemeName))
                .components(
                        new Components()
                                .addSecuritySchemes(securitySchemeName,
                                        new SecurityScheme()
                                                .name(securitySchemeName)
                                                .type(SecurityScheme.Type.HTTP)
                                                .scheme("bearer")
                                                .bearerFormat("JWT")
                                )
                )
                .info(new Info()
		              //... 基本文檔配置
    }
配置過後才會看到右方有 Authorize 和鎖頭圖示,就可以將登入取得的 JWT 輸入,解開該鎖之後後續所有需要用到 JWT 的 API 都會套用自動帶入 Header 內,就不用每次請求都要細部設定,整合 Securtity 後相當方便。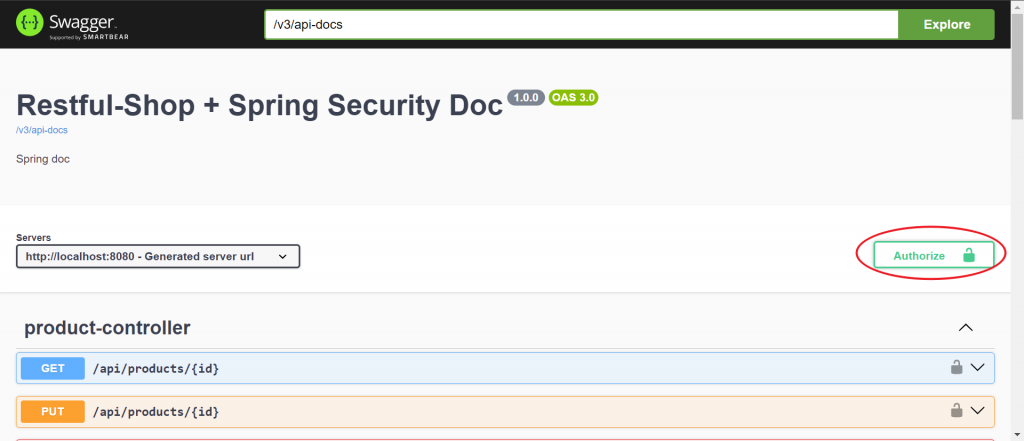
securitySchemeName 這個變數可以代入下圖紅框欄位顯示的名稱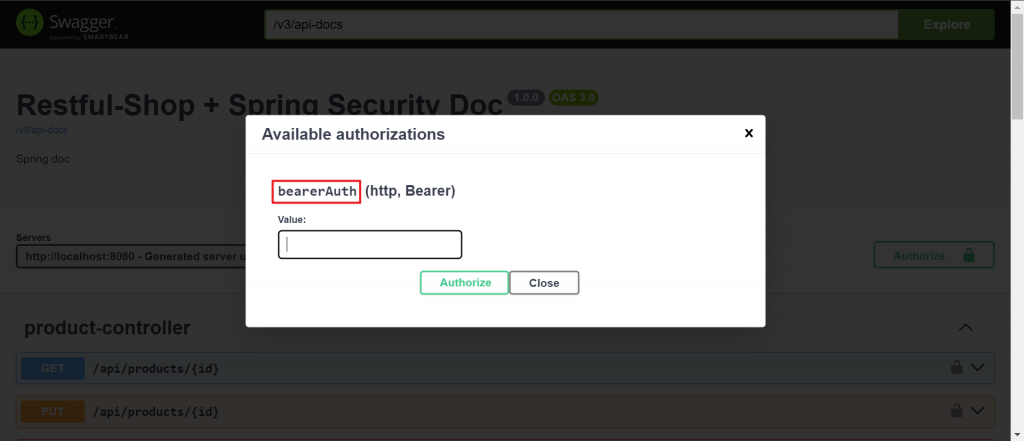
配置過後才會看到右方有 Authorize 和鎖頭圖示,就可以將登入取得的 JWT 輸入,解開該鎖之後後續所有需要用到 JWT 的 API 都會套用自動帶入 Header 內,就不用每次請求都要細部設定,整合 Securtity 後相當方便。
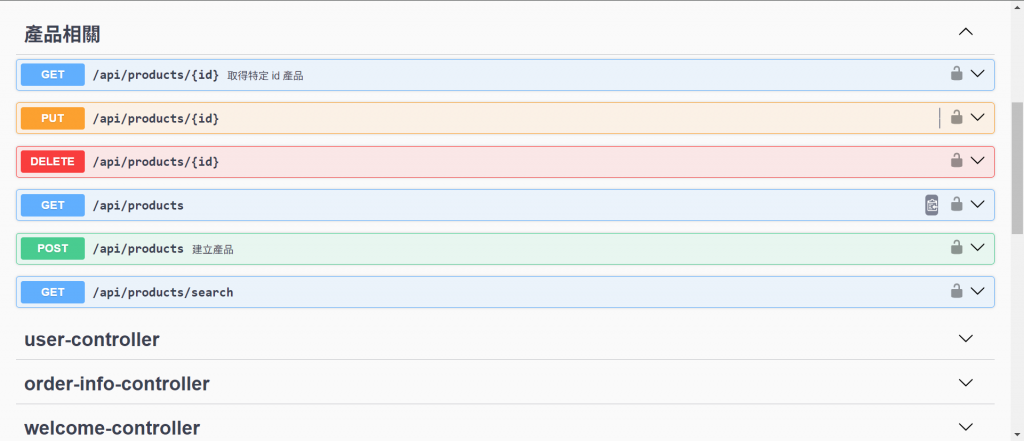
可加在 class 上或 method 上,在 class 加上可以幫 Controller 分組描述使用,取代原本預設為 Controller 名稱,如果加在方法上,就是將特定端口抽出來另外分類及描述
加在 controller
@Tag(name = "產品相關")
@RestController
@RequestMapping("/api/products")
public class ProductController {
 //... api
}
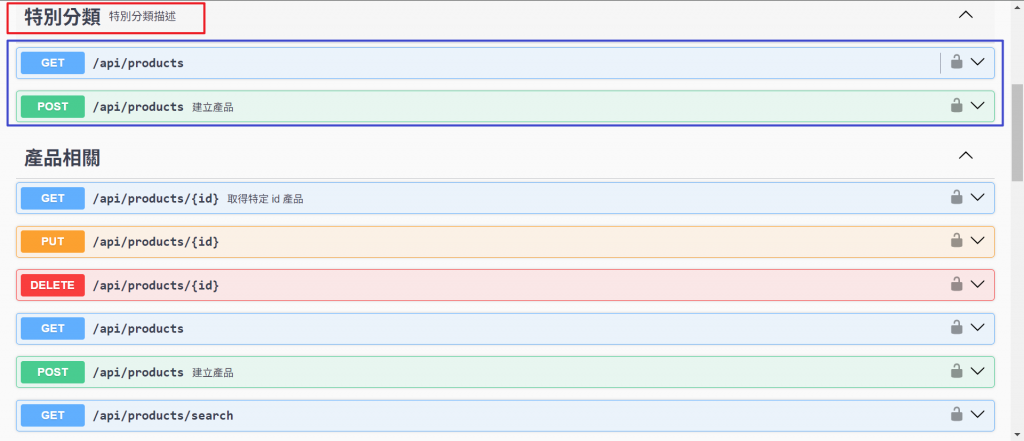
加在 method上就會抽來本來的部分,如果 name 相同就會被分到同一區域,同一區域 description 會依照程式執行順序後面蓋前面,所以
    @PostMapping
    @Tag(name = "特別分類", description = "特別分類描述")
    @Operation(summary = "建立產品", description = "建立產品需要攜帶產品相關資訊之請求,建立成功會回傳 httpStatus = 201 ")
    public ResponseEntity<Product> createProduct(@RequestBody @Valid ProductRequest productRequest) {
			 //...略
    }

    @GetMapping
    @Tag(name = "特別分類", description = "特別分類描述")
    public ResponseEntity<List<Product>> getProducts() {
	    //...略
    }
描述特定的API操作說明,外層用 summary 註記,內層描述用 description 標住。
    @PostMapping
    @Operation(summary = "建立產品", description = "建立產品需要攜帶產品相關資訊之請求,建立成功會回傳 httpStatus = 201 ")
    public ResponseEntity<Product> createProduct(@RequestBody @Valid ProductRequest productRequest) {
        Product createdProduct = productService.createProduct(productRequest);
        return ResponseEntity.status(HttpStatus.CREATED).body(createdProduct);
    }
使用這個註解可以標記初該 api 相關說明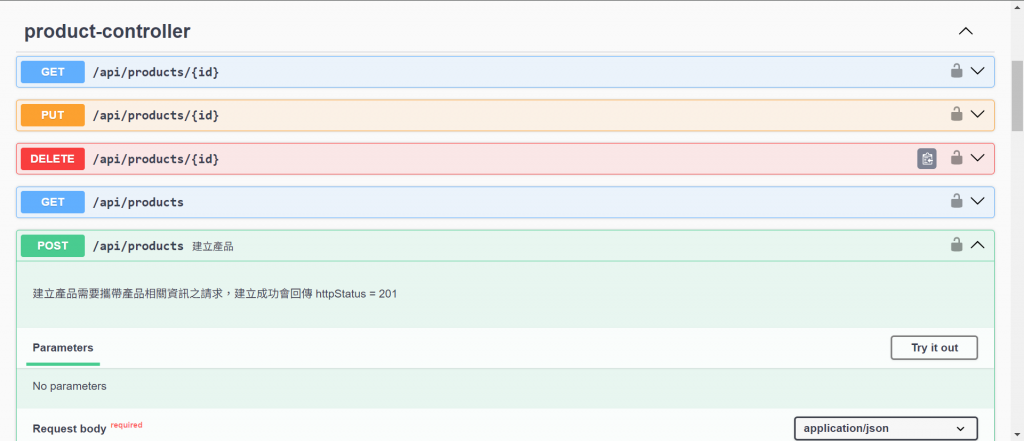
可以和前一個 @Operation 一起合併使用,用來註記 api 回傳狀態碼及描述相關說明
@GetMapping("/{id}")
    @Operation(summary = "取得特定 id 產品",
            description = "選擇 id 商品資料回傳",
            responses = {
                    @ApiResponse(responseCode = "200", description = "回傳特定 id 商品"),
                    @ApiResponse(responseCode = "404", description = "找不到商品")}
    )
    public ResponseEntity<Optional<Product>> getProduct(@Parameter(description = "商品 id") @PathVariable Integer id) {
        Optional<Product> product = productService.getProductById(id);
        if (product.isPresent()) {
            return ResponseEntity.status(HttpStatus.OK).body(product);
        }
        return ResponseEntity.status(HttpStatus.NOT_FOUND).build();
    }
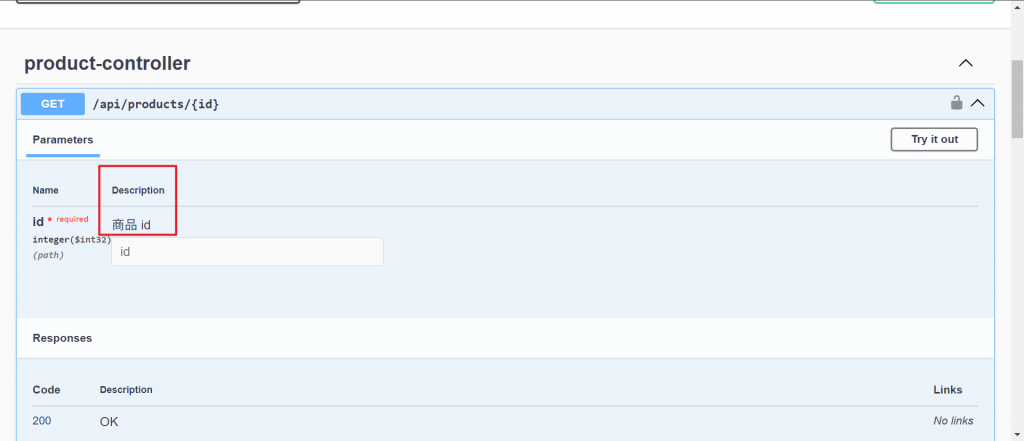
註解描述API操作的參數。和 @PathVariable、@RequestParam和@RequestHeader等註解可以結合使用,如果使用上面這些註解其實自動都會幫我們結合進去文檔裡面,可以自行斟酌是否需要更細部的說明。
    @GetMapping("/{id}")
    public ResponseEntity<Optional<Product>> getProduct(@Parameter(description = "商品 id") @PathVariable Integer id) {
        Optional<Product> product = productService.getProductById(id);
        if (product.isPresent()) {
            return ResponseEntity.status(HttpStatus.OK).body(product);
        }
        return ResponseEntity.status(HttpStatus.NOT_FOUND).build();
    }
端口內就會多一個描述的欄位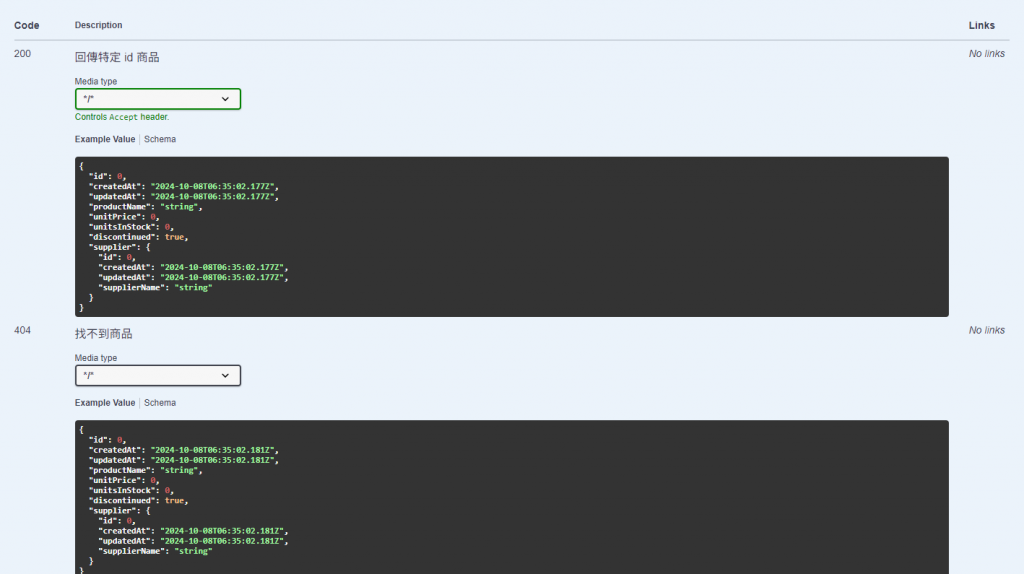
以上就是基本對於 springdoc 套件使用 Swagger UI 的一些方式,還有一些應用方式可以參考下面的一些參考來源。
Ref: