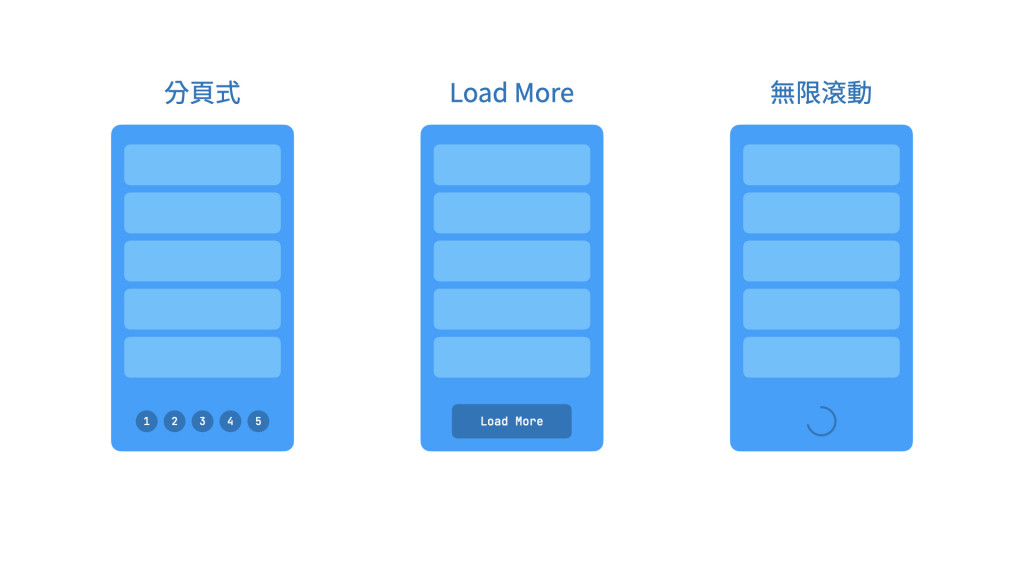
在 Day 19 - Sanity GROQ Pagination 中有提到網頁的幾種分頁模式:

我原本的網站是用 分頁式 的,這一次重做網站我打算改用 Load More 模式。
在開始寫功能之前,先把文章顯示的區塊拉個 Component 出去:
next-app
├── app
│   ├── components
│   │   ├── PostsBlock.tsx // <- 顯示文章都在這
// ...
│   ├── page.tsx // <- 首頁
// PostsBlock.tsx
import Link from "next/link"; // 引入 Link
import { client } from "@/app/sanity/lib/client";
import { BLOG_POSTS_QUERY } from "@/app/sanity/lib/queries";

export default async function PostsBlock() {
  const posts = await client.fetch(BLOG_POSTS_QUERY, {
    lastPublishedAt: "4000-01-01",
    title: "",
  });
  return (
    <ul className="post-list">
      {posts.map((post) => (
        <li key={post._id} className="py-8 border-b border-b-neutral-800">
          <h2 className="text-3xl tracking-wider font-bold text-neutral-200">
            <Link href={`/${post.slug.current}`}>{post.title}</Link>
          </h2>
          <div className="text-base font-bold text-neutral-200 mt-5">
            {post.tags?.map((tag) => (
              <span
                className="px-3 first:pl-0 border-r border-r-neutral-200"
                key={tag}
              >
                {tag}
              </span>
            ))}
            <span className="px-3">{post.publishedAt}</span>
          </div>
          <h3 className="text-lg font-light mt-5">{post.subtitle}</h3>
          <div className="mt-5">
            <Link
              className="inline-block border-2 border-neutral-200 text-neutral-200 px-3 py-2 text-sm font-bold rounded uppercase"
              href={`/${post.slug.current}`}
            >
              Read More
            </Link>
          </div>
        </li>
      ))}
    </ul>
  );
}
Query 語法的話是這樣 ( 只取得指定日期的前 5 筆文章 )
export const BLOG_POSTS_QUERY = defineQuery(`*[
  _type == "blogPost"
  && (publishedAt < $lastPublishedAt
  || (publishedAt < $lastPublishedAt && title != $title))
] | order(publishedAt desc)[0...5]
`);
接著在首頁引入後就可以有跟原本一樣的顯示了:
// app/pages.tsx
import PostsBlock from "./components/PostsBlock";

export default async function Home() {
  return (
    <div className="w-full">
      <div className="w-full lg:w-1/2 p-5">
        <PostsBlock />
      </div>
    </div>
  );
}
在開始實作 Load More 功能之前,先來針對 BLOG_POSTS_QUERY 做一些修改,我要做的是將每次載入的文章數量改為變數,因為我要在 Sanity 的 網站設定 中指定,讓在管理網站時可以做動態的更改。
也不難,只要在 query 語法中將 5 改為 $perPage 就好了。
export const BLOG_POSTS_QUERY = defineQuery(`*[
  _type == "blogPost"
  && (publishedAt < $lastPublishedAt
  || (publishedAt < $lastPublishedAt && title != $title))
] | order(publishedAt desc)[0...$perPage]
`);
在使用的地方多指定一個 perPage 就可以了:
const posts = await client.fetch(BLOG_POSTS_QUERY, {
    lastPublishedAt: "4000-01-01",
    title: "",
    perPage: 5, // 暫時使用變數指定
  });
接著就可以實作 Load More 功能了。
首先,因為有 Load More 功能的 Component 勢必是動態的了,是會跟隨者使用者的操作而有內容改變的,所以必須要使用 "use client" 的 Component 了,並且要用到 useState 跟 useEffect。
首先,先初始一個空的文章陣列:
"use client";
import React, { useState, useEffect } from "react";
import type { BlogPost } from "@/app/sanity/types";
// ...
export default function PostsBlock() {
  const [posts, setPosts] = useState<BlogPost[]>([]);

  return (
	  // ...
  )
}
再來建立一個 fetchPosts() 方法來根據條件載入文章:
async function fetchPosts(
  lastPublishedAt = "4000-01-01",
  title = "",
  perPage = 5,
) {
  const newPosts = await client.fetch(BLOG_POSTS_QUERY, {
    lastPublishedAt,
    title,
    perPage,
  });
  setPosts((oldPosts) => R.uniq([...oldPosts, ...newPosts]));
}
fetchPosts() 方法可以接收幾個參數決定要載入文章的範圍,如果不指定,預設會是最新的五篇文章。
( 這邊有導入 ramda 套件做 uniq(),主要是保證不會有重複載入同一篇文章的意外,也可以不做這一步 )
再來用 useEffect 讓文章在初始化的時候就載入:
useEffect(() => {
  fetchPosts();
}, []);
( 如果用 React 18 的話會重複呼叫兩次,但是到生產環境之後就不會了! )
這麼一來應該就在每次進入首頁時看到文章了,會有一時的延遲,也是預期中的事。
再來最後就是 Load More 的按鈕:
  {/* ... */}
))}
</ul>
<div>
  <button onClick={loadMore}>Load More</button>
</div>
並且在點擊時會呼叫 loadMore 的 function。
定義 loadMore():
function loadMore() {
  const lastPost = R.last(posts); // 取得目前文章中最後的一篇
  fetchPosts(lastPost?.publishedAt, lastPost?.title); // 傳入最後的日期、title 作為搜尋條件
}
這麼一來,簡單的 Load More 功能就完成了。
每次點擊 Load More 按鈕都會載入新的 5 篇文章。
最後完整的 PostsBlock.tsx 在這裡:
"use client";
import React, { useState, useEffect } from "react";
import Link from "next/link";
import { client } from "@/app/sanity/lib/client";
import { BLOG_POSTS_QUERY } from "@/app/sanity/lib/queries";
import type { BlogPost } from "@/app/sanity/types";
import * as R from "ramda";

export default function PostsBlock() {
  const [posts, setPosts] = useState<BlogPost[]>([]);
  useEffect(() => {
    fetchPosts();
  }, []);
  async function fetchPosts(
    lastPublishedAt = "4000-01-01",
    title = "",
    perPage = 5,
  ) {
    const newPosts = await client.fetch(BLOG_POSTS_QUERY, {
      lastPublishedAt,
      title,
      perPage,
    });
    setPosts((oldPosts) => R.uniq([...oldPosts, ...newPosts]));
  }

  function loadMore() {
    const lastPost = R.last(posts);
    fetchPosts(lastPost?.publishedAt, lastPost?.title);
  }
  return (
    <div>
      <ul className="post-list">
        {posts.map((post) => (
          <li key={post._id} className="py-8 border-b border-b-neutral-800">
            <h2 className="text-3xl tracking-wider font-bold text-neutral-200">
              <Link href={`/${post.slug.current}`}>{post.title}</Link>
            </h2>
            <div className="text-base font-bold text-neutral-200 mt-5">
              {post.tags?.map((tag) => (
                <span
                  className="px-3 first:pl-0 border-r border-r-neutral-200"
                  key={tag}
                >
                  {tag}
                </span>
              ))}
              <span className="px-3">{post.publishedAt}</span>
            </div>
            <h3 className="text-lg font-light mt-5">{post.subtitle}</h3>
            <div className="mt-5">
              <Link
                className="inline-block border-2 border-neutral-200 text-neutral-200 px-3 py-2 text-sm font-bold rounded uppercase"
                href={`/${post.slug.current}`}
              >
                Read More
              </Link>
            </div>
          </li>
        ))}
      </ul>
      <div>
        <button onClick={loadMore}>Load More</button>
      </div>
    </div>
  );
}
